Squishy Makeovers: Fixing Your Squishies #24
May 29, 2021foreigner Hello, it's me, it's time for another
squishy
makeover video. We all look forward to these moments and they are so special. I sound very sarcastic and I don't know why I'm really looking forward to these. I guess there's a little bit of dread because today I'm doing something you guys wanted me to do, but I'm also anticipating the worst. I recently made another unboxing video and after posting that unboxing video you guys had some opinions, this one came up quite a bit in the conversation. a lot I have bought so many pineapples before why is this one suddenly being talked about?
I mentioned I had an idea. I'm having some ideas about this pineapple. I didn't say what the idea was. I don't know if I could do it and I'm afraid you guys would make me do it, but who are we kidding? Everyone knew what I was thinking about turning this pineapple into one of my existing characters, Georgie, who is actually a pin. It seems very easy because it is already a pineapple. It will not be. I need to create limbs for it. There are deep grooves through this soft. Will it make it look weird? There's also a flower here, but I'm going to try it. because you guys really wanted me to do it, so if I fail, that's up to you, but you also asked me a lot to work on this plucked butterfly right there.

More Interesting Facts About,
squishy makeovers fixing your squishies 24...
I have some plans for this one. I'm actually pretty excited about this one most of the time. Today I make three
squishies
in asquishy
makeover. I'm not sure it's possible to have time for a third party. I will leave that to the future. Okay, let's get into the squishy toasting, okay, so let's start with this. little fruity creature it's a pineapple with a flower and a face this soft one looks new oh it has this youthful glow I'm not very excited about the design those heart eyes no, that's not that much no, stop looking at me there There are deep grooves all over it contour except for a small area around the face, but this isn't the correct location for Georgie's face so it doesn't really help me.
The reason I was so hesitant to try this Georgie Recreation project is because you guys know how much I love Georgie and I didn't want to completely fail and disgrace him, but I'm going to try it anyway, first we'll need to sand this soft to give enough texture to the foam so the paint can adhere properly vacuuming up the crumbs is that in the video or is it just a speck on my screen oh okay I should probably still clean the screen although next I need to surgically remove the flower so cutting it off and then just cutting out that area trying to blend the edges into the pineapple shape as much as possible to turn it into Georgie, we need to add all of his duckling attributes the wings the beak the legs I'm looking for Squishies with body parts that I need I don't really I don't want to have Than molding new foam parts by hand, it's much easier to just slide up some other soft ones, cut the body parts off of them, and use them.

Oh, those are cute. Wings you have there, he wants us after all my research, I did select three victims, but before we cut them down, let's get to know them, this is one of the two penguins. I actually wrote that in a video when I was trying out some markers someone sent me, I wanted to use the legs on this one, the beak is a bit too pointy for Georgie, so I'll pass on it and use the wings, but someone already beat me to it. Well, you know you've lost body parts before, so it's no big deal, okay, just sing a happy song and don't do it.
Don't think about the fact that
your
feet are being cut off, that's a real defeat, splendidly, that's right, wait for the last time, I'm afraid, finally this one I think is supposed to be wrapped in a towel and like a hat shower as if he had just come out. from the shower it looks more like it just came out of the dumpster, but I like its spout. Georgie needs a pickaxe, let it go, come on, don't be selfish, so I've collected all the fresh parts of my body and you might be wondering what it is. It's going to happen to all these poor little people I'm going to move them to the Hopeless bin the lack of respect this bin only houses the most desperate softies at least everyone can cry together I pulled out Georgie's original pin for reference and I'm I'm going to start trying of putting all these parts in the right places, oh boy, oh no, okay, let's go to a new place and try again, it looks so awkward and again, luckily, after playing with this one a little more, I actually got a decent resemblance to Georgie.Actually it can work normally. I try to use fabric glue to preserve the softness of the crushed cheese, but shhh, considering how many small pieces I had to put together, I opted for hot glue this time, even with the hot glue, although it was actually very tricky trying to get it. all these pieces to glue because of the deep ridges in the foam, you can see the edges don't hold up at all, ah, that's very frustrating to see. I just had to glue and re-glue these pieces and then work quickly to try to seal everything with puffy paint.
I had to completely surround each piece towards the end of this process. I noticed the spike was coming back. I have to wait until the paint is completely dry to make sure it is dry to try to help the bond. I'm just using some tweezers to try to get some small pieces of foam out and hopefully give the glue a better surface to hang on. Here we go with the glue, keep it dry and seal the seam. While I'm at it, I'm going over some of the other areas that needed a little more reinforcement. I'm also repairing the flesh exposed from the flower removal injury, of course making sure to soften the edges of the paint. this helps create a nice smooth surface so you don't end up with too many lumps and then I like to go over everything with a couple of very thin coats of Slick Paint and this just helps smooth everything out at once and evenly.
Things clear up a little and here it is, poor creature, it looks sore and I'm finally going over everything with a white base coat and isn't it so nice? The base coat really helps to start over. It's so much easier to paint over it and oh it's exciting, this will really start to become Georgie. If you're new to my channel, Georgie is a character I made up in a previous video. Georgie, it's a pineapple duck that I've become obsessed with. I guess. Who's here now to paint on the back? Oh, look at this super cool transition, you see this, it's getting closer and then, oh, wow, I just get chills.
I'm joking, in case
your
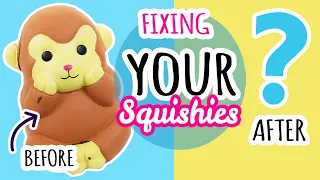
sarcasm meter is broken and the crown is very different. in shape and volume than my original design, but I decided to let it go. You know, I already had enough to worry about when putting this project together, so the leaves aren't exactly the same. It's okay, we can deal with that. Promise me no one will. I complain that the sheets are not exactly the same. I promise to remove the green and put the orange. At this point, we're really just rocking and rolling. I will point out the toes, particularly on the right foot, they form together into a mega toe.I do not do it. I don't know, I'm just saying I needed to do a little touch up just cleaning up the edges to give us some nice crisp lines and now for the face, so I took a screenshot while recording the planning phase that way. I knew where I needed to place each feature and I could focus on creating smooth lines and I'm just getting some of that toe separation back. I thought the brown I used was a little too dark, so I revised that. with a lighter brown add the little sparkle in her eye oh yeah that's Georgie hi and that soft area where the old face was uh which is now her butt I decided to take advantage of that little area by using it as a place for my signature and it's joji, here There is the before and the after.
I love Georgie's design much more than that original pineapple. This wasn't half as terrible as I thought. It looks like baby Georgie so let me take the time to thank you all for pushing me on this, thanks honey I'm glad I tried it so let's compare it to the original design okay okay what about you , Georgie's painted shell? It's interesting, how about Georgie's stuffed animal? I'm excited to announce that the Georgie plush is available for sale. The link is in the description. I know what everyone is thinking. Everything was planned from the moment I had the idea to make a Georgie squishy to the release of the official Georgie plush. but that's actually not true.
We've been working on developing this plush for months and I've been painting the Squishies in this video for weeks. Both projects came together and landed on the same day and it's perfection, I just can. I can't believe the incredible timing of this, but anyway you guys have been requesting a Georgie plush ever since the video where I designed this character came out and I'm so excited to be able to fulfill this and give people what they've been asking for. because we are used to seeing Georgie like this, the plush reveals, oh my gosh, look at these legs, this plush is available for a limited time, so if you want one, don't wait, the price you see includes shipping, so no there is no additional charge. shipping, this is actually reducing the total cost for you.
It comes with its own official certificate and also access to a special little thank you video made by me. Don't forget to check your order page because shipping times vary. We will be back. to the video, but I just want to say this again, I didn't really say anything. I don't believe it. I love plushies in general, but this one is exceptionally cute, okay, I'm going to stop now and now it's butterfly time. We've already talked about wing shedding, that's a situation we'll deal with. Oh, look, I'm making it fly, so the shape of the wings.
I really like her body. It's a no from me, just look at those little legs, they look like pimples. or otter nipples, I don't like them either, why does he wear earmuffs? So what's my big plan for the butterfly I was so excited about? Come on, don't be shy. I got this squishy dragon when I first opened it. On camera, a lot of people requested it, but it was surpassed by that huge donut that I opened in the same video and which ended up being Team Unicorn, which then went on to be the Wind Squishy of the Year in my annual ranking video, but then , you already know.
Everyone forgot about you, right? It looks like someone started painting this and then gave up. It's definitely not one of those ferocious dragons that guard castles and eat people. This one probably eats cake. Back to the butterfly, I'm just going to cut the little insect off, we don't need it quickly. I'm going to sand them up or down, sand them down, sand them over, sand them under, I don't know and look I've taken her under my wing, is that a Joke so you know this Dragon is not intimidating, come on to put some big butterfly wings on it.
Yes, that helps first. I have to try to remove all the paint that is there now that most of the paint has been removed. This softie is ready. to be sanded, she's about to get some beautiful full, beautiful, beautiful, beautiful, beautiful wings, so we really don't need these little shrunken Wing Nubs anymore, it's okay honey, just look down at me, it's like a haircut , but with pain, cut, cut, there we are. Go take some fabric glue and just squeeze a big amount oh no I'm going to apply the glue to the wing and stick it on and once we have both in place throw a rubber band or two or three to keep the pressure on them As they dry a few hours later, they are ready to be released and now it's time to fill in all the gaps, holes and rough patches, oh but the journey is just beginning and here we come in with the finger paint, yeah, a Sometimes it's the best way and now that everything is dry and in place guess what it's time to apply an outrageous amount of layers of paint, yes I applied so many layers of puffy paint to try to achieve a smooth surface so now , sorry, I understood you normally, see? dragons with very bold intense colors, but this is not a typical dragon, so I thought: do you know what would happen if I did the complete opposite and only used very soft muted colors?
I decided to use a kind of light khaki color, yes this may seem like a strange choice yes, and honestly I'm still not completely convinced that it was the perfect choice. I've never seen a dragon this color so if that's a good or bad thing I don't know from the wings and accents I decided to go with a range of colors, this looks like a real little mini Factory one so yeah I'm going to go for the rainbow, but but, but, but usually this time I choose a pastel rainbow or just a bright rainbow. I'm actually going to desaturate the colors by mixing the complementary color and then creating a much more muted version of the color, so I don't want to hear girl, you need to branch out and no, no, no, I'm, this is different, okay?
Honestly, I think it could have been even more muted, but I didn't want to go too far, so I'll use these colors in rainbow order on the wings and belly. It's a little sad how the green and yellow are. like right in your face, but then the blue and purple arelike hidden in the crotch not a great place to be I mean from the front you can't even see the purple oh yeah it's underneath too just a general comment so far I don't like this maybe the pink is too light so hopefully the fit will solve my issues and here I go with the second layer, the darker pink helped make it look a little more balanced now but Honestly I'm still not sold on this design but I was starting to worry like You can see, now I'm ignoring the squishy mold and I'm just changing all the stripes and getting the placement I want.
My original plan with these butterfly wings was to put them on a completely random animal, like traditionally wingless, like a cat, creating new species and stuff, so using a squishy dragon wasn't really going with my original plan because dragons They normally have wings, but these are definitely not traditional dragon wings, I mean, they're butterfly wings, so I guess technically this is a new species, it's a Dragon butterfly, let's call it a dragonfly, wait, what? Do you want me to call it butter? No, no, dragonfly. It's time to paint the little spines and I went with Rainbow.
They look sweet and I'm taking the time to show that I'm painting over that last little section. We don't need it there. I'm going to stick with the mouth as it is and just outline it to make it stand out a little more drawing some cute little eyes adding some little details to the eyes I looked at this. This all lasted two seconds before I decided to change it, so I put a little more paint on top. Clearly I'm creating a very lumpy mess, so I thought, "You know, let's clean this all up." I'm so sorry, I'll step away for a second.
I'm going to work on adding some details to the wings. Nice and easy, everything is fine, don't worry about the fact that the face is melting this time. I'm going to try black eyes, so I'm just painting big black circles. I noticed that the original eyes were a little bit off to the side, but I really wanted you to be able to see her entire face from the front since her wings are on the outside and I just wanted everything to be facing forward, but she looks like a hippo, like this who guess what, oh that's right, this could be in a waterproof mascara ad.
She was feeling a very strong need to give this up, burn it, burn it, as you can see. I just completely painted everything. I want to start over, so I'm going in with some fresh eyes, a little different style. I'm changing the shape. I'm changing the position so far so good and then I added these. lines there why why wait wait wait wait this is what I've done still looks like a damn hippo. I'm starting to think that maybe the mouth is part of the problem, so although this should have been done much earlier in the process I'm going to try to cover the mouth mark by applying a thick layer of puffy paint and layer after layer after layer after layer It's a little less noticeable, let's say it's your little double chin, that's fine.
I feel like you're filling out a little more. of the details the horns the ears trying to fix the mess of the Torso and while I was working on that I made the decision that I want to give her a very strong blush on her cheeks because I feel like her eyes are like she looks embarrassed let's move on she is embarrassed , I wanted it to look like that, that's what I was going for. I'll call her Rosie, this is Rosie the shy dragon fly. Dragonfly dragon, so I'll give him a little side smile like I got embarrassed, so this one was very difficult, a lot of struggle, but now that I stand back and look at him, I think I really like him, I actually like his embarrassed expression, it's Kinda funny, I'm still trying to do it. silly looking fly, these colors look very bright when you see it alone, but compare it to one of my bright rainbow paint jobs and you can see that they are quite dull colors in comparison and oh, not to rub salt in the wound, Look who. es is her nemesis passive-aggressive step by step oh no, she didn't do it oh boy, it's okay forget it oh no oh no no no no no no no what's going on Rosie stop, you're killing her, okay, that's already over in the At the beginning of this video I told you that I wasn't sure I had time for a third squishy.
In fact, I started painting a third one but couldn't finish it in time. I needed to stop filming and get started editing and I already had a lot of footage for this video, so I'm going to finish it and post a photo of the completed squishy on Instagram this weekend so you can at least see how it turned out. My account is Mariah Elizabeth's official Instagram account anyway. Everything I have for you today. I really love these two Georgies, they are so sweet and Rosie is so shy. I hope you enjoyed this episode of squishy
makeovers
and I'll see you next week, bye.If you have any copyright issue, please Contact