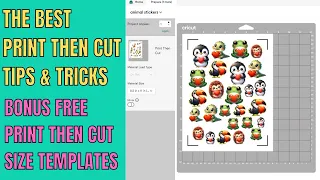
Trick your Cricut to do FULL PAGE Print and Cut - Sticker Tutorial!!
Jun 06, 2021Alright, it's prep time, so let's talk about the materials that we're going to need for this
tutorial
and I'll show you what we're going to do, so what we're going to make aresticker
s, as you can see, they're laminated.sticker
s you can see the laminate nice and shiny and that's why I laminate it because it looks nice so the first thing you're going to need is painter's tape, very important, this is because I know everyone is going to ask, this is the magnetic paper that use. I understand. on Amazon I have Amazon Prime I have tons of this is the contact paper I use.
The same company that took a chance on these guys. I saw some bad reviews. I have yet to give a bad review. This is incredible. hundred sheets I think it's something like I don't remember what it was I think it's like 20 dollars 400 sheets of adhesive paper no, so this is Avery nine by twelve rapid lamination self adhesive you'll see what I use this for because This is what I laminate everything with, This is called cold press lamination, it's self-adhesive, it doesn't require heat, you get a pack of 50 and that's very useful, so the first thing we'll do is talk about it.

More Interesting Facts About,
trick your cricut to do full page print and cut sticker tutorial...
The mat here is not a new mat, but anyway I met it and I want to make a new one. These are mats. These mats I have tend not to be very sticky. They don't have to be. You'll see why. in the other part of the video, but just to say that the self adhesive, the edges stick themselves, as long as you're not doing super complex inches or intricate cuts, you should be all set, so on this particular mat I can already see. Look, I've been using this mat for a while now, so you can see where they got the lines from the
page
here and these are the cut corners.
Now one thing I'm going to do is the Cricut machine doesn't care. which side I mean, which one you know, it goes that way or it goes in, although it doesn't matter, we don't really care, in this case I've already started to wear down the corners, so let's go ahead and I'll show you how to use the other side of the mat to do basically exactly the same thing without any problems. The first thing I'm going to do is start taping the mat right now. I definitely mean. I know I'll have my
full
size sheet here, so we'll do it in this area and I'll show you what I do here, so now I do all three sides.
I'll do the three sides first. The reason is that now that we have the three sides ready, we can take a
full
sheet of paper and get an idea. Now, let's glue it. Oh, anyway, have an idea of where you know it's going to land, because we're going to feed. this through the cutter this way what we want to do and I tend to tape all the rest of the access so I'm going to tape this you don't want it to overlap so why something off the edge? I'm just going to remove it so The rest of this I'm going to go ahead and just tape it down that way it stays sticky.You can use it later for whatever you need to use
your
mat for. I have a lot of these mats. I get them on sale either through cricket or Hobby Lobby Michaels, whenever they have them on sale you can usually get them for 40% off, you get about two to three minutes depending on what you buy. Well, we're basically Justin, at this point we're just covering all access. sticky, okay, we're out of painter's tape, take that off, here's the next thing, so let's go to the design space. I'll go ahead and try to make this work a little better like this, real quick. and easy because I don't feel like editing a bunch of videos together, so there's our matte, we put the painter's tape on it again, like I said, it doesn't matter which side we put this on the Cricut, but in this case it's going to be upside down here's what's at the bottom this is how I'm going to go in to cut and prepare the mat okay, to prepare the mat for this in the design space we need to make a shape we're going to ask where we're going to unlock it we're going to do eight and a half times eleven so eight point five times eleven let's position it right first of all angle I'm fine let's position it at zero times zero okay so that's a full sheet of paper it's on the canvas that's it that's it what to do now we're just going to press do okay we're going to leave it here don't mess with it it's just going to cut a large full size sheet we want to continue now for this again all of this is just to prepare the mat.I'm going to go ahead and choose my cutter. I have a browser. I didn't feel the need for anything else. what I was doing, I may consider purchasing a different one in the future, especially considering that I don't think my knob is working properly and their tech support has yet to figure out why that is and I haven't figured out why anyway. We're going to change our material for this. I'll probably just make light cardstock. I don't really see doing anything crazy. I mean, a regular sheet of paper would probably work or maybe vinyl. Let's do final exams or anything.
Alright. I'm just going to do, I'm just going to choose print
able vinyl on this one. I mean the point is just to cut the tape we don't need to do anything else we just need to cut the tape okay sorry now I sent this to the cutter let's go over here and get our Matt with just our tape we have nothing more there except the tape. I'll load it like I always load my mat completely flush to the left, oh. m post painter's tape Matt loaded the entire sheet keep it flush to the left without much pressure.
I usually just bend the mat a little bit like this, that's all the pressure I put on it. I'm going to carry the mat, that's all if you push. if it's too much it will offset
your
cut, you know you don't want to do that and then we're just going to cut and all we're going to cut is a rectangle for good measure. I'm going to cut it one more time, no I don't always do that, but for this I'll make sure to cut the tape into different parts of the tape or thicker because it has layers.Okay, we're all ready. Now we're going to peel where it was cut like this and all we want to do is get that full leaf rectangle, there we go, now remember it's going to go through the mat, in this case it's going to go backwards, it can be either way and as you'll see in the rest of the video, this is how you position your file or the paper that you're going to cut, this is how you get the perfect alignment and I'll show you a couple of
trick
s and things like that. I'll probably do my best to mess up a cut just to show you how to adjust it sometimes I have to do that not very often you get used to it as you go anyway let me move on to the next step alright here's how I think my files to cut them to fullpage
with the Cricut creates a new file.I'm going to choose a letter that is 8.5 inches wide by 11 inches, it has a resolution of 300 for good print
quality. Now the first thing I do is create my registration marks, so I'm creating a quarter inch block and I'm going to create one in each corner of my file, you won't really be able to see it now. They are white. Okay, I'll make the background black so you can see how the registration works, as you can see here. the registration marks there's one in each corner now I'm going to go ahead and add my files that I'm going to want to cut these files are already transparent PNGs as you can see I have the white around the images that were made When I created these files I'm not going to get into that now.
I'm just going to show you how I place them here trying to use as much space as possible. Okay, when I'm done with that, I'm going to turn off the background now, do it just so I can see where my position is and then I'll save it as a PNG. In fact, make sure it's transparent so, as you can see in Photoshop, these squares mean there's no background. that's the transparency, save all this as PNG. Once I save the file, I can go ahead and load it into design space. You have an open plan space that you can open now.
This is the new design space. This is version 3.0 beta. it doesn't use flash it works great it's much faster let's go ahead and upload the image let's make a simple image just let's press continue raaah i can't do anything here just press continue again now when you make sure you add your image to your no you do it, I repeat, I don't want to save and print the cut image, you just want to make cuts, you can see the logs are in the corners of the file, these are the transparent cuts that we are I'm going to go ahead and save it.
Now I'm going to select it and insert it into my design space canvas. Right now, it's going to be the wrong size, so the next thing we want to do is turn it off or unlock the aspect ratio and we're going to put 8.5 as the width and then we're going to put 811 as the height, we're going to want to change our XY access to 0 0, this will position it correctly on the mat and that's and then we're going to make it so we don't touch this, this is already placed on the mat 0 0 and we'll move on to the next step before we make the cuts.
Okay, now I'm going to go over the print. So one of the first things is to try to make this a little bit clearer for printing now because I'm using Photoshop. It's a little bit easier here, let's see if I can zoom in, so in the printer settings for this particular one, I'm going to do that. cut some stickers, I choose semi-gloss, okay, I make backing paper for this particular printer, okay, now the other thing you need to do is make sure that your paper is in the center, which is very important, okay, while is centered we can go ahead and print. actually little paper is being used, so here's my printer, weird paper, paper feed.
One thing I discovered is that sometimes it doesn't always load correctly, so a lot of times we basically eject the paper and reload it, well, we want to make sure it arrives. perfectly aligned like it's supposed to be right there let's print it now. I'm going to go ahead and hit continue even though it's technically out of bounds, meaning the image is larger than the paper, which is fine again. it's my epson wf7 workforce six one zero we're going to go ahead and let this print and I'll show you what I do next. Okay, now that my print is ready, I'll show you what I do next.
This is my job of all. This is. the cold lamination is adhesive it is clear there is a top to peel off the small part you can see it there and what I do is I have a piece of glass here here is my print this is my adhesive paper what I like to do is kind of line up just on that little part you can see it like a little piece of paper so it's nice and straight I push it down I push down on the glass okay now this is the
trick
I pull it back I start peeling the backing here and then I do this, I put my finger here, I put my whole palm here and I push down slightly as I pull, I do a back and forth motion and that's it, now we're going to lift that up and we're going to get the map. what we prepare we remove the cover from the mat we peel the paper now I know this is the way I printed it you can already see the shine and the shine now I'm going to line it up on my mat from the corner usually the bottom and because of That the ribbons on the mat also fall right into place, you can feel it.I make sure to line up the corners. I push it down here. I also use the laminated edges to help stick it to the mat. These mats are not very sticky. I tend to use my old mats for this and as you can see now the papers on the mat now have no registration marks printed on them, they are white so you won't see them on the mat. and the next thing I'm going to show you, go ahead and we'll send it to the cutter. Okay, I sent my file to the cutter. Go ahead and upload it now for this particular decal with the laminate.
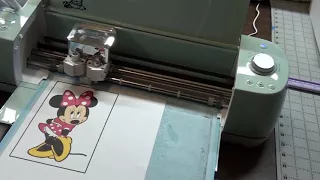
We'll go ahead and put it on the cutter I put mine custom on the knob, my knobs don't really work right sometimes so I leave it like that, all I do is carry it, I don't put any pressure on it, I hold the match up a little bit no pressure, I make sure it's flush to the left, I try to keep it as straight as possible and then I press the load button, that's it, I let it sit now because this is in custom settings, it's on point four millimeters and it's a custom setup for the stickers that I created and I'm going to go ahead and cut them out right away.
The first thing you're going to cut are the registration marks, just little squares so you know the paper is aligned. Now I have noticed one thing. Actually, for some reason, this is wrong if I have too much space here, so I'll give you a break. I'll show you a little trick so these two have already cut, now they're normally slightly off center. I would have stopped this sooner, but I was hoping this would happen, so I can show you a trick for this, so instead of reloading the mat and doing everything I'm actually doing, I'm going to remove the mess, let's unload the mat, so if you run into mistakes like that, it happens sometimes, now you can see where it's a little bit off and your image needs to move a little bit so that instead of taking it off. the mat, all I'm going to do is put it back in the cutter.
I'm going to move it a little bit beyond this left offset, just a little bit, just enough to cut it again. I'm going to load it again, okay, the first one. What you are going to think is that if I press againCut, the same two images will be cut. Well, those images are pretty decent. I'm going to keep them, so what I'm going to do is cheat. the cutter and I remove the blade, then I am going to execute the cut, it thinks it is going to be a cut, obviously it is not, there is no plate, so what I want to keep an eye on are these are the two cuts that have already been made, okay , we'll let the second one finish and we'll be ready when it gets up, you want to pause it, put the blade back in, that's it, don't press it, don't touch it, resume pause, it'll start making the next cut, it'll usually stop there, press the upload button again.
It's going to go ahead now my alignment is absolutely perfect and it's going to finish making the rest of the cuts and everything should turn out great so we're going to go ahead and let it continue doing that. Now I've realized that when I make a lot of cuts, it will. Sometimes the machine starts to scroll a little if I'm doing a lot of pages. I adjust that as I go, so if I'm going to make a stack of stickers, sometimes I'll have to move them around a bit. little and no, that's why I showed you how to remove the blade and put it back.
Well, we're almost done. We have a couple more left. One thing I also do is when it comes to the corner, log cuts. I usually stop it, so this is our last weight, we're not going to cut it, so you have two more cuts, okay, here's the last one, as soon as it's ready, it will cut the corner, you can let it cut the corner, no is so big. I usually stop it, just pause it, unload Matt and voila, those are our cuts. Now we're going to go ahead and remove these, so let me adjust the camera and I'll show you how I remove them from Matt. okay, here's my trick for removing anything from the mat.
I know people have different tools and they really like these things. In fact, I just bought this for my fiancé. I don't use it at all. I haven't even had a knee for what I am. by doing that, here's my mat, my cuts, I take it face down, I peel the mat off of whatever I'm removing from the mat, so we're going to pull that and then we're just going to remove the mat so they explode instantly. Right away anything that is folded on the mat tends to come off so I just keep taking them out and that's it, fold the mat please take it off like I said this is not a super sticky mat.
I tend to wear them out. I had one that wasn't sticky at all and then every once in a while you show up on this line, okay, just take them off, here's your sheet, there's your waste, look it barely went to waste. I probably could have put a couple more in there if I really wanted to take it. time, so there's our batch of stickers. Now I'm going to show you what I do with these next, so we'll continue here and see, we laminate them nicely, so the next thing we need to do is a little bit tricky. to see, but there are like little bubbles, they're not quite perfect yet, so what I have here is just a piece of thick cardboard, it's actually two pieces of cardboard that I put together, it's not cardboard, it's a little thick, you can see him.
Alright, now this is my cold press, it's actually a hot press laminating machine, it's hot or cold. I only use it for cold. I have never used it for hot, but I carry it in the back. I make sure it's cold press. I turn it on. It will start pulling on the cardboard a little bit and then I place my stickers on the cardboard before turning it back on. I try to make sure they don't overlap so it's hard to see which ones go first. to get in there I just push them until they hit the roller and what this will do is press the stickers for me.
I used to do it very differently with a pasta machine. I think there's a video on my Instagram about it. Don't do it that way, pain in the butt, this machine is not cheap, but it is much better, there are other machines available, so let's go ahead and just turn it on, since it's already loaded, sometimes it's not the most fast as you can. duplicate the stickers, you know, make sure they don't move. This machine is not a super heavy press, so it doesn't tend to distort things if they accidentally overlap a little, but once they come out, they look really pretty. glossy vinyl decals and actually there are paper decals so we'll let them finish and I just take them out and turn it off and that's it these are all my decals so again here we go that's it and that's how you get a complete. -page print, cut whatever you are doing, you can make magnets.
I make magnets. I just bought vinyl sticker paper or printable vinyl. Basically, I'm not sure if I would laminate it yet. I haven't played with him. In fact, I was thinking of trying it. get some clear laminate or clear vinyl to put over the vinyl stickers so they'll probably last a little bit longer if you want to put them on mugs or outside or whatever, but there are those and let's see, I have one, how many do we have? I got four six eight nine ten eleven so I got twelve about twelve stickers that look like twelve stickers from a sheet of paper and as you can see if you look at the mat where the registration mark was, you can see where it's still there so that's the registration mark and that's how it works and you can see where it starts to wear on the mat, as you'll see when, as you can see, these mats will eventually start to wear on this part.
I've actually cleanly cut out these registration marks here, one thing I found is that because we're only using a quarter or three quarters of the mat, the Cricut machine doesn't care which way you place this mat, right? I don't know the difference, so if you wanted, you could remove all of this, tape all the painter's tape off of this mat, flip it over and use the other side to line up your images, just make sure you don't cut clean here because that will cause There's a problem when you are cutting from the other side. This part here is still a lot stickier than this part, although there are still some sticks left, so you can see that you could put it this way.
As long as you remove the painter's tape and redo the mat the way we prepared it and I think that's it, thank you.
If you have any copyright issue, please Contact