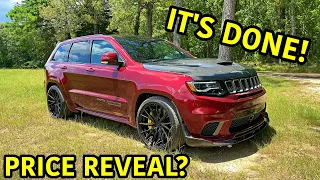
What You HAVE to have for your Trackhawk! | The Ultimate Trackhawk Build
May 31, 2021What's wrong with everyone? This is Brenton Brown from Forza tuning performance and
for you now is the next series of videos about the
.
what
Ihave
for you now is the next series of videos about the ultimate
version of the Trackhawk or some things that need to be done in a version of the Trackhawk, so let's highlight things. under the vehicle now obviously there's a lot more things you can do so this would be basicallywhat
I think would be the items needed in a thousand horsepowerbuild
so let's start from the back while we're here um . The first thing we see obviously is the catback exhaust now in a regular stage for ourtrackhawk
.
It's like all other packages, so it doesn't come with catback exhaust on all Challengers and Chargers. We recommend leaving it in stock at 100 until you use it. I would say over a thousand horsepower at the wheels, once you start getting into that kind of power range, then we upgrade to a fully custom system that we
, so on the
it has this suitcase style muffler, so It has mufflers at the rear. but then in the middle of the truck it has a suitcase style like the new zl1 camaros um it's really restrictive even with the headers and stuff it really doesn't sound that good and it's stealing power so we recommend a catback um this is a system that American Racing Header creates for us, it's actually a little bit different than the ones we normally use, so we're constantly giving feedback back and forth to make custom things for us and we're constantly revising, so we had some suggestions of design to make it fit a little bit better so they were more than willing to make some adjustments again and this is one of those tests just trying to perfect it so as we come back here the exhaust tips not on it just so you know, if you're wondering I've seen some stuff in the comments and some stuff about you know the exhaust tips are bent on the trackhawk and all that so it's actually pretty easy to fix so this is the same one way than stock.
have
, so on the trackhawk
it has this suitcase style muffler, so It has mufflers at the rear. but then in the middle of the truck it has a suitcase style like the new zl1 camaros um it's really restrictive even with the headers and stuff it really doesn't sound that good and it's stealing power so we recommend a catback um this is a system that American Racing Header creates for us, it's actually a little bit different than the ones we normally use, so we're constantly giving feedback back and forth to make custom things for us and we're constantly revising, so we had some suggestions of design to make it fit a little bit better so they were more than willing to make some adjustments again and this is one of those tests just trying to perfect it so as we come back here the exhaust tips not on it just so you know, if you're wondering I've seen some stuff in the comments and some stuff about you know the exhaust tips are bent on the trackhawk and all that so it's actually pretty easy to fix so this is the same one way than stock.
More Interesting Facts About,
what you have to have for your trackhawk the ultimate trackhawk build...
The exhaust is set up, so I'm going to take an exhaust tip and you'll notice that's what's considered a ball joint, and what makes them nice is that you can just loosen the clamp bolt and move it around very easily. this tip place it where you want and then tighten the bolt, so if the exhaust tip is not perfectly aligned on the rear valance, you can loosen it a little, move it by hand and tighten it again so that some of them stock or twisted just a little and sometimes you know that they may not be perfectly aligned or maybe one has been knocked around a little bit and is transported to the dealership, so don't worry, you can fix this very easily
your
self, that's it and that's it. the original tips are reused, so the next thing I'm going to talk about is these are what are called rear tow bars, and they're called that because they're responsible for adjusting the toe of the rear tires, the rear tow bars. originals.
It will flex when you make hard launches on a trackhawk, even with the stock power level, it's not that bad on the street, but if you're going to take it to the track where you have sticky pavement and really lower the traction, you'll get it. In fact, bend them and you'll notice that the wheels will warp after a bit, so upgrading is necessary. You can use a bar similar to this one, so you can get a chrome molle bar or a tube, you know, dom tubing. and then you have a hybrid bushing or a delrin bushing or something like that, you just want something that's good quality, this is perfectly fine, but what you can see here is a new arm that we're working with and it's all angles are designed, they do a lot of suspension stuff for us, so we wanted to make something that was even a better alternative than this, so what we did was we got Zach and Parker.

We sent him some drawings and we sent him some material. arms and all that, and this is what they came up with now, obviously these are not anodized, these are test arms, um, the final arms are in production, so they will come off and be anodized black, there will be some provisions to bolt the emergency brake cables into the arm similar to
your
Hellcat arms, so this is just, you know, billet aluminum, it's lighter, it's stronger, in my opinion, this looks better, so again We are constantly trying to find better and better products that you know as we go.So that pretty much sums up that the rest of the suspension arms you can change. We offer billet adjustable upper arms, plus you don't have to, it's not that necessary as on the challenger loader platform they are a very nice addition. again and the all angle design makes those also sold through chad in black ops so you have to go through it to get the ones usually found on the sway bar links in the back just the ones we leave in stock you can upgrade them again eh chad sull it's a really nice designed set but again it's not necessary we usually never get it right so the next thing I'm going to talk about is the rear differential mount so we've covered this topic on cars so this particular bracket is made by b woody um so this is perfectly fine this would be what is considered a one piece rear differential bracket meaning it is a unique structural piece of metal that bolts to the differential and rear subframe of the jeep we are actually working with. in the performance development of the new dirs j bracket which will be a two piece rear differential bracket for the tri-cox and that is what we will use exclusively on each
build
, it is a much stronger bracket and it is a two piece bracket .So the way it works is you have one piece that is bolted to just the differential housing, okay so it's a billet and that in itself will help structurally make the differential housing stronger, so the second piece It will be another piece. made of billet aluminum and will mount to the rear subframe; Those two pieces are joined with a bolt and a large rubber bushing. The same bushing is used on the top of the differential. The benefit of the two pieces is that the one piece is actually one. making the housing stronger and then the secondary piece can make the connection point lower on the differential and the reason why that is important is because it has a more triangulated reinforcement design so it is much more strong, the differential and the trackhawk, the casting is a little different and is actually a stronger mount.
I try to think about where it's mounted or how it's mounted and the subframe is a little stronger. The easiest way to explain it is if you look at the correlation between where the pinion is and where. you know where the drop shaft engages which is connected to the pinion so that's where all the torque goes down the driveline on the track hawk it's the way the mountain points are most centrally located In other words more In line with where the opinion gear is, if you look at a differential on a Challenger or Charger, the front mounting points are mounted on top and the pinion is actually underneath, so it's just by pure nature that the pinion It has more leverage. apply a torque twist to the shell itself for that part and I'm sure they did this probably because obviously the vehicle is heavier to strengthen the shell, but you know, adding a bracket back here I would say is necessary as you move forward here.
You may notice that you will see paint marks on everything. We do very strict quality control on all of these vehicles, so when the vehicle first arrives, you will know if we pick up your vehicle and you are out of state. A lot of times that is the case, we have about five different drivers that we use, they are highly trained and they transport very expensive vehicles and everything is in fully insured nearby transport and they do a very detailed inspection of your vehicle with you there and then you sign. We turn it off when it arrives at our facility, they do another check with one of us present and then we sign the vehicle, so once it arrives we do a visual look with the driver and then we test the vehicle just to make sure there are no tail lights. check engine, vibrations, strange noises or anything that is out of the ordinary.
That way we know 100% that when we get to the tuning part and we're driving it, we hear that it knows a noise or something that we're not trying to figure out is, hey, is it something we did or was so pre-existing, so we do it once the car stops each car is detailed before we start working on it and then once the vehicle comes in it goes into a full safety check from front to back so we literally check and check every bolt of suspension, brake bolt, everything and we tightened everything on the car, and that's just so you know, we don't know if that car maybe had it replaced, let's say the brakes replaced it. you know a month ago and you say someone didn't tighten the bolts or something like that we don't do anything with the brakes but the vehicle goes and something comes loose you know this is just to cover us and obviously these cars have a lot of power people probably are. driving fast and we don't want any potentially harmful situations, so that's the first major safety check after the build, there's another safety check and everything we do on the vehicle is checked and everything has a paint mark.
So this makes it very easy to just do a visual inspection of everything we touch, it will have a paint mark on it so you can see what we touched and what we didn't touch and you can see if the bolt is removed. or come loose, so you really know they've been using this on assembly lines and automotive stuff for a long time, so this says, hey, we tap this bolt and tighten it to spec with a calibrated torque wrench. Well those are the paint marks and then obviously after the tune up before the car goes out it goes through a third final safety check before it's loaded onto the truck so that's just to make sure you have a 100 vehicle % reliable when it comes to you next time we have the driveshaft so always replace the front and rear driveshaft on all stage 4r trackhawks same as the car obviously there is no front driveshaft on that , but you can use this is an aluminum version from the driveshaft shop, a really nice driveshaft, you can get it.
Carbon fiber too, we usually just do aluminum ones unless the customer wants carbon fiber and we offer that as an option so we'll go a little further down the line, there's a bracket missing here so if anyone notices , this is In a kind of intermediate build, we won't finish this part until tomorrow, so don't pay attention to it. You can't really see the headers very well, but they're up there, you can tell they're there, so that's it. As part of each stage three package, we make the headers. We do a custom set of headers made for us by American Racing Header.
We asked for some specific things about the headers unique to our design and they fit that, which is why we used American Racing. The header is a very high quality product, obviously you get a good view of the exhaust under the truck and it is perfectly centered in the tunnel. You have enough clearance for the drop axle etc, we have a Hellcat out there that has an aftermarket catback. from a company I won't name, but the fit is so poor that it falls into the shadows of the aftermarket, so we are replacing it with an American Racing header catback because it no longer has an original catback, so keep that in mind when when We buy things, sometimes when things are a little cheaper, in the end they will be more expensive.
Up here we have the front differential support. This is also a pretty simple wood design. Actually, we basically just went out and drilled two holes. the differential case straps and this helps lock it in place when we start doing this and we're doing all the fit testing for the driveshafts for the driveshaft shop. We had a lot of problems with the front CV hitting the subframe here. and then we didn't want to grind it and clean it up, so we ended up with a different CV design. Basically, you know, the driveshaft shop came up with something that had a smaller diameter and was still as strong as the larger CV and that's why you'll notice that the CVs have different diameters from one side to the other and another big issue was how much movement the front diff had so when we put it in it looked like it would have a lot of clearance and then after a test drive and a few hard launches there would be, you know, scuff marks so we ended up mounting a gopro under the vehicle and we were surprised to see how much movement the front diff had on hard launches so we definitely put afront differential support there and that's nice. a lot of it wraps around the underside of the vehicle um everything else there's a lot of things you can do I mean a lot of people we lowered a lot of them but none of that is necessary these are the elements that I feel um if I wanted the car It was perfectly reliable and had the most power possible and I didn't want to spend anything extra, I just wanted the 100 reliability aspect.
These are the modifications I would suggest and the other things would just be extras, so that kind of wraps it up if there is anything that You saw and I didn't touch base. You had any questions again. Always put them in the comments. If there's anything specific you want to know again, put it in the comments and a lot of that stuff. It gives us feedback and ideas for future videos because it tells us what you all want to know so again thanks for watching if you haven't subscribed to the channel please do and if you like the video give it a like and we'll see. next time thanks
If you have any copyright issue, please Contact