Turning old jewelry into pure gold bars
Feb 27, 2020A few months ago, one of my clients contacted me because he saw one of my old videos where I separated
gold
from computer parts. He was wondering if he could make a video like that again, except aboutjewelry
, and he wanted to send me somegold
-covered chains and a vintage Rolex. He had no idea how much gold there actually was, but he was pretty sure there was a decent amount. I thought it would be fun to take out whatever was in there, even if it wasn't much. But I had a concern. Before this, I had never tried to extract gold fromjewelry
and was a little worried that I might mess it up.
This is because with gold, even a small loss can start to add up quickly. For example, this thing here is worth $5, and it's such a small amount that you might not be able to see it in... Oh, no. I didn't really know much about the whole process, but I didn't think I could screw it up that much. So I asked him to send it all to me and it arrived about a week later. It was a huge mess, so I went to organize it a little, and almost immediately began to doubt that they were just gold-covered chains.
More Interesting Facts About,
turning old jewelry into pure gold bars...
Gold-plated material is usually made of a cheap metal base such as copper, silver or steel, and its density is about half that of gold. However, most of the chains were very heavy and felt too dense to be made of any of those metals. When everything was organized, I saw that I had five chains, a watch face, and a pile of scrap metal. The first thing I did was look at the clock and noticed that it was still working. The fact that it was still functional and probably didn't have much gold or any other precious metal in it, I really didn't think it was worth destroying.
So I put this aside and went on to look at the chains. The first thing I wanted to know was the purity of the gold in each of them. And to do this, I simply looked for a stamp. I was able to find one on three of them, where two of them were marked 18 carat and the other was marked 14. However, one of the smaller ones was not marked and the clasp on this one had broken. where it was probably written. So now, since I had no real idea what these chains were made of, I had to try them.
There are many different ways to perform this test, but I just used what I had on hand, which was concentrated nitric acid. So I made a deep scratch in the big chain, dipped it in the acid and left it there for a few minutes. Gold jewelry comes in different carats and refers to the purity of the gold. Twenty-four carats is 100%, and everything else is based on a fraction of that. So for example, with 18 karat gold, it means that the
pure
fraction is 18 over 24 or 75%. The other 25% is usually made of other metals such as copper, silver or iron, which change its color and make gold more durable.Nitric acid is capable of reacting with most metals and dissolving them, but some metals like gold are really resistant. At lower carats, below about 8 or 10, the acid can eat away at the gold atoms and dissolve the other metals. However, when we start to get up to 12 or 14 carats, gold is able to block the acid. So even after sitting here for a few minutes, virtually nothing happened. A deep scratch didn't help either. Taken together, this told me that not only was it not plated, but it was probably at least around 14 carats. Now, doing the same test with a piece of the smaller chain, the story was different, and the acid immediately began to attack it.
It also changed color where it was initially blue and then slowly turned green due to all the copper nitrate that was forming. About 10 minutes later, there was almost nothing left, and it was mostly just some light black flakes. I took a small sample of this and added it to a test tube. Then I diluted it with a little more water and added some concentrated hydrochloric acid. Almost immediately a pile of white substance appeared, which was probably silver chloride. This told me that, well, there was silver present and that the chain was probably just a mix of copper and silver.
The last thing I saw was all this junk, but I didn't bother trying it because nothing seemed very dense. I just assumed everything was less than 14 carats and decided to process it separately. But for now I put it aside and went back to working on the chains. Now I had an idea of how much gold was in each chain and I knew that this one probably didn't have any gold in it. I decided I would still process it, but I would do it with all that other waste. However, to process these chains, which actually contained gold, the next step was something called inquartation.
This just meant that it had to be mixed with another metal such as copper or silver to reduce the concentration of gold. Normally the target is about 6 carats, that is, about 25%. By doing this, the gold stops being able to block the nitric acid from the other metals, and you will see why this is important later. The most common and probably the best metal for quarting is silver, mainly because it is very easy to recover and use in another execution. However, I didn't have any money, and this was just a one-time thing, so it didn't make sense for me to go out and buy something just for this.
Instead, I simply used copper that I scavenged from a bunch of cables I had left over after moving into my new office. I then weighed each of the chains and, based on their purity, calculated how much copper was needed to reduce them to around that 6 carat point. For the largest one, which I determined to be at least around 14 carats, I went ahead and assumed it was 18 just for calculations. I did this because it was better to overestimate the amount of copper I needed than to not add enough. Now, to mix the copper into it, I had to melt it all together.
I had done this before on a very small scale on a porcelain plate, but never with this much metal. There are many different configurations that people use to do this, but I wanted to choose the simplest and cheapest one. From some videos I watched, I discovered that it was possible to do it with just a can of paint, some blowtorches, and fiberglass insulation. So I ordered the fiberglass from Amazon and went to buy the torches and can of paint at my local hardware store. Also, while I was on Amazon, I bought this little starter kit for metal casting.
Now putting this whole thing together from the can was really easy. I just had to cut a small circle to cover the bottom and then cut a larger piece to cover the sides of the can. For the torches, I made a hole in each side and stuck them in. Then I put a crucible I had inside, lit the torches and tried to place them correctly. To try to keep the heat in, I covered the top with more fiberglass and waited for it to warm up. However, for safety reasons, some torch heads like the one I have on the right are made of brass.
For general use, this is totally fine, but in this case, the tips of the torches are surrounded by insulation. This causes them to become much hotter than normal and, in the case of brass, can begin to release toxic zinc vapor. For this reason, I did it all in a range hood, but I probably should have avoided brass altogether. My torch head on the left is made of steel and I could have gotten another one. But anyway, after 15 minutes or so, it didn't even seem like it was close to being red hot. Honestly, this didn't surprise me much and I assumed it was because the can and crucible were too big for these little flames.
The simple solution was to build it using a smaller can. The only problem with this, however, was that the only crucible I had that fit this was made of graphite. I wasn't sure if it was okay to use with torch flames, but I thought I'd give it a try. I did a test and was able to get it red hot, and it didn't seem like the flame was destroying it. So I let it cool to room temperature and started loading it with the copper and chains. However, I only had room to fit one chain and its copper, so I would have to wait for it to melt a bit before adding more.
So I put this inside my little tin, lit the torches and covered the top. In just a few minutes it started glowing red and to make it work faster I blew out the top with another torch. Then I let it sit there a little longer and it finally started to melt. There was still a lot of solid matter, but it was liquefying. Now there was a lot of extra space, so I started adding more copper and gold. I started with the little 14 karat chain and all its copper, and it might have looked a little strange here.
This was because to make sure there was no moisture on the metal, I preheated it with a blowtorch. I really messed up a lot and the chain melted into the copper a bit. I waited for all of this to melt and then added half of one of the larger chains along with half the amount of copper. It's entirely possible that it would have been possible to do it all, but there really wasn't much point in trying. There was still a third string to do, which definitely wouldn't have fit, and there was no point in risking overflowing it if I had to do a second run anyway.
But in any case, with everything added, I covered the top again and waited for everything to melt. When everything was finally liquefied, I stirred it very well to make sure all the metals were mixed evenly. After that, I covered the top and heated it up for a few more minutes just to make sure it was nice and hot, and then poured it all into a can full of water. When I was done, I replaced the crucible and prepared the second pass. Just to make things go faster and to make sure there was no moisture, I gave all the copper and gold chains a strong preheat.
Then I slowly added everything to the crucible. At first I just did this with the tongs, but I discovered that doing this with all the copper would take forever, so I started pouring it from a jar. It was much faster to do it that way, but it wasn't as accurate, so I ended up missing a lot of copper. However, this really wasn't a big deal because not including just a small amount of copper wouldn't make much of a difference. When everything was finally melted, I mixed it as before and let it sit for a few more minutes.
Then I went to pour it all into the same can, but I was a little surprised because the liquid metal started coming out the side before the front. This was definitely not a good thing, but at the moment, it was still too hot to investigate. So for now, I put the crucible back in the can, turned off the blowtorches, and let it cool. When I looked at it a few hours later, I noticed that there were some huge holes in the side, which were made by the torch flame. This is why oxidizing torch flames should not be used on graphite for long periods of time.
I was lucky that it didn't end up being a problem, but it could have caused the crucible to break when I tried to lift it. Not only could this have caused all the gold to spill everywhere, but it would have also been a major safety hazard. But anyway, back to what was fortunately not a catastrophic failure, all my gold alloy was now in this can. I quickly got rid of all the water and that's how it looked. By pouring all the liquid metal directly into the water, he created these pieces that have a relatively high surface area.
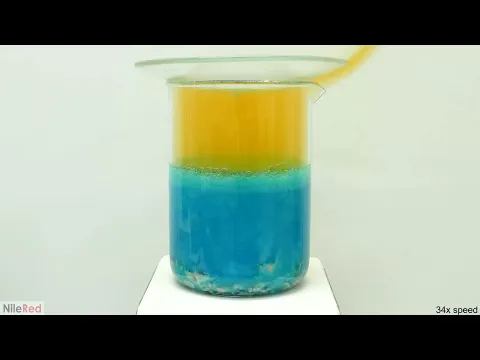
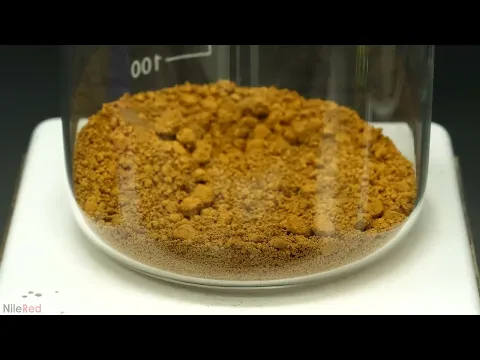
However, ideally they would have been a little flatter and more like cornflakes. But I guess I didn't pour it high enough. In the can, right on top of the fiberglass, I also found this chunk of alloy, which had leaked out the side of the crucible. So I took this, along with all the flakes, and put them in a beaker. Then on top of all this I poured some diluted nitric acid. A reaction immediately began and some unpleasant nitrogen dioxide fumes began to be released. The nitric acid was attacking all the copper I just tested it with, as well as any other metals that may have been mixed with the gold.
In this case, the other major metal used was probably just silver. However, small amounts of other metals, such as nickel, zinc, or iron, may be present. The nitric acid converted the metallic copper into copper nitrate, which, as I mentioned before, has this really pretty blue color. However, as the concentration of copper nitrate increased, it slowly turned dark green. Silver and other trace metals are also converted to nitrate salts and dissolve in solution. However, silver nitrate is colorless and there are not enough other metals to really affect the color. When the reaction subsided, I added another load of dilute nitric acid and it started bubbling like crazy again.
I waited for this to settle as well and when it was ready, I poured everything into a larger beaker. Then I kept adding more dilute acid and continued the same cycle. As I mentioned before, I'm using dilute acid here rather than concentrated material, and there were two main reasons for this. The first is that it prevents the reaction from getting out of control, and the second is that it needed extra water to dissolve all the salts.I was also able to recover some money and with it I made another bar. I didn't feel like it fit in this video, but if you're interested in seeing how I got the silver out and how I dealt with all the waste in general, I've put together another video.
This one, however, is not posted on my main channel here and can be found on my other one called NileBlue, and there is a link in the description. As a final note after all this, I went to a company called KITCO and asked them to test the purity of both the gold and silver. They initially told me they were both 100%, but they didn't know I wanted a hard copy of the results. So I asked them to run it again, but this time the results were slightly different. The silver was still 100%, but it said the gold was 99% and the rest was tungsten.
However, I think this was just a mistake because if I took out 100% of the copper and silver, there is no way there would still be a random 1% of tungsten in there. When I posted this on Patreon a few days ago, one of my patrons, Victor, gave a good explanation as to why he might have told me there was tungsten. The gold was analyzed using something called X-ray fluorescence or simply XRF, and he said it can sometimes be confused between gold and tungsten. This is because with XRF, the peaks of tungsten and gold are very similar. Another user found these two XRF results for tungsten and gold, and you can see how some of the peaks overlap slightly.
Victor also told me that he didn't even need to ask for this video, and that there is another method that can be done where the jewelry is treated directly with aqua regia. Not only would this method save a lot of nitric acid, but it could also be much faster and generate much less copper waste. But anyway, in conclusion, I was able to mine the gold and I didn't completely screw it up. The only sad part now is that I can't keep the gold and I have to give it all back to my employer. But either way, him sending it to me was generally very kind and, well, trusting.
So we thank you very much for that. However, if any of you are interested in donating your gold to me, I'm definitely open to it. Now before I go, I just wanted to quickly mention that I also have an Instagram account. I post a lot of things there, some of which never make it to this channel, and I also post stories covering some of the projects I'm currently working on. And if you were following me, you would have known I was working on this whole gold project. I also sometimes post very high-quality content like this, so you should definitely consider checking it out.
As always, thank you very much to all my followers on Patreon. Everyone who supports me can watch my videos at least 24 hours before posting them on YouTube. Also, everyone on Patreon can message me directly. And if you support me with $5 or more, you'll get your name at the end like you see here.
If you have any copyright issue, please Contact