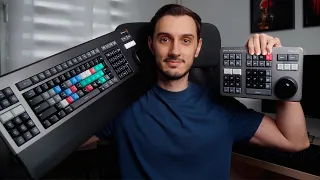
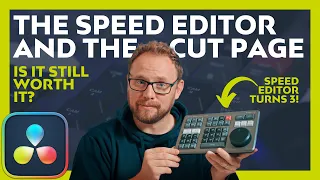
Speed Editor Tutorial & In-Depth with the Cut Page [PART 1] for Beginners by a PRO.
Mar 07, 2024What to do now is press one of these buttons here, so I'm going to press overwrite source and what that will do is match the source, it will give me a five second clip, the default is five seconds and it will be perfectly timed with my intro , so let's take a look, I'll go to the timeline, so you can see the full screen, well, I appreciated the pun and the play on the word uh citizen kane citizen chain so there we go, we're perfectly in sync with the another camera angle, all I have to do now is crop it back so I can go crop here.

He was a great admirer of Orson Welles. I appreciated the play on words and the play on words, so what I need to do is get a little closer to the clipping point. I'm going to press camera three, which will select. track three clipping, I'm going to take that back somewhere around here. I appreciated the pun and the uh pun from Citizen Kane Citizen Chain, let's do it exactly where it says Citizen Kane, the pun and the pun. uh citizen kane citizenship that's great okay we can even delete that. um, the best thing I can do is use another function.

More Interesting Facts About,
speed editor tutorial in depth with the cut page part 1 for beginners by a pro...
There's a function here called foreground and what I'm going to do is at this point, I'm going to come to the beginning. of that clip, make sure my photos are on. I'm going to press Close and what it's going to do is it's going to automatically place the same shot on top of itself, but it's going to zoom in. I'm just going to trim. That backed off a bit. I appreciated the
part
. You can see what is done. It's not quite aligned, so to realign it, if I just press and hold this, I can now adjust the position and.
He was a great admirer of Orson Welles. I appreciated the play on words. and the Citizen Kane Citizen Chain pun is great, so we're going to show you guys very quickly and easily what all these buttons do now and make our interview look good, I think just to finish this panel, this one here dissolves. and that's nice. Then a lot of that was covered, so just to show you what's happening here, if I move to the edit
page
, you can see the exact same thing happening, so the two of them are talking to each other and I can adjust this to any moment.
So if I wanted to get rid of that, if I just highlight it, delete it, go back to my cut
page
, it's gone, so let me quickly show you some of the other little features that are here if I go to the top of the line of time. let's embed, let's put a title here, so I'm going to go to my titles, I'm going to grab some text here, just drop it on top, let's crop it and let's go to our inspector, okay. Now, if you want to choose a font different, what you can do is go here and hold down first to do your transitions.If you double click and hold it, it will make your font so you can go through all the different fonts you have. We have in your system, so it's a really nice and quick way to check what font you want it to be, so with one click we change the transition, so let's change that back. I really don't want it to be like that, let's do it. clockwise, why not, okay, let's change the duration again, let's turn that down and go, the other thing we have here is the ability to put markers there, so if I go here and double press the audio level button, a marker is added and if I continue, let's say you want to add another one, if I double click and hold, you can choose a different marker color and then the next time you press the marker it will stay in that color now, If I triple click, it will get the color. bookmark and you will get the dialog box here ready to write whatever notes you want for the bookmark and then to get rid of that box, just press escape and if you want to make a place at the top, let's come back here, what else can we?
What I do is I go to our font, I go to our logo here and if I press place on top, that's going to place it on top of everything, so I'm going to switch to the color page and just show you what works in the
speed
editor
on the color page, so here we have the main things that work, obviously, jog, scroll and scroll, everything works great and if I make a mark on a was big and a mark and I have my loot. The plate in this becomes my loop so you can define an area so it can generate a lot of words.I was a big fan of Orson Welles. I appreciated the pun and maybe I want my loot game to be both. I was a big orson welles fan I appreciated the pun and was a big so it works you can delete them with a double click the bookmarks work you can't do the color dial bookmark but the bookmarks work so you can add a bookmark here like this splitting works, so the nice thing about splitting is that if you're doing a fit and often if you're working with a flattened file and you use an edl to do the prefit, what can happen sometimes is you lose a take, so the color page you need to split that clip, otherwise you are grading two different takes with the same color grade, so to split the take what you do is go in, so let's imagine it's two takes, but represent as an icon if you just press split it splits it in two normally you would have to go to the edit page and cut it on the edit page but you can do it directly here with the split button which is really useful for adjusting any something you do and can undo here. and the other thing that works, it's really nice if I take this still image, the jog Shuttle acts as a cleaner, so when you're comparing still images or you're comparing a still image to your live footage, the jog Shuttle works as a deleted, that's really cool on the edit page, you have pretty good functionality, the cameras don't work as well in multicam, okay, the cameras are working differently, which I'll show you shortly, but the roll moves all that. some things work and all the trimming functions work.
The font button will only highlight the font viewer. Does not work as a source tape. The timeline will also highlight the full view work of your timeline, so this red button here will have a full view. that works on the color page, the cut page and the edit page so you get a really nice full view there and things like dissolves and cuts work too so after editing all of this together I realized that I actually missed some buttons in the
speed
editor
. so let me show you what they are now, first one is important, it's overwritten with waves and this allows me to very easily change a shot on my timeline, so let's say for example I want to get rid of this shot here, I'm going to go to my source tape, I'm going to find a new take, so there we go, let's just mark there and mark there the new duration, this cue point that we just made here is going to replace the duration of this clip, so I'm just going to press wave to the right and you'll see that the new clip has been inserted and the duration has been adjusted so our timeline has been stretched or shortened to accommodate the new clip, so it's a really quick and easy way to just replace takes without having to We have to worry about the duration.Well, the other thing we have here is the ability to zoom in on the timeline, so if I press this button here you'll see that I can adjust my interface very easily. We have a full view button, so it's nice that it works on the color page and the edit page, and down here we have slides, so below the scroll we have slides. If I double click and hold, you'll see now. that I'm sliding my clip along my timeline so I don't change the in and out points, I'm literally changing its position in the edit so that one is slide and the other one is move so below the split we have we have to move, so if I press it once and hold it down.
Now I can move the clip along my timeline and the other one up here is under Smart Insert and Add. You have a clip and what that does is bring up the entire clip, it doesn't matter. over the in and out point, so again, if I go back to my source, now let's choose a new clip, let's say we want this clip here, if I press the add button twice, the entire clip will come down to my timeline, you can see what he brought. that down there now, if I undo it, you can also add it to a different track, so if I press camera 2 here you'll see that video track 2 is now highlighted and if I add it back now to my source viewer and double click on that now. adds it to track two so the camera angles also double as a track selector so camera one and then press camera two so that's another really useful feature so in the second
part
we'll look at the container of the sink in much more detail and I'm going to show you some timing problems I've had and how to fix them.If you enjoyed this episode, consider subscribing, take care and I'll see you in part two.
If you have any copyright issue, please Contact