Painting your Car with Spray Paint!
May 29, 2021What's going on guys and welcome back to Paint Society uncut. We have our Honda Civic project here and we have this project here because we're going to address, you know, common
it, yeah, so all I'm really going to do is use some 400 grit and I've got a little hand pad here and we're just trying to get the rust off the little areas here um like I said guys this project is not going to be
paint
problems. Guys, listen, this car is 17 years old and today. We're going to use some rattle cans to go ahead and give it a finish here that's going to make this look a lot better. We understand it's not going to be perfect, but for you, you know, the average is doing ityour
self or without any uh. know heavy equipment, I'll show you a couple of tricks along the way to make this look halfway decent so it's been a while since we used a roll primer and I had a few areas that were sanded down to bare metal and a time The car sat outside for a month, you know, it rusted a little bit, so we'll fix that before we startpaint
ing
it, yeah, so all I'm really going to do is use some 400 grit and I've got a little hand pad here and we're just trying to get the rust off the little areas here um like I said guys this project is not going to be your
certified paint repair this is a home garage that's why we have it here we are trying. to make my car look better, so I found that 400 grit is just what you need to remove those small areas of rust.
Now this video is mainly to show you how to paint. Now, this existing primer is a urethane primer that we applied, you can watch the video here and you know it's a pretty good primer, but I had a little bit of grit, so you know, that's what I'm tackling now and I'll show you how to take care of it. . of that bare metal area before I paint, I'm going to mask it off, you can go to advanced auto and get an inch and a quarter. I like the yellow masking tape, it works pretty well and we'll just go around all the edges and then I went ahead and put it on the tape.

More Interesting Facts About,
painting your car with spray paint...
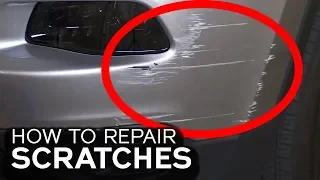
This makes it easier even at home. We're not going crazy with masking. We're just masking the panels. We don't want any paint on this car. It definitely shows. Better days, but you know it's a cool project because it has a lot of common paint problems, right, that a lot of you might have on your own vehicle or let's say you're trying to make a turn. or something like that and you want to make a car look better, you know, make a couple extra bucks. You know this can also be an option, you know you won't get the perfect finish, but it will look better, you know?

That's what we're going to do. What I like about this project is that there aren't many real expectations. We just follow it and see what happens. We are testing different products, different equipment and the mask underneath. we'll just go ahead and mask it off again, this is what we call masking, but a mask on this fender will probably take about 10 minutes to take off, it'll probably take about half an hour between removing the bumper and removing everything else. and risk ruining something yeah so for the plastic I have an automotive based plastic which means one side is treated so it doesn't flake you don't really need it you can go to Walmart or Home Depot Lowe's and get it yourself.

The painters plastic that would be used around the house, the only drawback is that if you are
painting
a lot and have a lot of time in between when you use it as a paint gun, then that paint can come off because In this plastic, one side is treated , so I'll put this in the description, so if you want to go ahead and get this for your project, it's a must when painting a lot of panels or being in a paint booth or something. small like this you don't really need it and I get a razor blade to cut all those edges it doesn't take much to cut the plastic I like to pull it out first that way it creates less air underneath and then just cut along the tape here it's okay, now all we're going to do is just tape our plastic to the tape that we already have there, okay, so just tape along your back the mask tape, make it nice and even , okay, and we finish here in the headlight area so far it's not very difficult to do I just want to give you the confidence you need to say hey maybe I can do that job I have an older car I think it might look a little bit a little better, let me test it well and so that the plastic doesn't move too much, I just taped it under the car to make it as tight as possible, so now we're going to move on to the next step, so I'm going to continue go ahead and let's get a little bit of let's look at ourselves, well it's a self etch primer and how funny the metal looks so, yeah, we've got a couple of areas here that have, you know, our metal visible and self-recording.I'm going to protect that metal so it doesn't go ahead and start rusting us again. If you didn't have any kind of metal showing, you could do that 400 and then 600 and it would be nice to paint. I'm going to put this on everything just to give it another smooth surface and that way I can sand it with 600 and I'll have a smoother surface the smoother the surface the better the paint will come out without being too smooth. I wouldn't want to do more than 600 to 800, but we'll probably stop at 600 after
spray
ing this. We're not going to use too much, we just want to cover our surface in self-etching primer. it's not meant to like the build, it's not meant to fill in any kind of scratches or anything like that or body work, it's just meant to give you kind of a barrier that's mainly focused on our areas where we had that metal and that that's all.We put our metal areas on just now the key is not to sand them when we sand again so we'll go light with like a 600 and let this flash for a good 15 minutes and once it's dry. I'm going to take you to the next step, so I'm ready to sand this and I have the same hand pad, but this time I have 600 grit, now you can use 600 to 800. This is a very fine primer and I like it. I said I don't want to go through it again to the bare metal, this is just to protect it and I can go through it dry okay, or I can go through it wet now, if I do it wet, what the water does is It will go ahead and prolong the paper, just a little, in this case I can see that the paper cuts it perfectly and I don't need to wet sand it.
In my opinion, wet sanding is more of a personal preference, although If you are doing large areas, it is good to wash the car before painting it so that all the residue can be cleaned and you won't have it on your paint job, but by feeling this, it's pretty super soft without a smooth finish. before painting, you will never be able to have a smooth finish after painting, so ready to paint now, quick tip. If you can control your environment, that's great, but most of us can't when we're in our garage, so if you pick them early.
In the mornings maybe 70 to 80 degrees if you have that in your area or in the evenings your paint will work much better now this is acrylic lacquer and our 2k urethane so there have been some questions about if they are compatible, yes they will peel well. It's a 17 year old car, this is our project car and we've done this before in the video above and so far so good, the results have lasted a good seven months and there are no signs of peeling or flaking so let's continue. go ahead and I have a can here, uh, this is b92p and we'll put it on our panel.
A light coat will get the paint into the panel and then we'll go from there and see if one can is enough. Now the attack shelf is a It's a good idea to have it right before painting, this will remove debris and I like to put tacks around the entire area that way any debris that's on the plastic won't make it onto the panel and as I mentioned in my other video make sure you have a towel so you can wipe that tip every few passes that way it won't start spitting on our panel so the first coat will go on pretty smooth and be streaky don't worry we'll clear up the things in the next few coats, so the worst thing we can do is not let it dry, it's been about 10 minutes and it's pretty dry, we're going to run our adhesive cloth over the surface and then apply our second coat to let it set. account. my distance is about four to five inches and I work on small areas the same way I work on small areas and the reason I do that is they can stay wet the paint is wetter it's going to be smoother and it's going to dry more smooth if I end up everywhere. the place where it will land dry and with a clear coat when placed on top will also be dry so I will separate it into a quadrant to not do more than 8 to 10 inches of movement and I will do different quadrants okay and I will take it along the entire fender.
Now I have to say this looks pretty good, now you might get these little dots of mucus here, don't worry about it once the clear hits it, you won. I can't even tell they're there, so here's the second coat, it's been 10 minutes, let's say your surface is totally rough, it's not coming out right, you can go ahead and take your 800 grit again, sand everything down and it'll be smooth. Take it out and start from square one, but you already have that color, so you won't need as many layers. Let's go ahead with one more layer and check it out and I think it should look good.
The third layer is. dry, now I have the lights off, you might be wondering why, well this is a good way to tell, I have spots of light, so I bought a little flashlight here and I'll look at it and see, hey. Can I see through the primer like here it looks a little bit light, okay in this area so I know I need a little bit more there and here too so you can just know when the sun is coming up. I needed more paint and well it's too late now so I think one more coat and we should be good so with four coats I only have a little bit left so it looks like these little eight ounce cans are good enough for about a panel or so.
So here's what's going to separate this job from any rattle can job: it's a 2k high gloss clear similar to what you get with a paint gun, which means it has a catalyst on the bottom that went go ahead and mix it with the actual clear coat and when they harden together it will give you a 2k 2k means two parts okay and that's similar to what comes out of a paint gun. Now the way to use this is to take this red cap here and there. a bladder inside, like I said, a transparent layer bladder and then we're going to pierce it by pushing this red cap.
Now it's a little hard, so you want to put it against something very firm and when you hear that click. you know it's good to start, they've already drilled it from here, it's like a ticking time bomb, now some say you can last up to a week if you keep it in a cabinet and the temperatures anywhere you live or around 70, well , that is. We don't have beautiful weather here in South Florida, so it may only be a day or two before it starts to gel in the can, but as for our project, we have more than enough time here before it starts. .
To be ready to clean now, I don't recommend taking the tack rack now and running it over the panel. Sometimes these
spray
cans can come out very dry and textured and they will pick up all the fibers and the fiber will stay there. panel now, here's a tip you might want to follow if you want a smoother finish. My finish is pretty good, so I'll leave it alone, but if your finish isn't good, take 1000 grit sandpaper and just rub it over the surface. that's going to go ahead and smooth it out and then from there it's just going to give it one more coat, what it's going to do is it's going to remove all the texture buildup and with just one coat of paint it's not going to be that heavy for me, I'm fine, like that. that I will leave it.Remember that every job is different. We are ready for our 2k. Now the important thing is that we don't want to get the best finish on the first coat. It's going to take time to build up probably about two or three layers and we'll be fine, but it's very important to remember that we don't want to put four or five, six or seven, something like that, which could look great here in three. or four hours will look pretty boring because you're not giving the clear paint a chance to breathe and too many coats will trap it and when it's trapped properly you'll have a dull paint job at the end of the day. go ahead and spray some clear, so the first coat came out really good, but you can see that in some areas it will be dry, I mean that's normal, this is what I'm talking about, it's not too heavy, no You will believe how it will be.
Look at that second and third coat, this is a really good base for my clear to go on, let's give it about five to ten minutes, so I'm currently sitting for about eight minutes and I can tell it's done because it's tacky, look how it is . It goes on like a fingerprint, it's fine and not stringy or wet so I'm ready for the second coat. We'll go a little wetter, a little slower and see how the shine starts to emerge and after that second coat it starts. to show offreally good, I had a little mistake here that I picked and left a little mark, but I can always polish that up at the end if I need to and we're about eight minutes later, eight or ten minutes later.
I realized we're ready to go, this works pretty quickly, so the third coat we're going to apply a little bit wetter and a little bit slower and then that's it, we'll leave it alone and it's funny that we have an error at about the exact same area now for this I have a piece of tape and it looks like I've got them I'm just going to leave you a little bit of clarity on that and we'll buff it out later and about 10 minutes into the third coat it looks really good now if you need to step up and apply one more layer is fine, just make sure to keep it well ventilated. -ventilated area, you don't want it to be too hot so when it gets too hot what happens is the paint will start to cure on the top without curing on the bottom and when it starts to cure on the bottom and you're done cured on the top, that's when you'll start to see dying or little spots or something, so overall this job looks beautiful, I mean take a look at the finish on a spray can now that we've got a couple of grime . and debris and if you're paying attention, I'll show you how to remove that and any orange peel that may be on it, but I have to say it's really good, so we'll let it dry, I'll say about a good three hours.
We'll leave it at that and then unmask it. You don't need to remove any tape. Just leave it like that. You are more at risk of disrupting that. Clear. It already looks that good. Do not mess. okay so actually we're two weeks away and I haven't been able to touch the car because I've been a little busy but look at the shine it's still pretty good let's go ahead and attack that little area where that bug was going to remove the dust here and I'm going to sand the entire fender just to see how well it sands and polishes the varnish, okay, so the guys at Eagle Abrasive send this little kit, it's a toll.
Cutting this is really good, we're going to use it to get this little bit of dirt out. It comes with a couple of different blocks and is a starter kit. A small variety of paper, so there are two blocks. I'm going to go ahead and use this. uh, a more square one, it has more of a round one and also an oval. We use a square one and there is an oval, but the square will only level out at the top and what's underneath won't burn. areas where you don't want we're not going to use 800 800 anymore if you haven't run I'll start with 1200 and the reason I like them is they're super easy to use. and they are strong now you don't use it wet at all, use it dry, that's the point behind cutting the tip it is to be used dry, it is designed to be the only paper or one of the only papers that can be cut dry without the use. of water, so I'm just going to remove a little bit of the surface and let's see what happens, like I said, this one is pretty deep, short of scrubbing it and sanding it again would be the only other way to really get it. so we're going to be the best we can be and then we're going to make it better so we need to know where to stop these little white spots that we can't really do much about because they're coming from the mistake but these little spots underneath are a low spot and we sanded it down considerably and still so, you know, sanding, but I don't want to overdo it, they're not that bad, but let's say, this little spike of dirt right in this area, if you can see it right here.
We got it down well, these are the ones that will stand out. Well, look at how the top surface is, so you're pretty much going to sand it until it's gone and this is a good way to minimize the area now. 1200 is a little aggressive for just a dirt tip, 1500 to 2000 would probably do, but since we were using it for this area here we can see that it cuts, you know that pretty well now, looking at the rest of the fender, it honestly came out okay. clean the only reason we're polishing it is just to give it a little more shine clean it just a touch but you can leave it like that if you're happy with this most of you I'll probably show it.
Do you know what to do if you're going to go ahead and take it a step further, so I'm going to cut to 2000 grit because, you know, a less aggressive scratch is going to be easier to polish out, so I'm going to take my uh little block here and now. I'm going to go to the little spikes okay, there's like one right there okay, can you see it now, when do you stop, do you stop when that little bump there, a little spike, disappears, okay, can you see what it is? flat type, that's good enough in that area, I have a small one here, so you know the same concept, actually two, we take a look here, you'll see the top of the tip here and here and everything you're going to do . it's just flattening it out a little bit now it's going to be a little bit flatter in this area usually because you cut it off, I don't want to say anything that anyone is really going to notice, it looks a lot better than having a spike of dirt in the middle of your paint job and then in this area where I had that 1200 grit, I'm going to sand it down more to refine that scratch that you always want to refine frontally, you know just a little bit more so it's easier to polish yourself.
I know this one here isn't going to be perfect, but you know that's one of the sacrifices you're going to have to make in the garage. Do you know things that could fall into your painting? you just can't get out, I mean, there's always the option of repainting, so now before you move on to the next step, it's a good idea to get a spray glass cleaner and just clean the surface a little bit. I don't want that residue to come back on your new sandpaper and for our new sandpaper we're going to increase it to 3000 grit.
Now this is a block of Eagle abrasives right here and I have 3000 here now, I'm just going to focus primarily on this one. area where I wanted to make sure it looks really nice and consistent with the rest of the car, so I'm going to sand it now. 3000 is very easy to polish, so we don't have to worry about, you know, putting too bad scratches on the panel and what 3000 will do well, it will remove the smaller bits of dirt and, you know, it will remove a little bit the surface so it can have a nice Beautiful finish if let's say yours faded a little bit so after 3000 it's obviously going to look dull, but it's ready to polish, to polish, this is what we're going to do with each of these foam pads and I prefer foam. matches the corresponding compound polish or ultrafine machine polish and I'm using Milwaukee.
This is probably one of the best polishes you can get for one or two panels. I want to make a whole car out of it, but it's very, very good. It has a 3 m adapter. I'll put everything in the description so we'll start with the foam polishing with the foam compound for our polish and our mic girl machine polisher. Actually, it's only for dark colors. Now I'm sure there are other different materials. It can be used to achieve the same effect, but you can't use this by hand, it won't increase the shine, so let's go ahead and polish it a little, don't let it get too messy with the polish, just put a little on and work it first.
What I'm most looking forward to is seeing how well these buffs clean up and this is the third pass we're going to do and then we'll check it out so now I'm going to switch to that black pad and I'm running the buffer around 1200 rpm, not too much. high. Now after you start polishing, you will see that your paint will start to look very good. So with this blue stage, what this will do is like when you're in the sun and you see those polish marks all over the place or those streaks, well, this is a type of material that will move them, remove them for you and with this you want work slow and then you'll start to sweat a little, that's when you know you're hitting the sweet spot.
Then to finish, I have some quick details. Just go to our dashboard. Can you believe we accomplished this in our garage? and looks. like this with aerosol cans, I'm very excited and I hope you are too now. Can you go ahead and paint your entire car with spray cans? I don't recommend it with the cost of the material you will have and just painting. for aerosol cans you can probably get at least a 30 gallon compressor and paint one panel at a time, but for small things it really works well for hoods if you're painting a hood that's a little small. a little difficult because it's flat and naturally aerosol cans don't work well when they're, you know, when you hold them more horizontally, so if you can fix the hood so it hangs down, then you might have a better chance, but for small things like this, we show you without much material or much expense, you can fix your fender or maybe a small part of your car, now we recognize that the rest of the car is fine. pretty sun-battered, but you know this is our project and we're going to go ahead and attack different panels throughout this series to learn everything there is about painting.
I hope you learned something, enjoy this, and I hope you can do it on your own. project until next time, this is Brian from Paint Society, reminding you not to overthink it, it's just paint, let's take a look at this work.
If you have any copyright issue, please Contact