Make a Motorised Drift Trike with Basic Tools
Jun 01, 2021drift
tricycles, these things are cool, laughs, now this is my electric version. I also have a gasoline version. They both go about 60 miles per hour and are fairly simple to build, but today I have a challenge for myself. A while ago I made a motorized kart without using a welder and I want tomake
one of these, but not just without using a welder, but we are using the mostbasic
set oftools
that I can use, so with that in mind, I accept the challenge . You two are out of control, oh yeah, the right fingers have it all.
Engine wheels,
drift
sleeves, axles, carriers, chain sprockets, metal bearing bits and of course a BMX. The first thing we need to do is cut the bike up now, Dennis, you need a lot of the BMX. I need handlebars Forks on the front wheel on the down tube so we can cut the chain stays here and remove the seat tube and then cut the top Shoom at the angle right there anyway this time well I saw it cleanly now , loyola if you have forks, you have v brake mounts, I'll just give you a little advice before we go too far, drill a small two and a half thousand hole just below the head set at the angle and then we can pass the cable of the front brake up and out, yeah, gotta do it, it's a little bit cleaner, okay, so we want to hold this off the ground.
More Interesting Facts About,
make a motorised drift trike with basic tools...
I have some two inch lumber, 54:25 melba, three mil thick. wool box section, this one is about 50 centimeters long right now and I know this is going to be good because I screwed the exhaust pipe onto the engine, just open it up, you can see we've got a replacement planned to stick out here and that. everything looks pretty good first, how are you going to connect that without using a soldering iron? You'll get a hole saw with the same diamonds on the bottom bracket and then we'll drill the side wall of the box section and then use the top and bottom bits.

To lift up and
make
like flaps, we can drill and attach to the bottom bracket, so we need to hold some wood against the side because we're going to drill off center and obviously pilot drill. You won't have anything to do. That's pretty good. Very good university. Correct for your axial mountain. We need to find the center line of the axes. No? I've cut some chain there, pretty sure it doesn't have to be that way. long and then I have the smallest sprocket. I was able to get almost a 1 to 1 gear ratio on these things. Okay, measure the center of the wheel but 14 centimeters and then bring the center of it to the same height now. that is the center line of our shaft, make a small mark.
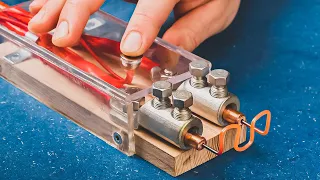
Hello, my name is Colin, humble wanderer, a welder. The rear axle is a 25 pin coaxial, but the main thing is that it is keyed along its entire length and that is important because we need the shape of the key. a little bit lower for the sprocket current, so essentially we're going to stick that in there and then we'll make it like a little square on the back here that the bearings can be screwed into and on the seat they can also be attached and then Somehow I'm going to try to get some extra strength on the top of the engineer because, although you think my little boat, Dan, is pretty good, I'm not sure I want to put all my trust in it, so get another one. box of 25 or 50 thousand.
That will stick in your head. I'll do that in a moment and then we'll get a little bit of 50 over 50 times three male angles and that will go over the top and then it'll be another little bit of angle line. which will go down the side where the bearings are going to screw into the inlet and then maintain that filling position the entire time. I'll only do this because there's no point in explaining it, essentially it gives me a lot of cutting, bending and screwing, but they are That's life without a welder coming. I tried it, oh yes, did a lovely job with it, nice and strong, as well as the measurements: 35 centimeters, 21 centimeters and then the actual curvature in a fairly simple screwing technique.
Finally I have it. Get your cash section. You need to curve the edges on two sides because the angle is like a small radius on the inside and when you put it against it, if you don't do that, it won't fit right and then you will get the angle. you
basic
ally put a little three centimeter square on the end, you can see the measurements on the screen and then when you place it against your box section you basically screw a bolt through that bit, bend it, shake it and then glue other. essentially screw it into each joint we want to try to get two bolts if you have one bolt it may just come loose it's no good you have two bolts lock it nice and tight now before we fix this on our frame we need to drill the holes so it will fix the axle and bearings, please try to put it there like this, screw it in now, the center of my axle at the bottom of my chassis is nine to two millimeters and then I made the holes in the center of the holes 20 thousand from the edge on the right, let's screw this to that right.I have it mounted there and basically just cut 200 mil 10 square centimeter bits and a 3 mil plate. I drilled some holes in the sham for the cornice. I took it off so it looked clean and screwed it on now before I hit it and put on the whole axle and all the wheels and everything we need to make the sprocket now this isn't actually a bicycle sprocket it's a wheel now half-inch pitch flat plate. Basically, this is another hub bracket that normally holds the wheels, so we need to make this bit there um, but we shouldn't lose the lathe.
Now, kids, it didn't end well. I didn't win that badly, did I? Let's put it. the axle put the axle on and then we can put the chain on and then we'll know you put the motor mounts on yeah that feels pretty strong right now if you notice I cut the axle basically the distance between the outside of the way was. about 110 centimeters now all suitable axles on the end there is a circlip we should stop the hub from flying off of course you are going to cut the other end so you will lose it so just drill and tap put a big washer put and that will do the same job, let's assemble this engine now.
Our first main point of the engine is these four bolts underneath, basically, I just made a little plate, put some holes in it, put it in there and then on the center line of the engineer, obviously I drilled a line, drilled another two bolts and then luckily, because they're raised a little bit, we can have a bolt head behind there and it'll still be fine, so then we can screw it in. our frame and then that's going to hold the motor on the bottom so let's screw this in here and then we can mark it where it needs to go oh this is where you set the chain tension so now this is pretty tight and I must admit I'm pretty Surprised at how stiff it is, but since it's bolted on, there's no other option to loosen it, so we could use something that goes from this point on the frame and connects to the top tube to stiffen everything up and give us another support support. engine, so how are you going to do that?
And in common, let's fix everything, it stiffened it a little bit because it was a little loose laterally. Now the next exhaust job, now I'm a welded version. I hit the exhaust. up here and it made you have to cut it and twist it quite a bit to get it to stick properly there, but now we're trying to keep things simple here, so we'll go to where it already is. We just have to bend it down a little so that it sticks out nice and straight. You don't have to do that, but you know I'm a neat person.
I like things to be organized, so we'll do that. and then the seat will have to be a little higher this time. I have a little bit, but we'll say, we'll say Riley, there, mr. exhausted Piper Roni and then it's just the tank full of electricity, it's time to stay Oh, every day is so strange, it's so straight, it's really straight, I feel it twisted in my side, I realized that you'll come back just to keep you always , oh yeah, sure, eh, we're back. your electric fuel tank cabins mounted now with the electrical system, the real simple thing, the wires are all color coordinated, just clip them and stick them and basically all you are trying to do is keep it away from the exhaust pipe and not wrapped in the chain, now the battery will be a lipo battery that you just push in, turn it on and then take it out again.
You can leave it in, but they don't really load properly from here because now they need balance to load the seat. I did two methods to mount the seat. I use a connector on one side and on the other I just use the bolt going up with a nut on top. You just have to grind it to make it a little more comfortable. we're right, so tear it up, paint it and then when you've done it, you know, but it works, this is brilliant, this is a perfect first project for uni, the amount of people emailing me saying, I want to get on what you're doing, what do I do to make this and with the world that most of us right now are in lockdown, this is a perfect project to try and you know, eliminates some of the boredom if you can still get older parts and everything that.
Now I can't believe how many less
tools
it is taking me to do this. I bet most people already have almost all of them in their garage, except for all the sauce, maybe, and maybe that clamp, but other than that, they probably already have them all there. In terms of cost, the motor is two or three hundred pounds new and the rear axle is probably around £150 with the bushings and all the brackets and the axle and all that, you don't need new tyres, obviously, you can get them. as part warns of a go kart track and the rest is steel, the BMX parts and bobs, you can get them at the junkyard, all the steel parts are super small so you can probably get them out of the cuts, now I I'm going to keep I like a list on my website so you can see roughly exactly what you need so you can know to check off details and there we are, if you want me to try to build something else using basic tools, you know another project.Leave your requests in the comments and I'll take a look because I'm really awesome. I'm enjoying it. I think I've done well. This is the perfect blocking project or if you just want to start making things later too. I put a sneak peek photo on my social media accounts, a lot of people are asking about the decals I have on this thing, so I've made Colin Furze's decal sheet available, now mostly spelled Colin, first job as director of safety toys, t-shirt explosions. whatever mugs it's all there subscribe look next I know which one you are
If you have any copyright issue, please Contact