How to Powder Coat Valve Covers - Honda B Series - A full tutorial - Ep 117
May 30, 2021What's happening? Everyone, welcome to the unknown coding channel. I'm Sean and on this channel I try to bring everyone into the world of
powder
coat
ing. This video is long. I warn you in advance that you have probably already seen it. After almost an hour there is a video on my channel similar to this one, it's episode 20 thatcovers
some of this stuff, basically what this video is is making twohonda
bseries
valve
covers
, both in two stages of different colors, um, but it shows the The whole process starts to finish, so you know, there's actually no chemical pickling in this, there's just sandblasting, but it looks like the turkey fryer to remove the fat and the oil inside thevalve
cover.
You know, clean everything up, mask it for the jet, show the baffles removed. on one of the valve caps masking the dust, there are different little tips and tricks both in the masking process and then after masking getting rid of the similar edges of the plugs and things of that nature, so it also says brush the lyrics, I guess it's one of the other things, so this is like a real start to finish, complete, I can't be much more detailed, I don't think these are valve cover
tutorial
s, so also before I forget in the description of this video because I understand that this video is very long, there are timestamps for the different ones. parts of this video, whether you know, turkey fryer prep, sandblasting, masking, basting, whatever you know, deburring whatever is there, if you click on them, it will take you right to that place in the video, so I divided it into sections in case you need it.
More Interesting Facts About,
how to powder coat valve covers honda b series a full tutorial ep 117...
To come back to this and check something or I just want to move on to other parts, I hope that helps you, so the first thing is to remove this support. I have no idea why every Honda valve cover I get. brought has this bracket every time they take everything off about this for some reason and this valve cap that we're doing in a flat transparent blue is going to be to mimic some of the spoon valve caps, um, not the yellow spoon clearly, but we'll go Let's go, I'm going to put this in the turkey fryer to clean it, get rid of all this oil and everything that's in it, um and then we're going to go through the whole process like I said at the beginning of this. video, so we'll do that first, okay, and since we're doing B-
series
stuff, I'm going to do another one.
The deflectors have already been removed from this one. You can see they just took a grinder, removed all the rivets and this appeared. and I have some fittings soldered to it the way I normally do it, I just use the am caps. These are the ones for board 10. I just bought the caps for board 10, screw them on because I actually have some plastic variants that I'll show you. Here, in just a second, screw the plastic ones for shot blasting and then for
coat
ing. I end up using metal ones just so they can go through the oven.
Protects the threads much better and easier than taping them. We're also going to go through and remove all this cast flare like I usually do on the front of these covers just because it looks a lot better, so I guess real quick I'll show you this so you can buy these plastic covers. I mean I buy them from a place called hose and rubber supplies so any hose place probably has these caps these are only 40 cents these plastic ones or you can get the steel version I think they're 1.50 . I normally use the plastic ones, usually for blasting, and then put the steel or aluminum ones.
I have boxes of everything to protect the threads during shot blasting and then also during coating. Obviously you can't use the plastic ones during coating, but it just makes life a little easier, you don't have to use tape. take them off, you know you're getting a good seal because obviously it's sealing really well, um, I don't know, it's something to consider when you're doing this kind of shenanigans, I'm trying. to cover everything from all the different valve cover videos I've done trying to put all the tips into one. I've already started going over this a bit.
You can probably see it here where it is. maybe it's brighter, I wish you could see that in the video, but Honda valve covers and a lot of valve covers aren't just Honda, they have these weird little casting elements in there, they're not even defects, it's just because they are molded with sand, so they have these strange rough spots. and I tend to go over each one of them with a file just to try to knock them down. If what you're making is a wrinkled valve cover or a textured valve cover, it's much less of a problem, but if you're making something that's going to be shiny, you know that taking something like that out of your finish ahead of time is going to make your finish. much better, so this one's not so bad, there's one right here, I don't know, I don't know how good this is going to look. on camera, but I end up knocking them all down and then as I mentioned before, we're going to go through and delete all of this launch flash along this line.
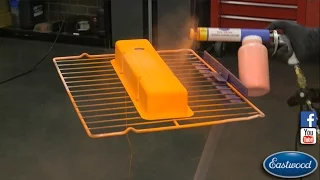
I usually do this side, basically I do the front and both sides sometimes do the back depends on how motivated you are, um just because it gives a much better look, so we'll do that next. Okay, I took this out of the deep fryer, turkey fryer, clean it up as you can see, now a lot of this finish is coming. off, it's pretty standard on factory finishes, I don't know if it's a combination of the heat and the degreaser attacking them, but it will remove the valve cover, it won't remove the valve cover, it's like this is all very There a lot here, but as you can see, a bunch came off too, so it gets most of this stuff out and gives you a nice clean inside to work with, so now we don't have to worry, we're still going to mask all of this out. things to fly, uh, we're going to put the clay in like I've shown you in the past, you know, plug these holes, plug the other one, the PCB hole on the other side, basically, we're trying to keep the sand out of here. and the reason we clean it the way we do is to get the oil and stuff out so the sand doesn't have anything to stick to, that's the most important thing, so we'll cover this up and you know, let's go to be sandblasted so I'm going to make the clay first and then I'm going to sandblast it and then it goes into the kiln to degas it as well, so for you guys who haven't seen the
tutorial
s on how I do this, they're here. link them in the description of the original tutorial I showed using clay as a good way to mask, mask, blasting baffles, more specifically, so this is the same one I used in that video.I use this stuff all the time. Technically it never goes wrong, I mean it gets very dirty, as you can see, you use it over time, but you just cut a piece off and then you're going to cover this slot, so normally what I do is I'll take a piece of aluminum foil and I'm going to put it here and then I'm going to use it to put the aluminum foil in, the aluminum foil that I have inside mainly so that the pieces of this don't fall in there, I mean, I've never dropped one. even on the aluminum foil, but it's still a weird paranoia for me, so come here, grab some aluminum foil off the rack, do like this and then just shape this so it's nice, you know it'll hold the aluminum foil. aluminum instead.
Modeling clay, so it is very easy to shape and this is a non-drying modeling clay. I guess all modeling players can be like that, but I don't know, like I said, there's a link in the description of this video that will show you. the original process of this where I go into a little more detail, but we'll do the same thing here, we'll stick this in there a little bit and the same thing will mold it and you'll want to make sure this sticks to the valve cap, don't let it sit alone into the aluminum foil because then it won't stay on the foil, it will tear and it defeats the whole purpose of what we're doing here, which is making this a nice sealed surface so that sand can't get into these baffles and on this B series there are no holes, some of the other valve covers will be small holes, it's like extra ventilation you'll want to make sure of. or you tape them up or you put clay in them, some people put silicone plugs in them, you know, the plugs that we all use for
powder
coating and then you turn this over and we're going to go into our lid drawer and plugs, these are all supplied by alta Temporary masking is a discount code located in the description of this video for those and we're just going to mask it so nothing gets in and it doesn't get ruined.We're going to leave that factory finish on this. and the next step for this will actually be the next step will be to remove all the plaster that you guys may have seen on the valve cover that I just finished, so we'll do that first and probably go over this and file some of these away. This one actually has a bunch that you can see and they are much more visible than on the previous cover, but the color of this one doesn't worry me as much, it looks like the factory. In fact, someone already went by and did it. this and this is a factory finish on this but this is where most of the casting problems are here on this edge and it looks like someone already went in and filed all of this away and by someone I mean someone at the factory because like I said This is a factory finish, which makes life a little easier.
There are still some strange issues with this, but I'll go over this a bit after blasting. I think the blasting, most of these are actually pretty loose, so the blasting will probably take care of it. that, so we're going to go right now and do this whole part, um, make this all pretty, we don't have to worry about this edge at all because it was removed to leave the cam gears exposed, which you see on a lot of covers on the B series, so I just hope that if you're a programmer, okay, let's put this in the cabinet, so now I have this thing ruined, all the red removed, obviously, hoping that you guys can see it, oh yeah, you can definitely see it. , these are small casting defects. that I was talking about hitting with a file, there's another one right there, there's a bunch of them here and they obviously don't look like much, but if you're going to put a base like I'm putting a chrome base under these, you can see them all right here, I'm putting on a chrome base, you're going to see all of these and by the way, clearly, not just a little bit, so we're going to go real quick just with a file, um, just a nutcase, I mean, literally, I think I bought this one. file kit at Walmart, it's like six dollars, so it came with like six files, so we're going to do this real quick to try to get rid of all these weird little spots. and uh, set this thing to degas, so we take out the clay and as you can see, I mean there's a nice clean defined line on this.
I'm going to rinse it. I always rinse them anyway, like it's a bonus. Caution because you can never be too sure, but you can see the line where it was, you can see that there is sand built up around that area where there was clay and aluminum foil, which means it won't go through there, which is exactly what we were trying to do. We'll rinse this thing and put it in to eliminate the gases. um, okay, so on that last cover, um, it had a factory timing cover, this one has been cut off, that's why you can't see it, I guess it's on the camera, that's why you can't see another wall up here, so we're going to mask off just this area the same way I did in the last time lapse that you saw just with aluminum foil.
I'm going to make sure to put plugs in these eight. The holes on the back should have done that, it doesn't really matter, it just prevents you from having a little edge right there, so aluminum binder clips are available at Walmart. I think a whole tub of them like this big one costs like six dollars. or something like that, you'll want to make sure you use industrial aluminum foil, like commercial aluminum foil, you can get it at Sam's Club Costco restaurant supply stores. Things like that, it's much more resistant and doesn't break as much. easy as normal, like homemade aluminum foil, so we're going to mask all of that and we're going to leave this area exposed because we're actually going to apply a layer of powder because all of this is visible, not too visible because the gears cam are in the way but it's visible, so I want to make sure it matches, so we're going to throw some aluminum foil on this thing.
We cut this piece too big, but that's okay, that's okay, and it doesn't matter how many binder clips. What do you use, I mean all you're trying to do is keep the aluminum foil blocking, oh you know what I almost ruined, I think I surprised myself, so our plugs once again supplied by a high temperature masking supply , there is a discount code in the description. If they want to get some plugs or a discount on plugs, then they want to plug these holes from the back, like I said, it just stops them from having them, I mean, it stops dust from getting into the valve cover, that's why we're. mask the back anyway, but it will also preventYou might have a weird edge on the other side where the plugs are because both valve covers are going to be two-stage so you won't have If a little dust builds up you don't want to pull the plugs in the middle so let's make sure that they're nice and tight because we're going to turn this around after we're done, obviously, and you're not.
I don't want them to fall off, but it doesn't matter, I was saying, it doesn't really matter which of these or how many of these clips you use, all you're trying to do is keep the foil from lifting up, that's obviously all. Masking point and by the way, if you're enjoying these tutorials, this or any of my others, make sure to like and subscribe. I have a ton of new tutorials coming out over the next few months. In fact, I've already filmed a lot because there will be some downtime for me. where I'm not going to be producing content, so I wanted to make sure I queued up a bunch of videos for you guys or I'm going to create content, it's just going to be a little bit different content for a while.
Kinda just with the store expansion and new gear and things of that nature so I'm trying to have a bunch of videos lined up in the queue so you guys still get content like I said if you're enjoying this stuff be sure to If you subscribe, you can hit the bell and turn on all notifications so you'll be notified every time I post. I try to post on the UK Army Facebook group if you haven't joined it make sure you check it out there are plenty. of super helpful people in that group, a lot of people asking questions that they think are stupid, but they are all pretty good questions, especially for new people and the group has been amazing, I mean the support in that group is great, I love it see him.
And I know from time to time I get asked why I use aluminum foil. It's pretty much because it's much cheaper than tape. It's also much easier than tape and, for two-stage things, it actually stays in place much better than tape. Well, better. Than the green tape, the amber tape never comes off anyway, but getting the tape to stick to very thin areas, like these zip ties where the gasket goes, is never fun for anyone, so I came up with this way a long time ago time and I know I've seen it used a lot since then.
I don't know if I'm the one who created it necessarily, but you know I came up with it on my own, doesn't mean someone else did too. They don't come up with it on their own, but now I see it all the time and I actually like to see any of the advice I put on this channel. I'll watch it on people they know's Instagram or some other YouTube channel. Guys who have YouTube channels that do powder coating, it's funny all the messages I got from my last video that had the Volvo thing. I don't know if it was my last video when you see this, one of the last videos.
Made and posted while I was making this was that Volvo video and everyone thought I had a new car because of the way the picture was on the front. I didn't do it, it's not mine, it was a client's car. Oh yes, I use these. these all the time is a little pro tip, these are just the inside of the tape. I use them as is all the time because once you put these binder clips in you can't just leave them obviously so another free pro tip and I think these are the wrong size gray ones and then one more cap hope
full
y it's the right size that will work and a couple of plugs.I'm sure I already mentioned it somewhere in this video, but if you need plugs, there is a discount code in the description for high temp masking you can get 15 off your entire order, so we already handled them, I think that's it, I think we're good here, so I'll post this. I always leave a hole exposed. It's this one or this one. one just depends um that's usually where I hang a valve cover from so I'm going to hang this one. It has a chrome base and then a flat transparent blue. It's actually a little funny, this transparent blue.
I don't know if you guys even do it. I'll be able to see it on camera here, but it's from 2011. And I get questions all the time about y'all can use old powder and the general answer is yes, but there are a lot of variables, it's not just yes, unfortunately, I'm lucky. You know, I live in Utah, where we have very low humidity. I can store it in the store and stores at about the same temperature most of the time, so I can store the powder and not have to worry about the humidity issue. Obviously, that's not the case for anyone or everyone, so yes, you can use old powder.
It's usually not a good idea. I just tested this on a sample piece and it worked great, so we're going to hang this thing and spray the chrome. base on this and then we'll put it on a rack and do the flat transparent blue on this color, so for the base coat on this um using hypersmooth o2 we're going to spray if it's black super wet with the kvi. I said 45 that's like six psi I think let's see yeah about six psi turn on the manifold so one of the problems with these valve covers that everyone has is dust gets in this area so I tend to Spray that area first. just to try to get as much dust in there as possible, it's like a super weird Faraday area and it's a bit unpleasant to deal with, so get close, not too close obviously, but you're going to try to get dust in that opening and it doesn't like it getting in there, just keep that in mind, like these openings are the devil.
Anyone who's done a B-movie cover knows how much those openings for dust to get in stink. I did that thing, just a base coat, if it's black super wet and we're. I'll throw it in and we'll get a partial cure and we'll also go to extreme atoms of gold, okay, so I'm almost wrong big time. I'm really glad we caught this, um, we erased these letters because these letters are At the end it will be visible, which means I need to remove as much of this dust as possible. I actually don't leave them perfectly clean most of the time.
In fact, I guess on this one I'm going to have to do it because I'm spraying the Adams gold, the extreme gold elements over the top of the brush letters, so there's a couple different techniques, it really depends on the cap of the valve, but when I saw a point of light, let me do this real quick, I nailed it the first time every time, well, the second time. time in this case, so I tend to remove most of it with just my finger, just a clean cloth, you have to be very careful when doing this, you don't want to touch any of the areas, I think every time I've said this in the video I ended up touching one of the areas, but I try not to curse myself.
I just did it. I only touched one area. Like I say, try not to mix it up. It doesn't take much to fix it, especially just barely touching it. where doing things on a uh, what's it called, on an oven rack where the valve cover is is a little bit easier to handle and make sure you talk to your customer; Some clients don't want you to clarify these letters. Because the factory doesn't make these letters clear, a lot of people are clearly looking not for an OEM look based on what we're doing here, but rather that kind of general OEM look with the brush lettering on the finished valve cover that I usually use.
To do it, I encourage people to do it. I have to say that just because you protect these letters, these letters will end up looking pretty bad. I'm just touching this valve cap everywhere, so since I'm having a hard time, I'm going to use the other technique which is a Q-tip and you can just spit on the Q-tip and throw away most of this powder. You can use a Q-tip to get rid of most of the dust and then come back and do a detailed job with a new one or two. You're just trying to get most of the dust off and you want to make sure that there's no uh, like stringy bits of this come off when you do that because they tend to get stuck on the edges of this and then you cure them into powder and once Since you remove most of the dust, it is very easy to do so. the final detail work is really taking that good initial part out of there, that's the problem: I'm not blocking this with my hand from the camera and usually what you want to do is try to clean with the grain, it will form the dust.
It comes out much easier going sideways oh it's hard to start going sideways across the grain it just tends to grab the dust a lot more try this here oh I'm killing myself this is ridiculous okay let's see if I can here we go. I'm sure this is an absolutely fascinating video for you, that's why I like to make videos with music unless the tutorials blow away all this dust, but yes, it's the reason I like to make videos with music that seems that this is so. Know that you guys like to learn, so it's not that I mind doing it this way, it just feels boring, plus I listen to music while I work, that's an important thing.
I'm about to go get more swabs and this. area, I don't know if you guys can really see this in the video. I touched this area but didn't go through it, like I'm a little screwed with the dust, that'll be fine after it flows, so I'm not too screwed. worried about that grip, maybe I can do it with one last swab, maybe, uh, okay, let me take one more real wrestling swab over here right now, so if you ever see anyone talking about how I never post my mistakes you can definitely show them this video for some reason there are people out there who think I'm not wrong I'll tell you right now it's categorically not true no I can't believe I just did that ah okay I have to sprinkle some more powder another Maybe I'm going to do this in time lapse there's no way this can be entertaining for you guys so I finally finished this or cleaned it up we'll throw it in so it flows into this uh. ifs super wet black and then I'm going to spray the extreme Adam gold.
Actually, I'm probably going to spray that hot color for a specific reason. I want to stack the conversation with you about that in the past, but and I want to cover these letters to make them a little more dynamic and more attractive looking, so we'll include this and start with the other cover of the B series. Okay, I have this other cover, the same process using a new ifs chrome. I'll put a picture of that here somewhere so you can see the same general concept, although I mean we're going to cover the inside of this, it'll really be the only difference.
I'm still going to clean. of the letters um and then this is getting uh let's leave this will eventually get flat transparent blue on top of this chrome. I've never actually photographed this card before, so I guess we'll get to see what it looks like. Alright. Exactly the same process, so I'm going to clean this up. I will do it in a very quick time frame. I'm sure you guys don't want that paint passed on to you again. This chrome is really interesting, it looks very metallic. I mean, right now who knows what it's going to look like soon here, but I'm definitely curious to see what it's going to look like.
I don't even think I saw it. I may have seen a sample of this and I really can't. Remember, but I guess we'll figure it out together, okay guys, so there's a little problem here. I sprayed what is called new chrome from ifs and I don't know how good this looks in the video, this is what it should look like. The primer in the video is a silver sparkle primer because that's it. This needs to be done today, so I took it out and I'm going to put polished aluminum on top of this and try to remove it.
I would. I love making an excuse for this because I love this, but I don't know what it was supposed to be. I emailed or texted my rep, so I guess we'll see, but I'm going to throw out some brushed aluminum. from prismatic on top because i know what it looks like, it was my first time taking this so making sure it wasn't too hot, i realized my kvs were really high because i never adjusted them down okay, everything is alright. now problem solved uh okay guys I'm actually editing this video right now and I thought I'd give you a little update on if the color was wrong we discovered the problem there was only one production I guess it was a production issue.
I hadn't opened any of the powder yet and they had sent me to make some videos for the channel. I found out what the problem is. They're actually sending out another batch of this powder that we're going to spray in an upcoming video um they took care of it literally in a matter of hours so um I mean the color was off but they fixed it right away so no I can ask for a lot more than that, let's get back to the video, okay, cool this thing down, start unplugging all the plugs. I looked at this on camera before or before I started recording and this guy looks weird in this light.
I'm not really sure why it looks so much cooler in person. It's just a crazy gold flake obviously on black so you guys have seen it on this channel several times I went around and trimmed these edges all these plugs were one more and I guess I'll show you guys I use a deburring tool to trim the edges where there were a lot of plugs, so I'll show you that too. Go grab it here, so I mentioned the deburring tool, so you're going to end up with these little areas.elevated like this where you have plugs.
Sometimes this is a waste tool. You can buy it at any machine supply store. You can order them on Amazon. I think this one on Amazon is only $12 with extra blades, but it works like a champ. I'm going to set up the camera here so you can see it, but you literally just put it here and then you make a circle or you go back and forth, the blade cuts in each direction and knocks down those edges for you. I don't know if there's a good way to show you this honestly, but we'll try and it doesn't fit.
Do you know? In some tight corners you'll have to make it work for you, but it works like an absolute champ when you can put it in places and use it. It is actually used to deburr metal after it comes out of a machine. of the times like a CNC machine and it works like a champ, so there you go, continue with this blue, okay guys, polished it. aluminum on this float ready to go, explain, you're putting flat transparent blue on top of this. I haven't photographed this color in a long time. I remember it as a huge pain in the butt, so I hope it turns out okay.
Oh, and I move this over to an oven rack to make it easier to get into this with this color because I know for a fact that this color sucks to spray the ground directly on this thing and I don't remember why I know this color sucks to spray, just I remember it being a pain in the butt, I think it looks really cool, although if I remember correctly I should have done this bottom area, the recessed area first, but you know I'm new and I'm still thinking about all this stuff. in turn lower the kbs so I can get down here tight yeah hope
full
y yeah this color sucks.I feel like it has good coverage even though it looks weird in some of these areas, but I remember this color like batteries, weird, it's almost like it was taken. like a candy blue and they put Casper Clear on it so it looks like there's a lot of white in it and that white doesn't actually show up as white okay guys I hope you enjoyed that video as always make sure you hit it. Subscribe button activates notifications to receive notices when we publish new videos. Hit the like button if you enjoyed this video or found it useful in any way and join the ukc army page in our ukc army group instead of on Facebook.
See you next. time
If you have any copyright issue, please Contact