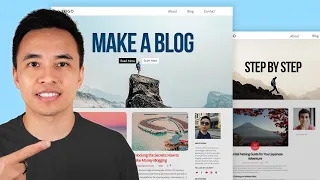
How To Make a WordPress Blog - Step by Step
May 01, 2024Hello, my name is Tyler Moore and in this video I will show you how to
by
without skipping any steps. This
make
thisblog
step
by step
without skipping any steps. This blog
is absolutely amazing. We did a lot of research to research this blog. We researched blogs thatmake
anywhere from a dollar a month to 14 million dollars a month and we wanted to see all the things they had in common, so we put all this stuff here and did all this research and it was pretty boring, but I learned what it really does. that a blog is amazing and one of those things was having the latest articles on the home page because as soon as someone comes to your website they want to see all the different articles and they want to see what's new, most of them too. they had an about page so we put an about page on it, obviously they also had a separate blog page and they had a contact page so you can contact them, they also had a search function so people can search on your blogs and I really love the design of this blog and its simplicity, it's great, here we have this section about us, of course, you can change this however you want, you can change all the colors, all the text, everything and then we have this additional section. on this home page to contact so they can contact you and we have this beautiful footer down here footers like your footers is at the bottom so when you get to the bottom you can go to any of these links and you can see your Logo. and copyright here so we can scroll up and we can also see this header, this header just has this logo here and this is like Apple where they just have their logo here or Nike where they just have their logo here or Starbucks where they have this logo up here and these people seem very happy to receive their sugar and their coffee and I'm very happy to show you this tutorial on how to make a blog step by step without skipping steps, so let's do it.
Again we're going to do everything as scientifically as possible so that you have the best chance of success, so let's get off to a good start, so what are we going to learn? Let's learn how to put this logo, of course you can. put whatever logo you want, you can even put your name up here, we're going to learn how to put it in this menu, we're going to learn how to put this big picture with this guy approaching if you want, if not that's not right either, we're going to learn how to put all these different items here same, obviously they will be your articles eventually and we are going to put in this little about section this contact section with all these images and these colors and all that and then we will also learn how to put this footer and if there is something new, some word is new, everything is fine, we will do it step by step without skipping steps, you got it right, so let's take a look at our blog page, this is where all your blog posts go, so these are your latest posts.

More Interesting Facts About,
how to make a wordpress blog step by step...
This huge image here and its transparent background with the menu. I think it's great and we can scroll down and we can see all the different ones. blog posts, I'm going to show you how to round these corners, obviously you don't have to show you how to put in this title everything like this, I think it looks super clean and super nice, so we can go to the next page here. and people can see more of your blog posts and we can go to the next page and so on, so that's your blog page, your actual blog posts are when you click on them, so when your user clicks click on the blog post, it arrives here this huge. main image of course you can rearrange and change this and then your blog post and then people can comment but that was the most amazing blog I have ever seen and you can start talking to them and have a conversation and all that.

Okay, so let's go up and go to the About page, let me show you this is the layout of the About page again, of course, you can change this however you want, you can mix and match as many different layouts, so it's just super simple page, we took a lot of that research and just wanted to make it really user friendly. Nice to meet you and have a cool photo of you or whatever, obviously your blog could be about something different so we just have upcoming projects that could Maybe be your most popular blog post and you can put them all here, something like that with the inspirational image .

I think it's great, so let's go up, let's go to the contact page. This is where people can contact you again. This huge heroic image. here and we scroll down and they can contact you, so we made it very easy, where they can fill out their name, their email, a message and send the message and it goes directly to their email inbox . They can also contact you here if they want you don't need to enter your address or your email or your phone number but you can and then you're linked to your social media pages so we have a map that could be like where you are in the world or we can remove it completely, everything will be done visually, so it will be super easy and awesome.
If we go to our website, we could just click here to go back to our home page and if we scale it down like you're on a phone, it's completely mobile friendly, so it will work on your mobile phone, your tablets, everything and it will look perfect; actually it looks even better than this on your mobile phone so it looks super awesome and the mobile menu works and everything works so it will work on your tablets your desktop it will even work on a tv it will work on everything fine , so we spent tons and tons of time and effort on this and I hope you really like it, so let's get started and Look what we're going to learn, the first thing we're going to do is get the name of your website.
Your website name is like yourwebsite.com. yourwebsite.org. The name of Facebook website is facebook.com. The name of my website is tyler.com. You need a place for someone to type something so they can go to your website, so we need a website name. The second thing we are going to do is get accommodation now. What is accommodation? The host is a computer that is turned on. 24 7 that you have super fast internet that contains all your website information so it is stored as your text, it contains your images, it contains everything if you just had the name of a website and someone typed yourwebsite.com but you didn't have hosting for that website. would be left blank because there is no place for all your texts and images to live; those texts and images need to be stored somewhere and with hosting they are stored on a computer with super fast internet that contains all that information, so you definitely need a website name and you definitely need hosting somewhere to store all that information.
The next thing we are going to do is install WordPress. WordPress is what's called a content management system, which is just a fancy way of saying it. It helps you manage all the content on your website, so instead of having to code and all this confusing stuff, it's all visual and it does it all for you. WordPress is by far the most popular way in the world to create a website and it is definitely definitely, definitely the most popular way to create a blog, nothing comes close to it. Almost all of the blogs we researched were on WordPress.
WordPress is also great because you can do so many things with WordPress there are a ton of apps called plugins that are absolutely free that allow you to customize your website the way you want, that's one of the best things about WordPress and you can do almost anything. design visually, so it's super awesome. After installing WordPress, we will create your blog website which includes things like designing the home page, designing the blog page, creating your logo and creating the contact page, so only steps one and two cost money, all The rest is absolutely free. WordPress is open source so it's absolutely free and creating your blog is absolutely free because you're doing it all, so instead of paying a developer two thousand dollars to do it for you, that part will be absolutely free .
So how much does it cost to get your website name? It generally costs about fourteen dollars a year and how much does it cost. get hosting, which usually costs around ten dollars a month, installing WordPress is free, and creating your website yourself is obviously free, so this is the regular cost, but I'll show you how to get a discount, so the total will be about 30 dollars give or take a dollar or two, I think it's a great deal to have your blog spread all over the world where anyone can access it, so let's start with steps one and two, luckily we can do them in the same place. so let's get the name of your website and then let's get your hosting so all you have to do is open your browser and we can go to hostgator.com which is hostgator or dot com and hit enter.
I get a commission for recommending hostgator, but I've been using Hostgator myself for 16 years and recommended them before purchasing anything and I really like them for their 24/7/365 live chat and phone support. of the year, and they are the least expensive while still offering the best value now, obviously, I haven't tried them all. hosting company there are thousands and thousands of hosting companies, but I really like hostgator, so we have all these domain hosting options essential professional hosting and support. What we want to do is hover over hosting and then we have three options, shared hosting website builder and
wordpress
. hosting, you would think you would use WordPress hosting, but in reality it's too many things, we don't need all of them and it just costs more money and you can always upgrade later, so what we want to do is what we want to do. shared hosting so just click on shared hosting and we can see if we scroll down on these three different plans and we can see the price right here 2.75 cents a month but I have a little trick if you go up here and go to hostgator .com. forward slash and then type unlock u-n-l-o-c-k and press enter you will see that the highest discount is now unlocked so now when we go down we will see the same three plans but now they are two dollars and fifty seven cents a month so have these three different plans here the pup plan, the baby plan and the business plan, the business plan is too much and you can always update it later so we don't really even need to think about it, it's really between the pup plan and the baby plan, the difference between the pup plan and the baby plan is that the baby plan offers unlimited websites, so like yourwebsite.com, another dot net website, yourmomswebsite.org, you can have unlimited websites, clientwebsite.com, where you can only have the baby plan. a single website like yourwebsite.com, so if you know you want two websites, choose the baby plan immediately, but if you only have one website now, choose the hatching plan, if you decide you will have one website later , you can always do it. update, so that's what we're going to do, we're just going to follow the hatch plan and click buy now.Now it asks us if we are registering a new domain or if we already own this domain. You would choose that I already own this domain. If you already got your domain from somewhere like godaddy.com and you already bought it, then type it in here like you already have it dot com, whatever it is, click register a new domain if you're registering a new one. website name so that's what we're doing so I'm going to put mine right here once we do that we have the option to choose the extension the extension is like dot com so dot com is the most popular but sometimes your main website name is not available so sometimes people choose dot net or dot org or dot online or dot space or sometimes it is great if you have a website new and technological to accompany it as a dot space. or a different type of extension, the extension again is just the ending of your website name.
If you're a nonprofit, you might want to use the.org, but we'll stick with the.com and now to ask ourselves do we want all these additional domain names for 15 a year or thirty dollars a year in my opinion? , I don't think you need this, it's not like someone is going to steal and copy your exact website idea and create a new one. Domain name is just not necessary, of course they want to make more money but I don't think it is necessary Next, if we scroll down we will see the domain privacy protection when you register a new website, put things like your email and phone number, so people can search your website and see who to contact.
The downside to this is that sometimes you will get spam emails or phone calls and it's a bit annoying, so for 15 a year they will hide this information and you won't get any unwanted calls there.bother me so much or maybe I should say I'm a little cheap so I'm going to uncheck this and I know I may get some spam calls but I'm going to save 15 a year next if we scroll down it says choose a plan hosting, we already chose the hatching plan, that's great and now we have to choose how we are billed and this is where a little strategy comes into play because we want to pay the minimum. amount up front, but you'll save the most amount in the long run, so with the one month plan our big discount will only apply for the first month, so we'll pay the least amount up front, but we'll actually pay the most In the long run, with the three-year plan, we will save the most in the long run, but we will pay the most up front.
So what's the balance between paying the least amount up front and saving the most in the long run? I think that's the 12 month plan because you can see it costs 2.58 cents for each month and the three year plan only saves one cent which is 2.57 for each month so I think the one year plan has the best of both worlds: you save the most long term but pay the least amount up front, so we'll choose that one and then it'll ask us to create a one-year plan. account, so enter your email confirm your email enter a password and then put in a security pin.
Next, we'll scroll down and it will say enter your billing information, for example, your first name, last name, phone number, address, country, city, state. I'm in California and zip, then we'll go up and it will say what type of payment you want to make. Do you want to make a credit card or PayPal? I'll just keep it as a credit card, but you could choose PayPal, enter all your credit card information, don't worry this isn't real, your expiration date and all that, then we'll scroll down and it'll ask us what additional services we want to add.
I want ssl this is security for your website and our website already comes with security so this is advanced security and I don't think we need it especially for forty bucks a year we can do everything with regular security and then do it essential to block the site. I don't think we need this especially for 35 a year, that's crazy. In fact, we can download something in WordPress that will protect our website and it is absolutely free. So do we want a Gmail email? I like Gmail and if I were going to receive an email, I would. get it from them, but their website already comes with its own free email, so it may be something you'd like to do, but you can always do it in the future and their website already comes with its own free basic email, so which I don't think we can If we need it, it will say: do we want to backup our hard work again?
We can download something on WordPress that is absolutely free to back up our hard work and we'll save 24 a year, so do we want to? improve your search ranking and that sounds great but I don't think it's really going to work and again we can download free plugins that help us do this so all additional services are a no the next thing we're going to go into our coupon code so if it's not here it probably is but if it's not just type unlock that's the biggest discount you can get and click validate and this is my coupon code so thank you very much for using it , help me continue making these videos absolutely free below we will scroll down and we can review our order 24 7 365 live phone chat and email support instant account activation money back guarantee of our website name for one year and the breeding plan for 12 months so that everything comes to light at thirty-one dollars sometimes this fluctuates from thirty dollars to thirty-five dollars.
I think anything there is a great price to get your website online, so we can scroll down and just click on I read the hostgator terms of service and click checkout now. So congratulations, you've done the hardest part, which is simply deciding that you really want a website and doing something about it. Next, we want to install WordPress. You can find WordPress installation here on the market or you can find it here, basically anything it says. install
wordpress
we want to click on it so wordpress used to be very difficult to install but as you can see it is very easy so now we just click on install and choose our domain name so i have a bunch of domain names , but I'm going to choose the right one for me and make sure it's blank.Don't add anything here because if you do, your website will be installed at yourwebsite.com, slash something instead of installing WordPress. your main website, leave it as is, don't change it, whatever it is, it doesn't need to be mine exactly, it could be a higher version, so leave it blank and leave it as is, then we'll choose our site. name, I'm just going to put create a blog and then we want to make a description of the site, this is what your website is about, so this could be my blog about travel around the world or my thoughts on the economy or the latest news about printers 3D.
I'm just going to put "Learn how to create a blog" and we can leave these two blank here and then it will ask us for our administrator account. I would just like to put my name in and I'm going to hide this password and create a password. that I can remember, then it asks you for an admin email and you have to enter your email here, then it wants you to choose a language. I'm going to choose English, but again you can choose whatever you want. Leave all of this blank and I'm not going to select a theme because I'm going to show you how to select the best theme in just a second and then before you click Install, you don't have to do this, but I like to put it on. my email just to send me more details about my installation, if you didn't put it there, don't worry, click install and now it will install WordPress, so it will do all that hard work for you and for you.
We'll have WordPress installed on your website, so it took a couple of minutes, but I sped it up so it says Congratulations, it's installed successfully, but really, let's take a look at our website by just clicking on the name of our website. I can see that the website is not really working and the reason is that sometimes it takes 10 minutes to an hour for your website to spread all over the internet, but it is rare that it can take up to 24 hours most of the time. in 20 minutes so we'll come back in 20 minutes and we'll check our website one more time so I'll just get out of this and actually I can also get out of this and I'll be right back. go for a walk or something so I'm back from my walk let's take a look at the website and see if it works now and it works.
We have our website, so congratulations, you really have your own website. Some people charge 500 just to get here which is absolutely crazy as you can see it was super easy but we don't want it to be just this website it's pretty ugly and pretty bad so let's log on to our website and let's start changing things to get to the end of your website to change things you need to go to yourwebsite.com forward slash wp dash admin a d m i n so forward slash wp dash admin and press enter this will take us to the end of our site web, at once.
We are here, it will ask us for our username and password that we created in the previous step, so we can enter them here and press Sign in. Now that we are logged in, we can exit this tab. and congratulations, we're at the back of the website aka the dashboard so we can see in our dashboard it looks like a mess we have all these different things here and it looks a little disorganized and that's because To businesses hosting companies pay them to basically install programs or applications on your website that you don't really want, it's like when you buy a new phone and you have all these applications that are basically garbage and you delete them immediately or when you get a new computer and you have all these programs that you don't want on your computer, so you just delete them.
Whoever made that computer gets paid to put those programs or apps on your device and that makes up the cost of the laptop or for your phone but you don't really want all that stuff on it, basically that's the same thing that's happening here, we have these different programs and some of them are useful but some are not, but we just want to start with a clean and fresh installation of wordpress, so all this is called plugins, that's what the applications or programs for wordpress are called , they are called plugins, for example wordpress by default doesn't have a contact form that you can just fill out and hit submit and it will send it to you or by default wordpress doesn't have a backup plugin where you can make a backup of your entire website so you can download and install a free plugin that does all these cool things and that's why plugins are great, but these are extra plugins that we don't really need, so to remove all these plugins and start from scratch , let's go to the plugins, we can scroll down, select them all and go up here and continue. to remove and press apply and that will remove all the plugins, it didn't actually remove all the plugins because we actually have to deactivate them first, so come up here press deactivate, select all and apply, that will deactivate all the plugins and then come up here again and go to remove and apply and that will remove all the plugins, so now all the plugins, all the additional programs and applications that the hosting companies installed on our website are gone, so we can go back to the main page. panel by clicking here and we can see that this is much cleaner and much better now that we're starting off blank and clean and now we can actually start creating your website so you can get back to the front end of your website everything you need.
What you have to do is click on your name up here and we can see the front of your website. You know you're logged in by this black bar up here. This is only shown when you log in and is not displayed. when a user visits your website, if we click on hello world, this is just a sample blog post, we can click on it and we can see how to create a website or yourwebsite.com, move forward a date and then hello world In my opinion, that's not as professional as just Hello Dash World, so that's the first thing we're going to change.
We'll change it to say Hello Dash World instead of the date. Then, Hello Dash World, okay, so let's get into it. our dashboard by just clicking on your name up here or your company name or your blog name and then going to settings and permalinks once we do that all we have to do is change it to post name and press save changes once we do it. check our work by going to the interface and clicking on hello world and now we only see the slash hello dash world, it is much cleaner and our blog post will display much better, once we do that we can go back to the dashboard.
By clicking on our name again and the next thing we will do is install a theme, so let's go to the interface again by clicking on it and we can see that this is the theme. design of your website, so a theme is the design of your website, it is how your website looks. We're installing a theme that can literally create any layout you want, so this one isn't that flexible. Let's install it. a theme or a layout that is super flexible where you can create any layout you want, so again go to the back of your website, this is a very good back and forth practice and then go to appearance and then themes, then we'll Click Add New and we're actually installing this one right here, but we'll search for it, so we'll search for astra a-s-t-r-a in case it's not at the top and this is one of the most popular themes around the world, I think which is actually the most popular theme so we can go to details and preview it and we can see that it has 5000 ratings and 5 stars and I think it has been downloaded a million times or more and This is a preview but That's not how it will look.
We're going to make it look much better than this, as you saw in the walkthrough, so we'll click Install and our theme will install. then we'll click activate and it will activate on our website, so now we can go to the interface once again by clicking on our name and we can see that the layout has changed so it's not as good. but it will allow us the most flexibility and it will also allow us to use pre-installed templates and import them directly into our website, so let's do that, let's go to the bottom of our website and add a new plugin, so go to plugins and add new ones.
This plugin will allow us to install already created designsdirectly on our website and I think it's very important to start with a pre-made design and then customize it from there instead of starting from scratch. go search and search for starter templates starter templates t-e-m-p-l-a-t-e-s okay it's been installed a million times and it has five star reviews with two thousand one hundred four five star ratings so let's just click install now and click to activate everything right now. everything activated, so what we can do is hover over the appearance and we have this new menu item here, which is launch templates, so that's what this plugin did: it added this new menu and it added all this functionality additional that allows us to put -Layouts made, so now it says select a page builder, so we want Gutenberg element or Beaver Builder windy.
This all seems confusing, but there is one that surpasses the rest and that is Elementor, so this one is much more popular and the easiest, so there we are. I'm just going to choose Elementor okay and now we have all of these to choose from and you can choose any of them some of them are premium so they cost money so you can go up here and go for free and now all of these are free so literally you can click on any of these and it will be installed on your website so that's great look how many there are that are absolutely free super awesome but there is one that I think is one of the best if not the best and that is outdoor adventure, so we'll click on that one and install all these pages.
Home about services projects contact. This doesn't actually have a blog, but we're adding a blog to it and that's a beautiful thing. about wordpress is that we can add a lot of things to it, so I'm going to import the entire site and I'm going to import it right here, so it's going to ask us some questions and you can answer them, and I'm going to skip this and now I'm going to import this. It may take a couple of minutes, so I'm going to fast forward and wait for it to import. Now it says it was imported successfully so now we can see our site so just click View Site and now this is our new website.
Obviously it's not your content, but your website already looks much better and all the pages should work and everything should be great, so we have this about page, we have this services page, we have this projects page and you can keep or remove anything. that works for you, that's great, we have this thing where it slides and we're also going to remove a lot of this stuff, but it looks really cool, so we also have this contact page where people can contact you and send you a message now. that's pretty awesome, we also have this action button that doesn't do anything right now, but you can make it do whatever you want, it's super simple, okay, that's our website so far, I'm going to get out of this and I'm going I'm going to get out of here and I'm going to go back to the plugins because I installed some plugins and I just want to show them to you so you understand that when we imported the website it installed two other plugins, so the starter templates The plugin we installed ourselves, but it installed Elementor, which it's the drag and drop visual website designer so you don't have to struggle to create your website with code or anything, that's really cool and then it installed wp form light, which is that contact. form on that contact page, that's what enables that contact form, so it's pretty amazing that you installed this stuff for us and I just wanted to show you so you can understand how it works.
Another thing that he did for us is he set up a bunch of pages for us, so he created some pages, so he created that about page, let me show you what it looks like, so he created this about service project contact pages. and this home page so we can see the contact home projects and services you created. I think all of these pages, this sample page and this privacy policy page, were there before, so we can just click on this and click on this and we can just click on this and we can just put them in the trash to keep it clean.
We're going to move this to the trash and apply it, then what we can do is go to the trash and permanently delete it. This isn't because you have to, it's just because I'm crazy and want to keep it super clean. we can see all our pages again by clicking on all of them so that they are our pages and our pages are again like home about contact project services as well as here home about contact project services that is different from our posts our posts are like hello world that hello world This is our blog post.
Basically if we go to cnn.com we can see the CNN home page, but on the home page there are a bunch of different blog posts, basically there are a bunch of news articles, so that's the difference between pages and Post pages are like your About page or your Contact page. Posts are like your different blog posts. We have a sample blog post here called Hello World, but we don't really need it, so we might as well click on it, move it to the trash and apply. and then go to trash and permanently delete. Now we are starting fresh and clean.
Okay, we're done with that. We'll add content below, but there's a big mistake you could be making. adding your own content is a mistake because if you start adding your own content you will not set up the entire website and you will get distracted and never finish your website. I've seen it time and time again. over and over again, so resist the temptation to start adding your own content and just add this demo content to make the structure of your website look really good and after adding it you can change it and add your own content. so don't add your own content right now, just go ahead and then add your content later, so let's close this for now and add something new for a new post, but don't click on it yet, we'll keep the command if you're in a Mac or control if you are on a PC to click on it and it will open a new window or you can right click and say open link in new tab or just hold command if you are on a Mac or control if you are on a PC and click and it will open in a new tab and that is because we will open several new post pages because we will add several posts to your website. it makes more sense in a second so now that we have the first one let's go ahead and open it up and in the description below there is dummy content all the images and all the text and all that once you download it to your computer just download it to your desktop and it will look like this again.
It's in the description below and just click on it to unzip it and then you'll have all of those files right here, so we want to post the blog content. and we can see the blog titles and the blog body text, so let's go ahead and click on the titles here we have it, so let's go ahead and just copy this. You can press command c on a Mac or Ctrl c on a PC or you can right click and press copy, then we can open it again and we can paste that title right there, so that's the title and now for the body text we have it here , so we have all this text, these are the instructions, right? here, but I'll show you how to do it so you don't have to read them and what we can do is just copy it and then open it again and go here and just paste it right so it's not formatted. just like Microsoft, so all we have to do is click on it and it will give us all these formatting options like bold, numbers, bullets and all that.
We're going to click on this right here and let's change it to a header, a header is basically like a title and we don't want it to be h2 because it's too big so we want it to be h3 so h1 is the largest and h6 is the smallest one, so h3 will be good for us and We'll go through each one of these and click on this, go to the header and change it to h3, so do that over and over again every time you see a number here, all good , so We're done with that, we just made them all with headings of three and we also have our title here and now that we've done that we can come back here and we can add eight more, so go ahead and press Ctrl and click or command. and click if you're on a Mac eight times plus one two three four five six seven eight, now we're going to add another eight blog posts.
What I want you to do is just go here and copy all of this. you can do that by clicking here and hitting copy and then we'll paste all of that same text into each blog post. I know all the blog posts are the same now, but this is just filler content to make your website look great and then you can edit it later, so we have nine blog posts in total. Only the first one has a title, so let's add a title for all the others, so let's go back to our titles and start copying. and pasting them all, so I'm going to move this off the screen for a second and I'm going to paste them all here, so this is title number two and I'm copying the third and now we can speed it up. because I think you get the point right, our nine blog posts are there, but we want to add an image to each of the blog posts to make it look really nice, so I'm going to leave here and I'm going to click on the settings right here and I'll scroll down and I'll go to the featured image and I'll set the featured image, so we'll upload the files and we'll select files and we'll go to our desktop and we'll find that folder and we'll go to blog images and we'll just click on the blog one to see the first one, we'll let it load and set the featured image, then we'll do that for all the other blogs, so go here. to set featured image set featured image upload files select files and go to blog two and then three four five six seven eight nine and so on and then set featured image and I'm going to speed that up right now all my featured images are uploaded now , I'm actually just going to publish all of these blog posts, so just click here to publish and click publish again and do that for nine, right now, all nine of our blog posts are published, we can go to the first. and we can check how it looks by clicking view post so just click view post and eventually we will make it look better like making this background white instead of gray but it looks pretty good and our first post of blog is on our website and people can comment on it and everything else, so that's really cool and it has this really nice featured image, so of course we're going to make this look better, but it's very okay right now and we can close all of these. different tabs and I want to give you one more tip and that tip is where to find good images that are copyright free so you can use them on your blog.
One of the best places is pexels.com p-e-x-e-l-s dot c-o-m and press enter to All of these are royalty free images and this is where I got most of my images from so we can click on them and we can download them so we can know how to download them for free, we can download them like this, so that's great, another place to get images. that are copyright free is pixabay.com p-i-x-a-b-a-y dot c-o-m and press enter, so here is pixabay and we can do the same and click on it and download it here. You don't want to download the 6000 by 4000 that you want to download. something like 1920x1280 because if you download a file that's too big your website will load very slowly, so downloading the second highest quality is probably pretty good.
The last place to get images is unsplash.com unsp l a s h dot c o m and press enter and here are great images from Unsplash so same thing just download them and you can use them royalty free now that we have all our blog posts on our website or at least the demo post on our website that we can walk away from. here and let's go to our home page by clicking on the name of our website and we can see this home menu about services projects in contact we need a page here called blog and we also want to delete some of these pages obviously you can keep them if you I need, but we're going to remove services and projects, we're going to add a blog here and capitalize on all this text just because I think it's going to look better, so that's our game plan, so let's do it. let's delete both let's add a blog, let's put everything in caps to do that, let's go to the backend and then let's go to the pages because we're going to delete some pages and we'll check the projects and services and then we'll go up here and we'll move. to the trash and apply and then for it to be removed from the menu we have to delete it permanently so go to the trash and select them all, permanently delete them and apply to delete them all, aNext we want to go. everyone and we see that we have three pages about contact and home we want to add a new page we want to add a new blog page because there needs to be a page to hold all those blog posts so I'm just going to name this blog and I'm going to click on post and post again, that's all you have to do for the blog page, so just click on this up here and now if we go back to our home page, we can see some things. have changed, like the home page and the contact page are now here and not those other pages, but we don't have the blog in our menu and that's because we need to add that page to our menu so we can go to the bottom and we can go to appearance and menus and we can see it below the pages here of this blog, so we bookmark it and add it to the menu.
Now I'm just going to capitalize all of these menu items, so there's no reason for this except it looks better. so home about contact and blog once I've renamed them, I'm actually going to reorder them because I want it to be the home blog about contact just because I think the blog is one of the main things that people will visit the website. it should be second in line after home, once we do that and again let's just click hold and drag this to make sure it's not indented because then it's going to be a submenu, it's going to be a menu under home, so make sure that be like Then press save menu and we can go to our website and we can see that now it has changed.
Home Blog About and Contact This blog page is not designed yet so if we go to it it will not show anything and we can go back to our home page by clicking on this so let's start the design now the first thing we are going to design is this home page, so we're going to redesign this home page and again, it's very important not to start getting your own design right. now, but just learn how to design, you don't want to do two things at once, you don't want to put your design and learn at the same time, that will make it really confusing and I will make you not finish the video, so follow it first and then make your design later once you learn how to do it, so we'll style this home page, it's not up here, we'll style this later and it won't I'll be styling this footer right here, so just this inner page here and we can do it by hitting edit with Elementor or going to the end here, going to pages and then seeing home or any page that you want to edit with Elementor and clicking on edit with Elementor okay once we do that we can edit anything that we see here so that when we hover on it we can see it highlights it and anything we click on here will be editable here so if we click here we can edit it here if we click this button here we can edit it here so that's basically how it works we can see a quick edit here, so if we go here and we can delete this word, we see it updated here, we can also delete entire sections by going up here and pressing the x button let's say we did it by accident, we can press ctrl z or command z if you're in a Mac and that will undo, sometimes undo doesn't work so well, so we can go here to our history and let's say we deleted this here, we can go to our history right here and we can see all the things that we did, so we can go back or move forward in time like that, so that's cool, so don't do it.
Don't really worry if you're going to get something wrong, you always have your history here and when you hit refresh you'll have your revisions here, so let's first see what we want to do, so this is the layout we want. achieve, we're not focusing on this here yet, but we want to put this, create a blog, we want to put this guy over the a and we want to put this background image, so let's go ahead and do that, let's start with this. large background image, so to do that we want to hover over this and select the entire section here, so just click on these six dots here, this is how you edit this entire section and now we have three different options, style of layout and layout we want to click on. on the style or how it looks, so we're going to click on style and then we're going to see this image here and we're going to change it, we're going to click on choose image and we're going to choose a different image and then we're going to upload files and we're going to select files and we're going to go to the images you downloaded from the description below and we will go to the home page images and make the home header one, then we will open it, it will load and then we will insert media.
We want to change the position of this image a little bit and we want to lighten it a little bit, so under the position we want to go to the center, center and so it was. just a little bit but it focuses in the center it's barely noticeable but when you zoom or go into answer mode like a mobile phone it will be in the center so it's much better and when we pan now you see how the image doesn't moves, we don't want it to move, so we want to change the attachment to scroll and now this will move.
We can see that there is a background overlay, it basically makes the image very dark when it really is. It's not dark, so if we scroll down here and go to the background overlay, we can make it zero so there's no background overlay and it's completely transparent. Next, we want to change the spacing of this image, so how much space is there up here? this and how much space is down here, so to do that we're going to go ahead and do 230 at the top, you'll see how the space is changing and for the bottom we don't want it to be that much, we just want it to be 80.
Okay, now it's much less big, the next thing we're going to do because if we see here that it doesn't have any of those texts and it doesn't have a button, although We could keep the button, but we're going to delete it for this one, so we want to delete it, so all you have to do is hover over it, right click and press delete, so come up here again and we would right click and delete, but sometimes these things are really hard to select, sometimes it's hard to select these things and right click and delete them, so they've created a little browser here, so if we click this button here on the left, we see this browser and this browser. makes it very easy to select different things, so this is a whole section, we just selected this whole section and this is a column here, so we can select this column and now we can select this divider right here, so now it's just select this divider.
We can also pin this navigator to the side by just holding it and dragging it and it will be pinned to the side, so now we can just right click and delete and now it's much easier to select that way, so we're going to go to our button and we're going to click on it and we can press the delete key on our keyboard and sometimes that works, it didn't in this case, so we have to right click and delete it, so we're going to exit. from the browser for now and we're going to click on this and we can actually just triple click on it and put the caps lock on and type create a blog, we're going to set the size of this to xxl and then we're going to go to advanced and padding and the padding is basically the space around it so we're going to remove this padding from the top and the bottom then we'll change the font so we'll go to style and then click on typography and then for the family we'll start typing b e b a s for biebus nuo and we'll change the size to 155. and then for the weight, which is how bold something is.
Let's change it to 100 and for the line height, which is the height of the lines, we'll use 100 for the letter spacing, we'll use 3.7 to make it a little more spread out, that's right. looks pretty good, so we can close that and the next thing we're going to do is put this guy up here, so let's see how to get that and the way we add something new. We click on this elements widget up here and we can add anything to our site, so we can drag any of these into the header, images, text, video, anything, we're adding another section inside this section, so that we want to drag into this intersection now that we have. two additional columns where we could add different things inside there and we only need one column so we're going to right click on this and delete it so now there's only one column and now we want to drag an image here so click. in this and we can drag an image, click hold and drag into that column and now we have this big image here.
We want to change this image by clicking on it, then loading a file and selecting a file and let's select start. Header man, I took the background off of this guy to make it transparent behind him, so we can open it up and we can insert it right there and now we see that it's on the rock, but maybe we can position it better, but first. we want to set the size to full size so we don't lose quality and we can see how the type is over the text, which is really cool, so to do that all we have to do is click on this type right here. and then go to advanced and then make sure that these values are not linked because we want to do different spacing for each of these, so for the top you can just add minus 100, if we add a positive, it would push this guy further below.
There would be more space if we add negative, he'll go back up and maybe we want to move it a little bit like here, how it moved a little bit, so let's make it to the left, let's add 210, so there we go now. like hovering over the a and that looks pretty cool, it's going to look a little different without this sidebar, but it looks really cool, we can also make them swoop in if we want by going to motion effects and under the entrance animation, we can say fade away. Now we can click Refresh to save all of our work and we can click on this little preview and we can see what it looks like so far, super, super cool.
I love it, that's amazing, keep going to understand it. It takes a little getting used to, but once you understand the basics it will go much faster, so if we scroll down we'll delete this dating section. Because we're not going to use it, we want it to look like this below where it's just white, so we can delete all of that by just clicking x, then we can click on upcoming events and we can change this to latest articles by just typing y we can set the left alignment under the style and typography, we can make the font smaller, maybe make it 32 so it's not so big and then we can go here and select it if you can select it.
If you can't get back to that browser and we see that we're here, select it, right click and delete. If we look at our blog we can see that it has all of these latest articles here but by default our website right now doesn't We don't have the ability to publish all of our latest articles like this and it is automatically published once you create new articles , so by default we can't do it right now. So how do we get that functionality? And that is by installing a plugin. in which again it's basically like an app that will allow us to do more things, so we're going to update this right here and then we're going to preview it and again we want to change this to show our latest blogs, so we want to go back to the dashboard and we want to download a plugin that will allow us to change this, so if we go to plugins and click add new, we want to search for unlimited items, lineups, unlimited items, like that and we see unlimited. items 100,000 active installs 5 out of 5 stars we want to install that now which will give us the ability to see our latest articles on our home page then we click activate and then we can skip this right here and once we go to unlimited widgets elements you should already be there, but in case you go out of there, here's how you access this, let's select the posts widgets category and we'll select the posts blocks and we'll install the posts list and we'll install and the posts pagination. and install it, so let's see what all of these do.
Now we can get out of this and we're on our home page and now if we look at the widget posts blocks, we won't see anything because we need to refresh this. So if we update this here after you saved it, of course, now if we look for post blocks, we can see that we have these new post blocks here and then what we can simply do is drag them under these last articles and now. just like this page it has all of our posts so we needed to download that plugin to be able to have that capability so let's change some of these settings starting in content let's change the grid spacing to 50 and we can see it adds more space in betweenphone, most people will come from their phone. 50 to 90 percent of your traffic is going to come from people's phones, so we're going to click on this whole section, go to advanced and change this padding here, so change the padding above to 90 to give it a little less of space and the bottom one to 45. then we'll select this header up here and go to style, then typography and change this. to 50. make sure you have mobile here, right now we want to select this image again.
It's hard to click on, so we want to go down here under the first section of this image and let's go to content, sorry, style and we end up with 25 and maximum with 25. Then let's go to advanced and unbind these values again so that we don't they are equal and for the top let's make negative 7. and for the left let's make 60 so that it pushes it up a little. We're done with that, let's select the second section, it's right here and let's go to advanced and for the padding, make sure it's on mobile, let's do 40 to give it a little less space 10 to give it some space on the right 60 to give it space at the bottom and 10 to get some space on the left here, okay, scroll down and let's go to the bottom section here and what we want to do here is change this padding here a little bit, so let's go. to advanced and let's change the bottom padding to 60. that just gives it a little less space, everything else looks good after that, so let's update that and that's it for our mobile friendly website, so now we can preview it, let's go out. from here let's see it here it looks great on our desktop it looks great on our tablet and it looks great on our mobile device very very very cool there's one thing I noticed on the desktop come on here it's a little bit squashed and that it's because the width of the content is not full width, so let's click on this entire section, let's go to the layout, let's make sure that the content is full width and that will make sure that it spans all the way, but that's it, so let's update that. and we're already done with our home page and it looks really cool so let's see what it looks like on our actual website by just deleting all of this here and going to ourwebsite.com and we can see our home page now and it looks like. super super good now the header or this top part is not finished yet and as we can see in the example it looks a little different with this logo up here with the search up here and it works a little different with the mobile so there is a transparent one here and this menu is surrounded by a circle and it drops down, we can see it's a little different here, this is square, it's not transparent and this one looks much better in my opinion, so let's learn how to make this logo or any logo you want and Let's learn how to make this navigation menu for desktop, mobile and tablet.
Okay, let's get out of here. The first thing we're going to do is create that logo so we can open a new tab and go to logomaker.com which is l-o-g-o-m-a-k-r sin e dot c-o-m and press enter. I'm going to create a new layout and I'm going to leave here and the first thing I'm going to do is look for a graph like paper bird and we press enter and we see that there are like three million graphs here you can search for anything you want this is the one I want and we can just click hold and drag and make it bigger or smaller we can drag This around we can change the colors here we can make it like a traditional logo just by dragging it small and adding text and then putting something like you know, explore or something like that and make it smaller and then bigger and you know it could be our logo, which would be kind of like a traditional logo, but we just want that icon there, just like Apple does, if we see this, they just have their icon there and that's what We're also going to do it right, so what we can do is click on it and just click hold and drag and drag it to 512.
So the width is 512, so that's what we want. we can see it right at the bottom right, width 512 and then drop it. This is the perfect size for the favorite icon that we're going to create, so this little icon up here, I know we're working on the header, but just to save time, we're also going to create the favorite icon at the same time, so that we have our color, we're going to make fb 2056 for this color and then we're going to save it, so save it and we're going to download the low resolution file, that's going to save it, we're just going to drag it to our desktop, save it to your desktop and then we're going to save a different version , we need two versions because we can see right here. this is one version this is like the black version that we see down here this is the other version and we see up here this is the favorite icon the little icon at the top to identify your website very quickly, okay and if we go to the blog page, we can also see if we scroll down and click on the blog, we can see this version here because I think it looks a lot better than the darker version, so we can go out from here and this is the reddish pink version, so let's do another version, let's make it completely black, but let's make it a little bit transparent, so let's go to 70 transparencies and save this version as well, so we'll download the low resolution file and just download it right there, and I'm going to drag it to my desktop as well and we can exit here, so save it to your desktop however you can and get out of this.
We have these two logos right here. I'm just going to rename them you don't need to do this I'm just going to say black and reddish okay once we do that we can get out of here that's all for logo maker thank you very much okay and now to edit this. top header up here is different than editing this page right here, what we can do is click on customize up here and we need to edit both of them, so what we can do is click on the header builder and then let's click on blog, and I can see that this menu looks really bad on this page because you can't really see it, so down here we can build the header so that there are three different sections here and if we add one to this, it would actually be above the title of this site and logo so you can put things up here and you can put things down here right now, all of our elements are in the middle here and we can click the button here and we can link it to like the contact page moving forward with the slash contact and it would go to the contact page and we can also change what it says here, for example, contact us, we're not going to use the button right now, so we'll get out of that, just delete it and it'll be deleted. from there, next we want to change this color so we can see it, we're going to click on the main menu and then we're going to go to design and we're going to scroll down and we're going to see the text bar link color and we're going to do click on it and we're going to change the first one to black, so now it's black and now we can see it very well, next we're going to click on our site title and logo and here we can see our two different logos, the normal logo and the retina logo.
We don't need to worry about the retina logo because our logo is high quality anyway, a retina logo is just a logo used for retina devices like the macbook pro, but it will still look perfect there because our logo is from very high quality, so let's delete this one and change this logo, let's load files, select files, let's go to our desktop, let's use red and press open, okay? We're going to select this and skip the crop because we already cropped it in the logo maker and we're going to change the size, so for the logo size I don't want it that big, so I'm going to change it. this at 50 and to me that looks very good.
Next, we're going to add a little border underneath to separate it, so let's click on this whole sprocket here and let's go to design and select the size of the bottom border. be one and the color we can drag to black. Then let's add a search to our website up here, so go here and press the plus button and we'll just click search and that will add it here, let's click search, let's set the icon size to 32 because it's a little bit small and looks much better, let's go to design and make this search icon black too, okay, and now our non-transparent header is ready, that's super awesome, so let's click publish. just to save that and let's go to our home page by clicking on the bird or home here, okay and let's click back and under the header types, let's click on the transparent header, so let's remove the retina logo again and let's change this logo up here.
We're going to change this to the black version, so just upload the files, select the files, click on the black dot png and press open, then we'll choose the image and it will look too big, so let's change that, let's put 50 here same. and to me that looks really cool, it's like flying in the sun and to me this looks a little too dark. You think you'd click search, but you don't. You actually go up here because it's the transparent header, you click on Layout and then you scroll down. down until you see the search color and we can click on it and we'll turn it into an off-white color, so we'll do it e e e e e okay, that will change it just for this transparent menu, and finally Let's go up this bird here because we haven't yet it's our site icon so let's go back and click on the site title and logo and scroll down and again here you can change the title of your site so if you don't like what you put in. how to create a blog, that's what appears here create a blog, learn how to create a blog that is right here and that will appear in the search engines.
If you don't like it, you can edit it here, but let's put our site icon. just click on it and let's select our site icon and let's select this reddish pink bird, skip the clipping and now we can see it here and it looks amazing so now we can click publish and now our desktop versions of our transparent header and regular. The header works perfectly, but what about our tablet on mobile? We need our header to look good too, so let's go ahead and do that, click back and go to the header builder and now we can click on this tablet to preview what it looks like. like on the tablet and we can see it's not transparent and we want it to be transparent so let's click on the transparent header and we can set it to desktop and mobile and now we can scroll down and obviously this is too big so let's do this. 60 or maybe 50.
Yeah, that looks good and then we can come up here to style and under the background overlay we can drag it all the way to the left to make it transparent. Now maybe we want this to be rounded, so let's click the toggle button and make it a little bit thicker, I think it looks better, so let's go to the design and give it a border radius of 100 so it's round, I think which is great, then let's add a search, so let's click. in this and let's add a search and click on the search and change the icon, let's make that 24 just to make it a little bit bigger, maybe we could even make 30.
Okay, that's it for the tablet that looks great, Let's switch to our mobile phone. menu so let's publish this just to save all of our changes and click on mobile okay this is what it looks like mobile looks really crazy let's go back one and go to header types transparent header and change our logo with Let's do 40 this time, I can't really see it that well right now and let's go to the layout and let's go to the background overlay and clear that up again, there we go okay, so let's look at the menu right here, so let's click on the menu. and I think we want the initial color to be black and the hover color to be that reddish pink, so let's change that here, let's say the initial color is black, this color will be that pink and now it looks a lot better, okay, let's click on this search icon. to make it a little bigger, let's get out of here and make this about 24, okay, maybe a little bigger, actually, maybe let's make it 30 and that looks pretty good.
We can also change this if we want, maybe this can continue. this side and I think I like it better, okay, or maybe we don't even want to look at this one, so we can move out of this if we want, we can also zoom in if we want by clicking on layout and unlinking these. values and for the right we can put negative 5 if we want to bring it a little bit closer, and one last thing, if we go back and click on the site title and logo and scroll down, we want to make sure that the logo is 40 for devices mobiles and we can click on this and make sure it's 54 for desktop and click on this and we can put 50 for tablet, so we'll make sure that your logos are the right size and now we can publish it. and we can go back to our websitejust removing all that and now we have a perfect header that works on all devices and looks super cool and works on the transparent header and the non-transparent header and looks super cool, right?
So that was by far the hardest part of this entire tutorial, everything else will be very easy. The next thing we will do is the footer. The footer is like your feet at the bottom. Let's change this. To be much better, I want to put the menu here so that when people get to the end of your website they can click on a menu. I want to put the logo here because I think it would be cool and then maybe copyright it. here is okay, so to change that we are going to customize again and then we go to the footer builder, okay and we have it here and again, you can stack things up or down using these columns here, all of this here is this. here first let's change this copyright so just click on it and let's explain what this copyright does is this copyright the c is a c this current year put the current year here and the site title put the site title here what What we could do is delete this and we can type create a blog and that will update right here, maybe we want this to link to the home page so highlight it and then click on this link and go to your home page here .
We could start typing on home and it will link to our home page and then we can highlight everything and under alignment we can align it nicely, that looks a little messy now, but it will make more sense in a second. Also click on layout, let's unbind these values and on the right side let's add 20 pixels of space to the right and it's not updating right now, but that will add 20 pixels of space here and then we can also change the color of the text here. and we can change it to white so that it stands out a little more.
Now our first element is ready. Next, let's delete this right here because we don't need it. Let's get out of here, there we go and now we can see. space, so okay, let's click on this gear wheel and make three columns instead of one, let's click hold and drag this one to the right side, okay and now let's add a menu here, so let's just click on more and let's add. a footer menu here, when we click on it, it will ask us to set our menu from here and our main menu is for the top and for the footer menu we are also going to make that menu and it will appear right there.
So that's awesome, so let's go back and we're going to change these colors, so again let's go to the footer builder, click on this menu here and then let's go to layout and change these colors so that this one is normal. it's placed when you hover over it and this is active on whatever page you're on, so normal, we're going to do white and then we're going to hover over it, we're going to make that color pink and active, we're going to make that same color pink as well. Alright, we're currently on the home page, so that's the active menu, so it's pink and when we hover over it it's also pink.
Everything in between, here we are going to add an image the same way you add an image. If you add html, then we'll add html, click on it, remove all this text, add media? I want to choose that pink bird and insert it into the post, okay, and it's too big, so let's edit it. here and we'll align it to the center and resize it to a custom size and we'll just put 50 in the first option and keep the second option the same so it scales proportionally to everyone. Well, we also want to link to a custom URL and we can just put our website here www dot.
Okay, so we can hit refresh and now it looks much better and very nice, but it's not perfectly aligned, so let's click on this here. and go to layout and under padding let's change the top to 35 first we have to unbind the values the top to 35 this can be blank the bottom to 30 and this can be blank now it looks perfect on the desktop but what about the mobile versions? I'm just going to click publish to save all my changes. Now let's click on tablet mode and scroll down and go up here and go to general and change this layout to vertical so everything is stacked on top of each other and then we can go to layout and we can change the internal column spacing to 36 just so you have a little bit more space and then click on this footer menu item and click on inline and then go to layout and let's unbind the menu spacing and let's add 10 on top, let's remove that and 10 on the bottom and let's delete this and now what we can do is go to the copyright. here and align it to the center, okay, that looks pretty good, then let's see how it looks in mobile mode, so let's click on mobile and it looks pretty good, except for this here, copyright, it doesn't have enough space . the bottom, so what we can do is click on layout and we can unlink them, we can give it a top margin of zero and a bottom margin of 10 and that will make it look much better and perfect, okay, so we're done with our footer looks great on the desktop version it looks great on the tablet version and it looks great on the mobile version congratulations, now we can publish it and we can see our finished homepage, the rest of the pages they'll go a lot faster and it's a lot easier, so let's take a look at it and we can see that our header is ready, the type appears and our footer looks amazing, and the next thing we're going to do is create our blog page.
So our blog page looks like this right now, so there's nothing you know on it and what we're going to do is copy the header from this home page here and put it on the blog as the first thing we do. press control click if you're on a PC or click Command if you're on a Mac or right click and open the link in a new tab just so we have both open. I'm going to click refresh to get this admin bar. here for some reason it didn't appear right now I don't see edit with Elementor so we want to go to our dashboard and we want to go to pages and we want to go to the blog and I don't see edit with Elementor because we haven't enabled it yet so once we click on the blog, we can click on edit with Elementor and we have the Elementor editor that we can use well once we do that, I really want to open this with Elementor.
I also want to edit this with Elementor and then I want to open the browser and I want to grab this section and right click on it and I want to copy it and then I want to go here and right click and paste it now. having that section there perfectly fine, but we don't see that it's transparent, so what we can do is hit refresh and we can come back here and we can just delete everything up to the wp-admin bar and that will get we go into our backend and then we're going to pages and we want to update this blog page so that it has a transparent header, so we come back here to the blog and click on it and then what we're going to do is We're going to go to this Astra settings right here and we're going to click on that and then we'll scroll down and where it says transparent header we want to enable it so when you enable transparent header and hit refresh and now we can see our page, now we can go.
Go back and make sure this is updated, then click Refresh and now we can see that it has a transparent header, so that's great. Okay, we don't see the navigation right now, but we would see it if we went to our page, so let's do that. just go to our page and go to the blog and now we can see it, it looks exactly the same, it doesn't have all those extra sections and it looks really cool, let's edit it more, so let's click on this header here and change it. to the latest posts of our latest blog posts, so let's open our browser, then click on this intersection here and delete it, which will delete the guy, but now our spacing is off, so let's click here and go to advanced and on instead of 230 and 80 let's make it 286 and 286 so it's nice and big okay, we can get out of there for now and we'll change this background image by clicking on this and then going to style and then clicking on choose image and then the we will load files and we'll select files and this is the folder that you downloaded so let's go to the blog page and blog page header and we can open this one and then we can click on insert media and it looks pretty good, it's a little bit shiny and it's a little hard to read, let's add a background overlay and the black is fine and we can do opacity, so we're going to do point one, so we don't want it too dark.
Point one is just great, so it makes it a little bit darker. and the text appears a little bit more and that's pretty awesome we can refresh it and we can see our blog page if we just refresh and now it looks amazing and it's different from our home page so we have our home page and now we have our blog page which will contain all of our most recent posts right now, we're going to add a couple more sections next here, so let's go to the blog page and click on this and add one and click on it and add another, so we'll add two right here.
Right now what we want to do is click on this little widget area and type post and we'll see this post list item right here so just click hold and drag this is the plugin that we downloaded called unlimited plugins and will add all of our blog posts, so that's great for the second element, we're going to add post pagination, so click on this and just type the post. and we'll see it right here, same thing from unlimited items and just click hold and drag and we should see it here, this will basically add navigation so you can go to different pages of different posts, for example, if you click on two.
It would go to the second search results for those blog posts, but let's make this look a lot better, so let's just click on this, click on the pencil icon here above and below content and general to see the space in the list, let's make it 50. that. I'll add some space and the number of intro characters. I want it to be a little bit more so people can read a little bit more, so I'm going to put 200 and that will add more words here and then below the design. I'm going to show the date here, okay, and we can choose after the intro, okay, but I'm going to remove the author right here and I'm also going to remove the date icon.
I don't think it's necessary, that's fine. pretty neat on the posts query, I'm going to scroll down and put the max post at four just to show you the different post pages that we can do. Obviously you can make more than four posts on a page, but I'll only make four. and if we scroll down under post pagination and ajax, we'll use the pagination widget because that's what we have down here and then we'll say enable ajax which will load the pages dynamically so you don't have to refresh the page, okay, let's move on to the style, so let's go to the style and give each element a solid border, but only for the bottom, so just place one here, unbind the values, so we'll do 0, zero, one and zero, and for the padding, let's unlink these values. also and just give it a bottom padding of 50. and then in content, we're going to change the content background to white so it blends in and for the content padding we're going to make it 25 so there's a little more space. for the image, we're going to set the width to 400 and the height to 250.
For the image radius, which will give us some rounded corners, we're going to set it to 30. To me, that looks amazing now under the title. we're going to click on the title typography and we're going to do montserrat, the size is going to be 33 pixels so it's going to be bigger and the weight is going to be bolder so it's going to be 700 and what we can do is put it all in in all caps if we want, so it's all caps and it looks pretty cool and we can change the line height to something like 48.
Okay, let's take a look at that and it looks pretty good, let's continue. It looks a little squashed here, but it doesn't look like that on a normal screen. There's not enough space between here, so just select the entire section, go to Advanced, and unbind these values. Make a top margin of 80. and that's going to add us some space here, okay, that looks pretty good, let's move on to pagination and let's go ahead and click on this little pencil icon and let's go to advanced and change the a little bit. spacing, let's unbind these values. make a top margin of 50 and a bottom margin of 75 to give you some space at the bottom which just adds some space here and here then click on content and under previous and next I think it would be great if we enabled them now. we can see the previous and the next and it makes it easier for usersmove the pages forward or back so you can easily see all your blog posts and there we have it, we can click refresh and we can see our blog page, so let's go. go ahead and see it, let's refresh this and it looks really cool, we can go to the next page and we can see it loads automatically and that's really cool, that's what the ajax did, it made it load like that, so it loads without recharging.
Look at that, so I think it's super cool. The next thing we're going to do is make this responsive so it doesn't look exactly right. It looks pretty good, but not perfect, so we'll do it. it looks perfect for your tablet and for your phone so what we can do is go to Elementor to edit and then click on responsive mode and let's click on tablet and let's go to the first section and let's go to advanced and for the fill . let's add a little bit of padding to the top, let's make it 160. and let's add a little bit to the bottom, so 150.
Okay, that looks pretty good and then let's select our second section and open the browser to make sure we're selecting the right section, so here it is and we're going to unbind the margin values and give it a top margin of 50. Okay, so we're going to select our post list, which is this right here and then in style and image, we're going to give it a image height of 400 so it looks a little better and then under title and typography we're going to set it a little bit smaller to 24 and for the text typography we're going to set it to 13.
Okay So it looks pretty good, we're going to click on Refresh and we can see what it looks like getting out of here and doing this and it looks really cool. Okay, let's open that backup and now let's go. to switch to mobile mode as well as your phone and we're also going to change some of these settings. Okay, let's open the browser again. Let's select the first section, which is this one here. We're going to set the padding to 95 at the top and 85 at the bottom which seems about right for the header element right here, if we go advanced we'll make sure everything is zero and for the second section which is here, we will go to unlink advanced. the values and give it a top margin of 50 to add some space, then we'll select the posts list and then in style we're going to fill elements and give it the bottom 15 and go to unbind the values and give the rest 0 0 0 15 0.
Okay and then below the image below the width of the image instead of 400 pixels, we're going to do the percentage and we're going to do 100 percent so that the image has a width of 100. except for this little space here okay it looks a lot better and we could give it an image height of 250 and we could set the image radius to 15 so it doesn't round off as much and then under the typography heading we can set this to 22 .and for the line height, make sure it's in pixel pixels and we can set it to 35. Okay, we can check it and it looks pretty good.
We can select this right here, post the pagination and in style below the page numbers. We can set the dimensions to 25 and that will make everything fit and then we could go to advanced and we can make sure that all of these are zero zero zero zero zero just to give us the most space, if we click refresh now we can see our site and it should work for your desktop, it should work for your mobile, it should work for everything, so let's take a look at it and it looks super cool, great, then once we make sure we've updated this, we'll be able to close here and the next thing we're going to do is work on our About page, so I'm just going to right click and open in a new tab and that's because I'm going to copy this header to this About page. header here, so we could change this here, but I think to keep it consistent and get all the mobile-friendliness and all the work that we did, let's copy it so we can edit with Elementor here and then go to our about. and edit with Elementor and we could just click on this section here and press copy, then we can go here, we can paste it here somehow, we'll go here, right click and press paste, now that's there, now we can click. hold it down and drag it and drag it up, so it looks really nice and we can delete this right here, and now we can get out of here for now and write about us and then we can change this photo in the background. just click on it, go to style, go to choose image, then upload files and select files and we'll go up one level, then we'll go to the page about page header and press open, then we'll insert media and that will change that looks really cool so we're going to refresh it to save all of our changes and we're going to preview it and see what it looks like so let's go to our main website and see what it looks like so we have this and I want to show you how to make an overlay of gradient so that it goes from one color to another but is transparent, so let's see how to do that and this could be really useful if, for example, We can't see this navigation very well, we make a gradient overlay and make it darker here and lighter here and then you can see the menu better, so let's go ahead and check that, so under style if we scroll down. and we go to the background overlay, we can click here on the gradient overlay and then we want the color to be from white to black.
Now we can't see it very well, so we can do it like this and we can see it much better. Obviously that doesn't look good, but that just helps us see it better so we can change the location. If we do that, we can see how it's changing here so we can change the first one to 20 and we can change the second one. to zero if we want and it's very sharp, now we can change the opacity to something like point three and now we can change the angle, so maybe we want it over here or maybe we want it even over here, okay, maybe we want it. want some darker in this corner, so let's modify the angle like this and the other location like this so that it's a nice gradient and that will darken the menu up here and maybe let's not make it as dark so we can just do it like this, another interesting thing that What we can do is we can have it dark in this corner and not light here by going to this first color and making it transparent, so to me that looks a lot better, so now It's dark in this corner where our menu is and it's barely noticeable. , but if we change the angle we can notice it, so I'm going to change the angle to go all the way up here and change the location a little bit.
A little bit just to go up and I think it looks really good now it's going to be darker here, but actually our logo is dark, so let me change it one more time so I like it like this, so our logo will be dark here, the menu will be light here, I think. that will work pretty well and we can refresh it and now we can go back to our information and we can refresh this page and we can see the darker overlay here and to me that looks a lot better and makes it pop. a little bit more if you want to get rid of that overlay, it's pretty simple, all you have to do is click on it and it will disappear and press refresh and now we can see what it would look like without an overlay, again if you want. to do that in reverse so you can go to the history and add it back we can click on the whole section go to the background overlay and maybe make it a little bit less and hit refresh and now we can see it again so feel free. to experiment, you can always go back and forth so it looks pretty good, then scroll down and on this one and let's change our mission, let's change it to Nice to meet you and align it with the center, let's also select the divider. and let's align that to the center as well and give the divider a width of 25, okay, so it's a little bit bigger.
The next thing we're going to do is change them right here, so we're just going to drag this column over to this side and change it like this, super easy. We could also make this column a little bigger by just selecting it and making it bigger by dragging it. Maybe we want it to be sixty percent. See it right there, it'll look a little better on a bigger screen like that, but it looks pretty good, maybe we don't like this shadow behind here, so we can go ahead and click edit and then go to style and then scroll down and where it says box shadow we can go back to the default value and that will remove that for the border radius, we can make it more curved and we can make it 20 pixels and it will become more rounded, next we can select this column and we can align it vertically at the top and that will barely do anything, but it will make this text always at the top instead of being center aligned, which would shift down a little bit and then We can go to advanced and remove some padding and we can set it to zero because there's all the space here and we don't really need it, so let's set it to zero, that looks better, so we can preview what that would look like and that looks pretty good and maybe we want to add a little bit more text here, so let's duplicate this and add a little bit more text and see how it looks and it lines up nicely, scroll down and we're.
We're going to delete this section here, so let's just go out from there and now we're going to duplicate this section here, so we're just going to click on it and duplicate it and now we have it like this, so it looks really nice and now we're just going to drag. and drop this here so it looks nice, like the image on the left, then the image on the right and now we're going to make this column less, so we're going to make this one 40 and the other one 160. and make sure you click on this and then go to advanced and make sure the padding is zero so it goes all the way there we go and now we need a little bit of space here so we can click on this column and then go to advanced and select the right padding 450 just to give it a little bit more space and we can also add 50 pixels of space to the left padding just to give it a little bit of padding here, okay, it looks pretty good and for the header, let's change it to next projects, okay, let's change this image right here . let's go to the content and click on it, let's find an interesting image, I think it's called hiking, and there we are, it's an interesting image, it should already be in your media library and we can click on insert media, under style, let's change its height to 500. pixels and set it to cover so it doesn't stretch, that looks amazing, okay, let's add a little more text, let's copy this and duplicate it so it's a little longer and delete this last word here and that will be go. pretty good, now let's open this up again and change the spacing right here, maybe it's too much, so let's click on this, go to advanced and change the top to 40 and the bottom to 120 that way everything will be spaced . really nice and it looks pretty good I really like it so it looks great the next thing we're going to do is make it mobile friendly so let's go ahead and go into responsive mode let's click on tablet like we did before and let's see what it looks like, so let's go to the column of this right here and let's give it a width of 100 and we see that we have space here, so let's go to advanced and change this to zero, let's actually change all of them to zero and below the margin , let's unlink them, we give it a maximum of zero and everything else, we give it 50.
Okay, that looks pretty good, let's select our second column here and go to layout, give it a width of 100 and then go to advanced and give it a padding of 50 on the right and 50 on the left, all right, let's keep going down and this looks pretty good, let's click on our entire section and for the padding at the top let's do 20 and at the bottom let's do 55. demos both columns a width of 100 and then for the first one, go to advanced, let's delete these, let's go to zero and zero and under the margin let's make zero at the top right 50, let's unbind the values, let's make zero at the top right, down and left 50.
Alright now we can scroll down and click on this column here, go to advanced and do the same thing to unlink the values, we'll do 50 50 and 50 and that should look super, super good, we're done with the tablet view and that looks amazing, I think we can also click on this and then go to responsive and invert the tablet and invert the mobile so that it's image, text, image and text, all good, so now we have Done with the tablet, now let's do the mobile, so I'm going to update that and click on mobile and now we'll change it to work perfectly on your mobile device, so this looks pretty good, but in this section we can go ahead and Click on it to go to advanced. and we can set the top padding to be a little bit less than 40. and let's select this column and let's go to advanced, let's unbind these margins and make sure they're all zero and then for the padding, let's make it 20 and then add a little bit of space here for 30 and 20. and then let's select our divider element and go to advanced, unbind the values and set the bottom margin to 20. that will adda little bit more space, okay, scroll down, select this right here and then go to advanced again and we can make a top padding of 20 so it's not that far away and let's make a bottom padding of 60.
Let's see how it looks, it's okay, it looks pretty good, let's select this column here and let's unbind these values and copy what these values were that I completely forgot, so 20 30 and 20. so let's do that 20 30 and 20 20 30 and 20. Okay, so looks pretty good and then for this it should be the same as this. one up here so let's see what that one was twenty zero and twenty so zero twenty zero twenty let's try that for this one zero twenty zero twenty and this is zero here we go, it looks a lot better and there you have it.
I think it looks really cool, I really like it, okay, so we're done, it works on tablet, it works on mobile, and of course it works on desktop, super, cool, let's update, we're done with our About the page, all right, the next page we're going to design is the contact page, so make sure it's updated and we can go to our website deleting all of that and then going to contact here and then editing with element or us. Once again we're going to replace this with this top image here so we can edit with Elementor and we're going to copy this and paste it here, so let's open that browser again, just right click and hit copy. and come back here and scroll down and right click and hit paste, click hold and drag all the way up sometimes you have to move it a little bit and we can get out of here, okay, let's change this to get in touch and change something. of this contact information is pretty easy, just click on it and it will change it, and we can click on this and we can change it to my email and we can click on this and change it to my phone number, all good and then, of course. we can click on any of these social media icons and we can put your social media accounts right here so just put the link here like facebook.com, forward slash whatever your profile is and you can find it on Facebook or Twitter or google you can also add instagram or youtube or whatever you want by adding it here and then just clicking here and you can add whatever you want they have tons and tons you can also go to style and change any of these colors but I like these colors so which I'm going to keep them as another thing I want to add is a Google map so I'm going to add a new section so here this section and then I'm going to click on widget and I'm going to add a Google map so click keep and drag and that Google map will appear now.
I can enter whatever I want, let's look at Malibu, California, and that will appear right there. I can get a little closer. if I want and I can also change the height of the map, maybe I want it to be 400 a little bit bigger and that looks really good to me, maybe this is too vibrant for me, so we can go to the style and we can go to css and go down the saturation a little bit, like 60. You can turn it all the way down and make it black and white, which is great, but I'm going to turn it down a little bit because it's a little bit too bright for the website, so maybe I'll put it at 60 and that looks good, I want to try to get rid of the space around it because I want it to completely encompass it, so now we can see it.
It doesn't go all the way and that's for a few different reasons. The first reason is that we can click on this and for the content width we can make it full width. Now it will cover more, but we still have a little left. of space here and here and here and that's why it doesn't look perfect so let's see how to get rid of them it could be in two different places it could be up here and we could go to advanced and make sure everything has zero and if that doesn't work then we click on the column and we go to advanced and make sure everything has zeros and that seems to have worked so now we can see that it is aligned with this and there is no gap and it looks great, it's also an interactive map, like this which is pretty awesome, we can zoom in and it's just a normal Google map, so I really like it, it looks pretty good, I like that there's maybe a little too much space around it.
Here, where is it? Maybe this section here, so we can go to advanced and I don't see any space there, so it's probably inside this here, so it's here advanced, there it is, so there's too much space here. for me, so I'm going to do that a little bit less, I'm just going to do 80. and to me that looks pretty good, so this page is pretty much done now I want to see what it looks like in responsive mode, so I'm going to click on update and I'll check first to see if everything's ok, so I'll delete all of this and get in touch and make sure.
It looks good, it still says about us, so I forgot to change that and I forgot to change the background image, so let's do those two things, let's contact us and change this image by clicking on it and going to style and choosing image, we already have this in our media library, if we look in the section, that's it and we can insert media, it's already there so it looks really cool. now we can update that and now we can see it here, it will actually say contact us, all right, now let's do the responsiveness for this, let's go here to responsive mode and click on the tablet which looks pretty good, which also looks pretty good. and everything here looks pretty good maybe a little less padding I think, or maybe this section there is, maybe the bottom part should be 50 instead of 80 and that will give us a little less padding here and I think it looks a little bit better maybe this map is a little bit too big so if we go to the height we can do 300 and that looks a little better so let's update that and now let's go to our mobile mode so let's click on this again and go. to mobile and see how it looks, contact us, let's get in touch, that all looks pretty good, perfect, maybe let's add a little bit of different height to this, so let's go to advanced and to fill in the bottom, let's add a little bit, let's add 20 Okay, it looks pretty good and for this map we're going to make it 320 for mobile okay and this looks amazing so let's refresh it and see how it looks, we can refresh it and we can resize it. really good and the mobile looks great, everything looks perfect, however there is one thing we didn't talk about and that is this form here, how do we edit this form if we click edit with Elementor and exit? from here and we scroll down and click on it and click edit like we normally would, it just has something called a shortcode, now a shortcode is just a code to enter this form, but how do we edit this actual form?
If we wanted to, the way we do it is we go to the back of our website, so let's go to the back of our website, we can exit from here and then we go to the wp forms, this is one of the plugins that was automatically installed when we installed our template, so this is the code right here, the code that was there and this code corresponds with this form, so let's edit this form and we can edit everything here, so if we want multiple option , we would just click hold and drag and drop it there, if we want to delete something, we can delete this multiple choice and I accidentally clicked on it again so we can delete this one as well, so you can put all these different fields in here. you can even put a number slider by clicking on it saying how was our service or something and people can select it and slide it up and down and then once you save it you can go to your website and we can see that It's changed right here.
So that looks great, but maybe we don't want that, so let's go back and delete it and you can play with all the things in here. It's great, we can also go to the settings and we can change what it says when it is. sending the message and we can also change the notifications so that the notification is for the administrator email, so this is the email that you use to install WordPress, but just to make sure that you can enter your email address so that all messages are sent to we can change the subject line, maybe it says new message from website and the who field is, it's from your name field, so it's your name, then your name, let me save this so it disappears , so your name is your name would be who it's from and that makes sense and then it's from your website so it's the admin email so that also makes sense and then who you reply to, you reply to your email address, so this is the label that corresponds to your email.
So this is just the code that's entered into their email, so when you reply to the email, it will respond to whatever they type here and then in the email message that you'll receive in your email inbox. it has all the fields so it will have your name your email and your message and that's it it will be sent to your email so that all makes sense we can also click on confirmations and then it says thank you for contacting us, We'll be in touch. with you shortly, okay so we can save, this is how you control the form and you can see when we do it and we send the message that will say thank you for contacting us, we will contact you shortly, then we can open. in our gmail and we can see we have this email here so he emailed us hey hey tyler I must have put that in and then he says hi.
I accidentally put my name in hate tyler, that's why it says that right there. name hello tyler I should say tyler but I accidentally put hello tyler here okay that's how you do it and that's super cool and now we can get out of it so now we know how to control this and you basically know how control it. everything on your website except one thing and that is when you click on the blog and you click on this last post, we haven't been able to control this page yet and what I want to do is get rid of this background and change a couple more things, then, how do we do it?
Okay, to change it we click on customize and then we go to global and then we go to colors and then we go to the bottom of the content right here and we have to scroll down. a little bit and we want this white to look now blends perfectly. Then we can go back and back and then go to the blog and the single post and we'll make some changes here, for example, maybe we want this image. at the top here and not at the bottom so we can click hold and drag and drag the image at the top, I think that looks great and then what we can do is say we want the publish date be here and let's hide everything else because Don't think it matters and we'll keep it super clean.
Okay, it looks pretty good, that's how I want it. Let's click publish to publish those changes. Next we want to edit the archive pages, which are the search pages. so let me do that again, I did it quickly, we'll go back and go to the blog bar, okay, so let's search for trips here and this is what shows up, so these different blog posts and this is the page that we go to. come on. edit the search results page, so again we'll hide everything except the post date, we'll hide them and bring the post date to the top and see what it looks like now, that's changed, that's good.
Alright, this looks pretty good, let's click publish and get out of there and now we can see if we go here and search for something like travel, we can see that it looks great and it's already responsive and the astra looks great. The theme has taken care of that for us and if we click on our blog and click on a more recent post, we can also see that it is also responsive. Astra took care of that for us. The Astra theme took care of that for all of us right now. we can go back to the home page and we are done with our website, we did it, we did it all step by step without skipping any steps, our website looks super amazing, let's take one last tour of it, it looks great, all this works.
It works perfectly on your desktop, your tablet, your phone. It was so fun to show them how to do this. I appreciate it and I think you should be super proud of yourself. There is one more thing you can do if you want and that is to log out. that you can see the website as your viewer would see it, obviously you don't have to do this right now, you might want to go back and put in your own content now that everything is set up, but in case you want to log in. you can do that you can hover over the top right and you can click log out and then we can go back to our home page and we can see it as the user without that black bar at the top so congratulations again remember to comment rate and subscribe I'm tyler moore thank you very much
If you have any copyright issue, please Contact