How To Make a WordPress Website - 2021
Jun 07, 2021Hello, at the end of this video you will know how to create all these different
website
s and I will show you how to create all these differentwebsite
s step by step without skipping steps, not only are you going to know how to create all these different websites, but we can also mix and match these different websites, maybe we like this lucy anderson with this christy dao are and we want to mix them up. It's totally possible, totally feasible, or maybe we want this to be a clean car. a happy car with the garden of your dreams and we want to take you to our website mix them change the content we can do it totally or maybe randomly we want to breathe easy with this red thing here we want to mix them together we can do that completely, not only can we mix them up but obviously we can also provide our own designs there, but I always tell people that it's very important, I think starting with an initial design so that you're not looking at a blank website in fear, what do I do?
So it's much easier to start with a blank website. We are going to
make
this website in three easy steps and they are configuration options and layout configuration options and configuration layout. be where we get our domain name and hosting from, so your domain name is the name of your website, so your domain name is probably yourbusiness.com yourname.com a non-profit organization where is working dot org so that is the name of your website without the name of your website no one has any idea what to type to visit your website the second thing in the setup is your hosting so your hosting is a computer that is on 24 hours a day and contains all your information, for example, this is an image on a website. right here and this is an image on a website right here it must be somewhere on the internet so there must be a computer that is on 24 hours a day that contains this content so that when someone types in that domain name appears and this information appears if you didn't have hosting, someone would type in your domain name and there would be nothing to show, the website would appear blank because there is no place to store all the information images for your website and all that. so in the setup we need your domain name and hosting, the second step is the options, the different options that we can do and we can use, the options are literally endless, so we can do so many things on our website, maybe we want a website to have e-commerce capability so we want to be able to take a shopping cart and we want people to be able to buy things in it so it's very easy to do or maybe we want to blog or maybe not we want none. from that we just want a really simple website and that's why this tutorial will be super simple for you because many of the options you won't even use because it's very easy to set up a super simple website, other options we can What we can do here, yes we want, we can have a live chat so that when someone visits our website, a pop-up window appears and we can chat with them live and tell them about our services or products or something like that.
More Interesting Facts About,
how to make a wordpress website 2021...
Other options that we can do, which I think are very important, are like Google Analytics, so Google Analytics allows you to see how many people visit your website per day and where they come from. Very important things to know if your social media posts are working or if you are getting traffic from search engines is very important so all that is in the options so we have finished the setup let's do options we will get all the raw material on your website and finally the The third phase is the design. Let's implement the design on your website.
In the options we put all the raw materials. All the different pages and the different things that we want on our website. In the design that we are actually going to do. modify the layout, so we're going to put your content type in your content, put your images, put it differently, it shows on your website, so again, the three steps are configure options, layout, configuration options, design, it's super easy and I. I came up with this method after eight years of doing this and I think it's the best method because obviously you need to set up but you don't want to jump into design right away before you know all your options so I think it's very important to do it this way Instead of jumping into design and then not knowing all the possibilities you want to put all that raw material into your website before you start shaping and molding it, that's what we're going to do. do it step by step if anything I said here doesn't
make
sense don't worry because I will show you how to do it all step by step without skipping any steps so let's get started so we have the setup options for our main steps. and the layout configuration options are pretty easy, but those steps need to be broken down into sub-steps.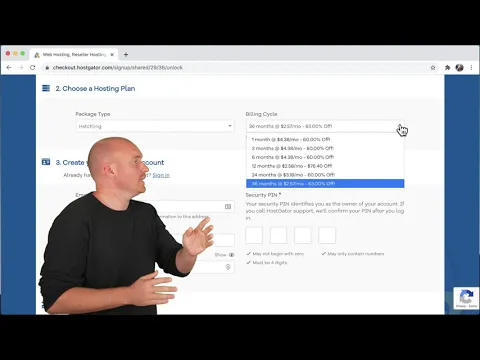
We are going to tackle setup first and setup has three sub-steps which are: getting your domain name, getting hosting, and installing WordPress. Now setup is quite interesting because it is the only step that has any cost associated with it, all the other steps are free, so I will explain what each of these steps are and how much they cost, so your domain name, your domain name is the name of your website, so my domain. The name is tyler.com The Google domain name is google.com Your domain name will probably be something like yourbusiness.com or yourname.com or your non-profit dot org, so that's your name. domain.
Your domain name is also called the name of your website or its URL. The domain name costs about thirteen dollars a year and there is no way out of that because you need to be able to tell someone what your website name is so they can access your website. Now hosting is something a little different, it's a computer that's on 24 7 that contains all of your website's information, for example your logo, your text, all of your content and all of your files, that's what hosting is. hosting, it contains all the information, it is a computer that is on 24 7, when someone types your domain name. you go to the hosting and the hosting provides that information without hosting, if someone were to go to your website the website would appear blank there would be nothing there so hosting is absolutely necessary so the cost of hosting and you I'll show you how to get a discount, but it costs about ten dollars a month, so I'll show you how to get a discount, but that's the next thing that comes with hosting: installing WordPress.
What is WordPress? WordPress is a content management system, which is just a fancy way of saying that it helps you manage your website content, so instead of having to do all this nerdy stuff like coding and messing with ftp files and css and All of that, it does it all visually for you, and honestly, it does it much better, much faster, and much more efficiently. WordPress is the world's most popular way to build a website, blowing places like shopify, wix, squarespace and weebly out of the water, they don't even come close to the popularity of
wordpress
.WordPress is used by companies like CNN Forbes and people like Jay-Z. and katy perry and it is by far the best way to create a website and I think that is because it is what is called open source, so anyone can add things to
wordpress
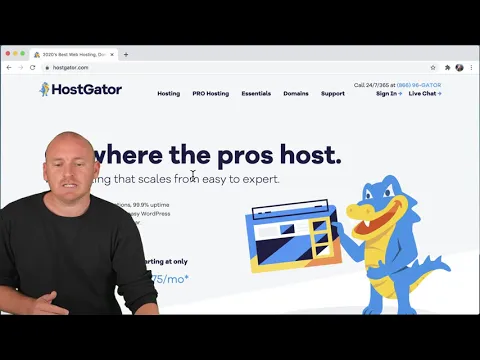
and you can also transfer your files anywhere and download them to your computer where other companies don't. They don't let you do that because it's their own proprietary software, so I'm happy to tell you that WordPress is absolutely free, so that's it for the domain name, hosting, and installing WordPress. That's all for the configuration.The total cost is about ten dollars to start. and ten dollars a month or if you use the discount that I'm going to offer you, it's thirty dollars for the whole year, that is, about three dollars a month, which I think is an incredible offer to get your website broadcast to the entire world. world, so thirty dollars per For the whole year, about three dollars a month, we can get your domain name and hosting in the same place which is hostgator.com, so all we have to do is open our browser and go to hostgator.com, which is hostgator dot com and press enter.
So I get a commission for recommending Hostgator, but nine years ago I made a video teaching people how to build a website with Hostgator and I didn't get anything for it, it's just who I use, but Hostgator has since contacted me to provide to my audience. biggest discount ever so I really appreciate it and it helps me make these tutorials totally free. I really like hostgator for their live email chat and 24/7 phone support, and they make it super easy to set up a WordPress website so we can have all these options here and I don't think we should use professional hosting because there are too many things, we don't need them all and we can always upgrade later, so I really think you should go for hosting now we have three options here: shared hosting, website builder or wordpress hosting.
You would think you would use wordpress hosting but I think it costs more and is too much for what we need right now and you can always upgrade to then we can get the same thing with shared hosting and you can install WordPress on it, saving you as much as possible, so we're going to click on shared hosting and if we scroll down we'll see these different plans here. the breeding plan, the baby plan and the business plan, but before we do that, we can go up here and we can go to the slash to unlock a n c and it will take us to the same page, but it will be a much smaller discount, so Yes We scroll down and we can see those three different plans: the baby plan, the baby plan and the business plan, the business plan is too much, we don't really need it, so it's really between the baby plan and the baby plan, the difference between The baby plan and the baby plan is the baby plan that offers unlimited domain names so you can have like yourwebsite.com yourmomswebsite.org your other website.netaclienswebsite.com.
You can have as many domain names as you want, whereas with the brood plan you can only have a single domain name, like yourwebsite.com, so it's really up to you. Do you already have two domain names, two websites you want to start and then choose the baby plan. I think most people are just starting out with a single domain name. so go ahead with the breeding plan, so that's what we're going to do. We'll start with a single domain name and simply click buy now on the breeding plan. Okay, now you're asking. If we already own a domain or want to register a new domain, we would click on I already have this domain, for example, if we already got our domain from somewhere like godaddy.com, then type here dot com you already own. put it up and put it there today.
I'm registering a new domain, so I'm going to click register a new domain and type it in here so we can see that our website name is available. there, but sometimes your website name will not be available, so you need to be a little creative with your website name or you can use a different extension, such as dot com, dot net, dot org, dot space, technology, store point. or just be a little more creative with the name of your website, hopefully it will be available but it's not a big deal if not, you can always change the name of your website later, you know, it costs about 12-15 dollars a anus. a new website name but it's not a big deal as you can see they also want us to add in the dot club, dot site, online space technology website organization but I don't think we need all of these. obviously they want to make more money, but I don't think anyone is going to copy you or anything like that with.net.
I don't really see any value in getting any of these other extensions personally so we can scroll down and skip all of them. That's why I'm a little conflicted about protecting the privacy of this domain because on one hand I want to save you as much as possible, but on the other hand some people get upset if they receive an email or a call from somewhere from a different country. saying: do you want some Google rankings or do you want me to develop your website? That's what domain privacy protection ensures that when you register a domain name, when you register the name of your website, yourwebsite.com, people can search for it and see your email. address and your phone number what domain privacy protection does is it makes it so you can't see any of that, so for 15 a year sometimes it's worth it for people so they don't get any of that spam or discomfort. phone calls but sometimes people don't really care so I don't really care so I'm going to uncheck add domain privacy so I'll probably get a couple of calls and it might be a little bitannoying but I'll save 15 a year and we'll save as much as possible so now we can go down and we can see that our package type was a hatch because we didn't use the baby plan, use the baby plan again if you have unlimited domains, for So if you want multiple domains on your website just starting out, use hatching if you only have a single domain name right now for the billing cycle.
If we click on it, we can see all the options here and the options. They are interesting because the discount only applies once, so if you have the monthly plan it would only apply for the first month, so you would pay around ten dollars a month, so it would be like ten dollars upfront and ten dollars a month where the annual discount applies for the entire year and the three-year plan applies for the full three years, so what is the best strategy? What's the best balance between paying so little up front but still saving the most in the long run?
I really think that's the 12 month plan. because you save more it's dollars and 58 cents a month the three year plan is 2.57 cents a month but you will pay a little more up front the month you will pay the least amount up front but you will pay more in the long term so I think the best balance is the 12 month plan and the one year plan. It offers a huge discount, so once you do, we can create your own Hostgator account, so just enter your email address. Confirm your email address. Enter your password right here. Enter your security pin.
Scroll down. We can enter our name. Last name. name phone number address country state i am in california and zip code below we can upload and we can pay by credit card or paypal so you can enter it right here don't worry this is not a real credit card number enter in your code, your expiration date, then we can scroll down and we'll ask you about additional services, so do we need the SSL? Our website already comes with SSL, so I don't know, this is an advanced SSL, we definitely don't need it. leave it unchecked Do we need site blocking essentials to protect our website?
There are plugins that allow you to protect your website, so I don't think we need this either, so we're going to uncheck it. Do we need a professional email? I think you should get your email from Gmail but your website already comes with email. It's a basic email, but there is an email, so you wouldn't get it from Microsoft. I'd get it from Gmail if I were going to do it, so let's not do that either. We want to backup our hard work for two dollars a month and I don't think we need that either. I'm going to show you how to download a plugin that allows you to backup all your work.
Do you want to improve? your search rankings and increase web visitors with hostgator SEO tools. I don't think I need this. I'm not sure what they would do. I don't think it's something they can really help you with, so I go. To say no to that, then we want to enter our coupon code, it should already be there, but if not, just type unlock u-n-l-o-c-k and press validate. We can now review our order, we receive 24/7/365 live chat on the phone and email. support instant account activation money back in 45 days guarantee of our registered domain name for one year we have the hatchling plan for 12 months so all this is for 12 months and now it costs 33.5 cents which can go up and down a few dollars here and there, but it should cost between 30 and 35 dollars, maybe give or take a dollar or two, so now we can go down and click on "You have read and agreed to the terms of service" and click checkout now, so we have completed the The hardest part was deciding to build our website.
Now it's all pretty downhill. From here we are going to do the last part of the configuration, which is to install WordPress. It's super easy. All we have to do is go here after we have checked out. We will see a page like this and then we will click on install now, then it will ask us what current version we have. Okay, then it's going to ask us to choose where we want to install it, so I have a bunch of domain names because I have the baby plan, but I'm going to install it on learn how to create a dot com website.
Okay and make sure it's blank, don't put anything here because if you have it, it will install it in learn how. To create a dot com website or your dot com website, make a forward slash instead of just your website.com. Next, it will ask us for site settings, so for your site name, you can put the name of your site and you can always change it later. Don't worry too much about it, but I'm going to put "create a website" as the name of my site. The name of your site will probably be the name of your company, so whatever your company name is or whatever your name is will be the name of your site.
Your site description is how you describe your website, so if you're in plumbing, maybe I'd say you've been a Los Angeles plumber since 1972, but I'm just going to write learn how to create a website, now we can scroll down , it will ask us for our username and password, so I will put my name as username, you will put your name and password. I'm going to hide this so the Internet doesn't hack me and I'm going to put that. here and then your email address, so maybe just enter my name and learn how to create a website.com for my email.
You can always add some later if you don't want it to be too easy to add, then we'll do that. We're going to select our English language and we're going to skip all of these things, we don't need them, so we're going to skip this as well and we're going to go straight to install now instead of just clicking on that, we can actually enter our email if we already clicked on it, no big deal, but we can enter our email to get all the details of our installation, like our username and password that we just created, we'll just click install and now it's done.
It's going to install fine, so now that the installation is done, we'll get congratulations because the software installed successfully, but if we click on it, we'll see this sad face because your website isn't ready yet. It can take up to an hour, maybe two hours, sometimes up to 24 hours, but it's very rare, but probably 10 minutes to an hour for your website to reach everyone, so your website spreads to all servers on which all hosts are located. everyone and you're letting them know that your website exists, so right now you might see this, but if you check back in 10 20 30 minutes, it'll start working, so right now I'm going to close this right here. a little break and when I get it back we'll try again so I'm back it's been about 20 minutes so I'm going to see if my website is working so I'll click on it and we'll be there.
Come on, we have our website. I'm going to close this right here. We now have our website online. If someone were to go to your site, they would see something like this. Hello World. Here we can see the different pages. Obviously, there is nothing. really into it and obviously this looks pretty bad but if we click on the sample page we can see it's a sample page it looks good it's not the best we'll make it look a lot better if you click here we can go back to the home page and we have this blog post here and it doesn't look that good, but it's our website and we saved a lot of money just by getting here, so how do we log in to our website?
Well, it's very easy for everyone. What we have to do is go to yourwebsite.com and then slash wp dash admin wp dash a d m i n and press enter. Now it's going to ask us for our username and password, so we're going to enter them right here, so what was our username? we just created it so you should remember that but my username was tyler and my password was whatever my password was so just hit log in so we're officially done with the setup phase of the website we signed up for accommodate. We have our domain name, installed WordPress, and are logged into the dashboard.
Now is the time to look at all the options. I'm going to show you all the options you can have on your website and I think you're there. I'm really going to like it and it's going to be really cool, so let's explore all the different options on your website. This is phase 2, so we have configuration and design options. This is the options part of the website, as we can see from this and some. different things, we have all this extra stuff on our website and it's not really necessary, so it's basically like when you get a new phone and you have all these apps that you don't really want on your phone or you get a new computer and it has all these programs on your computer you really don't want someone to pay the manufacturer to install those programs on your phone and on your computer to reduce the cost of that phone or computer, but we don't want all that stuff there it's the same with all this stuff from here, they basically paid them to install them, but we really don't want all that stuff there, so how do we get rid of all that stuff?
That is first. what we're going to do and they're basically plugins that are installed so we're just going to clear all the plugins so we can go to the plugins here and if we scroll down we can see all these different ones. plugins which in my opinion are not really necessary so we just click on this plugin and I'm going to select all of them and then we're going to deactivate them and press apply and then we're going to click on it again and we're going to delete and apply and that. will delete them all, we'll say goodbye and now if we go back to our dashboard we can see that we have a nice clean website, none of those extra plugins are installed, they can all start clean and fresh, so this is what they call the dashboard , it's basically the back of your website your dashboard is where you control all the options it's where you go when you log in and access your website and it's the place you go to edit your website you need to log in once you log in, you go to the control panel, so once we go to the control panel we can go back to our website by clicking on this up here and now we are logged in to our website and you can tell that you are logged in in this bar from here up. so this bar lets us know that we are logged in, no one else sees this except us, this is how we know that we are logged in to go back to the dashboard, all you have to do is hover over your website name and do click. in it and you will return to the control panel.
Alright, next I just want to show you something that I like to show people. If you ever want to change your username or password or add a different user, you can simply click on users and you will be able to click on their name or you can add a new one. If you click on your name you can scroll down and you can generate a new password and change it like that, then just click on update profile, that's how you change a password or add a new user. The next thing I like to do is two additional checks and that is to make sure that WordPress is up to date and also that your permalinks are correct.
I'm going to show you how to do it right now, so the first thing we want to do is to see if WordPress is updated, so we click on this panel right here and if we had an update, it would have one next to it, but there are no updates, so neither we don't even need to click on it, but if it did, it would. just click here and there will be a big refresh button right here that you just press super simple. The next thing I want to check is the permalinks if we click on our website name here and go to the sample page and click on that we can see it's our dot com website forward slash sample script page, sometimes hosting companies have a slash id equal to one or a slash question mark and some numbers, we want to make sure everyone is on the same page so your URL is displayed as this is much better than a number or a letter or something so we can go back to our dashboard then we can go to settings and go to permalinks so now our permalinks are on day and name so if we had a blog post I would actually put the date, but I don't really like that, I like the clean version that's here, so that's what we're going to do, we're just going to put the name of that post, so go ahead and just click on the post name, it's really up to you, but I like to keep it as simple as possible, so click on the post name and click savechanges now everyone's permalinks will be the same and really simple and in my opinion the post name is the best so The next thing we want to do is make sure that search engines can find your website and I think you can enable this right now even if your website is not ready so the way to do it is read right here and click on it and make sure it is not checked discourage search engines from indexing the site so that we want it to not be marked like this and save the changes.
This will ensure that our website is now discoverable on places like Google, Bing and Yahoo. Popular search engines are fine, the next thing we will do is install our theme. If we go ahead and click on the front of our website, we can see that this is the theme. The theme is basically the design of the website. So this theme has this tan color and this big hello world and this navigation here at the top and the sample page here with this search icon right here, that's the theme we want to install, in my opinion, a much better theme that allows you to control the entire website allows you to control the entire header and the entire footer at the bottom and everything else, so it is much better to control all parts of your website, so installing a new theme is obviously super simple, all we do is go to the back of our website once again by simply clicking on the name of our website and then going to appearance and themes, once we do that we can click add new because we are adding a new topic and we can go here and search for a topic. this one is called astra it is by far my favorite a-s-t-r-a theme and it is actually one of the most popular themes out there so we can check it out and click on details and preview it and we can see here that it has been rated close to 5 000 times and I think it is installed almost or a million times, so it is the most popular theme out there and it is the best because you can get the most out of it, so we will just click on this install right here once it is installed, then we click activate, now we're going to go to the front of our website and although this doesn't look very good, we can see that the theme or the design has changed and it looks different, we see this header up here. which looks a little different in this sidebar here and the blog posts are showing different right here, so the theme has changed to the best theme on the internet and it looks a little different. different, it doesn't look great, but we're going to make it look cool in just a second, so to make it cool, let's go back to our website, go to plugins and click add new, so what we're doing now is we're installing a new plugin that we will allow you to import an entire website to our website as a starting point.
Remember that plugins help you extend the functionality of WordPress. Basically, if your website doesn't have something like a contact form, you can install a plugin that will be a contact form or if your website doesn't have an image gallery that's really good, you can download an image gallery plugin and put it there, if your website does not have shopping cart feature, you can easily download a plugin and now your website will also have a shopping cart, so plugins are very important. It's basically like installing an app on your phone or a program on your computer. It is really beneficial and this is where the power of WordPress really lies.
Places like Wix squarespace weebly and shopify can't match how many people create plugins for wordpress and how many options there are, so there are thousands and thousands of plugins to choose from. This plugin is called starter templates, starter templates, t-m-p-l-a-t-e-s, press enter and we can see the first one. one has five stars, 563 reviews, and 800,000 active installs. It is always important to look at all these numbers and also click on more details and get more information here, such as when it was last updated, who is the author and how to use it with the installation FAQ, the different screenshots you can see before you install it so definitely research each plugin before you install it and once you think it can do what you need just click on install now so we'll click on install now it will install for us and then we'll click on activate , so one of the reasons why it was important to install the astra theme first is because this plugin only works with the astra theme, so now we have all these different ones.
Options to select a page builder like Elementor Beaver Builder Gutenberg and Breezy, but which one do we choose? There is one that is much better than the rest and that is the first Elementor, so we'll go ahead and click on Elementor All. Right now we have all these options and this really concerns you. Do you want an e-commerce store? Do you want a normal website? What design do you like? Can any of these websites also be mixed and matched to create any combination? from any of these websites we can also upload here and instead of searching all we can search for free, so just the free ones and we can scroll down and find something that you really like.
I like to keep it super simple and easy, so I think I'm going to go with this cute natural elephant, click on it and then we can import the entire site, then just click import, if we've already imported something before, you can delete your previously imported site, but we haven't done it yet. I'm just going to click import and now it's importing and this is saving you a lot of time, it's saving you at least 10 hours of work and it's very well designed and it's importing all the images and all the plugins that you need. and all so you have a good starting point and I think this is a huge and amazing feature so we'll wait for it to import it's importing the images right now and now our import is complete so we can click view. site and now we can see we have this beautiful website, it's really pretty, it looks amazing and we have all these different pages here, so we can click on the About page and we can see the About Us page and this is how it looks go and me.
I think this is a good starting point. Such a cool feature they have added. We can click on services and we can see the services page. If you have different services, you can put them here and we have our projects page. it has this really cool image in the background and these projects and these will be like our different projects here we have this contact page that allows people to contact you so you can fill out this form it's all set up for you and you can send the message and put more contact information up here and it has this really cool map that's interactive so it's really cool, it's a Google map and we have this extra button here that we can use for anything we like.
I don't do anything right now, so if we click on it it won't do anything, but of course I'll show you how to delete it or make it do something interesting so we can go back to our home page. by clicking start or by clicking on this logo up here and now we have a really cool website and look right now we can edit this website we can click on edit with Elementor right here and we can click on anything and we can edit it , basically philosophy is anything you click here, you can edit it here, so if we click this welcome here, we can edit it right here, if we click this learn more button right here, we can edit it here, we can move. down and we can edit more things, so anything we click here we can edit here, scroll down, same thing, anything we click here or here, you can edit it here if you want to edit an entire section and change the images, for example, we can click here and you can press Got it, you can also right click, they're telling you and we can go to the style here and we can edit anything there, so although we can edit right now, I don't think be the best idea, remember. we're doing configuration options and layout configuration options layout and that's because that's the best order to do things right now, if we just jump into editing we'll get confused and lost and we won't know all the options we have.
To make our website the best it can be, we must first get all the options, all the raw materials on our website before we start shaping and designing them right now, although I know it's tempting to start editing your website. Won't it serve you much better in the long run? So let's find out all the options and best ways to do things before you start editing. That's fine, if we want to update our website, although I don't think you should. now you hit refresh and that would be it so we can go back to our main website by deleting all of this and hitting enter and hitting exit because we're not going to save any of those changes and that's how you would edit your site if you wanted to.
I'm going to go a lot deeper into editing your website, but now first we need to get all the options and then I'll show you all the cool tips and tricks on how to edit your website, so now let's go back to our dashboard and do some more options , one of the options we have is to backup our website, so we need a plugin to backup all of our hard work right now, so we've done all this and we want to save our progress basically so we can feel free to experiment more so now we are just going to click on plugins and we will get a new plugin that will allow you to backup your website so let's go to the plugins. super cool because you basically save all your progress and you can always go back to anything if you're afraid of messing up something that you're probably not going to do, so we click add new here and after we look for add-ons, I'm just going to write everything in one because it it calls all in one wp migrator but I'm going to write all in one and it's actually called all in one wp migrator so there are 3 million active installations. 6 500 4 out of 5 stars it looks super good press install now it will now install it on our website so basically we have an additional program on our website now and now we will activate it and once we have activated it we can Look here it will added something to the sidebar here, so we're going to click on it and now we're just going to export and choose the file, so we're going to download a file to our computer and export it for us.
Here and now we can download it to our computer by clicking on it and now we just have to wait for it to download to our computer, but now we have a backup of the entire website and nothing was lost, so that's great. everything is downloaded. I'm going to get out of there and close this if we don't want to load a full backup of the website. There is also an easy way to verify all backups; we can just go to backups. here and we can see our backup here and all we have to do is click on this restore button and it will restore it, so I'm going to create a label for the backup, I'm just going to call it clean install, press enter to rename, so now that I know that if I ever make a mistake or do something bad or crazy, I can restore this installation and I also have it downloaded on my computer, now we can go back to our Control Panel, the next thing we're going to do is put your name on your website, so at the top of your website right now you have this weird saw thing, so we'll go to your website and we can see the nature of the saw right here.
So right there, how do we change that and name your website? Then we'll put in a logo, but for now we'll just put in the name of your website and to do that all you have to do is click customize. and then we can click on the header because it is like the header or the top of our website and then we can click on the transparent header because this header is transparent and it is below the transparent header, once we do that we can remove this logo by clicking delete and then we can come back and we can go to the site identity and once we do that we can also delete this logo so we will remove it from the normal website, the header not transparent so we are not going to see nothing different, but if we scroll down a little bit it will say show site title, so we want to click on that and we can change it if we want, we can put make here and that should update right here, but I We'll still create there and we can see that change up here now, if we scroll down, it will say the tagline of the site that we went over this before, but basically this just describes what you do and if we hover over here we can see it if If we hover overthis, we can see it has our site tagline right there, so that's the site tagline and that's where it shows up and I'll also show up in the search engines that describe your website, once we're done. with that and we have it the way we want, we can click publish and we can get out of there and now our site title is on our website later on, of course, I'll show you how to style this much better, change the colors. change the font, change the height and also insert your logo right there but right now we are not doing any design we will save it for later and the next thing we will do is to insert a page right here maybe you want a different page than one of these here you probably do, so how do we make another page?
It's super simple. All we have to do is click on the name of our website and then click on pages and then click. add new we can leave here and we can add a new page, any page you want, services, gallery, contact, faq, anything you want here, I'll just put it in the gallery and then click publish, so I'm going to post that, then I'll click publish, it will update and once we're done we can click edit with Elementor. We are using the Elementor editor and not the normal gutenberg wordpress editor because I think Elementor is much better.
Alright, now we can edit our site, we can drag anything from this left side to this right side or add any section by clicking on this, but I want to show you a much easier way to create a page that is much faster and Let's do that , we want to click on this button here, click on it and now we have all of those Astra home sites pages. We have the starter templates here and we can insert them into our website, so this is much faster. way to create a site and we can go here and we can make sure it's free or we can go here and we can search for something, maybe we want to search for a gallery and we can scroll down and search for some gallery, maybe like this one here, so we click on it and then we import this template.
This saves us a lot of time and effort, by simply mixing and matching all the different websites we can make millions of different combinations and really find what we want. all good once we're done with that we can go here and zip the update and that will update our website and then we can click on this little preview icon so click on preview and we can see we have a new gallery page and it looks absolutely beautiful, we can go to the slash gallery of our dot com website and we can see that we have this nice gallery page right here so we can get out of this and now we can see that even though we created this page and it is absolutely beautiful, we have two problems and one of the problems is that the page is not here, so if someone were to visit our home page, they would never be able to access it because it is not here, there is no way to access it .
The second problem is that this is not transparent, so all our other pages were transparent, but this is not transparent here, so how do we make it transparent? So let's address these issues one at a time, first let's address transparency and then we'll include this page in our navigation, so all we need to do to make the website transparent is go to the edit page right here and then on the right side here we can scroll down and then under the transparent header we can enable it, once we do that we can refresh and then we can preview our website so we can preview it, we can preview it in a new tab and we can Look, this header is now transparent and this page looks great, but we can also see that we don't have it here, so if we go to the home page, we can exit and we can see that the gallery page doesn't .
It doesn't exist so our user won't be able to click on the gallery page from here so what we can do is go to our dashboard by clicking on our website name and then clicking on appearance and then clicking on menus and then We can click on the gallery page and click on Add to Menu which will add it to the menu and now we can click on hold and drag and rearrange the order that we want it to appear in so If we want it right after startup, we can put it there. If we want it right after the services, we can put it there, so I'll put it right after we release it and hit the Save menu.
Now that it's saved, we can go and check out our website by clicking on it and we can see that we have that gallery. page right there and we can click on it and now our users can access that page, but what if we don't like some of these pages here or we just don't like the gallery page and we want to get rid of it? Well that's super easy all we have to do is go back to the backend by clicking on our website name and then go to pages and here we can delete any page so we want to get rid of that gallery page that in We really don't want to.
I like it after all so just click on the trash and then go to the trash and actually we can delete it permanently by clicking delete permanently and now when we go to our website we can see that our gallery page is removed from our website. What we do is we're going to create a blog, a blog can be here with a little link that says blog or it could be on your home page. We want to blog because whatever industry you are in, you really want to make useful content so that people are attracted from search engines, people are attracted from social media to your website and then you can sell yourself products. and services that you offer me now, this is much better than paying for similar ads.
Google or Facebook and attracting them to your website is much less expensive, obviously, if you create the content yourself and I think providing useful and useful information is a much better strategy in the future than constantly paying for ads, so the way you that we do our blog post and we're not designing the post yet, so we're not designing any of this yet, we're just creating it right now, but the way to do that is to go back to the dashboard once we're in the dashboard, you can go to posts and you can click add new because we're adding a new blog post, and since we're just adding dummy content, we're just practicing right now, I'm going to go to zen habits, which is a royalty-free blog. author, so it allows you to use them freely and I'm just going to copy some content, so I'm going to copy this here and paste it here for the title and then I'll go back and copy the entire blog. post it and paste it right here, okay obviously you don't want to just copy random things, you want to do things that are relevant to your business because we want to attract the right type of person, not just anyone, but someone who is interested in what you have for offer we are also using the default wordpress gutenberg editor instead of the Elementor visual designer because I think the editor that comes default with wordpress is much more consistent, it's much more structured with Elementor, you can do whatever you want, but I want it all.
The blog posts look super consistent, that's why I chose the regular WordPress editor, so it looks pretty good. We can save the draft if we're not done with our blog yet, but if we're done, we can go ahead and click publish. then we can publish it again and now our blog is published on the Internet. If we click on view post, we can see this post, we can see the title right there when it was created, and of course we can edit it to make it look different. I'll show it to you later and we can scroll down to see the post and then people can comment on it and tell you how amazing your content was.
Okay, if we scroll up, a quick way to make another post is to go up to new here and click on post and we can find another zen habits post, let's find this one here and we can copy it and copy it here and then we can publish it so that we can click publish, then we can see the post and there we have We have another post there and it looks pretty impressive. Well, thanks Zen habits, that's all we need from you. If we go back to the main website, we can see that we don't see any way for our users to access it. the blog is not on the home page it is not on a page called blog up here there is no way for our users to see our blog page so we have created a blog post but there is no blog page to show everyone the blogs so we can create the blog in two ways, the first is that we can have it on the home page right here, the second way, we can create a page called blog and put all the blog posts on that page, I will show you both ways, but if you have a product or service that you are selling, then you probably want to have it on a page here called blog instead of your home page because your home page will be used to sell your product or service and your blog page will be used to sell your product or service. will use somewhere up here to attract all the users so set it to the home page so we can go back to the dashboard then we can go to settings and read once we do that it says to show your home page and Just click on your last post and then click save changes.
Well, there are some other options here, like how many posts per page and different options like that, but we can go back to the home page and click visit site and we see that our home page has changed. and we can see all of our blog posts right here. This is the default blog post which I'll show you how to delete in just a second, but we have all of our blog posts here and if we click on one, we can see. that whole blog post is fine and if we go back to the home page we'll see that again this is where our blog post resides, but I think it's probably a much better way to create a page called blog here and then put all the posts in that page are fine, so that's what we're going to do, so let's go back to the dashboard, go to the pages and click on add new.
We're adding a new page called blog, so we're just going to put up a blog. b-l-o-g and we'll hit publish and click publish again and then we'll see our page. Now we can see that this page is completely blank and it doesn't have any of our posts on it, so we need to go back to the back end and set our blog post on this page so again we can come up here and enter the dashboard and then go to settings and read again and instead of your last post we want it to be a static page, so we want the home page. again to be the home and the post page will be that blog page, that's where all your blog posts will go, then we can click save changes, then we can go back and visit our website and we can see that our blog page start is here.
It's back to normal, we set up the blog post on the blog page, but it's not in our menu here, so we need to put it in our menu, so we go here and go back to the panel and then we go to appearance and menus. and then for the pages we want to see all and we see this blog page and then we can add it to the menu, once it is added to the menu we can click on keep, drag and rearrange wherever we want, then click on save menu and then we can go back to our website and visit the site and now finally our users can click on our blog and they can see our blog posts but now we have a problem and that is because this hello world is here but we want to delete it , then, how do we do it?
To do that, we can easily go back to the dashboard, we can click on the posts and then we can hover over Hello world and click on the trash can and then we can click on the trash can, hover over it and click Delete permanently, which will remove it from our website and if we now visit our site and come back to the blog, we can see that our blog is just the way we want it, the next thing we are going to do is something that I think is cool, we are going to put a chat on I live at the bottom of your website so that when a user enters your website you can chat with them and sell them your products and services.
I think this is great, so all we have to do is go to your website name and click on the panel, we will install a plugin again, a plugin is something that extends the functionality of WordPress, it's basically like an application for your phone or a program on your computer and you will be able to connect and Sell to your users much better with chat and I think it's great so everything youwhat we have to do is click on plugins right here and then click on Add New because we're adding a new plugin, basically a new program on your website, and then Let's go find plugins, this one is called s-m-a-r-t-s-u-p-p smartz up, okay , this one has 10,000 active installs, four and a half out of five we're going to install it now, it's also free, which is super awesome, so we're going to activate it. and once we're done activating it, we'll look here in the sidebar and we'll see the intelligence icon and we can click on it here.
Next, it will ask us to create a free account, so I'll just enter my email right here and enter a password and then create a free account. Just click on it. So what you could do now is chat with our users so you can chat with your visitors. here, click on that button and then all I have to do is log in with the login that I just created, click on log in and then just click on a basic color and press continue, then I'll type my name , I'm just going to say tyler and hit continue and then you can put in a new auto message which is fine with me so I'm just going to hit continue okay then I'm going to put in my URL so I'm just going to type it in. right here and press continue and then I don't need to do any of this, I'm just going to go down and go install the cms plugin and since we already did that, I'm just going to press go to control panel, so I'm going to get out of here.
I don't want notifications, but if you want them, you can press continue and then I'll notify you when someone messages you. So I'm just going to get out of there and go. get out of here because we already did this and now I'm going to open Chrome in a new incognito window so it thinks I'm a new user and I'm going to go to my website and now I can see this chat icon so maybe I needed help with some. I could click chat and I can say, tell me more about your services and click send, and that's like a client just sent that and now we can see it in our dashboard right here, hey. tell me more about your services, we can click on that chat and we can respond to them.
I'm going to say that I make sure to do xyz and hit reply and then if we come back to this, we'll show it to our users, so that's super awesome. and a great way to have chat on your website, this is how you do it and it has more user information and a lot more options, but this is basically how you install chat on your website and I think it's great. I'm going to get out of here now and now we can go back to our website, so we're chatting with our users on our website, we're getting valuable feedback, we're using that feedback to change the design so we can actually sell more products or more services. or help the customer more, that's super interesting and nice, but we're not done with our information gathering yet.
I don't think we need to install Google Analytics. Google Analytics is one way to see how. Many people go to your website, what kind of links they click on and where they come from. Do they come from search engines? Do they come from social networks? This is a very valuable information that you should know and once you know it, you can check which blog. Posts are popular and you can create more types of blog posts that will attract more people to your website and get more people to collect more data and you can make better and better decisions based on all that information that you have.
Do we install Google Analytics to know all this information? That's what we'll do now. Alright, installing Google Analytics is super simple. All we have to do is go to the control panel here and then go to plugins again. and we added new we are adding a new Google Analytics plugin we went through all the plugins we created a spreadsheet and sorted them and the best one is from Google itself and it's called Google Site Kit so we have Google Kik site installed 900 000 times four out of five, I think it's super good, so we'll install it every once in a while and then activate it fine.
Once we do that, we're going to start the setup right here and we're going to sign in with Google, okay, I'm just going to use my tylermore gmail.com. It will give me a two-step verification, so I'll submit that verification, enter it here and click Next. click allow and allow okay and then I will click allow again and proceed to verify the property then I will click allow again and add the site then I will go back to the dashboard and then after that I will connect Google Analytics so I will connect this service. I'll click on my name again and allow.
Okay, come down here and allow, then I'm going to set up Analytics and now we have our Google Analytics connected so right now it's collecting all of our data and soon everything will be displayed here, so I'm just going to press ok, I've got it and we're going to wait for until all of this data is collected and once enough information has been collected. Everything will be displayed here, but I've already installed Google Analytics on my own website, so I just want to show you what it looks like. If we go to Analytics.google.com, we can see on my website that there are two people in Currently one is from West Haven and this is in real time right now, so we can also see different things like this from Redondo Beach and We can also see our acquisition, how we acquired them so we can go to the overview and we can see. that most people came directly, so most people typed tyler.com or yourwebsite.com and then 21 came from searches like google.com or bing.com, some of them were referred by social networks like facebook .com or instagram. com and some of them are referred only from other websites and we can see how many users we have every day here and we can go down and drill down and click on any of these to get more information about it.
We can also look at their behavior, so what do they do on the site if we click on the overview? Most people went to just the home page so that's just one bar and then a lot of people, six percent, went to the bar templates, some of them went to the intro and some of them went to the bar templates. they downloaded other templates, so this is again from my personal website, if we click on audience and we can see an overview, we can see what the audience did, how many users over what time period, how many are new versus returning users , so this is someone who has never been to the website this is someone who keeps coming back day after day or at least once this is the number of pages on average that people visited, about five and a half pages and this is the time average they spent on the website So, 4 minutes and 11 seconds, this is the bounce rate or how many people entered the website and then jumped.
If you want this to be low, the lower the better, we can also click on demographics and go to an overview and We can see that we can see the ages of the people, we can see that they are mostly men and around 40 women and you can learn all kinds of really great and useful information, so again, once all the information has been collected, it will be here, that's how When you install Google Analytics, I think it's very important to know where your users are coming from, what they did on your website and how you are attracting users to your website and what they are doing on your website.
It's very, very important and that information can really make your website even better so the next part is probably the one you've been waiting for and that is designing your website so if we go to the home page we can see this design right here, but maybe we don't like this design. we want to design something else, so how do we do it? It's super easy. All we have to do is click on this edit with Elementor and we can literally make it look like any website, so that's what we're going to do, just click. edit with Elementor for the home page and now this is where we edit our website so anything you click on here you can edit it here and also anything here you can drag it and you can grab it and drop it here so if you want this header right here you can click hold and drag and you can put it here if you want an image you can click hold and drag this image and put it somewhere if you want a text editor click hold and drag put it there a button do click hold and drag and drop it there so everything on this side can be dragged over here and anything you click here will be editable here.
Let me show you what I mean, so maybe the first thing we want to edit is this background. image here to do that we need to click on this whole section right here to click on it and then it's editable here so we can click on style to get to the style and we can choose our image so we'll click on choose image maybe we want a different image right here we can get free images from pixabay so we can click on them and we can search for any image we want. These are free of copyright and you can use them for your website. search for something like Ocean Mountain and maybe we can search and scroll and find something we like and obviously we can choose any of these and hit save and insert and that will download it right to your website which is great if you want to upload your own image, you can also do it by clicking here and then uploading files and selecting files and then go to your desktop and we can see it here and we'll go to the hero home page and open that wait. for it to load and insert media and now we have that image there, but actually we can see that this image is too dark, it doesn't look like this image and that's because there is a background overlaid on it, so how do we change that background? overlay, how do we make it a little clearer?
So what we can do is go here and we can go to the background overlay and we can choose the color, so this is the background overlay. We can see it changing colors here so we can add a pink, red or yellow overlay and that's cool because it can match the colors of your logos or just match the feel or style of your website, but we want it to be completely black and we want opacity. or how transparent it is not to be transparent because then you wouldn't be able to see anything other than being very small like .18 and that looks pretty good, it makes the text stand out a little more and to me that looks great.
Great, the next thing we want to do is reduce all this space, it's too much space and it pushes this text too far down and I don't think it looks good and then we want to increase the size of this. font and maybe change what it says here, okay, so to do that, all we have to do is click on this section here and then go to advanced, this is how you change the spacing, go to advanced and then we see this fill right here. this padding adds space, so we want to be 200 and now it looks right in the middle and that looks much better to me.
Next is to change this text, let's click on this text and change it to explore and resize. of this text, so let's go to style and let's go to typography and for size let's make it 30. that looks pretty good and then for this text let's change it to wordpress, so I'm going to caps lock in wordpress and to me that looks like a lot . Better, the next thing we're going to do is change this button right here, we're going to change where it links to and we're going to change its name, so to do that all we have to do is click on the button, once let us click on it we will get the options here so let's change the text to contact us and then to change the link all we have to do is start typing the name of a page as contact and then that page pops up a window popup and we can select it, then I will automatically put the link for us now when someone clicks on this contact it will link them to the contact page.
We could also alter things like the alignment, so the size from left to right or center or we can alter a style, we can make it have a different text color or a different background color. I think it looks pretty good as is, but I'll show you how to change the background color here if you ever want to save a background. color, you can just copy this hex code or press this plus button right here and it will save the colors, so I'm going to copy that code and now we can change the color to whatever color we want, maybe we can like this green here or red or purple or blue or whatever we want, we can do it right there.
I'm going to go back to the color that I copied, so I'm going to paste it right there and press Enter. and it was accidentally copied to the wrong color, so to revert the changes just press this button here and it will go back to that red, that's how you change the buttons. There are tons of more options here, like typography, you can change the text size or how things are rounded by going to the border radius or the padding or space between these buttons by going to the padding aNext, if we scroll down this page, we can see that there's actually too much space here, so we're going to delete all this space to do that, all we have to do is click on this icon right here, go to advanced and instead of 340 we will change it to 200 and that will make this whole section look much more balanced and much better.
What I want to show you how to do is not just how to edit these sections, but how to create a whole new section yourself, so if we scroll down here under About Us, maybe we create three boxes, maybe they say quick service , easy and global payments. send something that will help sell to your customers so that they have a good understanding of the value of your products or services, so here we can use this plus sign to add a new section and then we can click on this plus sign and then we have all these options we want make it a column like this up here we want it to be two columns so divide it in half as if there was one on this side and another on this side we want it to be three so one two three well, we want it to be three because we wanted those three squares right there, so let's click on three and what we want to do is we want to go here to all of these elements here and we want to look for an icon because we're looking for an icon box, so we can click on hold and drag this to any of these different columns, but let's do the first one and then we can change the icon if we want so we can click on it and maybe look for a clock and we can select our clock and insert it and now we have a clock right there and now we want to change the title, so we're going to click on this and we're going to say right here, we're going to say express service and if we scroll down we have these different options for how we want to position ourselves, so maybe we want to position ourselves left, center or right, I just want it at the top center and then of course we can link it to any page we want by simply typing any page. we want to link here like we did before and if we scroll up we can go to the style and we can change the color of this, so let's go ahead and change that color, maybe make it a nice blue right there. very cool and we can also resize this right here so maybe we want it to be 36 or something like that or we can make it a lot bigger or a lot smaller but let's keep it at 36 and then maybe for this box here I want a little shadow, a little drop shadow around it to make it stand out and stick out a little bit more off the page, so to do that, all we have to do is go to advanced and then go down here and go to the edge. a border radius of 0 would have very sharp edges a border radius of 50 would have very rounded edges I just want to make it a little more rounded so I'm going to make a border radius of 6. and then if we go to the box shadow we can click on this and we can change its shadow, you'll see how the shadow right now is very dark, we don't want it to look that dark, so we'll click on this right here and maybe take the slider and bring it down to such time 12. so it's very, very light and subtle, but I think it looks really good and then for the blur, maybe we'll set it to something like 15. if we had it very blurry, you could barely see it, it would stretch out a lot if we didn't have any blur it would be very sharp so maybe around 15 is perfect so now it's a very light shadow and for me we can see there's no space between the shadow of this box and this icon so let's add a little space and that's pretty easy.
All we have to do is go up here to advanced and under the padding we can put 20. That will add 20 pixels of space. Everything is fine, so it looks pretty good, but we don't want to do all that work again for each of these frames, so how do we duplicate this and only modify the things that we need to modify? So the way to do it is super easy, all we have to do is right click and press duplicate and we'll duplicate it again and then we can click hold and drag all of this into each of these boxes, so just click on hold and drag and now we can modify it how we want to modify it, so maybe we want to click here and click on this icon and find a credit card and we can click on it and we can insert it and then we can add here instead of service quick we can say easy payments and We can do the same thing in this box here by clicking on it and we can click on it and search for balloon maybe and this one looks pretty good and we can insert it and here maybe we can put global shipping and the next if we don't.
Like the spacing of these, we can click on the entire section and go to the layout and under the content, we can adjust it right here, so maybe we want to be narrower or longer or maybe we have a specific number in mind like 960. so this is very close to this here, so we can change the spacing by clicking on this again and going to advanced and unbinding all the values for the padding and just putting 160 pixels of space at the bottom and now that looks Pretty even right there. The next thing I want to do is something a little more fun if we go down and look at this section here.
I think I want to replace this section with a big background video and maybe a customer testimonial. Well, how do we do it? that the first thing is to make this whole background a video background so we can click on this whole section and then go to style and then click on this video right here and then we can open youtube and we can search for drone footage in Africa or of course, whatever you want, okay, we'll click on the first video, okay, we can pause it and then we can copy this URL right here, we can get out of there and we can paste it right here and then maybe we want the video to start at 21 seconds and maybe we want to end at I don't know 40 seconds, so start at 21 seconds, play up to 40 and then go back, but this background overlay is too dark, so we want to make it smaller so we can go down here and go to the background overlay. background and we can reduce it, let's say. maybe all the way or maybe 2.2 which looks pretty good and then we can delete all of these intersections by just pressing x and deleting them okay and what we're going to do is add a custom header right here so we can click on this elements button and take the header and drag it, we can center it and we can put some text maybe let's put the customer review and after we do that we want to go to the style and maybe we want to do the color of the text. white, so just drag it to the left corner, that looks great.
What we want to do now is drag it to an internal section because we want to control a section independently of this other section, so what we're going to do is we're just going to type here intersection enter and we're going to drag and drop it right below client review and now gives us two intersections, we just need one so we can right click on this and press delete and inside this intersection we're going to drag a testimonial so we can just click here and find the testimonial and just click hold and drag it right there , okay, we can go to the style and change the typography basically the font size and we can make the font size 15 or 20 maybe we'll make it uh 20. and if we go ahead we can change the padding to 40 so there's space around it and then for the background we can make this background white so we can make it classic and make it white just so we can see it by the radius, if we look here, it has a very sharp edge, but if we go to the edge and below the radius of the edge, if we write six, it will appear has a rounded edge right there, let me put 60 so you can really see it, so it's very round, six is just a little bit round and finally we can go to the content tab and we can put our testimonial right here.
We could put I don't know, wow, that's awesome and put the rest of your testimonial right there, then we can choose an image and again you can upload a file or search for one from pixabay. I'm going to upload a file here and I'm going to select files and I'm going to find this guy right here and I'm going to press open and then we can insert media and he shows up right there and then I can say the name is jim morrison okay we can also check him this intersection right here so we can click on it and we can go to the layout and we can make it as wide or not as wide as we want, maybe we want to be around I don't know 900, see if it looks good, it looks perfect.
Okay, that looks pretty cool, it actually looks pretty awesome, I really like the next thing we're going to do is modify this call to action button down here, so we're going to change the color, maybe change the link, change the text. Alright, let's do this, the first thing I want to do is change this background color so it stands out a little bit more, maybe create a gradient all the way through, so click on the entire section, then go to style, and then on classic background place. Click on gradient and for the first color we can choose any color we want or we can put a predefined color code.
This is called hexadecimal code. Some people ask me what that hexadecimal means. Well, you can put your own code. you can do four five six e b zero and that will give you a nice blue press enter for the second code we can do a turquoise so we can write our turquoise code right here 2 3 b 8 b6 and that looks pretty good but it doesn't It doesn't look very okay and that's because the angle of the gradient is not that good so we can change the angle right here and I think 230 looks pretty good so it looks a lot better now but I think it will look a lot better if we change this to some other text so we can change this to how we can help you and then we can go to the style and change the color of the text maybe we want it to be white and then for the typography we can click on that and we can change it. at about I don't know 31 32.
Okay, that looks a lot better now let's finally change the button so we can click on the button and we can say we want people to contact us and that will link to our contact page , here we go. Alright, we're done with that, let's click on the Refresh button to update all of those changes and save them, so now that they're all updated we can click on this little i to preview our changes and we can see that our The website has changed and has those three different selling points that we do here. It has this really cool background video.
If we go down here, we can see this really awesome call to action down here and everything looks great. Almost everything is seen. Well right now the desktop version is perfect but the mobile version of the website is not perfect but luckily for us at Elementor we can change the mobile version independently of the desktop version so let's do it right so let's get out of here and let's click on mobile so this is what it looks like if you're using a mobile phone, so now we can see that maybe this is too big. Let's explore, we can see there's a big gap right here and it doesn't all the time.
The video plays in the background for mobile devices, so we want an alternative image. We want an image to display in case the video doesn't load and maybe this can be centered here, it looks pretty good, maybe it could be just on one line. so let's change all those things, it's super simple, so starting with this, let's explore. I want this to be a little bit smaller, so we click on it and then we go to typography and we see this little icon here, it's just the mobile icon. We can go ahead and resize this and this will only resize it for the mobile version.
Then we can click on WordPress and do the same thing, click on style and then go to typography and then increase the size a little bit and that's just for the mobile version. Then we go down and everything looks pretty good, maybe this above us could be a little bit bigger, so again we do the same thing, we can increase the size a little bit and we can go down and we can see all this right here that looks. pretty good, I like these sections, there's a big gap here and we can do that by clicking on all of this here to move forward, we see that little icon here so we can unbind these values and just do 60 something so that should be enough and now there's a little space and maybe let's put 60 up here, so let's make 60 at the top as well and now that looks great too, so here we need an alternative image because it doesn't always work. let's go ahead and click on this whole section and then here we can scroll down and it says background backup again.
You can choose any image you want. I'm just going to load a file that I already have preselected right here and I'm just going to press open and then insert media and now if this video doesn't load, this image will appear, so that's perfect, let's keep going down and this should be centered. I think it would look a lot better if it did. centered and maybe this was a little bit bigger, so click on that, go to style, go to typography, let's make it alittle bit bigger and let's click on this and we can see that this is mobile only, so let's align here and click on this. and we go to style and we see the mobile right there and we can center it and we can center all of this, so let's go ahead and do this right, now all of that looks good and it's all centered, so it's perfect how Can we help you?
Maybe it should be on one line, maybe two, I don't know, let's see how it looks, so let's go like this and yeah, let's do it on one line, so 23 is perfect, we can update it and now, if we look. on our phone it should look perfect, so we've learned how to edit the desktop version, we've learned how to edit the mobile version and make it responsive, let's pick up the pace a little and edit the rest of your pages, okay? So to do that, we want to make sure we refresh it to save all of our changes.
Then we can simply go to the front end of our website removing all of this and now we can visit any page that we want to edit. to edit this about page, so I'm going to click on this about page, so what do we want to do on this about page? I want to reduce the space. I think it's too much, so I want to reduce that space. I probably already know how to do that and then going down here I want to make this section a lot simpler, maybe make it one column and put our story at the top because maybe this section about our team and then down here no I think I need these different sections here, they're cool, but I don't think we need them, so let's get rid of that and put our team members, maybe one team member here, one here and one here, something like that table of functions that we have. i made it on the home page so let's get to it scroll up that's edit with Elementor up here since we're on this page okay and first let's shrink this here let's shrink the top and bottom I'm sure who already knows it. how to do this you click on the whole section you're going to advance and we put 160 at the top and 160 at the bottom which looks much more compact and to me it looks much better, right now let's delete these nature lovers right here that delete it, we'll change this to our story so you can type it here for the text right here from our story and let's click on hold and drag it to this column and let's delete this column right here by right clicking on it and deleting it, let's click on all of this and let's reduce the space up here, so let's go to advanced and for the top padding, let's make it 80 for the top and 40 for the bottom, let's check our work real quick, it looks pretty good and let's click on this whole section again. and we go to layout and we don't want it to cover all the text because it's hard to read when it does all the way, what we want to do is contain the text a little bit more so that it has space on the left side and the right side look a lot better, so let's make it a width of 800.
We can get it if we don't just type it here and that to me looks a lot better, it's nicer to look at and the next thing we do is What we're going to do is we're just going to delete these two sections right here, we don't need them, so delete and delete, bye, then we'll add a new section and we'll add three different columns here, we're actually going to add a new section right here that our team will say, so I'll just add a sign more here and it will be a single column that will span the whole way and then I will just paste it. our team, so we're just going to paste it and change this to our team, then we're going to go ahead and center that and then we're going to click on the whole section and we're going to go to advanced and unbind the values and for the top fill we're going to do 40 and for the bottom fill we're going to do 20.
Okay, actually we're going to change this a little bit in the advanced and we're going to make this one 120 and this one actually 60. While we're at it, we're going to do the layout with 800 for this one and then we're going to go to the elements right here and we're going to look for an image and we're going to see this image box and we're going to drag it to the first column, now we're going to click on choose images and we're going to upload some files, so I'm going to upload files and I'm going to select files and then I'm going to choose these different people right here .
You can press Ctrl if you're on a PC or Command if you're on a Mac to select multiple files and then press Open. They're all going to load here, but we're just going to select one file so it's okay, so we're going to insert media and she's going to be there, then we can go to the style and we can make the width of this 100 percent so it's bigger and after that. we can duplicate this three times by right clicking and hitting duplicate, right clicking and duplicating again and then clicking hold and dragging to each of these different boxes and now we have our team, but they're all the same person so we need to keep going go ahead and change that and put their name here put those names and then change the profile picture to some different people insert and click and insert this guy okay these people have wrong names so let's do that again and answer this guy for that and this one for her okay that's much better so now we have our story on our team and it looks pretty good we can go ahead and update it and then we can preview what it looks like and then we can get out of there. and if we go to the About page, we can see our changes and it looks pretty impressive, so the next thing we're going to do is edit our services page right there and we're going to add some. images, so let's go ahead and click on our services page and what we want to do on this page is reduce this space here and here and then when we scroll down, we want to add images below here to each of these services . this could be like our service 1 service 2 service 3 service 4 and we want some images underneath here, so we'll just click on edit with Elementor and to reduce the amount of space between here and here, you probably know how to do that. do it, click on the entire section and click advance.
We're going to make this 160 on top and 160 on top. Next we're going to scroll down and add images here, so all we have to do is click on this elements button and then click hold Pressed and dragged an image and now we can choose our image from the image. library again you can find these images in the description below or on my website so I'm just going to upload files and select files and I'm going to select the files that I want from the gallery images and I'm going to select desert and command and click or control and click if you're on a computer walk safari and a stampede there you go and I'm going to open them up and choose safari for the first one and insert media once I do. which we can do some cool effects with this by clicking on it and then going to style and then on hover, if we click on it, we can see the animation of the cursor, so when we hover over it it doesn't do anything on right now, but if we put shrink, hover over it and now it shrinks so we can tap and grow or we can pop and sometimes it's just a fun way to add some cool effects, we're going to add the hover effect just because it's not that noticeable or too distracting.
Alright, once we do that, I'm going to click here again and duplicate this a few times and then I'm going to click Hold and I'm going to drag them into these areas here and sometimes you're going to have to move it a little bit to make it register and that's what we will do, once we do it, then we have to change all these images, so just click on them, go to the content and choose another image, maybe we will stampede for this one. and we'll click on this one and choose the image, maybe do the hike for this one and for this one we can do the desert right now, all we have to do is change the names, so I'm just going to change. them very quickly and we're done with that and we're done with that page, we can refresh it and we can see our page by clicking preview get out of here, remove all this preview stuff right here, here's our page. we have it from time to time, when we hover over it, it has that cool little effect and I think it looks super awesome.
The next page we are going to do is edit the projects page. there and what we want to do on the projects page, if we click on it, we want to add a gallery, so some images are here, so there are a bunch of different images, maybe you have different projects that you worked on and you want to show. all your work, so that's what we're going to do, we're going to click on edit with Elementor and we're going to go ahead and click on the whole section because we're going to reduce the size again here because I think it's too big for 160 and 160. and then we're going to get rid of all of these sections here so one and two we can keep the call to action section, okay, we're going to click and add in a new one column section right here, so once we have our one column section here we want to add a gallery to it so we can click on these elements here and just type gallery and the basic gallery is great so we click hold and drag it there, next we want to add images to that gallery so we just click this and then we'll load the images and select files and then we'll have all the images in our gallery right here. to click on the first one and hold shift and click on the last one to select them all and press open and they will all be selected and they will all be loaded all now that they are all loaded we can make sure that We are all selected and we press create new Gallery.
Once it's inserted, we can resize the image to medium and it looks pretty good. Then we can click on the entire section and we'll give it a little more space by going to advanced unlink. the padding and get to 80 at the top and 80 at the bottom, that will give you some space up here, space up here, the gallery looks super awesome, so let's click refresh once it's updated, we can preview the changes and get out of here and just go to the normal projects page and we can take a look at the new projects page, it looks fantastic, obviously we can click on any of these and we can scroll and it looks really cool, so now we are done with the projects page, so the next page we are going to work on the contact page, so let's go ahead and go to the contact page, and what we want to do on this page is like this Once you delete all the space here, compress it a little bit like before.
I'm sure you know how to do it from time to time here we're going to change this, uh, contact us, let's duplicate it, put it here, add some social media icons here, I'll show you how to change everything. this information and finally in this map here we will show you how to change this map and change the settings, for this all we have to do is click on edit with Elementor and the first thing we are going to do is change this right here, so click all. section go to advanced instead of 250 let's do 160 and you can click on the tab twice and then do 160 again that looks pretty good so let's duplicate this contact us so just right click or command do click or control, I think, and press duplicate. and then click hold and drag and then here instead of this, follow us because we're going to put social media down here so we can find our social media icons right here, so let's go up here and find social media and then click on hold and drag down follow us and then we'll align this to the left and you can always add a new one so let's say we have an Instagram we can click on it and we can put a link instagram.com and we can change the icon and we'll search instagram so there it is and we can insert it so we can also change the shape or the colors or something like that, we can make it round or square or circular and that will change up there.
We'll keep it rounded, that looks great and then we can scroll up and go to the style and we can change it to the official or custom color if we want and we can change any of the colors so we can make it a nice blue or black. that looks pretty good and we can change the secondary color, which will change the color of the inside and we can also change the size, so maybe we want this size to be 20 pixels, but maybe we want to keep it at the official color, like this that we could just continue.
That way we can also change the spacing a little bit, so make it a little bit wider, maybe 10. And you have a bunch of other options to choose from to make it exactly how you like it and voila, this is how you place your network icons socials, if you want to change this, which I'm sure you want, you can also edit it so that you just click on it and then for the elements of the first one, let's click on it, we can change thecustomize and the first thing we want to do is get rid of this old text so I'm I'm going to click on the header and then I'm going to click on site identity and then I'm going to scroll down here and where it says show site title, I'm going to uncheck that so it goes away. and then I'll click back and I'll go to the transparent header because this is a transparent header right here, transparent header and then I'll select the logo, so I'll select the image and then I'll select my white logo, which I think is this one, so I'll upload files , I'll go here and put them there, choose an image and it will appear right there.
If you don't have the right width, we can adjust this width, but 250 is great. for me and now that I'm done with that, we really need to change it for the pages that don't have a transparent header, like the blog page, so we need to go back and go to the site identity again and now Let's load our black logo, so select and upload files and drag the black version and then we'll select it and skip the clipping and now it's there, but we don't see it because we're not on the page right now. and now if we scroll down, it asks us if we have the site icon and we do that.
That's the icon that goes up here, so we'll select it, upload files, and select the last one. one, then we're going to press select, we're going to skip the crop because we don't need to crop it and now that little logo is up there and that's super cool, once we're done with that, we can get out of there and we can click publish and get out of there and now we have our logo up here and if we go to the blog page we have our other logo and it looks super, super good, that's how it's created. and insert your logo, the next thing we will do is design your blog, so we have already entered your blog post right here and if we click on your blog posts, we can see that your blog posts are here, but not are designed, so we copy and paste all the bold, all these links and all that, so maybe we want to be a little bit different, maybe we want an image down here, maybe a list down here, maybe we want to add. a button down here somewhere and maybe this blog post at the top can have a featured image here and maybe we can also learn how to put different subtitles on, so let's learn how to do all that right, so all we have What to do is click on edit blog post or from the dashboard we can click on posts and if you want to add a new post you have to click on add new but we are just editing our post so we will just click on our post and now we can edit our blog posts, the first thing I want to do is maybe add an image, so let's add some space and mouse over and we see this plus button, so we can click on the plus button and we can choose an image and that will place our image there and then from the media library we can upload files or get them from pixabay or select them from our library and maybe we want to go into this desert right here and press select and that will place it right there, the next thing we can do is create a subtitle so we can highlight it here and we can click on it and we can go to the header and a header will be created so we can create it. h2 or h1 h1 is usually the main header h2 is the second header that you would normally use on your pages for subheadings and then h6 is the smallest header, so the largest and smallest you will probably want, although here is fine and then we can also bold things by clicking, highlighting and pressing bold, we can also make it a link by clicking and then adding a link, maybe this is a link to the About page, just type about and we can select that page and all this is super easy, like Microsoft.
Word or Google Docs, we can also make a list if we want, so maybe we want to list it here somewhere, so we just add some space, see the plus button and we can make a list, so there's our list and such Maybe we also want a button, so maybe we make a space for the button here and we can add the plus and we can explore everything if we want to see more and we can look for a button and click on it and then add whatever we want. like contact us for more information and we can also make that button a link to go to the contact page, so there we have it, there's a lot more things we can do, but that's the basics, it's pretty simple. add a featured image here and now it will also appear on our blog page so let's click here on settings and let's go to post here and then under the featured image we can set the featured image so maybe we want this mountain is down here. be the featured image and just click on set featured image, then we can refresh it and we can preview the blog post, we will get it on the desktop and we have that featured image there, the new image, the new subtitle that bold this link right here. and this link down here and this list, so it looks pretty good.
If we go back to the blog page and leave here, we can see that featured image is showing on this page, so that's great, let's add another featured image. to this blog post right here by clicking on it and then just clicking on edit post and then going down to set the featured image and let's find maybe that elephant and set the featured image and then we can update it and then we can preview it and go out. from there and we can see that featured image right there and if we go back to the blog we can see our two blog posts with that featured image, but what if we don't want these featured images here and we want to change the content that's there? on this page, how do we edit this blog page here?
Too easy. All we have to do is go to customize here and then just click on blog and then click on blog archive so here we can turn featured features on and off. Image if we want, I'll keep it on, although we can also turn it on and off if the comments are here, so this would say like three comments. If we have any comments, we can also click on and off the category and author. I'm just going to delete the category and we can also change its width, so if we want it to be a custom width, we can change that as well, we can make it very thin if we want, but I'm just going to go back to normal size, that's how to edit this page .
There's also a few more options down here like what type of font you use and things like that, but that's fine with me, so I'm going to click publish and then I'm going to go out of there and now that we're done designing not just the blog posts but also the blog page, the last thing we will do is go back to the home page and what we will do is edit its footer. Your footer is at the bottom of your website here, so I think what we're going to do is make this font bigger, maybe change this text here.
We'll add some links because if someone gets to the end of your website, you might want them to have some links so they can browse your website instead of just leaving and then we'll edit the contacts section down here and finally we'll remove it with technology of creating a website, we'll take this and place it in the center here, so all we have to do is go to the dashboard and then under the skin, we'll see header and footer blocks and we'll click on that and where it says site footer, hover over it and click edit with Elementor, so now I'm going to change this, I'm going to make it instead of h5, which is smaller, I'm going to make it h3. which is bigger and I'm going to do that with all of these right here, so make them a little bit bigger with this contact as well and then for this one I'll write site navigation and for our about i'm going to enter something else.
I'm going to write learn how to create a website with WordPress step by step, so what I want to do is add links right here, so I'm just going to click on this and press delete and then up here I'm going to search for navigation, I'm going to choose the second one and I'm going to click hold and drag below here then for the layout I'm going to choose vertical so it goes up and down and then I'm going to go to the style and change the color to white so that the text color is white to hover over the links .
I'm going to make them red, so I'm going to choose maybe this red and now when you hover over it. It's going to turn red and then we're going to look at this on mobile to make sure it's okay so we're going to look at it on mobile and it's going to collapse here so we don't want that to happen so we're going to go up here and go back to content then design and when we see a breakpoint, we'll choose none, so it looks pretty good, let's go back to our desktop view and go back to the contact section and edit some of these, so we'll just put in all this information, then the phone number and email.
Everything looks great except this powered by create a website, we don't need it there, so let's delete this column by clicking on it and pressing delete and then center this. clicking on it and making it go to the center, now our footer looks great, let's refresh, let's preview it and get out of here and now this is just a preview of our footer, so what we want to do is go back to our main website so we can delete all of this right here and go back to our main website and if we scroll down to the bottom we'll see the new footer and it looks super cool okay there's one.
There is one more optional step if you wish and that is to log out of your website. Obviously you don't have to do this, but I like to do it, so what you can do is go here and press log out. log out of your website of course if you want to log back in just move forward with wp dash admin slash but I want to log out completely and now I'm seeing the website as a visitor would see it and it looks amazing, so now we are done with the whole website, congratulations, you guys should be very proud that we did it all step by step without skipping steps, so remember to comment, rate and subscribe and if you know anyone who wants to create a website, send this video to them I'm tyler moore thank you very much
If you have any copyright issue, please Contact