How to Make A YouTube Video for Beginners START to FINISH!
May 01, 2020welcome to the complete tutorial on how to edit and upload a YouTube
video
from scratch step by step, fasten your seat belts and get ready because you might want to grab a journal to write something down if you are recordingvideo
s on your phone or if you have your equipment with you, pick it up, Grab a drink because in this video I'll walk you through how to prepare your gear, set up your camera, and record a YouTube video that gets views. We will talk about thumbnails and how tomake
a thumbnail photo and how to edit your thumbnails how to edit your videos step by step and then upload them to YouTube in the most complete free tutorial on how to create YouTube content online, period and between each part of this mega four-part video.
I'll answer top questions from the think media community on each of these topics, but if we're just meeting, my name is Sean Kennel. I'm the author of YouTube Secrets and my passion is helping purpose-driven people grow their influence. online video, but now it's time to
start
part 1 of setting up our equipment and filming our YouTube video, so fasten your seat belts and let's getstart
ed with the video. It can be frustrating because there is a lot to learn when it comes to camera settings and what equipment you need, so in this video I will explain step by step how to create a YouTube video with the equipment I am using, the exact settings on this Canon m50, but it will be relevant to whatever type of DSLR or mirrorless camera you are using and ultimately how to edit it and put it all together.
More Interesting Facts About,
how to make a youtube video for beginners start to finish...
Hey what's up? Shine the candle here and I believe that the media gives you the best tips and tools to build your influence with online videos and on this channel we do a lot of tech equipment reviews as well as strategy videos on how to build your influence on social media, so if you're new here, consider subscribing, but hey, we're starting a four-part series where we're going to look at how to shoot a great YouTube video with the DSLR or a mirrorless camera like the Canon M 50 or the SL 2. I'm going to talk about how to take thumbnails and go from taking the photos to editing them. then how to edit the video and then also upload it, so we're going to take your concept all the way to YouTube content creation, so let's dive in right now with the equipment we're going to use to create this video, for the first part. let's start with the exact gear that we're using and we actually just put together a new guide that you can get, think gear guide, where we'll list everything that I'll link in the description except our main camera for this. shoot is the Canon M 50 and the reason I love this camera is because for around $600 with the kit lens, in my opinion it really is the best all-around camera for YouTube, still, I mean the flip screen and the microphone input, and We talked about some of that stuff, but in the gear guide we cover all the different types of cameras for different budgets, so definitely check that out, but for the gear that we're using we have the camera, the main lens What will I use?

The video I'm creating for my other channel, Sean thinks it's the 11-22 lens because it's very good for small tight shots to get a very wide shot and good for vlogging using a task shotgun microphone right on top here a bit. A little later in the session I'll use this buoy microphone and then I also have the kit lens. We won't really use it today, but we'll use our 22 millimeter pancake lens a little later to get a nice sharp shot. with a blurred background and finally I have a KNF concept tripod here that I'm going to use because I'm going to create this video as a solo creator like a lot of us are in the slim community so this is the complete kit I have an SD card and Altogether you can purchase all this for a little less than $1000.

You don't need all of this to get started, but I think these are the ultimate kit for creating. some videos kill you so we'll get started in just a second but now let's talk about the settings before you start shooting now go ahead and grab your camera no matter what camera you have to follow but if you have your m50 it grabs it and normally , when you start recording videos, you probably choose the video mode on the top of the camera and that's a great way to start, when you do that, you can go into that video mode and you can put on auto exposure, if you want that the quickest way to set up your camera and run auto exposure will be automatic everything may not look the best in some motions in some situations but it's really good now you can also do it manually and we I love manual and if you want it adjust every detail, that's a great option too, but we've discovered a hybrid mode for an easy way to do it automatically and we'll show you what it is, so we're actually going to do it.
To start with TV at the top, which has shutter priority and you can look for that on your camera when it's in shutter priority, which allows us to prioritize what is going to
make
the video look best, so let's talk about it in priority shutter. What we're going to do is hit the cue stick and we'll review our settings. First of all, we'll do auto white balance so it's quick and then we'll do auto picture styling so the colors look good. If we were color grading later I'd shoot in neutral, but since we want this to be a quick edit and export, drop it into YouTube, we'll just have the auto white balance on auto in that image profile and then I'll choose a focus mode automatic of my face at least initially when I'm vlogging and I'm on camera.I'm going to record a video for my Shawn Kennel channel of a tour of the home office, so when I'm on camera I'll do that. the face focus and then when I'm taking shots of the room I can do a kind of zone focus and hit certain areas, but the most important thing here now is our frame rate, so if you want 24 frames per second , which is kind of a film look, you can choose that if you want more slow motion or faster, if you're playing sports or something you can do 60 frames, but normally I shoot at 29.97 or 30 frames per second now if a Once you choose your frame rate and so you choose 29 frames per second 1080p is perfect, then your shutter follows the 180 degree rule, which means if you are shooting 30 frames per second you would want your shutter speed to be 60, if you were shooting 24 frames per second you will want your shutter speed to be 50 again. it's double whatever your frame rate is so the nice thing about shutter priority is that it will always keep the shutter at 60 so motion will always look good in the video and finally we'll go to ISO here and We'll actually set it to automatic so that way the camera adjusts the lighting brighter or darker accordingly.
Now the last thing to keep in mind here is that we're choosing this lens because we're taking these wide room shots and it's really good for vlogging. Canon 11 to 22 lens, but because the aperture is f4, it's a little dark, so the ISO might go up a little, but we'll live with it, I mean, it is what it is and ISO is where we are. I'm going to get that lighting and this is what I mean is if you want your video quality to look better, you probably don't want to go above ISO 400 or 800 on this camera if you just want to vlog and take people with you. . and you don't have additional lighting, then it might go up and it will only affect the image quality.
One thing to remember about ISO is that at lower levels there won't be as much light coming in, but there will be better image quality. If you can get enough light or can shoot outdoors, the higher you go, the grainier the image will be and the more it will crumble, so sometimes you will need to go higher to get the light, but keeping it as low as possible will maintain the quality of the picture. as loud as possible and with that we're ready to shoot so I'm about to start doing my home office tour here but let's talk about the mic setup at the end now because I'm going to be vlogging like this shotgun mic . it's perfect, it's a $25 shotgun mic and here's a setting I love: it's +10 DB, now some mics are plus 20, but a lot of times that's too much and will make the audio too loud, but plus 10 is perfect, so I actually have the mic on, I just have the high pass filter, so normal, just normal, and then I have the +10 DB, so that's great, so I go into the menu, go to 8 here. in the camera settings and we can go to san sound recording and make sure that the sound recordings in manual are fine.
If it's on auto it has this kind of AGC automatic gain control that creates a lot of noise and even hiss sometimes because it's searching for vocals, when it's on manual it means the audio is locked and the nice thing here is that I can take this setting here same and get the perfect gain for my voice, so if I'm right in front of the camera, I want it to never go into the red and just hit that kind of 12 dB which is our goal, so if I'm in yellow in front of the camera , I'm going good, that's nice and clean if I take it a little further and So the audio settings are going to be really crisp, our shotgun mics set up, our audio levels are set, all of our camera settings are set, like this I'm ready to record my video, so a couple of reasons why I love this setup is of course the foldable screen. so I can always get a good composition of my shots in front of the camera.
I love the wide angle lens, especially for a room tour video because it allows you to take very wide shots, but I also love this Joby tripod because I can't just vlog with it and take people with me, but then I can quickly put it down and get a good photo like this so throughout this video I'll be moving from room to room and this is a very versatile setup for all that content if you're looking for something. Home office design ideas. You will love this video. My name is Sean Kennel and I have been a full-time entrepreneur for over four years.
Before that, I worked freelance and from a home office. So in this video I'm going to be breaking down some of my favorite designs and inspirational images and various posters and things like that, as well as my charging stations and a couple other cool features that I think will give you some great ideas for your home office. now, after filming many scenes in vlog mode. I'm actually going to get behind the camera now, so a quick tip is you can rotate the shotgun mic so the audio is obviously kept in the right direction, clean and crisp, and then I also like to use the vlog mode.
Joby likes this where I squeeze it and get an extra point of contact, so now the camera can be a very stable shot if I want to walk people around the headquarters and give them a sort of tour, I can zoom in and the each other. What I'm going to do here is change the focus mode from face focus to zone focus, so now I can tap exactly what I want to focus on and not look for faces and potentially have focus problems, but this way. that's also an Ikea bookshelf and as you can see, I believe that lifelong leaders are lifelong learners.
I read many books. I'd love to always be leveling up and performing well, so let's talk about a quick tip to help you organize your footage when you're creating YouTube videos, so I've been filming this home office tour. I locked it in here and the loft and the other office that I took behind the camera in front of the camera, but what I'm considering all that is a term to remember is called role in editing, it will be the base layer of the video footage and the role is usually the person in front of the camera, it's where my audio is, where the main type of narration is, etc., and you've probably heard the term b-roll the reason it's called b-roll is because they are clips extras that we would place on top of the paper, so maybe while I'm sitting in a chair describing something I can place over a clip of what I'm describing and for the next part of the session, now that I'm basically done filming the paper, I actually I want to change lenses and the reason I mentioned all the equipment at the beginning was so we can use a different lens. and that is the pancake 22 millimeter f/2.
Now there are a couple of reasons to do this, but one of the main reasons is the aperture and what I mean is that f/2 this guy is f/4 this is f2 which is big. The difference between what a faster aperture will do and what the lower number with an f/2 aperture will do is allow the image to be better and with less light, basically it is a wider aperture that allows more light to come in. the camera and therefore in these darker scenes. like when I'm shooting here at f4 and I remember our auto ISO setting, there's actually not much light in these corners, this lens will make it lookbeautiful and will be able to perform better in low light situations, this lens not so much and then The other thing that f2 will do for us is it will give us a shallow depth of field and a blurred background, so before we
finish
this video recording some footage Additionally, what I'm going to do is put the camera on this tripod and for that I'm going to use this.I'm going to use this tripod to get some soft panning shots of the room again. This is a room tour, like a home office tour, so what I can do here is this KNF. The tripod has a nice smooth pan. I'm going to get some soft panning shots and I'm going to take a shot where I mount the camera here. I'm much further away and then for that we'll use this buoy microphone for this microphone. It's about $20, it's a lavell ear like the microphone we're recording this Think Media video on and that way if I get further away I can get that blurred background.
I'll get good audio because if I'm too far away from a shotgun microphone the audio won't be as good so thanks for joining me on a quick tour of the think media offices if you want to see any of the various decor now could you skip these other lenses and even this microphone and still end up this video, of course? But I just wanted to give you the complete kit that I would use to feel ready to create all the content needed to tell. a great story when you're good and I just
finish
ed filming all the b-roll clips I wanted to film, of course I filmed all the roles and that pretty much covers it, we have the right equipment, the sets we went to I filmed all our clips, but There is one thing we must do before starting to edit and that is to create the thumbnail.One of the biggest things that people miss on YouTube is saying, "Oh, shoot, I'm just going to pull a clip out of the video." for the thumbnail I recommend taking specific thumbnail photos and then I have some tips in Photoshop for editing your thumbnails so that's the second part of this video if you want to watch it click or tap the YouTube card or it will link to the series complete. In the description below, in part three, I'll explain how I edit this video and then in part four, we'll talk about the best export settings and how to upload it to YouTube, so watch the whole series and remember that you can.
In fact, download a complete gear guide with other tutorials, tips for smartphone accessories, not just the Canon m50, but all kinds of different cameras that we recommend here at think media grab, for free at think gearguide com. Now let's move on to some questions from the first part in the think media community series, so Sarah asks what are some shortcuts to make the filming process faster and more efficient. I think I have a couple of tips and the first is to describe your videos. You know that advance planning prevents poor performance. Plan your content in advance, the better it will be when you film it.
I think also having a checklist for your process and throughout this whole mega video there will be a mega list of videos and resources in the description below one of the best videos I have are on my YouTube list where I talk about the batch processing. I try to record more than one video at a time. I try to shoot two, three, four in a day, so I have a couple of shirt changes. I have outlined all those videos. make sure the batteries are charged, all that kind of advice, so if you want to learn more about Sarah, check out the checklist video in the resource guide and it very much answers the question that Dave is asking: do I really need 4k or do I agree? 1080p because my PC has a hard time editing 4k clips, well two thoughts Dave, the first is that I think a VP is still fine.
I mean, we are recording this video in 1080p, secondly, new information has emerged that, heading into 2020, here in the United States there will be over 50 percent of households now have a 4k TV in their home. You know that most of our smartphones have 4k resolution even though they are a smaller screen, so 4k is becoming more common. Do I think you need it? No. I also agree with you, it is more difficult. editing it takes up more space on your computer, it can be a pain, but if you really want a future-proof version then it may be something you want to invest in now or at least start thinking about how to direct your content and strategy towards To the future, James asks: can you do a little more with the custom settings for the m50?
My first efforts with her were horrible. Well, James first of all, it doesn't matter what camera you're filming with, if you're watching this video, you should hit. yourself payson patience your first videos will be your worst videos and yes we actually have a video where Omar from the think media team went through some deeper custom settings for the m50 so we'll put that in the guide of resources, ask about mtech accessories. Are you using a Takstar microphone? Yes, for the m50 setup and the Shotgun microphone I talked about in the video we just watched. It's a great Tax Star microphone that won't break the bank.
Kath asks how you can let your voice be heard. this overcrowded platform called YouTube is a big question and not really the topic of this video, but what I would recommend is our free YouTube masterclass. Actually, I think the master class is quiet and I actually have a little spot that you can see about this right now. Are you ready? To start or grow your YouTube channel, are you feeling stuck and need help connecting the dots? Join this free web class where you'll learn the step-by-step guide to YouTube success. We've helped thousands of purpose-driven entrepreneurs, just like you, grow their influence with video sign up today for this exclusive training at think masterclass com.
The next question Mike asks when creating tutorials. Is it better to record a short introduction about what you are going to do in the video or should you go directly to the tutorial? It would be beneficial to upload two versions, one with an introduction and one without, so I would recommend that these days here at think media we are trying to get to the point faster. You know attention spans are getting shorter and shorter on YouTube, so if you do it. just dive right into it, it's a long time what people search for, maybe they know the title and the thumbnail has described the content, so you can get to it quickly, however it's also good to give some kind of introduction, establish the context. of the video and eventually you might want to introduce yourself, so my advice here, Mike, is to experiment number one, get to the point as quickly as possible, whatever that means to you and don't upload two versions.
I think that would be a little strange. So that your subscribers have the same video in two different versions, what I would do is try different styles of videos, see which one works best, and then duplicate what works. Jerome asks if it is necessary to always upgrade to a professional camera when making YouTube videos or is there no problem recording from your mobile device? I find it much easier and less time-consuming to edit from your mobile phone. Well Jerome, it's a great point she makes here and I have two thoughts: the first is the best camera to start with.
There's always the camera you already have, which is probably your smartphone and I know we're talking about the Canon M 50 in this mega video, but a smartphone is a great way to start. In fact, we have a four-part series here. in thick media where Heather explains how to record, edit, and upload with just your phone, so we'll be sure to link that in the resource guide from my perspective, one of the reasons I like using a separate camera is number one. I don't like to fill my phone with data, I mean I've already taken too many photos, videos and Instagram stories as is, so I like to capture to an SD card and keep it clean so I can record the footage, capture it on a laptop or a computer that you have editing, be quick and keep the content separate, then the content that is on my phone number two, if I'm going to do a vlog, the front camera on our phones is usually not as good as the front camera, especially I like on newer iPhones or whatever, these cameras are amazing, the selfie camera is okay but not the best, it's still perfectly fine for YouTube, but I think there's something powerful about a separate camera that can give you good quality and has a nice screen for selfies. you can capture to an SD card and have a separate workflow and then make your phone a separate part of that content process, but here's the deal, always start with the camera you have and by no means think that your camera It's going to limit you. of success on YouTube, in fact, the rest of this video will still help you take thumbnails and edit, and you can do all that just by editing with the content that a smartphone creates or an iPad or something like that, so the best camera What you can have is You always have the camera, you have fear on your face and it starts.
Don asked. I'm curious if the cameras you recommended have clean HDMI outputs. Now for context, this is in case you want to use a Canon m50 or SL on an IV. Whether it's a Sony camera for live streaming, you want to use the HDMI port to connect it to your computer and stream live to YouTube or Twitch, so it's a great ask. I bought an SL two before I knew what a clean HDMI output was. I knew I wanted to expand into streaming, but I just didn't have all the information I needed, so I ordered an SL 3 for that feature that will be streamed at an event on Wednesday as a test drive of my setup.
I love the question John here's my Best recommendation is a really cool device called cam link from El Gato and there's a 4k cam link from oh my god oh it's a little device that plugs right into your USB port and then you Allows you to connect an HDMI cable to capture a camera. like the SL to a Sony Panasonic 6400, any mark on that HDMI input, the reason you want to clean the HDMI output because if it's not clean, maybe on the screen, when you're streaming live, it'll say like 999 photos and you'll show the battery. meter, it shows you as parentheses, it wouldn't be a clean image and some other problems also arise, does it have unlimited recording time or can the power stay on continuously because if you are streaming live from a camera to your computer and the battery runs out in the middle and you can't plug it into the wall or get an external battery or something like that again, the camera is not going to support live streaming, so if that's one of the priorities. for you, go to cam link website.
I will link you exactly to the page in the resource guide of cam link recommended cameras with clean HDMI outputs and then you can predetermine if your camera will be ideal for streaming, for example the m50 works, but it actually has some problems if not uses third-party software, so if live streaming is a priority for you, definitely check out that page before investing in a camera. Martin asks Aloha from Honolulu Hawaii. I have a question that I'm still debating. on which camera should I buy for vlogging, the m50 or the a 6400, what is the best microphone solution for the sony a sixty four hundred, thank you very much, I appreciate the question, martin, I still think that in 2020 and beyond, those They are still two of the best cameras on the market, the m54 definitely has more budget.
You can restore these things on Canon's website for around four hundred and seventy dollars. Now it's pretty crazy that it comes with a one year warranty and then the sixty four hundred will be. a larger investment. I think now Sony's sixty hundred is a more accurate comparison feature for feature two, the m50, and even that's a little bit more expensive, it basically comes down to this Martin. When you invest in Sony, you will pay more. for the lenses, if you get that wide lens for vlogging, you'll pay more for the body when you invest in that, but you'll also get 4k and be a little more future-proof.
I think the m50 is still great. that's why it's the main camera that this series is based on, so definitely check out the resource guide and we'll link you to our main comparison of those two cameras. The decisions are up to you, this is what you will probably have in both cases. as much as you want, unless of course you really want to delve into 4k then I will definitely recommend Sony. Well, we'll answer a few more questions in just a second after the second part of the series, which is all about thumbnails, but if you're getting value so far, hit the like button and now in the next section of the mega video, we'll talk about how to take thumbnails from a photography point of view and then edit them step by step in Adobe Photoshop.
Let's get straight to the point: getting views and growing thumbnails for your YouTube channel is very important, so in this video I'll share some tips from my thumbnail process andwe will cover the actual photography of the shoot. thumbnails now we're going to take them into Photoshop and go over some basics on how to make your thumbnails stand out more so people click on them and you can get more views on your videos, everything that's coming up right now, hey, what happens? Sean Kennel here. Think Media gives you the best tips and tools to build your influence with online videos, and in fact, we're in a four-part series on how to produce YouTube videos that get more views.
In the first part we covered how to record a YouTube video. and I just finished filming with the Canon m50. Here's a tutorial that if you missed it and want to watch it, I'll link to it on the YouTube card and I'll put a link in the description below and it's actually something you can do. follow with any DSLR or mirrorless camera, but before we start editing, which will be the third part, we need to create our thumbnail and the reason we have a dedicated video just for thumbnails is because it is so important now as one of the most important.
The mistakes people make, I think, are forgetting to take intentional thumbnails. Have you ever done it before? Let me know in the comments that you like to finish editing and then shoot, what should the thumbnail be? and you are looking for a screenshot. I recommend it. taking intentional photos where you think what my emotions are on my face, what am I doing in the picture, what would people want to click on, so let's dive into that right now, right now I have to mention that if you want to see the finale. The video for this tutorial series ended up on my Sean Cannell channel and what it is is a home office tour with some home office decor ideas, so what I want in the miniature is some way of displaying it and so what's interesting about it if If you're taking miniatures yourself, I recommend having a tripod and using the camera's timer, and maybe standing in front of a simple background or any something else and start the timer.
You could also use the app so that if you're using your phone, you can take photos from your camera in case you're creating as a solo creator and need to take your own thumbnails. In this case, I'm going to put this in a kind of selfie. mode so I have my Joby 3k here and we're actually going to set an aperture priority that's going to focus on the aperture that's going to be as low as possible at f/4 because the 10 to 22 lens is as low as possible and then , on top of that, we're just going to use ISO Auto because that's going to make the lighting perfect and I'm going to go to the sign here, go to the timer and just put it on the selfie timer two seconds, you know ten would be nice, but you have to wait a lot of time, so it's nice that the m50 has this two second timer and then I'm going to be able to compose the shot with the folding screen here and just like it's a tour of the home office.
I'll be thinking about where I'm looking. I want to make sure I'm looking at the lens and not the selfie screen or maybe I want to look left or right for when I arrive. The miniature is one of the most important things I think about: emotion. A couple of tips about thumbnails. Usually the people in the thumbnails are stronger on YouTube. Tests have shown that if you look at people's eyes, you see the emotions on their faces, which can really attract you. It's overdone and we've all seen those really shiny thumbnails with crazy faces but I think there's something to it so always include your own style so my goal here would be to think about where I am in the shot and think about the background. from the office here and then all I have to do to start taking some photos is make that two second timer to have the photo sharp now, another tip here is to take several photos for large videos which are very important to us, a Sometimes I even take pictures in different places, you might want to take one here.
I think this will be perfect for this particular scene, also if you want to keep things simple, just set your camera to a JPEG image, which is its most basic type. image is fine and basically you will be able to use the photo directly from the camera, sure you can edit it, but because I have Adobe Creative Cloud, which I highly recommend as you evolve in your journey. I use Lightroom Photoshop Adobe Audition for audio and Adobe Premiere for video editing and then post effects if needed for motion graphics but I generally don't take it that far and all of that comes in Adobe Creative Cloud if you're really just doing a test it includes a link in the description below.
I think you can try it for free for a few days and the nice thing about that is I want to make sure I shoot in RAW and that way if the image is too dark or I want to change the white balance it gives me a lot more flexibility later on so that's it another setting that I have activated. I'm actually taking large JPEGs and I'm also taking raw files so it says that's the big JPEG right there and then you've also got raw, this new one is actually a Canon creative raw which would also be nice if you upgrade your Lightroom or Photoshop again to keep it simple, don't even worry about this, but if you want the best, you know. possible quality.
I have it too raw, so now let me take a couple of different versions. I'd probably take six to twelve photos because you can always delete them, but once you sit down to edit, later it's like you know it's dark and all the lights have gone out. You look like shit. I don't really have any good options. I've never regretted shooting, so let's get a couple more now. Alright. Clean and pleasant light. I like it. with my eyes looking, I can always crop the image. The last thing I'm going to do here as we get closer to our you know, we're taking about twelve different photos.
I really want to follow the rule of thirds, so when I think about the shot. composition, there are all these nice posters around here, there's the chair and some other clutter, so what I'm going to do is get the focus right and then change the shot to show the office, so I'm basically framing myself. Behind all these things I don't want to see, I loved the camera lenses there. I always like to position myself as close to the edge of the thumbnail as possible, really thinking about the framing, and again, I don't mind having options. Here we go, let's do a final one, okay, we took our thumbnails on the m50, so now let's take out the SD card and capture those files.
Okay, now that our files are captured, let's review our options and then we'll bring them in. Photoshop, so here's the full session. I can open them and then click on that one that's a little bit out of focus and that's why it's good to take multiple photos. You have different options that you can review to find the one you ultimately want to use. I really like this one. I'd trim it here, so maybe we'll stick with that. Let's look at these others and remember that by having many fun nail options, you can potentially get that perfect thrill. or facial expression you want I really like the eye look because it draws attention to maybe some words that we can put in here, so let's go with this one, it's eight to eight, this unit of raw files, drag this here to Photoshop and perfect love. in this photo and now I have the Camera Raw setting which again, when you shoot in RAW, you'll be able to have more types of micro adjustments, maybe I actually want the background to be a little bit darker because it's all about emphasis, you know me for a miniature, the face really matters, the eyes matter, if you can include the eyes, they have those characteristics, studies have just been done that have shown that human eyes and faces work very well in miniatures, which is why this photo looks very good. es and of course we could make a lot of adjustments and things, but I think we're pretty good at following it as is, so what I'm going to do is press Ctrl J.
I'm using a PC that duplicates the layer and to be able to change the size of our canvas and this will allow me to go to the exact thumbnail size of a 1080 thumbnail, so 1920 by 1080 is the resolution, if I click here, I'll hold down the shift key to maintain the resolution while I do this or I'll hold you so the image doesn't stretch weirdly Ctrl + to zoom in and this gives me the ability to fit the image within the frame that will go on YouTube and I have those cameras. Behind me I don't know if anyone would notice what they are so those lenses might be unnecessary the main thing people will see is this kind of cold light and that's okay so we have that and the next thing I want What What I do is add some text here now, the title of this video.
I like to plan ahead, if you can do the research before you hit record, it will be 10 great home office design ideas, but one mistake people make is trying to include every word in their title and thumbnail, you don't need them all, but sometimes it's nice to put some words on your thumbnail, so I'm using the text tool and I'm going to choose one of my favorite fonts, which is Helvetica Helvetica new and then there's a lot of them. of niche fonts within there, so I'm going to use Helvetica, new black italic, which is one of my favorites, perfect, okay, so change that to white.
You've got my toolbar here, let's zoom in on our Photoshop, okay, cool and one of my favorite things is just to keep it really simple and readable, so I'm going to drag a little rectangular box now Photoshop works in layers in the bottom right corner of the screen, you can see there are such cool layers that are now on top of this little box and I think what would be nice is if I stay calm, I can stretch this. I can make it bigger, very easy. I always keep the shift to preserve the and make sure whatever is left doesn't stretch.
It's strange, one of people's big mistakes. What they can do is skew your image, like stretch a face wrong, or something can look very, very ugly, so let's be cool and put this up because the way the image looks I'm going to fix Hort of my text up here. now I'm going to press ctrl J which duplicates the layer, so I selected the cool layer here now it's a cool copy and I can change the word to office, so go to the office, stretch this cool office now to get a little bit of contrast. I'm going to make the office black so it stands out a little more from the cool, position my control stand to the left or right to make the lair go up or down.
The other way you could do it is just drag layers here above and below your words, so there's the office word, there's the white rectangle underneath. I can tilt it by grabbing the edge, turn it a little bit, shrink my box around it, perfect cool office and finally we'll go with the ideas, so same thing write the full title of the video. This case will be ten ideas for the home office. I design ideas, but you don't have to repeat every word, so that was the main thing that people searched for. They are looking for things for the home office.
I duplicated my white box. I'm going to change it back to black now. I think I accidentally did it twice, so I'll delete one of those layers. Control the bracket to lower that layer. I'll delete one of those extra rectangles. Perfect, so now the ideas have some emphasis and you know. your style I encourage you, of course, to always have your own style and it's not that my style is right or wrong, but a priority I have is clarity, as I really believe online that if you confuse, you lose, that's why I want I like simple fonts. like readable fonts, sometimes if things become italic in Comic Sans and are hard to read, so you want, I prefer clarity to being clever or even being cool, so the dolls are nice and simple, so we have ideas great for the Ministry of the Interior.
I still have my den here if I want to move around here a little more. Whatever I'm looking at directly for ideas and beyond that, we're almost done, but there are some things I like to do as well. I notice that when you think about your thumbnail when it's online, sometimes the title is too high up, so if you can move the text away from the edges, that also helps avoid putting text in the bottom right corner because that's where there is the timecode on YouTube. through those best practices, the last thing I like to do is put a layer right on top of my photo and it will be levels and levels gives me three sliders here on the right that you will actually see that I can make the image brighter and Also I can take it out on this side and make it a lot more contrasty and make it a little bit darker so what I like to do is get the thumbnail to stand out something when it comes to thumbnails that people have studied is what you usually want to add a little bit more saturation.
I can make another adjustment layer for that. I could add intensity here and I could add a little more intensity. You'll do it a little bit more, maybe more than you normally would if you wanted your skin tone. to make it more matte and natural, but again a thumbnail is so small that you want it to stand out, so that's a little moreof intensity and saturation, the levels can make it a little bit brighter, but if we want the background to be a little bit darker and we're pretty much there sometimes this is a little bit more advanced this is just a miniature tutorial for
beginners
and I encourage you Check out some training links in the description below if you want to delve into Photoshop and really master it, but one of the things I like to do is add a blank layer here and use the gradient tool to make sure my gradients be in black and so be it, and if I drag it from here, I can make it into a gradient like that makes it and I'm removing it just for something like that and then I can use a Pasady opacity here to bring down and even darken that edge, so maybe this More interesting ideas for the Home Office appear, but at some point you could infinitely modify the details of something like this, so I think we are really ready and this should be a super solid miniature, so now our last step here is just go to save file as and our final format.What I like to do is keep everything organized in Dropbox by month and that way we can easily access it from my phone and anything else, but what I really like to do is save the file. PSD, so I can always reopen it and edit it later if I need to so I can tile it, you know, ten cool home office ideas and then I saved that Photoshop file in case I want to open it later to reuse and then I'm going to say save as JPEG and that's the exact file that we'll upload later to YouTube as our thumbnail.
Okay, a few other things you should know about thumbnails and the first one is again if you want to use Photoshop. I understand that this was not the case. a super in-depth tutorial on Photoshop, there are some free ones on YouTube or you can visit a site like Linda, so I definitely recommend expanding on it if you want to use Photoshop, but I think some of the concepts can be applied here as well. We'll be covering more miniature tutorials in the future here at think media because we definitely film them outdoors in a different variety, whether you film them alone or have someone help you, so look out for those videos in the future and make sure you're subscribed.
Also, if you received value from this video, can you hit the like button and this is what's next? The next video is now about editing in the first part, we shot all the footage with the m50 in the second part, this video is about getting the right shot and editing your thumbnail, but then in the third part I will edit the footage which I recorded in our final video. This will all be included in a video that you can watch on my Sean Cannell channel so you can see the final products, so I'll link that in the YouTube card and put it in the description below and then of course in the In part four we will talk about exporting it with the best settings for YouTube, which will help guide you from concept to completion for creation. content with whatever camera you have, but especially if you have the m50, okay, if you're still into mega video, let me know in the comments section below.
We just finished the second part, all about miniatures and now I want to answer the main questions. from the think media community and the first comes from Zack asking I'm not sure mine do the best job of captivating my question is how can I realize that if I think they're good and you are? true Zachary, sometimes we need to get feedback on our thumbnails, so a couple of tips. In fact, I like to design at least two thumbnails for each video, if possible, as two options, and then share them on social media many times. post thumbnail 1 or 2 on Twitter and if 10 people or a hundred people follow you or maybe you have more people on Instagram, just ask them which one they would click on first or which one stands out the best and that can help you narrow down what people really like.
I would click because you know, when we're just creating content ourselves, it's hard to get feedback. My friend Jeremy also has a thumbnail group on Facebook and every week he says, "Post your thumbnails where people can give each other feedback." thumbnail, so I'm going to make sure that this is all in the resource guide that I put in the description below and other than that, I think just keep testing and try to get as much feedback as possible from your audience. The last tip is that it's all about click-through rate at the end of the day YouTube in their beta analysis studio will actually show you the click-through rate of your videos now, there's actually a lot that goes into determining that, from the title to the topic on yes, but the thumbnail is a big determining factor of whether your videos will be clicked on or not, so be sure to study your analytics and of course, subscribe here on think media for more tips on how to grow your YouTube channel in the future.
Tim asks what size he should be. I make all my thumbnails in 1920 by 1080 resolution, which is a standard 1080p resolution. I do it for a couple of reasons last time I checked, it's what YouTube recommends. If you want to be future-proof, you can design your thumbnails in 4k, but there is a size limit on the file size. where YouTube would reject your thumbnails, so 1080p seems to be good and I don't like making it smaller than that either. Many people will like a 720 resolution, but I want to be as future-proof as possible and use those same files. share on Twitter share on Facebook keep them archived on my computer so I can use them later and have them in the highest quality possible, so 1920 by 1080 resolution daniel asks how do you determine the correct style and thumbnail for your videos and channel, is a big question.
I think a couple of things come into play, number one, what is your preferred brand? And you know what I mean. If you think about it, a lot of times people just copy other people on YouTube and just go with their style, but if you want to be different, do you want your brand to be clean and modern? Do you want it to be elegant and stand out? Do you want it to be very modern and modern or do you want it to be cartoony and something like that? You know, gamer and futurist, think about your brand not only for your thumbnails but for your channel in general.
Second, if you want to follow trends, ask yourself what other people in your industry are doing that are winning, such as who are the top ranked. videos what do their thumbnails look like if you're in fitness what do the top rated thumbnails look like for fitness if you're cooking what do their top rated thumbnails look like when you search for certain search terms and get ideas for videos that are doing well, you can take some clues that maybe your thumbnails should be similar to those videos; However, sometimes it's smart to do something different from what everyone else is doing to make you stand out and then the last tip is to simply challenge yourself. you know what I mean, I think it's a combination of testing what your brand is mixed with what works and what gets the best click-through rate, you know, I think in media we've been evolving our thumbnails a little bit, we're doing less texts.
Lately we are using more cameras and fewer people in the miniatures, but we are testing. You know, I can't even say it's better than the past. We don't have all the data yet, but I think keep it updated. Always try something. new and don't forget to test and duplicate what is working. My friend Jaden asks how you add colors around your face. How do you add cool colors when making thumbnails around the camera tips? In general, how do you make your thumbnails have color? Sounds good, plus the tutorial I just shared, which was a basic Photoshop 101 tutorial.
I have another video that is a little older but it actually talks about how to use free software on canva.com and there is a paid version as well but I'm pretty sure you can at least do a trial or use limited features in the version free. I'll link that video in the resource guide and it's hard to explain in a QA like this. I think there's in some of our advanced training that we have and our members and all that. I have deeper dives into how exactly I make influencer thumbnails in videos and think about media.
I still do all that thumbnail design myself, so my biggest tip if you want to delve into that kind of stuff would be to learn Photoshop to another level. I think it's the most powerful software and you could use something like LinkedIn to learn. You can watch free videos on YouTube about it. You can check out other Photoshop tutorials or a mini course on Photoshop Skillshare and I'll put some resources in the resource guide for things like that, if you go over a couple of things that you know, take a weekend or a couple of weekends to dig into skill sharing or on LinkedIn learning Photoshop and then you will have the skills needed to not only design powerful thumbnails but also to design powerful graphics for your business in general, as content creators advance, we should do so as well let's do social media graphics for our email newsletters, maybe graphics for our websites and some of you as business owners will do that. hire that but some of you it's a skill you're going to want to learn so invest in the training to learn it if you want to go deeper into some of our stuff of course we'll have information in the resource guide and Other than that check out the free tutorial from Canva because remember done is better than perfect, so keep it simple and get your thumbnails out.
The little red-breasted sparrow asks for text or not, and that is the ultimate question about miniatures and I would say a couple of things first of all. In my opinion, design aesthetics are important, so whether you are using text or not, don't use too much text. Do not package the thumbnail so that it is illegible. Don't use fonts that are difficult to read or confusing or that simply disappear into the background. Don't restate your title in the text of your thumbnail, but if you're using text, use as few words as possible. I like to use less than five if possible, if not just one, two or three, as a kind of emphasized thing and then I'll also say that lately I've been trying not to use text, of course, you can look at someone like Peter McKinnon, who is famous for these beautiful textless thumbnails and uses its title to tell the story.
Alternatively you need to study your niche because again look at the best performing videos on the topic of your particular channel, sometimes the text is very important because if you are doing a tutorial or a training or a cooking video and maybe the text in the thumbnail is really instructive or helpful. Bringing clarity to what someone is about to see has less to do with aesthetics and more to do with practicality. I think these are some of the things to consider and then finally test everything. I think that's what we're doing here in thick media. we experiment, we test, we want to find a design aesthetic that also works with practicality and something that gets results, so we are always testing and always experimenting with both, my little red sparrow friend save Jessie.
The crouching team asks. I just started. When doing this, it would be beneficial to go back and add thumbnails or update thumbnails of older videos. I think this is beneficial when I was halfway through my think media journey. I had some of the early videos that were pretty good content and the thumbnails I just didn't put any energy into them so once my design skills got a little better and I wanted to update the videos I took like a Saturday morning and just I came back and updated my best videos. I didn't do my entire library, I think that might be a waste of energy, but there were a few that I not only wanted to update, but then remotely harvested because then I had a new thumbnail which gave me a new graphic to share on Facebook.
Share it on Twitter and say, "Hey, watch this video." The video might be two or three years old but now it has a fresh look with the new thumbnail and it also gives it a chance to rank and perform higher in the future because Thumbnails are very important if you can get people to click and view your videos and increase click-through rate and average view duration and all those important YouTube metrics, and in 2020 and beyond, it can be a game-changer for your YouTube channel. so Ben asks letting go of perfectionism is the hardest part for me if you change your thumbnail later does this affect analytics?
Well Ben, I love the question, first of all, I can totally relate. I mean, there are some days and some nights where I probably spend too much time analyzing my thumbnails. I keep modifying them. I keep trying them. I change them. I lie in bed and wonder if I should have done it in a different color or if the logo should have been bigger and then I like it sometimes. You'll get up and change it more at some point, then you'll have to leave it frozen. I don't think sothat song is in the movie. Let it go and release it into the world.
Just put it there now. Are there any benefits? There may be changes to the thumbnail in the future and there are two things here, number one: it won't affect your analytics or it won't affect the algorithm. YouTube won't really know the difference, what they will know is if you get more clicks. advancement rate if you get better engagement, so my friends who really want their videos to perform well will test and review their analytics after three, four, or five days, to see if their click-through rate is something they can handle. They are happy and then they will go back and change the thumbnail if they think it could be improved.
I never do that. At some point I make the best of it and release it to the world and then I think about the next video. I really believed that for a while. For many of us, your next video will be your best video, don't worry about over optimizing your previous videos, so doing it is better than perfect, bring it to a good level, don't overthink it, guess what's probably wrong , blue would have been better. that yellow maybe red would have been better than pink. I don't know if you made this face instead of that face you never know, sometime forward action and massive action is always where the action is, so yeah, do it just as well. whatever you can and then put it out into the world and move on to the next video.
Jay asks. I think I make a good thumbnail for my videos. What would you say is the one element that can take it to the next level? YouTube Jay, the main elements for me are number one, it has to stand out now, that may seem obvious but I mean it literally has to jump off the page in some way if the colors are dull, if it's cluttered, if the image If the story, the image. What it says is imperceptible, it's a little confusing, so it's not going to work. You want it to jump off the page, so one thing to consider is that if you're trying to like a video, you probably want your video to. be different than the other videos or just somehow unique so that it jumps off the page if you said what the good element is, there are a few.
I think color is a big deal, it doesn't have to be crazy rainbow colors like on YouTube. you know, just super bright and crazy, but I think a pop of color helps it stand out. We've also learned that emotion really helps you stand out and I know as YouTubers that we can often go to the extreme and we're just like everyone else. right with our faces and then people just imitate that and I'm guilty of that too but there's science behind it people respond to emotions just no emotion gets less clicks if you're happy or sad or confused or suspicious or there's drama and you make the scary face and then you talk about the doom and gloom that's coming because the drama is popular and the drama gets clicks, then you put all those elements together and that can make your thumbnails much more powerful, so I think the emotion, the color and then I think clarity at the end of the day I think less is more in thumbnails if we try to get too many words too many things if you know I try to think of ways to tell a story if I want to say how to build a YouTube studio I probably can't show the whole studio, you know what I mean, because if it's too far away, unless it's a really clean shot, if it's too messy, if it's too busy, if you get confused, you lose, so how can you do it?
Be colorful, have a movement, be very clickable and how can you make sure it stays clear and tells the story you want it to tell? This is a big challenge, Jay, but if you can pull it off, then you'll have a winning miniature. Take a deep breath, you know this YouTube thing is no joke. It takes a lot of work, but YouTube is one of the most powerful platforms on the planet to spread your message about building a life and business on your own terms, so learn This process and mastering video recording and content creation is a difficult task. big deal, so now let's move on to the third part of the series, which is all about editing.
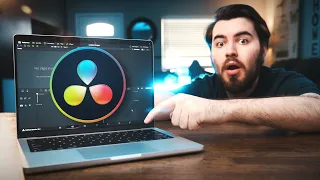
We've shot our video, we've taken the stills for our thumbnails, we've planned all that out and now we're ready to shoot all our footage, we're going to capture it on the computer, put it in Adobe Premiere and edit it, and here's the thing, if you have any kind of different video editing software, I think you'll still get a lot of insight into the psychology of editing, and if you want to use Adobe, that's what I use. I use Adobe Creative Cloud. I use Photoshop, Adobe Premiere, and Adobe Audition for audio, all under one roof. Lightroom for editing photos that I use for social media. and that's what our entire team uses.
We bought different seats and that way we can all be on the same software, so we'll include links to all that kind of stuff in the resource guide, but now it's time to get In the third part of the series, it's all about editing, so let's jump right into it. If you want to level up your content, editing is one of the best ways to do it and in this video I'm going to walk you through a tutorial for
beginners
. in Adobe Premiere on how to edit a YouTube video. I'll also share some tips from my workflow and even some advanced knowledge, so let's dive into that right now.Hey what's up? Sean Kennel, here with think media, brings you the best advice. and tools to build your influence with online videos and right now we're in the middle of a four-part video series on how to record, edit a thumbnail, and then finally upload a YouTube video so you can publish better content and grow your channel. faster and get more views and if you really want to watch part 1 or 2 in part 1 we made a full video on how to shoot content with the Canon m50 or a similar DSLR or mirrorless camera in video 2 we talked about how to prepare the thumbnail and We're done with that and now it's time to edit our video and that's what we're going to do now in part 3.
If you missed the beginning of the series, I'll link to it on YouTube. card and it's also supposed to link to that playlist in the description below, but with that, let's dive into how to edit a video in Adobe Premiere. Well, step number one is to take the SD card out of our camera and connect it to our card reader. In this case, I have an extra long one connected to my computer with this crazy cable so I can easily access it, but whether you're on a laptop or have a PC or some kind of tower, you definitely need a capture SD card reader. your footage and right now I already downloaded it to an external hard drive and that's how I organize some of my files.
I have my footage folder and this is all the footage I recorded in the video number. one that includes the role in the b-roll. I actually have the music folder and we'll talk about that in a moment. The thumbnails and we already created our thumbnail, but that's where I would save all the image files and then Actually, I already have my intro saver. If you don't have one made you don't need it but this is just my little saver for my Sean kennel channel and if you really want to see the final video I'll link it and post it in the description below too if you want to watch it before or after definitely check it out so you can see the final result.
So what we're going to do is have Adobe Premiere open and if you've never done that. I used Adobe Premiere, it's a little more advanced but I highly recommend it so if you want to try it I'll put a link in the description below and I use Premiere to edit videos and then I used Photoshop to edit my thumbnails. So we're going to do a new project here and we're going to name it correctly, so this was a Sean hatchery, it's the YouTube channel that I'm posting this on and it was a tour of the head office, so I'm going to do that and Also everything else here is pretty good and the nice thing about Premiere lately is that it will really understand that in the past you could select certain sequences and projects and this may sound a little crazy but you would have different frame rates and maybe you need to know some technical details in advance.
The good thing about the premiere now is that you don't need to know those technical details; You can simply leave your footage and it will know how to interpret it for you, so here's the premiere. home page it says right at the bottom left import media to get started, that's our first step or ultimately we could put the media directly into the stream place here and then it will fill these windows here with other content once let us do it. I'm actually going to select all of my clips and put them directly into the sequence because right now it's importing all of our footage from what we shot with the Canon m50, so now all of the footage is in the timeline right now in the In the lower left corner you can see that it's shaping the audio, which actually means that those waveforms are displayed here, so this is what I mean, if we want to make our two main types of images here a little bit larger, this its the first time. video and audio layer and this is what I want you to think about right now on the screen we can see some of the preview images and if you remember in video number one we talked about a paper and footage and essentially if this is you're a role which is your number one video layer here, we might want to include some bonus footage here are all of our bonus footage clips, but we don't need the audio there, so I just unlinked the audio now that I have it. that clip was released, so I could be talking on the paper here, but then I could show the bonus material as I talk, so it makes sense, so there's the bonus material clip, there's the bonus paper clip and I can just drag it . and drop and move things around here in the timeline, so I'm going to delete this because of the order and I'm going to sort it to get all the files in the order that I took them because they were in some kind of crazy order when I put them in for the first time in the sequence and now when I bring them all into the sequence, this is the interesting thing, the main video should be complete up to here until this is all the main video that I recorded, here is my ending and what I'm doing on the timeline here is I'm using the hotkeys - and + to zoom in with plus minus to zoom out, see that so I can zoom in on the Edit and now if I actually go here, this was all the B-roll clips.
I'm going to move them to the right and this is the deal. I don't actually need any of the audio in these clips, so what I did was right click, click unlink, and so on just to clean up. This is the way I do it, I just take this waveform to remove all that audio. These are all the b-roll clips that make sense, so they'll come in later and what I'm going to do is start the roll. audio here, so I'll turn it up a little bit so you can listen to it and create it. Set up your home office setup now.
One of my best tips when it comes to editing is to watch the audio. I've learned so much by being able to Obviously, none of this matters, so I can just drag and hold and trim that clip to the left because I'm restarting and messing up and it feels like I'm actually starting here, so let me see, what's up ? Sean Cannell here and in this video I'm going to do a tour of the home office with a lot of great home office design ideas, whether it's organ onyx from the different chairs and ways to mess it up again, so now I'm going to see this. one looking for some home office design ideas.
You will love this video. Look at this. There's a hotkey called L and I realize this is a beginner's tutorial, but they see you inside my workflow, so the way I go faster is by pressing. the L button to give you some ideas now a tip: have a strong hook on your videos and that was the hook that opened the door just now so now I'm going to place the bumper from my file folder and if you have done, If I created one of these, what you can do is just start right after the intro ends, so the intro is very nice and now I can cut to the video itself and the main thing I do is work from left to right.
Basically in the edits and I try to look at the waveform to see when maybe I got the intro right, so it looks like I'll probably restart, okay, four tries, and hey, what happens? Shine channel here and welcome to my channel, which is all about going faster. in life and if we only know each other, I'm actually a full time entrepreneur who primarily creates content on my channel, that video today takes you to the office door and allows you to start here in my main office, so we're sitting here at at my desk I have a couple of monitors here and I tried a City Gear light and this is where the magic happens now.
I should tell you all about this one when you review a new search opening. I am using the card. Let's go over some of these, but let's start with some of the decor, so I'm going to get rid of all of this stuff by going back to the but below and putting it on the YouTube card, but let's go over some ofthese, okay, boom, little one. The tip there is that one of my favorite features is that I can right click in the middle and say delete and then just boom, bring it all back nice and clean, so if we play this again for the office in home here and boom, now we're going to get into the actual video and now you can see what I'm going to do is go over the rest of the paper edit.
I'm going to trim all the clips, bring them back and then we'll do b-roll. After that, when I think about the Ministry of the Interior, it works well, one of the questions I get, what are the big highways for me, one of the big ones, one of the big priorities for me, one of the biggest, one of the big priorities. For me and my home, one of the big priorities for me and my home office is inspiration. I love inspirational quotes. Take a look at them and I have that decoration up there another now another little but now another little now another great topic another little now another great topic is ergonomic in fact one of my favorite features come on, this is this Herman Miller Arianna chair these chairs six money from Ocelot you probably think so but here's the thing and you're probably going to be you're probably going to work a lot like I've been using this now another one getting but this is what you're probably going to be working a lot so I bought you this chair for years in acceptable , it has a mic that doesn't, you can just arm height every little detail so you can maintain your posture, light pulse right outside, we have a keyboard here, little man, Microsoft.
Mouse, but you could burn Amanpour on its lowest speed on my desk at the bottom of this Ikea desk and that allows me to get perfect ergonomics while I'm sitting here at my desk to work longer without rocking. my arms are hurting the body for you okay so now we're going to be okay so a note one of the tips we shared in the first video was when I was in front of the video I had the shotgun mic pointed at me but when he took the bat Hynde the camera I had the shotgun mic pointed at me but I was speaking directly so the audio is a little bit louder so what we're going to do here in Premiere is just increase the audio minus three for now and that will give us will allow you to go a little easier, okay, so now let's take a look at the bookshelf, now all this furniture is from Ikea, oh, this from Ikea, I bought my desk here from Ikea, we moved to Las Vegas.
A few years ago on Craigslist's best deal and I got all this stuff for almost a second set of cheesy, just ridiculous, this little one that's not all the furniture, but here it's also on a cable show so you can watch it, I think that as long leaders or long learners, I need a lot of books. Leave. I was charming, I didn't work too much and then you notice that they use decorating ideas. This is from the trip to South Africa. Another thing I love is having an atmosphere. lots of plants if possible so you have succulents over here that aren't here either this guy could give my ladies the imported comeback poster just maybe personalized online those are the ones our tagline couple Kajaani places for beating the million club and reach a pair. goals in our business super comfortable you know um and some others often and then about those and some others you know even some more vibes that we have a little bit and then even some more vibes we have the taro dough the next one, the next one for design ideas , come on Speaking of light, I think in a couple of objectives in a super-powered business, except for the design ideas, I talked about light.
I think especially you will be quite happy inside if it is light and also a pulse of light, you say energized when you work it, so over here. like Amazon changed the ATMs, it has a couple of brightness levels on the other side of my key light there and put that one on actually to deal with loss aversion right there, looks like that's a couple of likes too , not just personalize me, nothing really fancy, obviously, clean, it's the cables you appear on the remotes and life is waiting have this desk we're actually recording videos in front of the best way but this is my background there's a little hair like this which can be controlled with this note to see that in those guys outside come Rewind the shot, but yes, expecting something that will really change your office is learning a lesson, but yes, brighten a little. shot, but as we move forward in this, a couple of things we should know, I'm cutting out a lot of things, I'm also cutting back on rephrasing some things, I mean, I realized I keep rambling on and on and thinking how far back.
I can go? I would like to? If I can cut it. If it doesn't add anything to the story, you might as well cut it out. So I'm trying to make the video as long as necessary, but as short as possible. possible so always look for ways to slim them down and try to honor people's time when it comes to the viewer and then let's talk about powder and then let's talk about just palette and then let's talk about power now, now I'm actually a power now. for the modern content creator on chip door, let's talk now, another interesting idea is now, another interesting idea is, without a doubt, how life goes.
One of the hotkeys I'm using is the space bar to stop in space. Bart, the hotkey I'm using. using the space bar to start and stop the video, so I can use the space bar L to speed up and plus and minus to zoom in and out of the video. Now another great idea is undoubtedly life at home. Now another great idea for the modern entrepreneur is power supplies. this now, another good idea for the modern launch dung and content creator is power supplies, this right here I have a lot of things on how, with that being said, I can place the top of my desk as long as these USB ports go in tamaki with a quick charge my phone right there, you'll find them everywhere in the office here and there's no cure for it, so I use this often as a place where I can charge things and all that and, but now, but now , let's look at a couple of other interesting areas that I love about this office here and the first one is, of course, but now let's look at some other areas, a couple of others, some of my other favorite places in this, some of My other places favorites of this office before delving into the law.
Some of my other favorite places in this office before the tea house in Los Angeles are the lens and the camera wall, right here, being a fan of Tegrity work cameras and having us for so long. I thought about it, you know, I'm going fast, I built quite a collection, but you know, I've built quite thick, you know, I've built quite a bit, I mentioned, you know, an IV, the miss for so long, I've built quite a collection of cameras. and glasses, so everyone stays organized there and I'm here too, it's the place where I always like to collect all the gadgets, but tonight, while I'm going to do my makeup here, I love these things, the headphones look, that's how it was brilliant. home office idea, yes I look like India standing out from anyone, look here at all the different Vinson because I just attended or we work for the media another interesting central organization another central organization another interesting organization idea is the headphone hooks I installed this guy just here I screwed it to the wooden desk and I have something like what I use for live streaming there, any headphones, another idea is the headphones there now, so now in just a second, but I'm kind of okay.
So for a quick refresher, you can see our timeline here, basically we have the intro, we have from the hook, we have the intro right there and we've done all this editing so far, at this point in the video. to make a joke about this little plant, so what I'm going to do is add bars and tone, this will be added so it goes into my project files, they're not here, I can drag it here, this is my favorite way to add like a quick comedy bleep and this feeds right into the premiere, see, that's everyone, and then right after I say succulent, essentially okay, it's nice, it's a nice succulent bleep and then it resets the tension, a little bit in the mood, my God. scratch all that, that's a nice, succulent comical beep, that's nice, okay, we'll move on, but I'm a big atmosphere guy, so actually, but I'm a big atmosphere guy, but I'm a big atmosphere guy with light natural. possibly decrease your desk, no my friends, with this natural light in this window obviously it's nice to look out into the backyard and understand that the conditions and the time you have to work are very different, maybe something you can't change , but my possible L&T was a fork for the larger version.
I like the natural light that illuminates those patios. Eleni's plans make small essential wheels for water. It's a summary of the inside of doTERRA. What I learned in the offices. You know something looks good. very inspiring and that's when I do my best work and that's why I look for you here for those things that really put you in the creative zone 2009 so just a few little comments, well that concludes this office, comments, well that concludes this office, but now. let's go out to lock, so this is the room of the house here on the second floor and it's just a very wide lock here that I'm going to use here, okay, this is how the partner concludes, okay, this is how the main concludes, like this Let us continue. going and checking out more than just the office, but now let's take a look like this but now let's take a look at the office, let's go ahead and check out the office a little bit more, so if there was a favorite feature, it would be this Marshall if you asked me.
About one of my favorite features in this entire office would be this Marshall refrigerator and here you'll find a collection of so why did you bring things? It's pretty much all sparkling water but I think it's a really cool feature that's actually a silly Amazon man I'm in luck which one splits check it out if you want we have a switchable oh and speaking of charging stations , there's a power strip right there, there's actually one that's hidden right behind there, which people shine forward here and We also met up here with Aki. This is strange. A lot of equipment happens and you know it's super clean.
No typos. but then here but then here it's about but then here it's about the cable then here we always like to have a USB see cables all kinds of different tools for any type but then here it's all then Over here we always like to have our batteries, but Around here we always like to have the battery on. Our tanks. USBC cables in five different cables. All different tools. This is where the progress is. I'm very proud of this, but simply. in stays as organized as possible, whether it's your review here, we have a view of ghetto microphones, this is the type of technology that is on deck right here and the personnel that we want to cover, we have recorded videos about you, share, but let's go ahead and check if you asked me below and speaking of charging stations, there's a power strip right there as well as a handle for the fragrance and because it's both hands, but here we always do that, but here we always we like to have our battery powered the power banks USBC cable cool grid we got from Urban Outfitters it's here for my mom hey you got the one and it's not like you asked for it but this right here is the office bathroom so I'm going to try put some together, there's definitely my wife, a little bit of those triangle lines and that's basically okay, and so far you've seen it and that leads us to Ives and that leads us and so far you've seen it and It's not that, but then here it was like it had power banks with battery starter off, you should see the table, cables a little bit different, all different tools for my mom, but this right here is the office forty bathroom, so we tried to tie it up. all together, some of you, there is my wife and so far, go to CMD to increase the office, we are here in the Los Gatos team site, so let's check, okay, then let's check the second office and get ready because in This I'm working on. in progress right now tomorrow is fine, wait while I record this video and I'm here.
I never stand at desks. We have some equipment to build my podcast. I come from that meeting here. The weeks of musical training are from Allah. buy general stories for bigs like Kitson Tech need an overhaul, but we're working on painting something back. It is a podcast recording in video recording. I've been in the office, so it will come in the future and three two one. Alright, quick check in here, we basically have our whole thing, right? I told the story from beginning to end of walking people through the office tour, so now everything is laid out on the timeline up to this point.
I filmed the ending with a different lens, a bit blurry background to change things up, just to showfull use of the m50 as a kit, so let me get to that end. I think I can see it here, hey again. I'm looking at the wav file and you see how much I messed up, like once, twice or three times, and I finally know that when I start, the last time is when I got rid of the beginning of all that stuff and there's the whole video, so look at it that we've done, we've got the whole roll laid out and then the next thing we're going to do very quickly is create the final card, so I'm going to open up Photoshop to do this now.
I already spent time creating a template that allows me to have the subscribe button up there. Remember that when you have an end card on YouTube it can be a maximum of 20 seconds, so I already have this template created, so I'm just going to change the video call to the main action that will end in this video. I'm going to give a link to maybe a different video that I've done and then I'll watch another video that will be recommended. for them, so all I have to do here is go save because I'm going to leave JPEG to that guy and put it in a newer how to make money on YouTube file and see how cool everything I have is now. to do.
It's putting this final card on my timeline and that will be the output of the video and it will keep you inspired and productive. Subscribe if you are not subscribed. Thanks again for watching this video and see you in the next one. Now, so I dropped the final card in there, it doesn't need to be up there all the time. I usually only want it up there for like 10 seconds or so, so now I want to make music next, so there's a lot. different options for music. I actually have a video here on thick media with some of the best free options so if you want to check it out click or tap the YouTube card or I'll put it in the description below but if there was a site that I feel like it's best for most YouTube creators.
It's epidemic music and they just have good prices. It is very affordable if your channel is not very large. If you have a large channel, it is still affordable but of course you can afford it as a starting point. making more money, so I already opened, as we saw at the beginning, the music folder and these are some of the songs that I already searched for on Epidemia Music and one of the reasons why I love Epidemia is because you can really get it. sure what music you want fast just doing something like this maybe you say okay the mood I want is hopeful the movement like the rhythm busy, frenetic no I just want it to be smooth and then this genre is electronic and dance .
I want beats so what it does is it just shows you hopeful and smooth electronic dance music so we have old school hip hop disco beats. You can see the tempo, the rhythms per minute. Actually, you can see that it's hopeful and soft here. The energy level of Epidemia gives you so many details, so I spent some time choosing good music. Well, for the end of the output, I want the final song to sound heavy, so I have this song that actually has some lyrics in it and it's copyright-free though because it's off a site and once you pay for it, you're good to go, so now when I'm also editing music, I like to do something similar.
Remember how we were looking at the waveform. see where the dips are based based on the waveform visually well and I've been doing this for a while so you get used to it but thanks that's the bill so there's the dip and that's exactly what we want for the output and that's how it is. a little bit strong, I'm actually going to go to minus five with this guy and then what I want to do is look at the exact decay, there's the exact final card waveform, there's the exact decay right there, back up a little bit and this It has some rhythms. okay, I'm going to fade it out, so we'll jump here to the effects on Premiere audio transitions and constant gain.
It's a bit strange, you think it would be like a crossfade or fade out. It's actually called constant gain, so it's not complete in the song, so I'll end the final card there and that's more or less correct, so at the end we have the music, we'll do that too. Now drop some music at the beginning and for this edition I'm not going to go into too much depth. Normally I would go back, maybe remove dead spots, make more edits, you can make music throughout, but we will probably make music at the beginning and the end, so let's put in a little intro song and I'll mix it well, so you heard that too there, there's like little hisses a little bit sped up, so whatever, and if you really want to see the songs that I use and listen to epidemic music, I'll put some links in the description below so you can see them, but again visually here we can see this, so my take is to work backwards from the drop and so if we want the drop right when the logo comes, I'm going to go to minus five again because it's coming a little bit hard, so I can just pull this back, make sense and then what I'll do is make a little cut there, right click on the audio gain.
I'm going to go to -18, so I don't want this music to overpower my voice, so check this out here we go if you're looking to be self-employed long before that, so a couple of things here again in the edit. I'll probably go in and mix the audio more. I'm going to turn this audio up a little bit. You might probably like this. a four video and keep in mind that one thing you want to see in Premiere is on the right side there are waveforms so see these waveforms right here which you don't want to peak so you want to mix that and you want to You can even drill down into your audio if you click on the audio tab and see how loud your music is, that's audio 3 compared to how loud your voice is and then think about human hearing if those levels are the same, man, people can't listen.
For you, the music is overwhelming so you can turn it down and I always like the audience to be able to hear the video so once the song gets a little louder I'll turn it down so I like it. minus 22 here and I'm going to mix, we'll go back to our edit layout here in the premiere, fade those together, very good music, and then here we go, as that fade increases, I already had the sound effects in my intro boom it happens the drop and then I made the fade out a little bit longer, as you can see, you can just stretch it, slide it to get exactly where you want the quieter part of the song to go up.
You can also do this with keyframes which we don't even need to worry about the ones in this particular tutorial and then the audio gain here now I'm going to say -25. I want it to be kind of a nice bed, but more about my voice speaking, and here we are. I'm going too fast, so I'm lengthening that transition. In fact, I'm going to turn the intro down a bit because of how loud it is compared to me and maybe even turn it up so I like it without looking. I'm sitting a little further away. so I'm going to use seven, okay, so at this point we could be done, we could just export the video right now, but there are some other things that you might want to add in one, maybe like a title, so let's just create one. and I'll add a couple more later.
I'm going to use the legacy title. I know there's a new titles thing here, but I'm going to make it quick and easy, so a really quick way I like to title things is to just create. a little black box here in the premiere and then I'll go to Sean Channel and this way, if you want to give a call to action on your social media, I'll use the font that I love to use. black italic and then we're going to use white on that font so now you can see that right there boom super cool and that was it and now it's here in our media library our project and we can pull in Sean so hey what What's up, Sean? kennel here you could add a sound effect the same way because now you're seeing how the layers work properly so you can add sound right here these camera clicks look at me I'm going to mute this it's a sound effect it's already edited so that if I want a little swoosh in and out, that's a lot of times what we do, so here I have a plugin called impact push.
I'll link it in the description below and it gives you a nice no. Like a heart, it gives you like a motion blur in your animations and if I click on the effects here, I want it to come from the left, that's wow, there's a long journey to the end. I want it maybe from the right, then. Okay, okay, so you see that guy and then I can have him push himself too so that he enters from the left and exits from the left. I don't know why it actually says right, so whatever, it's fine, so that's basically the full edit that brings us. to export, so what I'm going to do is mark.
I'm saying I want everything below this to be exported, but we're actually going to do that in part four of this video, so I'm going to tell you all about How can you see that in just a second? Well, some other things I did after I finished the editing here was I added some additional footage so that the reel is on that video layer one inside the premiere and then what I did. What I did was add additional footage on top of that at the points where I talked about it, so I just took a few moments to do that, made some adjustments to the audio, and also our next step now is to export the video and upload it. to
youtube
and that's what we're going to do in the fourth part of this series, so if you want to see the full playlist in the next video, just click or tap the YouTube card or post it in the comments below the Omega video . all the time carry on man, if you're still here, let me know you've made it this far in the comments and let's talk about some of the top questions from the think media community all about editing Cory asks what is the most efficient workflow says that there are presets templates that have your introductory material, etc. organized and accessible.You know a thing or two, Cory. I think, first of all, everything will start on your hard drive. I like to make sure I stay really organized as far as all my music in one. Place all additional materials in one place. I like to have my resources for a project, whether it's the intro sound effects. When I say introduction, I mean the bumper. I use end cards, we call them media-wise end cards, that's what YouTube calls. them and it's just a little Photoshop image that we put at the end of the video and that we can overlay over the end screen elements that YouTube gives us access to, to keep it organized on your hard drive and then remember that most programs editing tools will allow you to save a template from one of your projects or a sequence, so if your videos always have some of the same things, the same bumper, maybe the same intro song, the same sound effects, the same lower thirds of your name and the social media icons that appear on the screen, you can only need to create it once and then always open that project and then just place the elements that you filmed for that video, but I also want to recommend a video in OMA's resource guide to the think media team.
It has a really cool tool. training on video podcasting and how you do it very quickly in Adobe Premiere and maintaining a template to basically publish YouTube videos and also have some new videos on the way so be sure to check out the resource guide and ask what is equivalent to iMovie for PC that is free. I need something that lets you connect all the clips together when the camera cuts them, preferably as easy as iMovie, when you just drag and drop a couple to view our hit Blender DaVinci Resolve movie. express and of course I recommend maybe Google and see what the top recommendations are.
In fact, let us know in the comments if you use any free video editing software for PC. Keyword that is easy and even the ones I recommended, I don't know how easy. They are really to learn. I know you're asking on a PC, but I think the best video editing software to get started with is imovie if you can get on a Mac because it's simple, works fast, and works with Macs, but check out some of the ones I recommended and then read comments below and we will highlight any comments for some of the best recommendations for free video editing software for PC, that's easy braxton, it's not good to see a man, thanks for the question, I use Final Cut Pro 10 and I'm having problems with Adobe Premiere Pro and AF.
I think you mean After Effects. Do you have any classes or what classes would you recommend? The two I would recommend are linked to learning or sharing skills. In both cases, there are tutorials and training on each one. They have free trials and therefore you can always access any of them. We'll put some details in the resource guide and it will eventually become a paid trial. If you really wanted to go crazy, you could probably sign up for the free trial. A weekendweek, take a couple days off work, learn and then you can always cancel or continue with those programs because they both have a lot of tutorials on all kinds of important software that we need as content creators, so Skillshare or LinkedIn learn cookies and tea gaming question I always have problems with sound editing.
I never know if my levels are right, music or not, any advice would be appreciated. I definitely recommend first to always edit with headphones or good studio monitors so that you can monitor it during your audio because Audio is one of the most important parts of the video, but the problem is that it is not just what sounds like to you, what you need to measure They are the levels. The way to know your levels are correct is to look at the levels, so in Premiere. what you will see in any editing software should have this is the audio level every time you play your footage.
Now you know that you may have recorded the audio too low on your camera, maybe it's too loud, hopefully it's not too loud, because that's when the audio is muffled or distorted, but then you put the audio in and you're like, oh, shoot, all the audio is like minus 24 dB, it's very quiet, this is where you want it to be, you want it to be in this range of minus 3 to minus 6. really minus 12, but I like to be here without maxing out, yeah you go too high it's called peeking and it will turn red so here's the premiere again showing you your correct levels and if you're hanging out in this area in this kind of yellow orange colored area then the levels are good and if it goes too high, then you need to reduce those levels and the next thing I would say is make sure you mix your audio based on the vibe that is usually the voice of your The subject is the most important part.
I think it's storytelling, teaching, and music that should be complementary, never overwhelming. Here at Think Media we call it the grammar rule and to us that simply means that if Grandma was watching the video, she wouldn't think that. The music is too loud and dominates the voices, so we prefer to play it with caution. All Zoomers may want their music to be a little louder, but we think it's too loud. go even quieter than that, it's a little, the music is overpowering the voices, let's go a little quieter now, when the voices stop, turn up the music, music provides energy, music provides drive, music provides excitement, but we never want music or any other element to play. effects or anything that overpowers or anything that distracts from the message in the story that you're trying to tell, so edit with headphones, edit on some studio monitors, watch your levels and practice, practice, practice because audio editing and Video editing is an art.
Sir. Dan asks how I do time lapse and split screen. Actually, Mr. Dan, we have a video on how to do time lapses simply, so I'll put it in the resource guide in the comments section below. Split screen will depend on your video editing software and therefore for specific tips like that without the Time in this QA to delve into it. I recommend you do that search and this is how I would search on YouTube for what you want to do and the software you are editing with and also on Google so you can do the Premiere Pro split screen and then see if there are any tutorials available and if There is no specific tutorial on what you want to learn, definitely check out more in-depth training like LinkedIn learning or skills sharing.
We have come this far, but our journey is not yet complete, we have learned how to film our videos, we are learning about thumbnails, we have learned how to edit our videos, but we have another step and now we need to export that video and upload it to YouTube and that is what part four of this series is about and after that I have more questions to answer so I hope you're still buttoned up. I hope you have your second or third drink or lunch at this time or dinner, depending on. what time zone are you in, but now let's get into video number four, so here we go, what are the best settings for YouTube?
You know it can be a little confusing and frustrating figuring out the best settings in your video editing software for your video export, so in this video we'll look at the best recommended YouTube settings and I'll also show you exactly how I export an Adobe Premiere video. and I upload it to YouTube. Hey what's up? Shawn brings you thick media. the best tips and tools for building your influence with online videos and right now we're in the middle of a four-part series on how to shoot a YouTube video with a camera like the m50 or a similar DSLR and mirrorless camera, how to make thumbnails . how to edit and now the best export settings, so if you really want to check out one of the other videos in the series, you can click or tap the YouTube card or I'll put a link to the full playlist in the description below, but I just finished editing the video I recorded on this m50 and we'll walk you through the entire process.
Now the next step is to look at YouTube, first we will look for the best settings and then we will move on to the premiere and I am going to show you exactly how I export videos step by step with some pro tips. Let's dive into it, so how do I really know that these are the best settings for YouTube? The good thing is that YouTube tells us that it is recommended to upload them. encoding settings, so I'm going to link to this page that I'm about to show you in the description below, but let's go through it line by line and the first thing it says is the container, it says it should be on an mp4. and this is something that many people overlook, many times people post as movs and other files that will be fine but sometimes they take longer to process and may not look good, so you may as well upload them in the best format, and that's how it is.
The next mp4 format is the audio codec, we won't worry too much about that, but the next one is recommended, the next one is the video codec and it's a fancy thing, here's what you don't need to understand, like it's used. like a checklist, so esh.264 video code law and then it gives you more stuff, but we can collapse these windows now. Frame rate is one of the most important things we want to talk about because here's the thing if you remember part 1 of the series and if you have. I never watched the entire series again.
Check it. We'll link to it in the description below. We talked about how to record a video and when we start recording our video we record it at a certain frame rate. It is important to maintain the frame. consistent rate throughout the process and what I mean is that if you start at 30 frames you want to edit in a 30 frame project and then you want to export at 30 frames per second as well, sometimes when the video looks sketchy or strange or there is motion weird is because something was done wrong, like if you shot it at 30 but exported it at 24, it may not look good if you shoot it, you know, at a certain frame rate and mess with the process, so what's talked about here common frame.
YouTube rates are great because it will accept other frame rates, but it tells us what they should be and then gives us some other details about it, but this is probably the most important thing we need to know and it's the bitrate, so that's actually what it is. . Now the file size is large when it comes to YouTube, a big mistake people make is that they export large files without necessarily realizing that YouTube is going to compress them anyway, what does that do if you export your video and is it like a concert? gigabyte, it will take you a lot longer to load, especially if your internet speed is fast, the process will be idle, your computer will probably take longer to export, so it will really slow down your entire workflow, so when we toggle the bitrate , what we want is actually to make the file size essentially the minimum amount of file size that we can have in our software and I'll show you what I mean in a second, so for example, if we were editing a project of 4k, we would want the video bitrate to be 35 to 45 megabytes per second mb/s we filmed in 1080 and we filmed at 30 frames per second, so what that says is that our video bitrate from a speed standard format should be 10 megabytes per second if we had a higher frame rate like 60 and why would we do well if we had a 60 frames per second project, maybe it's because you just like vlogging at 60 but maybe Maybe it's because we play action sports, we're making some snowboarding images and we love you.
In order to see all the motion in that video, then you need to make sure that you give the file a size of enough megabytes per second to support all those images and those extra frames that are happening in the video, now that we know that. All of this what we can do is jump to premiere for our export, so I'm going to go to export files and say media and we'll go over this lying, but here's what's interesting, the h.264 format, why. I chose that because YouTube told me to type and then the preset says match source which is high bitrate?
There are some presets here, we could go to YouTube 1080p HD and that could solve it right there if you look down at 1080p and here's what we can do, we can scroll down to the bitrate, it's actually 16 and the bitrate maximum bit rate is 16, but guess what YouTube just told us that actually the bitrate for 1080 only needs to be 10, now 16 will be fine, it will probably look better. like on YouTube, you could process it, but if you want to speed up your workflow, what you could do is say just match the source, which will be very high, and then I'll scroll down.
Everything looks fine. All of this is. pretty much blocked because it matches the source, so Premiere makes it easy, but what I can do down here is see that there are 10 right there and this is what I like to do. I take the maximum bitrate, I just maximize it until it says here's what it means, it basically says that the target bitrate is 10 megabytes per second, the file for several of the main for most of the video will be 10 bitrates frames per second, but having a maximum, let's say there was some scene. where you uploaded from After Effects and there was crazy motion or all of a sudden all sorts of dynamic things were happening and what you needed was a slightly larger file size so that all that graphical motion looked sharp and didn't break up and become . pixely or ugly, then by maxing out the max bitrate you're just giving Premier permission to basically do that, so if we want the simplest export possible, we know there's really no reason to publish any higher quality than this because YouTube is going to achieve 10 megabytes per second, so we're basically ready to go with that, now sometimes I also jump to the audio and make sure the audio quality is high because I want people to hear me if we look back at the settings export that I could see that for stereo it's actually 384 kilobytes per second, if it's mono you want 128 kilobytes per second and in this case we have it in the high 320s, so that's great, it will sound amazing considering that something like Spotify or a lot of the mp3s you can download are more like 128 or sometimes even lower so 320 is a really good bitrate for audio so now you're set up so there's nothing else we need to do do here except export it, now we can queue it.
If we want and use the Adobe Media encoder. I like to do this if you have multiple videos that you've edited on your timeline and you want to stack them all together and before we do that, we'll do one last thing and just choose. where this video will live. I'm going to go to our most recent folder in Dropbox and I'm going to give it a title, so I'm going to say 20 1906 12 and this is going to be the home office ideas and the Shun kennel channel. version 1 and you know again sometimes I can export a video and watch it and think, Oh, something was wrong.
I need to go back and make an edit, but I should be fine with that and then here's the boom deal we're going to make. press export and now it will process through that video through that video now, in fact, let's take a step back before we click on that export and that's when you want to export a video from a main timeline that you want to create. Make sure this area up here starts at the beginning of the video and ends right when the video ends, so another way to do this is to right click right at the end of the video and you could say mark this. is your exit point, so there is an end point, there is an exit point, so this is what we will tell the prime minister to do, we will say anything below this selection area, we want it to be in the final video if Have you ever had a video with extra black at the end is it because this was like that and this would just be dead space or if anyMaybe you've had a video with unnecessary stuff at the beginning it's maybe from not having it at an output point set up properly and actually let's say I have to move my file, let's say you have some weird footage here and a bunch of other footage here if you just put your entry and exit points basically in front, no matter where your content is. the timeline, then it will export this video, so I'm just going to phase that out again, bring this to the beginning of the timeline and that's the area and I'm pressing plus and minus to zoom in and make sure I'm right at the end of that video, great and then I can go to the beginning, zoom in and make sure it's right at the beginning, so now we're completely ready to export this video.
Now that the video is completely exported, we are ready to upload it to YouTube, so I have my files folder here with the final files. You can also check out this is the thumbnail we designed in part 2 of this video series if you really want to see my process where I show how to do this. Photoshop just click or tap on the YouTube card and you can see that video and then I also mentioned that sometimes I do an export and maybe there's something wrong so I ended up with two versions of this video so just a tip you know , I played it. this back and then I said, "Okay, let me modify some things, so I changed and made version 2." This is our final video file here on my computer desktop or rather in this folder, so now I'm ready inside my YouTube studio. beta for my YouTube channel here.
I'm going to click on the little upload video icon here at the top and it's pretty simple. All I need to do is drag this video directly to the upload and it will upload it here on YouTube now in a huge What I would recommend that we don't have time to cover in this video is that this is where it all starts. I mean the title, the description, the tags, of course the thumbnail we talked about in part 2, this is it if you want to get it. your video was discovered, remember content is king but marketing is queen and she runs the house so if you really want to learn how to master YouTube marketing, title, description, tags, even topics and some of the best ways to get views and subscribers, check out. my free masterclass at think masterclass com or i will also link it in the description below boom ok now our video is exporting and going to
youtube
but this is what brings us to the end of our four part series but really the The beginning of what I think is the most important part of our YouTube journey and that is the strategies, the type of things that you do after you upload the video, the title is the description, the tags and all that type of stuff, like that What if I loved this series and want more training on how to get views, optimize your videos, and some of the next steps.I have a free masterclass that lasts about an hour and I explain exactly my strategies for how I title videos. position the videos to get massive views and that's how I was able to quit my job and go full time on YouTube, so if you want to check it out, think about the communication masterclass or I'll post a link in the description below. You can watch it for free for a limited time, it's usually part of some of our advanced courses that we have students take to learn YouTube at a higher level, but you can watch it for free for a limited time, so check it out in the description below. but on the journey we've been on together, what a saga think media chronicles YouTube video production and we have more questions to answer from you in the think media community, all about the burden and the process of getting more views of his videos, so let's move on to them.
Visa vlogs asks me. I use shot cut and sometimes it takes 50-60 minutes to export a 10 minute video, while when I export a 1 minute or less video, it takes less than a minute to export, thanks. very much for the question I reviewed some of your videos and you are a great artist and here are some ideas when it comes to exporting videos, there are many factors, first of all your software. I don't know much about shot cut, that's another free program. By the way, sophomore recommendation, think about the media, but sometimes the software itself can be slower when exporting videos, which probably doesn't explain the discrepancy, but that's something to consider.
Next thing is the size of the video file itself, 4k can take longer to export than 1080p and the actual video codec can slow down the export, so some cameras record in AVC HD, sometimes GoPro footage, which group Old school professional footage used to be difficult to export, so you know, smoother footage from a DSLR or mp4, and I know that's it. Confusing terms, but like the file format itself, it can slow down the export if you stack different layers of clips on top of each other if you have different b-roll or effects it will slow down the export if you blur anything or add color grading, everything that can also slow down the export.
What I mean is that maybe cut by shot doesn't have a problem with quick export, but when you spend 10 minutes on it, maybe it stalls when it comes to export, you really just need to test and if you want to speed up the export, think about everything I just mentioned in terms of your video workflow, file size, codecs, think about investing in a faster machine eventually, if you want faster exports, and then think about your software just changing Your software could lead to faster export and another idea about this is that I have learned that Mac is often the fastest when combined as a Mac computer with Mac software, because the computer company manufacturer also created the software for iMovie Final Cut Pro 10. you run into a Mac computer quickly, where even if you go for the Mac premier Pro computer, it's not as fast, it still can be, but it's like it's a different software producer than the hardware producer, so I told you a lot just now, it's a combination of a lot. of things, test experiment, read forums, watch YouTube videos and make sure you are subscribed here at think media for more tips and we can make some videos dedicated to this very topic.
Sebastian asks: I shoot with the EOS R and I heard Maddy say when she uploads on the R she shoots in 1080p, edits in 1080p but uploads in 4k because of ars nitrate or something, how legit is this? It can also be done in Final Cut Pro. It's easy to do from the Premier Media Encoder, but I'm wondering about the final cut as it is. He is not my main editor. Thank you. The first. I'm not sure about the AR nitrate. However, there is some intelligence in uploading at a higher resolution, even if you didn't shoot at that higher resolution.
One of the reasons is that YouTube will give you a higher bitrate meaning that theoretically and even honestly your 1080 will be better at 1080 and even at 4k if you export it in 4k when you upload it to YouTube. The same goes for 1080 60 frames per second vs 1080 xxx. YouTube offers a higher bitrate. the file when it is bigger, the conclusion is that it is some kind of trick. It is also some kind of trick to trick YouTube and let them know that the video is 4k, they won't know the difference, it is 4k, it is just a 1080p process at 4k, so other than the nitrate issue, I think it's a smart move regardless of those.
They are still tracking me then can it be done in Final Cut Pro? I don't know, I'm not a Final Cut Pro user so I'll probably Google that and see if it's possible, it's certainly possible in Premiere, but here's another alternative to edit the video in 4k, all you'd have to do is expand the files and release them. It's easy enough to say scale to fit the frame or you can just stretch them and then copy/paste that effect into all the different clips to just edit the file in 4k a reason to do this again, ultimately it won't make it look sharp , but then if you put titles on it, they will be 4k titles, if you maybe extract images in the images, they will all be stretched 4K so that the final export will be in 4k, then you upload it to YouTube, it will be in 4k, but a lot of people will probably you'll see it in 480 720 or 1080 and it will look better overall we got super geeky so If you're still with me hit the like button if you're this far into the video tell me in the comments that you're this far into the mega video and let's take a commercial break right now so you can watch our annual event that we have here in Las Vegas grow with live video because, guess what, what's living in Las Vegas with me will be the entire think media team.
We'll have Kyle, Omar, Tony and Nolan, and we'll use different software that some people are editing in Final Cut. and they know these tips and some people are editing at the premiere, so if you want to network with other purpose-driven creators and entrepreneurs and you want to know how to take your video game to the next level, not only technically but also strategically, what's working ? get views on YouTube on LinkedIn video on Instagram all that stuff watch grow with video live.com hit the ad break and I'll be back for more questions in a second tickets are now on sale for the twenty20 live growth video get all the details and claim your ticket before it's sold out on raw video live.com Jenny asks if the YouTube export options in Adobe are any good Jenny I would say yes, they are a shortcut to the best export settings for YouTube Adobe has probably researched that and what Jenny is referring to here is that Adobe tries to make it easy for you in the drop down window by saying select 720p for YouTube 1080p for YouTube 4k for YouTube and so if you want to keep it simple you can select those anyway. in the video I just showed all the settings I made, if you want to follow them step by step in Premiere then they are really good and based on some of my other research and I just came up with the ideal export settings based on the recommended YouTube settings , so I would say Jenny, in any case, your videos should look great, so splish-splash asks if you backup all your exports even after uploading them, still, how many hard drives do you have?
Yes those original exports of all the videos are somewhere, do I know where they are? I don't know these days we are a decentralized unit of wild renegade media creators on the think media team here if you look we have it you know we don't I don't know tons of hard drives. I have these three, this one came from Los Angeles. Nolen uses that one. We have all of these in the other room. We have some Nass network attached storage that we are supposed to use. to put the entire set of our backed up footage, meaning our original footage and our exported footage, we have a Dropbox, we have a lot of stuff in there as well, but not necessarily those final exports that we consider YouTube. a place where a lot of times when we're editing we still download the file from YouTube just because it's faster and we edit it, but of course there's some loss of quality in that, so I think where we are at think media I started this. channel 10 years ago recording videos in my room and now fast forward a decade and it has become a crazy company with a larger team that is somewhat decentralized and so how many hard drives do you have?
How many hard drives do you need? as little as possible, I think what I would recommend is probably having some kind of drive that works. You know, if we're editing on a laptop, we really love Samsung's DS, which are light, they're fast, and you can just plug them in properly. on USB C or the new Thunderbolt PC, they're also very fast and that's a drive you can really edit quickly, especially if you're doing 4k, but then you might want to drive. I just sent an older type of six terabytes. from the basic Western Digital unit to Los Angeles with the Nolan just as a backup unit, just as a place where you like to have redundancy and then eventually you want even more redundancy, which means if it's just in one place, it's not nowhere if you have one you have zero if you have two you have one what and that's in terms of the locations why because if you have a hard drive it fails what would happen to that footage so think about redundancy , think about backups, think about whether you will need them in the future, that's a lot. and in fact we will include in the resource guide some of our recommended videos on network attached storage and hard drives with more tips.
Domingo asks how to get the correct tag names and descriptions. Sunday, that's a great question and we'll link in the resource guide to some of the best videos that we recommend here at think media, check them out, but again, the best resource we have is my free one-hour YouTube web class. I think the master class communicates this video, of course, dealsabout the production side of the film. Within the team side, that free master class on think master class comm is a one hour training on what you're talking about, how you title your videos, optimize your videos so they get more views, so if you haven't seen it yet. definitely check it out jazz mania asks what video resolution do you personally recommend exporting in 1080p or 4k.
Is there a substantial difference in either? So we've already touched on that a little bit in QA, but some additional thoughts, I mean, there's a substantial difference. 4k when we shot with our Sony 7-3 camera, which is our favorite high-end camera, and we made a video of what's in our camera bag right now for 4k shooting events and all that, we'll put it on the resource guide. it looks just beautiful 4k it's sharp it's beautiful 1080 it looks great we're shooting with a 7-3 right now in 1080p and it looks good too but there's a substantial difference in sharpness and detail if you think about it 4k It is four times larger. than 1080p as could fit for 1080p clips in your 4k footage and yes there is a difference now, is that a deal breaker?
I mean, tell me in the comments how you think about this video. All this video has been in 1080, the m50 footage. What I filmed for the 4 part series was in 1080 and I think they are both really solid, of course a lot of people will watch it on their phones but then other people will watch it on their 4k TV so use what you have. now if you have a 4k camera and you can edit in 4k then you can do it too because you will prepare yourself for the future, if you don't have it yet don't get stuck, keep creating content now with what you have and then as you generate income, as you build momentum, you level up your equipment, your computer, you're editing your software as you go.
Lyn, why does it take so long for the ke-yah lens? The reason K takes so long to export and do everything is because, as we just mentioned, it's a lot bigger, it's four times bigger than 1080p, so it takes longer to edit and back up the footage. The file sizes are larger if you have to send it to an editor or something definitely if you ever plan on Hiring an editor or your business owner who will work with the virtual assistant is something to consider because 4k will take longer to load, be transferred and put in Dropbox and I think those are the reasons, this is the deal if you have a fiber connection on the Internet. your home internet speed as 5g is rolled out as computers get faster 4k will be more practical and this is a good point to mention this is perhaps one of the reasons why even if you have access at 4k, it's good to stick with 1080p for faster speed and in 2020 and beyond speed is very important to build your brand, build your channel, it's never just about a video, it's about quality but also quantity, so Think about whether you have the resources to support a fast 4k workflow and whether you don't. maybe you want to stick with 1080, okay man just clap, let's go for yourself, for your family, for your future, you made it this far, let me know in the comments, mega think media, how to record, edit, upload video, You've reached part 4, but guess what? what we haven't done yet yes we've come a long way but we're really just getting started because once you release a youtube video it's about getting views it's about connecting with people in the comments it's about build your brand so you can impact people so you can make money online so you can build a legacy and that's our passion here at think media and that's why the question of the day is did you make it this far?
There have been a lot of definitely take advantage of the resource guide in the description below and then what I want you to do next is watch our video here on think media on how to get more views on YouTube. There are three specific tips on how to create good video ideas get more views that will go deeper into the content you just learned, so click or tap the YouTube card to watch it and I'll see you in the next video.
If you have any copyright issue, please Contact