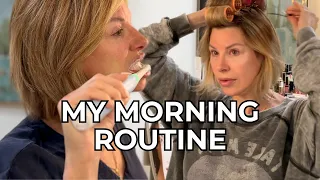
How to Look Amazing Up Close in Person
May 30, 2021Hello guys, welcome back to my channel. Today we will talk about how to
look
good inperson
. This is something that I think is everyone's ultimate goal when it comes to their makeup. Everyone wants tolook
good inperson
. Nobody wants your base. To look cakey people want to know how to do their eyeshadow and lipstick right so they can look good in person. I was inspired to make this video for many reasons. I feel like every time I meet a subscriber somewhere there are a lot of things. A lot of times people comment on my makeup and say, "Oh my gosh, your makeup really looks good in person." I'm so glad I asked myself that and it made me think that of course that's the end goal for me.
I not only want to look good, you know, in front of the camera, here, with the lights in my studio, but also outside of it. I want my face to look really pretty. I want it to be accessible. I want it to look like a version of myself, but I want to make it better. A little disclaimer before we get into this, my face is different than yours obviously, but I really want to empower you and encourage you to really try to understand your own characteristics and what works best for you, so as we move forward in this tutorial, the makeup.

More Interesting Facts About,
how to look amazing up close in person...
The look I am going to do will reflect who I am inside and what I feel most beautiful in its result can and should be different from mine depending on your personal taste, so here is the before and after as you can. see if the look we're going to create is okay, so first we'll talk about the eyebrows. The eyebrows are the only lines on the face. They are the first thing you see on a person if they are not done correctly. they can be a little scary they can make it look like you have an unwanted emotion on your face if you don't have the right lines so I'll quickly go over the basic tips that I like to follow to achieve My eyebrows are as natural as possible but of course , you still want them to be defined, as you can see my natural eyebrows only have a few hairs.

I'm missing a lot of hair here and I don't have as much hair as I would like. Here, if you have a very full brow, you may not need to follow all of these steps, you may just need to take a step back and evaluate your face and simply fill in the sparse areas. I'm going to use the benefit precisely of my eyebrow pencil, this eyebrow pencil. The range is really good for finding the right color for your hair. Also, Anastacio does a great job on this. Both brands will have some kind of guide depending on the color of your hair and that is what you want to match. so I just look at the natural color of my root hair and then also the natural color of my eyebrows.

Today I'm using the shade because I like to trace it on my brows by pressing the pencil against my nose and wherever it lines up. Above is where I want to put a clear mark and that will show me where my eyebrow would start. Something I've noticed a lot of women do is not press down on the pencil to make that mark, they'll go. from the edge of the nostril and I start the eyebrow here, but as you can see, if I use that to start my eyebrow, I'm just going to start filling it in from there so you can get an idea, see?
If I followed that rule of going along the edge of my nostril up, look how funny that makes my eyebrows look, imagine if you filled in all the rest, it would leave too much space between your eyebrows, so that's why. you really want to make sure that you're pressing the pencil into the nostril and that's where it should start, so now I'm going to go ahead and start filling in this inner part very, very lightly with hair-like strokes using this pencil and always alternate between fill in the eyebrows, turn them around and brush them with the spoolie.
Look at the difference in the starting points. Okay, so for the end of the eyebrow you want to make sure you go from here to the edge. eye and then you simply make a line to where your eyebrow should end, the arch of the eyebrow should go from the center of the nose to the pupil of the eye, right there I drew the point a little high, but that's where the highest point of my eyebrow it should be and then it should taper off towards the end. I'll use a little more pressure on the outside of my eyebrows, that's where I'm missing the most hair on my eyebrows.
Using more pressure will create a darker look. line and then as you go towards the center, you want to use very, very light strokes to avoid the square brow look. If you are having difficulty with this, you can try using a slightly lighter pencil in that area until you get the hang of it. Once you get the hang of it, you should be able to use just one color and use lighter pressure to create a lighter stroke with the brow pencil, so that's just a good rule of thumb, don't worry if the eyebrows are too perfect, they shouldn't be sisters. twins, so they won't be exactly the same, but you should be able to make them as symmetrical as possible.
It is always very useful to brush your eyebrows with the spoolie. I really need to trim my eyebrows, they are a little long today but bear with me, so as you can see the eyebrows are nice and filled in, they frame my face but they are not too scary, they are not blocked, they don't look like they are filled in with marker, it still looks like they should be there then. Now we will talk about the complexion. This is what I think was the most noticed makeup mistake and also the biggest fear for most women, number one is that the shade is wrong, an orange mask with a lighter.
Neck people are very afraid of that because you probably saw it in high school, maybe you have scars from it, maybe it happened to you, it certainly happened to me and the second thing is that pie-faced people don't He wants to look like a super. There is a very thick layer of makeup on the skin and I will show you how you can still wear a lot of makeup. I mean, I use so many different products on my skin, but it all depends on how you layer them and how much. you use, so I'm going to share all of those things with you before you even start applying products to your face.
You really want to take a look at your own complexion. What is your type of skin? Is it as oily as it is dry? It's a combination of mines. combination, so I get a little oilier all over the T-zone. I have larger pores here, which shows that I get a little oilier there and then the cheeks can get a little dry. Skin care is very important. It will never look better if applied over a super dry foundation. Think of it as your canvas. I assume the paint won't glide very well on the canvas. If you have rough spots, you may need to sand it or exfoliate it, so there is that.
In fact, what I did today I used an exfoliating mask. I'll have a link below. It's from Cora Organics and I loved it. I love it because it also brightens my face. There are two different types of scrub. He is a chemical exfoliant. and also a physical exfoliant, the one I use this morning is a little bit more of a physical exfoliant, which means there are actual physical beads that remove any dry skin, so after I used that mask this morning and rinsed it off, I went into the eye. cream and I also used a moisturizer, those are very important to prepare the skin, even if you have oily skin, in my opinion, you still need to moisturize and you still need to exfoliate, so my skin is super soft thanks to that mask, it's not perfect. blemishes I have texture, but I did my best to try to get rid of the dry, flaky spots with a moisturizer before makeup is so important and this is also something you'll have to think about for your own skin if you have more .
For oily skin, you may want to use a lighter gel formula. If you have super dry skin, you can get away with something a little heavier. Today I used the Touch Wet Skin Cream. I recently talked about this in my favorite video. I love this. I feel like it's
amazing
even for my combination skin. Oh, and also if you have dry lips, exfoliate your lips. It's really good to have a good routine, maybe pick a day during the week when you do a little extra with your skin. You exfoliate your face and lips, that will really help you.You don't want to physically exfoliate your skin every day because it can actually irritate it, so go for two or three times a week if you're really struggling with dry skin, okay? After I've exfoliated and moisturized, it's time to evaluate my complexion. I have some acne scars. I have a little bit of texture so I really like to focus a lot of my time and make my complexion look good if you already have a really nice complexion. Even skin tone again adjust this to suit your needs, you may want to use a little less product or perhaps something with lighter coverage like a BB cream so keep that in mind you can adjust based on your own skin, so for me, Personally, I really feel that the primer helps a lot.
I really liked this milk makeup primer. I feel like it really helps my makeup last a long time which is important for your makeup to look good in person, if it starts to fade it won't. It looks really nice so I'm going to go ahead and extend this focusing on the T zone as again that's where I have the most oil but I like to apply it all over my face no matter what foundation you use to prep my skin. somehow even if the foundation is just a moisturizer do something before the foundation it will help you a lot so i personally like a little bright complexion so i have really liked this glow complexion booster Milani soft focus.
I love how it adds shine. for the skin but it doesn't look shiny as an early foundation it just helps things look nice and fresh. I'll focus on the outer parts of the face because again I have combination skin so I'm a little drier. on the cheeks, okay, move on to the dreaded foundation, finding your foundation shade can be difficult, but it doesn't have to be if you just know a few basic rules, each of us has a skin tone and an undertone, so For example, my skin. the shade is light to light it can be medium it can be tan it can be deep it can be super light so that's all you have to know first which is very easy to know your skin tone the hardest part is listening to the nuance of your skin.
We all have a different undertone and they are described in makeup foundations in three different ways: a cool tone which has a slightly more pink undertone, a warm tone which will be the most yellow undertone and all the neutral undertones and undertones which means you have a little of both. I hope you can see on camera that I have a little bit of both, so I'm considered a neutral undertone, so I'm a light to light skin tone with a neutral undertone, as you can see. I have a little bit of pink there but I also have a little bit of yellow and then if you look at my chest too, I see warm tones and a little bit of cool, so that's all you need to know.
To start with, you may notice that most foundation ranges have a C and an N or W next to them and that's supposed to indicate your undertone, so a lot of my foundations have an N and if it's not labeled on the bottle, it usually says somewhere on the website, if you're looking at it, what shade the foundation is. This is a N one cream, so it has a neutral undertone. This BD wand or foundation only says "fair delight" but in the website description it is in neutral shade. Also my Estee Lauder Double Wear nude is in shade one and two which is also a neutral shade so that's where you should start of course we all fluctuate throughout the summer and the winter months we tan a little . in summer and then many of us go lighter in winter so that's something we can discuss later but from now on the basics are knowing the tone and the undertones so once you know it's okay, I can highlight with a neutral tone, you want to see foundation options that are in that range, pick three and you want to show them off on the side of your face.
Here I'll show you that you want to take them and just show them on the side of your face and blend it into the neck if it disappears into the neck like this is the right shade it'll be pretty obvious if it's not but that's what you should look for to avoid orange face. with a lighter neck, so today I'm going to go for the Estete Lauder Double Nude Water Fresh Makeup because I feel like it's very hard to go overboard with this particular foundation, it's a very watery formula, as you can see, it's like running through my hand, but I absolutely love it, so I'm going to start by applying a little bit in the center of the face and another thing you should always remember, especially with foundations, is that you can always go back and add more, it's not that easy. to remove the foundation and try to make it look less cakey once you've gone overboard, I'm taking a Real Techniques buffing brush and I'm really going to start applying this into the skin making sure to blend it into the neck so there's no no foundation, even if you have a good shade, you want to make sure you do it and I'm just taking my time with this, if you're having a hard time getting your foundation to look good, ask yourself If you've invested in any tools, are you using just your fingers? ?
Don't get me wrong, your fingers are great tools for certain things, but if you find that your foundation just doesn't blend quite the way you want it to. and you haven't tried a brush or a sponge, really try it, it makes the biggest difference and you know I've personally found that I like using both so I'm going to go ahead and polish my complexion with a brush andthen I go in with a sponge and take a little bit of the product that I have on the back of my hand and I'm going to really press this into the skin, another makeup mistake that a lot of people make is not getting the sponges wet.
Beauty sponges should always be moistened. I know there are some people I've heard of who like to use a dry sponge. Using a damp sponge will really help remove excess foundation and simply make the skin look more skin-like, even if you are using a fuller coverage foundation this will create the best finish. Plus, you won't have to spend an arm and a leg. and a leg on a beauty sponge. I will have several links below that will work for your price range and seriously, they are very good, so be sure to check the description bar if you need a sponge.
Okay, I've spent several minutes. pressing foundation into the skin I feel like what a lot of us get carried away with is that you can look at this complexion and say oh no, I don't look flawless, but there are blemishes peeking through, I better pile on more foundation, don't do it. Try to even out your skin tone as best as possible with as little foundation as possible. It's always best to use concealer and spot concealer in the places you need it if you have active breakouts. I still get the ones that It may be a little trickier but all you have to do is continue to take small amounts of foundation and layer over the spot where you need more coverage and just build it up slightly with a sponge until you get as good coverage as you want.
You can and then you can still go in and hide any of those stubborn imperfections that are still showing. This may not have been the best example of a combination. I've never actually tried this primer with this foundation, but I'm noticing that they're not really blending, so that's something that's maybe a blessing to happen, so I could talk about it. Certain products just don't mix, and if they don't and you notice something is wrong, you have to try it another way. combination, don't give up, it takes a lot of trial and error to find a primer and foundation that works for your skin specifically, everyone is different.
I just don't think this primer and this foundation go well together, but I'll go ahead and hope for the best for the concealer. I'm going to go into my personal favorite. This one is foolproof for me. It's by Laura Mercier. It's the Fusion Flawless Ultra-Long Wear Concealer. It looks beautiful all day long. For me personally, it's better. than the Tarte shaped tape, I'm going to use the shade 1n and I'm just going to put a little bit under the eyes and I'm going to go ahead and blend this out with a sponge. The same rule applies with concealer.
Less is more. so just add a little at a time, you can always reapply another more precise layer of concealer if you have darkness under your eyes. I always buy two shades of concealer, one that matches my skin tone best and then another that is slightly lighter than my skin tone to brighten my under-eye area. Personally, I don't feel like wearing a shade extremely lighter than my under-eye skin tone, it's flattering in person, so my advice would be to choose one that's one or two shades high. at most lighter than your skin tone under the eye area, you don't want it to look too bright otherwise it doesn't look natural.
I have quite a bit of texture on my forehead. We all have a little bit of redness around our nose here too, so I'm just going to put a little bit of concealer in that area. I'll use a brush to distribute the product first and then make sure it goes nice and perfect with the rest. skin products by simply sponging them on and pressing them into the skin, so my skin looks super fresh and dewy. I like the amount of coverage I have, it's all nice and blended, but I want you to notice and pay for it.
Heads up, I still have a couple of things that show you that it's okay to look human because you are. I know a lot of us see photos on Instagram and makeup on Instagram and you have to remember that a lot of people use Facetune to blur their blemishes and pores we all have pores we all have blemishes sometimes and that's okay we're not done with the complexion yet so don't worry about wrinkles now but I want you to see that my skin doesn't look completely flat and flawless right now it just looks better than when it started and I feel like that's what if you're able to evaluate when to stop applying foundation , it won't look cakey, it just won't, but if you keep layering or adding too much product from the beginning it's going to be very difficult to avoid looking cakey in the end, let's move on.
I keep talking. I feel like these videos are going to be really long because I could talk for hours about all the tips and tricks I've learned. Because I really want to share everything I've learned with you so you can go out and do your makeup and feel super confident, that's my overall goal. Okay, next we're going to really powder our face. of people are afraid of powder because they feel it will make you look dry and dusty, now you can, but I'll show you how to make sure it doesn't set. Powder is the only way to ensure your makeup lasts. all day if you are using cream products and not using a setting powder, you may not look your best in person after a few hours as it starts to fade from your face.
I'm going to use Thrive cosmetics, what is this? called filtered effects soft focus fixing powder HD. I'm going to pour a little bit on the lid and I always like to set under the eyes first and before I do that I want to make sure I remove any of the creases under the eyes and I'm just going to take a small brush and press the powder under the eye area. to really set it and just take it out. This powder is beautiful because it somehow sets the makeup very, very well, but it also has a beautiful blending effect, but it is not visible on the skin like some powders can be and then I will take a larger brush and use that same powder to set the rest of the skin products that we have on the cheeks and the forehead, but also the chin, and I also like to lower the neck to make sure it doesn't transfer throughout the day, if you like something that's also very important when you are getting ready for the day.
Make sure you are preparing with proper lighting. Think about what you are preparing for. Are you getting ready for the day? Where will you be? Will you be outside? If so, try preparing by a window if you wake up. too early and it's dark outside invest in good lighting, somehow find the best place in your house to prepare so you really set yourself up for success because really lighting can be half the battle if you're preparing in the darkness. room, you can accidentally apply too much and then you go out into the daylight and realize ooh, I probably could have used less foundation oh, it's a little dark, good lighting can help you avoid a lot of those mistakes, okay, now The makeup is nice and set, you can see a little bit of powder on the skin, but that's okay, we'll deal with that later, so this next part is kind of an extra step that I personally love to do if you have a lot. texture you might want to skip this because it might emphasize the texture a little bit, but I like to take a finishing powder, this is the Milani prep set and the clear shimmer powder and I like to take it and just press it all over my complexion and For me this helps restore a little luminosity to the skin.
You don't need that much. I'll just take that and press it all over my skin. I went into quite a bit of depth in a recent video on how to create a really pretty, flawless drugstore complexion, so I'll have the link to the video below if you're interested, let's move on to the bronzer. I'm going to use my current favorite bronzer, this has been one of my favorites for a long time. I also just did a video on my top 7 bronzers so I'll have that link below as well, but I'll just be using the Thrive Cosmetics Sunchaser bronzer in the shade ray and what I love about this is that it adds that warmth back to the skin, but it doesn't look fake and it has a little bit of a blurry property to it so I really feel like it softens any texture I might have and has the perfect undertone so I'm going to go ahead and use a fluffy brush to warm up the entire complexion.
I'm not going to do any heavy contouring because I feel like if you're not a pro at contouring and you try to do it during the day, you're probably going to do it. It looks quite scratched. Start by simply using a bronzer to warm up your complexion. As you get better at makeup, you can definitely go in and try to do some contouring. I personally don't contour every day, I just like to use bronzer. put it on and buff it so I make sure to blend the bronzer into the neck and you can even do it into the chest if that's where your shirt is and the neck line because that really helps make sure everything looks nice and seamless.
You may notice that it looks a little smudged on the cheeks, that's where this comes in handy. I'm just going to take a little powder, you can use whatever's left on the brush, but like last time I had a shimmer powder on the brush, I dipped it into my little bit of translucent powder and I'm just going to apply it over the bronzer for all over the skin and that will create the dimension and warmth you want, but it won't look super makeup. I hope you can see the difference that makes. mixing is so key guys, I can't emphasize enough if you can see the lines of your foundation, your contour powder, your blush or your highlighter, it won't look good in person so mix all your products no matter what it is .
So key, okay, next I'm going to use a highlighter. I've been really into this honest Beauty Midnight Shimmer Highlighting Powder. This to me is such a beautiful highlighter in person on camera. You know, sometimes I use a little more intense. products, but sometimes when you go out in the sun and you see a big shiny streak on your face, it suddenly looks less natural and not as flattering, so I'm going to use this, it has a nice baked formula and I'm going to start applying this on cheeks. What I really like about this is that it's super buildable so I feel like I can really buff it into the skin and it will look good no matter what I give you. a shine but it will look much more natural.
Personally I like to tone it down a little on the cheeks. I would also like to put a little bit here on the nose and just a little bit in the center of the nose, no. too much because again, you don't want too many visible streaks on the face, so again, after the highlighter, we're going to buff everything out. Next, I'm going to add a little bit of color to the cheeks that I'm going to use. L'Oreal's Paradise Enchanted Blush in the shade Shy, this is a little more of a beige apricot shade so it will look very very pretty in person, it will give a nice luminosity and flush to the cheeks but not It will look unnatural.
Many people don't like blush. I still don't always get it because I love blush so much. I'm going to polish it a little. This is a little brighter than I remember. We could change it. a little bit of this Burt's Bees blush in the shy pink shade like a little bit because it's a little bit more matte and I'm just going to layer it on the apples of my cheeks. You really don't need too much. I would like. It makes the complexion younger and healthier, but again use light layers and you'll avoid the cakey clown look.
You know a lot of people are afraid of looking like clowns with blush, but you just have to use the right amount and blend it out. mix mix mix seriously mix everything mix everything for ten seconds longer than you think you should okay I'm going to wipe off the foundation that's on the lips this is a trick that I like to do personally because if I just go in and apply foundation directly on the products I put on my lips during foundation application. I have a weird line on the inside of my lip that I hate, so this really helps prevent that during the day.
It's fine for eye shadow. I think I'm just going to do something really simple. I'll stick with some matte eyeshadows and use Milani's most loved matte palette. I'm going to start by taking a fluffy brush and I'm going to dip into this shade right here and I have a little bit of concealer on my lid, so I'm going to make sure to press into the crease of my lid and then I'm going to use this shade and apply it all over my lid to the crease. I'm not going to do too intense an eyeshadow today just because I feel like making your eyeshadow look good in person could be a whole separate video and I'd be here for another two hours explaining this to you, so I'm just going to take a neutral eyeshadow .
Brown and I'm just buffing this all over the lid and through the crease and a little bit above, but I'm making sure that this shade is light enough like it's one of the lightest shades in the palette so again it won't show through too harsh. and I'm really taking my time to sit here and blend it out and that's why I feel like tools are really important. Using an eyeshadow brush is very important. Find something fluffy. The elf does a lot of good things and doesn't have to be super. It's expensive and using a brush to buff everything in using your fingers with a matte shadow just won't give you the same effect as buffing an eyeshadow.
With a real brush, I'll take the same shade and sweep it across my lash line.lower. I'm actually going to take the same brush and dip it into the shade just below the shade that we're using and apply a light dusting of this to the outside of the eye just to create subtle definition there and stop the timing of the eyeshadow just right. below the crease, right in the crease, I guess, and then I'm going to take that same shade and pinch the brush and lightly sweep it along the outer third of your lower lash line, also making sure to buff it in and blend it really well.
Also something I wanted to mention is that you look good when you feel good and when you are doing your makeup step. Come back and discover your favorite features for me personally. I really like my eyes so I know it's something that I can really highlight and it will make me feel confident and it's something that I really like about my face so even though this eyeshadow is not very bold. I also really like my long lashes, so I'm going to really emphasize what I have and I'm going to emphasize my natural lashes. If you have
amazing
skin, let your skin be the focal point.I love the natural color of your lips. Put on a tinted lip balm and let your natural color shine like it's really about figuring out what you want to emphasize and ultimately what makes you feel most confident because, like I said, you look better when you feel better, the people will see it. You'll look good in person if they can see that your makeup enhances your natural features and makes you more of who you already are instead of using makeup to mask things, of course makeup is. amazing for hiding blemishes, of course, it's really important to learn how to use your makeup look instead of letting your makeup look where you know I'm going to use a mascara that really makes my lashes pop.
This is the Marc Jacobs Velvet Noir mascara that I have. Many favorite mascaras, L'Oreal Lash Paradise, are also very similar to the drugstore ones. If you're looking for an affordable option, you guys know how much I love it, but I'm really going to use this one to enhance my lashes today. Personal taste of mascara is a little clumpy. I like it a little piled up, a lot of people don't, and if you don't, choose a separating or lengthening mascara rather than a volumizing one, but for me and my lashes I really love pumping up the volume.
I tend to get a little messy when it comes to applying mascara as I smear mascara all over my eyelid all the time but I just wait for it to dry and then wipe it off while we wait for the mascara to dry I'm going to go ahead and apply a lip color This is where you should also set yourself up for success if you're going out to dinner and you say you're going to have pizza, you might want to think. Go ahead and maybe you don't want to wear a bright berry lipstick. Think about something that will look good, something that will be easier to touch up.
I feel like planning ahead is very important, so I don't feel like getting high for today. -Maintenance lip color so I'm just going to use the NYX butter gloss, this one is in the shade tiramisu and this will only give you a little bit of color but it feels very comfortable on the lips. Also, today I will wear my hair up. I know I will be confident walking outside and not having to worry about my hair flying into my shine. You can also use a lip liner if you want, especially if you are going to wear something that tends to bleed a little or if it is a bolder color, you will definitely want to use a lip liner which will help your lip color last all day , but just get familiar with your products, learn what works best, try your products in different combinations, find out what works on your lips or your face.
Okay, now I'm going to take the eyeshadow brush that we were using and I'm just going to go into the crease and remove the mascara marks. I will also remove them below the lower lash line. Now we take a step back. and I evaluate the situation. I'm taking what's left on the blush brush and adding a little more because I personally like blush a lot and I might add what's left on my bronzing brush to my forehead just to warm it up even more. I'm even going to revisit the brows and brush them and might even fill in some of the sparser areas on the outside and then this is the part that I feel is overlooked, you guys don't underestimate the power of setting sprays I'm telling you ago it all looks so much better in person and makes your makeup last longer it's just the best if you've been with me for a while you'll know about my three step setting routine I know it's a bit more if you don't have time for that try just a spray setting spray and see how you feel and what difference it makes, but I like to use two different types of setting sprays, one that is more or less gentle or moisturizing the face and then one that will be to set it and keep it on the skin all day , so I'll use mac fix+.
I normally use the Smashbox base water but fix+ is also very popular and if you have it, use it so I'm going to go ahead and spray the whole face with fix+ and I'm very generous with the settings for you guys. Now I take my handy fan, I'll take my sponge and I'll go over everything and just press it into the skin very lightly and after I've smoothed my face with that spray, I'll use Urban Decay all night. This is protection against contamination. I don't like it as much as the original. -More nights, but I'm just trying to use it, so let's put it all over my face.
I'm going to be equally generous, the same thing where we dry the face and apply the sponge to the skin and then for me, since I have. combination skin I like to take my Rimmel clear pressed powder and I'll just press it into the areas that I know I don't want any shine during the day, so because of the size of my nose, my smile aligns my chin in the center. of the forehead and I even go over this part of the eyebrow a little to the tip of the nose. Okay, I can't live without eyebrow gel either.
This is the benefit of the 24 hour brow center and I'm just going to run this. through the brows to lock them in place and before I forget, I'm going to take a little bit of the honest Beauty highlighter that we used and I'm just going to apply a little bit of this to the inner corner of my eye, I think. that makes your whole look more complete I feel like it brightens the eyes I love this step I'm also going to apply a little bit right under the eyebrow okay guys that completes this how to look good in person makeup obviously this is It's not the only makeup style you can use to look good in person.
This is just what I wanted to do today. Obviously, you could use more eyeshadow than this. You could do a bold lip if you want, but the idea is to just look like. a better version of yourselves I'll just get a little
close
r you see you can see the complexion my skin is not perfect you can still see bumps you can still see the pores but that's okay and normal I'd rather look human than look like I have too much makeup, that It makes sense even though I wear a lot of makeup like that with a lot of steps, but I feel like when you step back and like to lookclose
r, it looks more like skin than makeup. and that is the general objective.I hope you found it useful. Another thing to remember is that no matter what makeup style you do, set yourself up for success throughout the day. Also put some blotter sheets in your bag. Put a drying powder in your bag. Bring the lipstick you're using so you can touch up throughout the day and feel nice and fresh. You can also bring maybe a mini setting mist and that will also refresh your skin if you feel like it looks good. too dry, there are so many different things you can do that will really help you make sure your makeup looks really good all day long, no matter where you are or what you're doing, so don't forget that it's always great to smell good.
Also, so don't forget to spray a little bit of your favorite perfume, not too much perfume to where it's overpowering, but enough so that when you move, everyone says, oh, she smells fresh, keep your makeup accessible and be confident and wear a smile and you will do it. always always always always looks good in person and in photos, so I hope you found this helpful. If you have any questions below, please leave them. If there's a part of this video that you still have questions about, let me know because I really could. I talked for days and days and days about this, if there was a makeup mistake that I didn't mention today, please leave a comment below too because I would love to make more videos that address these things to help you look your best and be confident in your makeup application skills, so leave comments below if you are new here.
Hi, my name is Allie and I would love for you to join the family. You can do this by hitting the subscribe button and if you are already subscribed but want to be notified on Tuesdays, Thursdays and Saturdays when I upload, click the bell after you subscribe and you will receive a notification every time I post so that's it for today's video. I know it's a very simple look in the end, but I hope. You learned something today. I love you so much, remember that you are so beautiful. I hope you know this and that you don't need makeup to be beautiful, but as always I hope these tips and tricks help you be more confident in your makeup. application well that's all for today I love you all very much and I will see you in my next video I love you bye
If you have any copyright issue, please Contact