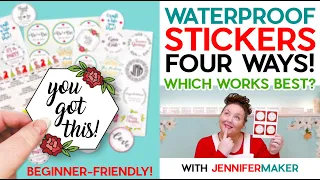
Easy Print & Cut Stickers on a Cricut!
Jun 05, 2021Hello everyone, my name is Jennifer Maker, today we are going to continue this and make print
and cut
easy
stickers
in the Make it Easy Cricut Craft ilan challenge. It's actually veryeasy
to make your own decals once you know what to do. and my daughter Alexa, come on, Alexa say hello everyone, she is a talented artist and designer and she has made us a set of very cute animal drawings so she can show you how to make your ownstickers
. You can do it in just four easy steps. steps and we will show you how to do it in this tutorial, step one, get the design.
I have several free sticker files here are the bee stickers can you see them? Thank you, you'll see they are angled like a Here's a really bright light so you can see well, there are the bee stickers, here are Jennifer's crafty stickers, you can see they look like traditional stickers, don't you like that? You can take them off right now and put them on something, look, and there you have it. it's folder stickers so my blog is on Jennifer maker.com and if you go to the red navigation bar at the top of the screen and hover over it you can get a free password and then you can go into the library and once you If you are in the library you can search the files but I really think it's faster if you search the page so if you just want to browse I have tons of free files here and the print
ed and cut stickers are here , there are actually three different ones. we have the crafts that are your Jennifer crafts and our bee stickers and folders and all you need to do is right click on this and it will download now.

More Interesting Facts About,
easy print cut stickers on a cricut...
It's important to note that these are PNG files rather than SVG or what you would normally share. and I will explain to you how it works, of course, if you want to make your own stickers, you can draw them yourself or search for images that are in the public domain to use. In fact, we're going to start with how you can take a picture that you find or that you've drawn and turn it into a sticker and then I'm going to show you how to make all the other stickers because I know you know a lot of different ways that people like to make stickers and if You're not familiar at all with how to archive and upload files to Cricut design space, which is what we'll be using for this tutorial.

I have an amazing video series that walks you through everything and shows you how to do it on Mac Windows. iPhone and iPad and it's totally free and it said Jennifer maker.com slash svgs is fine so if you're not familiar with this be sure to check it out in step 2. Print your sticker designs if you plan to cut them by hand with scissors or a craft knife, all you need to do is place your stickers on label paper and cut them out. It's that easy, but I want to show you how you can print out sticker designs with registration marks that your Cricut can use to then cut the stickers for you, so let's go.

Head over to Cricut Design Space so I can show you how to do this. This is what the Cricut design space looks like when we first get here and we're going to load up a sunflower so you can see how you can take any image. and turn it into a sticker, okay, so we'll click new project and click load load image and explore and I have a sunflower right here, it's one that I drew, but whatever graphics you use you won't find, this works fine. the higher the quality, the better it will print, but you know we work with what we have good, so we click open and what appears is a screen that looks like this and it asks us what the image type is, but I always say complex for this, although otherwise what happens is you get a weirdness like you're trying to narrow down your colors.
We don't want that, in this case at least we want complex and then click continue and what you get, we'll make it bigger so you can see it. alright, here's this image that has the sunflower on it, but keep in mind that it has a white background, so if we printed this out and cut it out now on our crickets, it would be a rectangular sticker, but I don't know about you, but I. I'm two stickers that have the area cropped correctly, you know, so that it fits the outside of the image and it's not just a square, because I mean anyone can do it, we want it to cut the shape of our sticker well, so yeah you have a white background or a color which is really any color that is different from your image itself, all you have to do is make sure you have the select and delete icon selected which is here in the top left corner and then click your background like this, now you see it changes to this blue and white checkered pattern, which means that you removed it because that's the background, which now means that this image is now transparent, so now we only have the sunflower and we don't we have the background which is what we want if we want to cut out the shape of our sunflower and you know, if you have to go in there because it's not quite clean, you can use the eraser tool and you can erase, you can look like this and erase everything, you can erase a lot and it makes this size of your eraser bigger and smaller, but we don't need to do that, it's perfect like this, okay, then we click continue now, when you get to this screen, you have two options, you can save as a print and cut image or save as a cut image of course we are doing a print then cut stickers so we want the default which is save as a print then cut image and we click save and that's it we have uploaded . a super cute sunflower for
cricut
design space that can be turned into a sticker but there's more so let me show you what to do to make sure it's selected and we click insert images and now it's on our page.Okay, let's make this bigger so I can see it better, so it's not a very big sticker, you know, it's a little over an inch, so if we cut it out right now, by the way, you can see on the left it says cut and print, so we know we could. Print this and it will trim it and cut it right on the edge of our sunflower. If you want it to look more like a fairly traditional sticker and have an outline around it, there are things you can do to duplicate this image. hold down the right mouse key and choose duplicate, so now we need to grab this image that you just duplicated.
Let me make it a little bigger to make sure everyone can see what I'm doing. Take this image that I've duplicated and up here, under fill, at the top of the window, change it from print to no fill and now we have a great background and let's change that color to white because we want the white paper to appear around it, OK? Now we have a white image. If we put this on top, it will still be the same size, so let's make it a little bigger like this. Now it's a little bigger. Now let's take this image and send it to the back because it should be under our sticker so I'm going to go fix it and choose to send it back look at that this also looks like a sticker now because now it looks like a sticker to me and then let's make sure that everything It is perfectly aligned.
I'm going to select everything, so I just click and drag around the background in the foreground and then I go to a line on the edge, choose the center and we saw them move a little bit and now this is a lot closer to what I expect it to be. the sticker is seen and you want to go down, you know you're not done yet, one more thing you need to do is click on flatten here in the bottom right corner and now you can see the The background is still there, it's white, but it's still there .
Now we have an image and it is cut and printed. If we click on "Do it now," you can see what will happen and then this is where we are. In fact, I'm going to make a long video in today's craft, so you'll see how it works. That's one way to do it. Let me go ahead and click cancel. Now there are two more ways we can make stickers. let's draw them ourselves, my daughter Alexa funny drew some bees so we could see what they look like, because if you want to make your own image like you, let's upload those, let's upload, upload images, browse, we're.
I'm going to find the bees and these stickers by the way they are in the file that you download for my blog, so you are welcome, so here are the herpes. She drew them herself in Blender, which is a 3D animation program. she is amazing click continue and here we have our bees and we have the same thing as before we have this white background and if we click it goes away and now we have the bees with their little white wings and that without bat bodies and nothing else in the background to make it print, it will print just this and crop it exactly now if now it's going to be a little bit harder to create a white background and of course you don't have to have it so if you can just click Continue, save as image to print and cut and insert yours, insert them into your canvas and they'll appear right here and they're ready to go.
We can go ahead and just cut them out as is and they'll look adorable, okay? let me show you how to make my Jennifer maker and my binder stickers too. Those are also very easy. They are the easiest because they are all ready to use, so we click upload image and browse, and most of the folder stickers first. Again, these are in the file that are free on my blog, so these are the stickers that I put in the folder for the cut above the SVG design folder, which is like a job like all the course workbooks and those are already in my bookstore.
You've never heard from them. I'm not particularly good at talking about it very often. I'm actually the worst salesman in the world if you haven't noticed anyway, but here are the folder stickers again, we can click. complex and then click continue the background is already transparent, you don't have to do anything. I already prepared it for you, save it as a print, then cut the image and then we'll place it on our canvas with our other stickers, so I'll just click on it and then click on Insert Images and here they are, so I'll make them a little bit smaller so we can see them here so they are all ready and one thing I want to know is the size of printing and cutting stickers so we have a limited size, if we are too big it will tell us it doesn't fit but I have changed the size.
I've sized everything to fit so you don't have to worry about that, but basically I want to be under here, 6 and 3/4 wide and 9 and 1/2 inches tall, but they're actually ready for you and lastly , but not least, my Jennifer Maker stickers, which are so adorable. I'm in love with these things. I called them my crafty stickers, these are all my favorite things and again they have a transparent background and they're all ready to go, they have the borders around and everything, so we click, save it as a cut image for printing and go. To upload that, these are also ready, they are all ready, they have a border around it and you can see, so here is my little one, I call her Jenny, my little one, that's her name and here is my laptop and my computer, my folder. and my clipboard and my coffee and look I even drew a Cricut machine and a Cricut explore and easy press and a mini easy press and three mats yeah what a joy yeah anyway these are the stickers you can make or you can make your own.
Alright, now let's talk about how to print the stickers once we have them in Cricut design space we need to print them so I'm going to hide everything except our sunflower and I'm just clicking on the eye here so here's the sunflower that We upload it and what we need to do now is print it, so we just click on Create It and this is what it will look like after we print it and it's giving you a preview. Now many people are confused why there is a black box. Don't put a black box there, it's supposed to be there, it's your registration mark.
Without it, your Cricut won't know where to cut it, so it'll need to have that black box there, so don't worry about that, so click continue now. A screen comes up that says number one, so our first job is to send it to our printer, so you need to have a printer for this. Your Cricut doesn't print it for you, sometimes that's confusing too, so you just want to click the green submit button. to the printer button and a print setup screen appears, so here is my printer. I use an HP Envy photo 7155 and I'll show you my printer so don't worry so you can see exactly which one I use.
We want a copy and we want to add. it bleeds because it makes the sticker look better, especially if there is one. Sometimes the cut will offset just a little bit and so when adding the bleed, make sure that if you have it, you know that it goes right to the edge where you cut yourself. you know you have the ink that fills it in so of course that's like decal B that won't be true for this decal here but I still like to leave it on so I don't forget so keep adding bleed and then this one that says use the system dialog.
I like to use this to have more control over my printing. There's no need. You can go ahead andclick Print right now, but let me show you what happens if we do the system dialog now. Note that there is an important little comment here that says that after you click print, your print dialog may appear behind your design space app, so click print and this is what I want to show you because a lot of people say, okay, it's stuck. Here, what do I do? What you do is you click and drag the screen down and there's the print dialog, that's what Cricut was trying to tell you to do, so I liked it.
I like to have my print dialog so I can choose my settings better so I'm going to change my paper type to special paper mat and in quality I'm going to change it to best to have the best quality I recommend normal or better not draft , the eraser just won't look good and you might even mess up your registration marks by printing it like too much lately, so normal or better, okay, otherwise, this looks good and we click print now. I'm not. I'm going to click Print, but we're going to go to my work surface so you can see me print it.
Okay, so the sticker paper from the beginning of the cricket elves. I'm going to do what I normally don't do because I would love everything. cricket, but in this case this material is super thick and it won't go through most people's printers unless you have a pass that goes straight through, it's very thick, it's almost thicker than cardstock, so unless you You have a really nice printer that does what my printer doesn't do. I recommend that you avoid this. Unfortunately, it is very pretty. It's too thick for most of us. Well, what I do recommend are full sheet Avery stickers, so these two copiers don't matter.
They work well. I've actually had these for a long time. I don't think the box looks any different now, by the way, but it's the same product, it's just a full sticky sheet, it's like copy paper on the front and it's sticky on the back, and you can get them at the supply store office or on Amazon in many places, it's nothing special, but I like Avery. I think they are a good brand. Okay, you can also get clear, shiny ones, so this is what we're going to use. here's my printer and it's an HP Envy photo 7155.
It's not expensive, it turns out to be a great printer, so we're good, so there's the print tray. Here is our adhesive paper now in almost everyone. In this case, especially when you have a loading tray like this, you want to turn it upside down, okay? because what happens is it goes to the printer like this and it comes out like this, so now you put it face down. This is not always true. If your printer is like this, you know that printers can be different, what I recommend you do is test it and then make a little note and stick it here, which is exactly what I've done, so we have our sticky paper here, it's mouth down, close it.
Okay and you're done. I'm going to go ahead and click Print, so here's our printed sticker sheet, there's the back and the front, this is what it looks like, it's got that black border around it, which is what we want. Are our registration marks okay? Now we're going to trim this out, so our next step is to cut it out. This is actually very easy. All we have to do is place it in the top corner like this, so always make sure to print and then cut it out. going to the top left corner, we're not going to move it on our mat like we could do another project now, a couple more things about print cutting because this trips some people up, if you're having any problems, there are troubleshooting things that you can do first everyone always uses white paper, you know, colored paper, you need high contrast to see those marks there.
Secondly, make sure you have good lighting in your room and try to avoid spotlights like a desk lamp that is right on your cricket because it can cause strange shadows, okay, so you need to have good light, if your room is too dark , you may not be able to see those registration marks well enough. Well, nice light white paper and if you're still stuck, there's a complete troubleshooting guide online and I'll do it for you. link to that in my tutorial which in almost all cases can fix this problem and if you get stuck and still can't fix your print cut issues call Cricut remember services will help you so we have our printed sheet and our mat.
Our registration marks are clear, right, they don't get cut by accident. This was my attempt at printing a very nice, very thick printer master sticker paper on crickets. Look what he did, so he couldn't feed him completely and he finished. shifting my image down now yes this was obviously messed up but what if I had just moved it down a bit and only saw three of the edges and then tried to crop it? It would have failed, okay, we need to see the four, the four edges of our recording rectangle and we need to have a little margin there, that's the way that cricket ball is going to cut right, so here we are back in the Cricut design space now that we have we already printed it and it says printed and you know we printed it now we need to set up our material and this is important, if you forget to do this step you will end up with the default value which if you are using your Explorer could be any stuff. your dial is on so set your dial in your Explorer as custom, you don't have to do this in the manufacturer, it's basically already customized all the time and then in Cricut design space click explore all materials and I recommend that you use the sticky note material, so just find the sticky note there, select that click and that's it, that's it, we load our mat with our paper, we want to press the flashing button right here and it will start cutting and I want it to see what it does, so this light comes on and you want it to come on.
It's looking for your registration marks and it will do this on all sides and once it's done it will tell you it works and start cutting. actually they won't even tell you they will just start cutting or they might tell you it's not working but it worked so now it just starts cutting but if you get an orange screen saying oh this didn't work then I need to troubleshoot some more the problems I suggested so you can see how it cuts around the sunflower, but it has a white border, which is what we wanted, there we go, that's it, it was super easy. put it to download, let me show you it's a little hard to look for, it's very bright, but there it is, so there's sticker paper everywhere.
I really just want this sticker and I want to save it if you want. just go ahead and remove the sticker right now and put it in your planner, that's it and that's it, but I want to save this for later so what I'm going to do is I'm going to remove the extra to that's why I call it weeding so I just take the corner here and I'll show you what I'm doing up here, so I took the corner and I'm just going to remove all the extra stuff just like that. Like I broke the corner here just a little bit, there we go, I fixed it and there's our sticker, can you see? can you see the white border?
Look how easy it was, that's all, that's all and now what you can. What you do is just remove it from the mat and in step four we show our decals. Here are awesome decals we made. Here is our sunflower. Here are our binder stickers. They are all ready to use, just glue them together and place them in your folder. Here are our foxy lady stickers which are my absolute favorites, and here are the adorable B stickers that Alexa designed for us, aren't they just super cute? She did a great job, she actually did 20 different poses and I selected my four favorite poses from her cute little bundle, these are our easy printable stickers to cut, they are actually very simple to create and you couldn't have any sticker you wanted, you can draw your own, you can find things on Cricut Access, you can find things online, you can take photos and As long as it's on a white background, you can remove the background to make your own and it's super fun.
In fact, I like that. I'm going to show you how easy it is to do this, let's take our sunflower sticker. We peeled it off like any other decal and placed it in the corner and voila, isn't it amazing, I loved them, I love these decals, they are so cute and so many people are intimidated by them. for stickers and they really don't have to be because they are so easy you guys saw that today okay so these stickers are so cute and I love how easy they were to make. Which of these occurs the most?
You like me? The best thing is that I like B. If you don't already have a Cricut to cut out your stickers, you can win one in my monthly Cricut giveaway. Enter the Jennifer Baker comm slash Cricut giveaway and don't forget to share your photos at Jennifer maker.com. Slash Cricket Crafters tomorrow we are going to share the love and make it really super easy. Heart box, that's right and until tomorrow, this is Jennifer and except reminding you to create the life you love.
If you have any copyright issue, please Contact