Dialux evo - How to do Street Lighting Design Calculation1
Jun 02, 2021Good morning everyone it's Nela again and we got a special request from our subscribers and it's about road
lighting
after giving you all the links for roadlighting
uh from Dil's YouTube tutorial this one and this one is still not satisfied so we'll run . another calculation so you understand more, you are complaining that it is too long and you can't understand the tutorial and you want a simple approach regarding your project, so right now I open my Evo dial and we are going to turn on thestreet
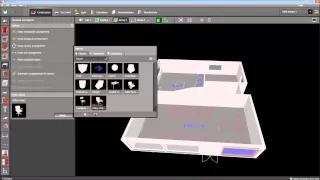
lights, so there come on. open now our dial Evo file and now we are on thestreet
lights, if you can check it here, we can go back and forth with the building and on the street lights, so let's go and check this, this is the plan view of the road. uh, the road or the street and then you can also see that one in isometric.
You can actually zoom in from here to here to get a better view and then of course he said he has 1000m of road and I think it's just straight and he said the spacing between the posts is 10m. You didn't mention the height of the pole but I think that's the problem that you want to know what the height of the pole is and what is the power you need to run a calculation to achieve all LX levels for this road lighting using a pole spacing of 10 m and it said the WID of the road is 10 m, so let's edit this one, so click on the road to go to this um. bathtub and then yeah you can say Street One and then the WID of the road, let's change it to 10m but actually 10m is actually a lane is just 3.5 so if it's 10m then it means that It has an emergency lane or a space between the solid line and the ditch, so I think it is an emergency lane or what we call we can say it is the rest area, so now for that these two lanes are enough, we have 7 m and then just add 1.5 and 1.5 to both sides so we can achieve the 10 m width that you mentioned so for me I can add as um emergency sorry let's do it uh lis let's do two and then put the other one down, click on the arrow to make it like you like this and you want to see this and in your 3D you can do that and if you want to add the sidewalk you can also do that let's say let's add a sidewalk, it's not part of your requirement, but I'll add the sidewalk and If we don't meet the sidewalk lighting requirements, then that's okay because we're going to focus only on the road light illumination and then he said let's go check the Lis, so we're going to change this to 1.5M, just the height will be the same, the other one we're also going to make it 1.5, so now we have the total width of the road 10 m, so if you want to check it, let's measure it from here to here.

More Interesting Facts About,
dialux evo how to do street lighting design calculation1...
Now it's 10 m, that's correct and then we have two. lanes, apparently, he said he needed uh, let's go first on the sidewalk, then on the sidewalk, let's keep it at 2 m and let's aim one and also the other, yeah, okay, then you better have a strip of grass on the side, so our view will be much better, so let's add another strip of grass. I want both sides again and then put it down, down, down, so that it goes to the other side of the road, so now we have two strips of grass and, um, okay, this is nice.

Okay, so you said you have a 10m spacing between the pole, but you don't know what the power is and what the height of the pole would be, so let's go and select SE the luminator. Okay, so let's select our setup on The Thorn lighting website and let's go to the outside door and let's go to this road lighting tuab and we'll select some fixtures. Let's try first because you didn't mention if it's LED or metal halide or sodium so I'm just going to use metal H. first and then then we're going to use Led so let's go and select for the moment let's use this filter and let's say we're going to get um let's hit first and then let's say we're going to get um 1/4 Watt and Let's say we use this Diana, this is a little decorative, but I like this one, so let's go and check the side entry, click on the dialects, the letter or word of the dialogue and then you will go directly to the download, click on the download link and then say "you".

I'm going to use it, so I think this one I'm using Google Chrome, so it's different, but if you go, if you're using Internet Explorer, it's going to be different, it's going to say use or download, so it's going to go here now. see the Diana connection or the Diana street lighting is now here and then we'll just drag and drop the Diana luminaire and then the Diana luminaire is now here uh the 3D is not good. I expect good 3D, but it's not anyway, okay. So the parameters for this street lighting are now here, okay, let's go and say we can do it, both Sid and the other side, all alternate, but since he didn't mention it, we'll just use one side and it'll be, uh, us.
We'll uncheck the optimization because it says 15 M and we'll make it 10 m 10 m and then the boom angle will be 5° we'll make it 5° and then the overhang will be 05, you can see that as soon as I changed the parameters here, on this side, you can see the 3D file that is changing and then the rotation of the pole will be the same and then Lumin per pole will make it one and then the distance of the pole from the road will be 1.5 so it will be on the trail okay 5 is 1 .5 is not enough, so let's make it 2.5 M, okay, now it's 2.5, but it's not good that it's in the middle of the path, so let's make it 2 m, okay, I think this is well there, opposite the path. is .5 and then it is 2 m from the main line of the road.
Now we have a 10 m space between the pole uh and then the height would be what the height would be. Ah, okay, so this is the height, so it's 8 m and check if it's okay, so let's run the calculation, we didn't achieve the EM, so we'll unmark the sidewalk because it's not actually part of our calculation, so the strip of grass we don't need to do that to check that Al to see that It also looks like we achieved all the LAX value by using the 8m tall pole and a 140 watt metal HDE luminaire and using the 10m pole spacing so you can see it here, let's review the documentation and let's go. and check the summary results for the road and everything is checked, so we are good, okay, so we correctly calculated the 10 m spacing of a luminaire with a 8 m high pole and 140 W metal halide, actually in Road lighting, what you need to consider is what is what would be the height of the post what is the power of the fixture what is the lamp of the fixture and then what is the maximum spacing and what is the maximum height you can achieve The Lax value of this lighting road, so most of the time, if you talk to the contractor or the consultant, they are talking differently, because if you continue, if you are talking to the contractor, they will ask you to lower the pole and increase the power. much lower as long as you reach the Lox value but of course you also have to reduce the quantity of the pole because sometimes the pole is very expensive compared to the luminer but if you talk to the consultant they will ask you to achieve the maximum.
LX value efficient and the most efficient fixture and the best
design
ever because sometimes they don't care about the price, but they care about the performance and thedesign
of the project, so yeah, okay. The next part of this video is we're going to use the LED, okay, we're going to go now and select an LED fixture and see what it's going to look like, so let's reset the filter and go to the road lighting tab and select the best LED, like this that there are more filters here, so if it's a 140 watt lamp, um and okay, if it's a 140 watt lamp, I think we can say a 60 W LED lamp, that's not good, okay, let's reset that and then let's select the same accessory.I think We also have this Diana LED, so we have conventional Diana LED and Diana LED, so let's select and go for maybe 74 watts. Now the filter says this so we can select a narrow beam and this is wet okay again please ask the lighting manufacturer or supplier what the codes mean but okay let's select this in the meantime let's select this which one What is the meaning of such a high-quality LED with a narrow road lighting distribution? Okay, I think this is best because it's our road. This is narrow it only has two lanes so I think this is the best so once selected go and click on this dialog box it will go to your download option and then click on that and then it will go to its now, it's here now in your dials file. so we'll just copy this um Road.
This is the good thing about D Evo because you can compare different fixtures if you want, we can also go for the sodium lamp later if you still prefer to see what the effect of the sodium lab is, so let's go. and duplicate the road, okay, we can create a new road, we can duplicate this road or we can duplicate the road with the Lum layout, so I think I need to duplicate the road with the Lum layout because we will still use the 10 m. spacing now it goes here automatically and now we're going to change the fixture to the Diana LED so let's put the fixture in this AR layout with the Led fixture Led and then apply okay now I think this has changed so if we go and run the results of the calculation. and see how it will look and see the result and yes, it's also good Lumin the Candela, everything is fine.
I think this spacing is really easy to get the LAX value, but sometimes if you do the road lighting calculation, if you really want to. compete with other manufacturers because I told you that the first goal is to decrease the amount of the pole and the luminer, so it means you need to increase the space between the poles. This one said 10m, we can't do anything about it, we can only play. about the power and pole height, but based on your requirements, I think we can easily achieve The Lax value because you specifically mentioned the spacing between the poles, so let's try if we can make this pole height 6.M, if we can still get the Lux value, let's say we will run it and check still yes, yes, this is fine, so it means the same parameters.
I just lowered the pole height to six M because it was 8 m before, but we still get the Lux value. Okay, what if I changed the wattage of the highlighter? So we're going to select another illuminator, the same Diana, but we'll look at, for example, 54 watts and we still opt for the narrow beam. Click on this one and then say used, so let's replace this one. the lowest wattage of Diana LED and then apply it and then run the calculation here and it's still fine so I think for you my subscriber you can use even a 54 watt LED fixture but of course it's our product , But I do not know.
If it is the same light output or Lumin output from another manufacturer, then yes, but if again for conventional, if you want to also reduce the value of The Lax, I mean power, then maybe we can also play with again that one, so let's go and select a lower wattage from the conventional Metal Halid, so let's go and reset this one and select the hit, select the Diana and then before we select the 140 watts, what if we use maybe 90 90 watts so let's select this 90 watts and then click on this one and then let's replace this one with the new 90 watt metal highlighter okay select this one and then apply it and then let's make the same height which is 6 M and then let's run the calculation, it looks like there's a red, okay, so I ran the calculation now and let's see, okay, now we find a red one here and it's the overall uniformity.
Oh, this is the most challenging part. This is only 35 and the requirements are 40. What happens if we change the pen angle to 10°? Look, now it's Okay, see that by using a lower power which is 90 watts and a lower pole height which is only 6M with of course the requirements which are a 10m spacing between the pole, we still achieve the Lax value here, but in LED and conventional metal. halide, so yes, I think you now have the solutions. You can use this one or you can look for the right accessories in your design, so that's it.
I hope you learned something from this tutorial, bye.
If you have any copyright issue, please Contact


![[#17] DIALUX Evo Software - Outdoor Lighting Calculation](https://i.ytimg.com/vi_webp/AqlXZLlujGc/mqdefault.webp)
