Building the CHEAPEST Powdercoating Oven from SCRATCH and saving $7500
May 31, 2021What's Happening Welcome back to the channel and today we are doing a DIY project, something I have wanted to do for a long time and that is to build a powder coating
oven
, so most powder coatingoven
s are very, very expensive. They range from three thousand dollars to twenty-five thousand dollars, so the furnace that I'mbuilding
today I think I could build for about 250 to 500 dollars and usually a furnace of this size costs between six and eight thousand dollars, so which is very, very big. Cost Savings I already found a used oven, a used home oven on the Facebook marketplace.
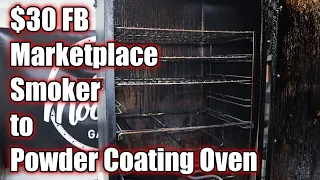
I got $475, so what I'm going to do now is go to the store and buy some galvanized steel sheets so I can make the inside of the oven. and then I also need to grab a square tube so I can make the frame of the oven. Once I've done this, I could put all the casings from the house oven into my oven and everything should be fine. The ovens are very, very simple. pretty much just sheet metal and most home ovens are coated because of grease and stuff which makes them a lot easier to clean since a layer of dust doesn't really matter but once you have all that stuff in there , should work great and The best thing about this is that when I need a powder coat for something, I don't have to take it somewhere, wait for it to be done, and usually take things to places where the coating is applied of dust takes weeks or months, so it is really an easy task.

More Interesting Facts About,
building the cheapest powdercoating oven from scratch and saving 7500...
Good solution that you can do yourself and very cheap. I mean, if you have the space to store this, I think it will be a little big, but it should be able to cut all the subframes and all that stuff that I have. I wanted to powder coat it, especially because I'm going to powder coat the rear subframes of the FC and it's going to be a really good solution, so we're going to work on grabbing all of these pieces and then start putting all of these together. things so that we have a powder coating oven to use finally I can put together the powder coating oven.

There are some things I still have to do. I need to add some screws here. I also need to add a stamp. I'll probably order. one on eBay there is one in the old oven, the oven parts are here but it won't be long enough so I will have to use that one and then I will buy another one and I think I should seal everything. The door on this oven is quite large, it may not look like that in the video, but we have an RPF one here and yes, look how big it is. I drilled some holes.

I just need to put in some hooks, but other than that, I think we'll get it done. Be good, I put three hooks there. I put in a center support so I could mount some hooks and then used some fiberglass insulation which is what they use for ovens in the first place. I also added the light switch so we have two items. we have the lower element the upper element we have the normal light we have the low thermal probe, you know, up there, where it's supposed to be. I used the glass from the original oven so we can see here if we turn on the light.
It's a little dirty, I need to clean it, but other than that, done. I'm also going to add the control panel here on the side and then I'll have another little switch so I can turn the light on. and off simply without opening the door. What I'm going to do now is take the cover off here and remove this because I still need to drill a hole to mount the controller, but I want to try this. I want to run it through a cycle and see if the old one reaches operating temperature. I mean, it has enough more fiberglass insulation than ovens, so I think it's a lot more insulated than it would be in a home oven.
It really should-it should hold heat well, all the wiring was cleaned in the electric cutting oven, so now everything is zip-tied cleaner than before. Plus, when I tied up all the cables, it gave me enough room to not have to do that. add more wiring so I'm going to cut the hole in the side cover for the controller. I'll mount it on the side. I think it will work great and then I also need to add that light switch and I think after we could put the cover on put the controller on eventually I'll have to make a little fascia for the cover just to cover it well always try to set the clock I think it was the it's happening good, I could feel it getting hot oh man she is, it's getting real hot, real fast, man, now I have the locks on the door and everything is good for a trial by fire.
I was going to screw it. I got what I needed for the seal and I was going to screw it in, but the screws I have, I literally made two of them and the heads just broke off, so what I'm going to do now is test this to see if it will hold up to 400 degrees. and if so, we will try powder coating. this lower control arm or this rear control arm hub assembly for the FC, that's really the only reason I built this powder coat oven so I could get my rear subframe, knuckles and everything powder coated for the FC, to be able to put all this power. for maximum suspension and to make it look good so it doesn't really look you know all the old components are really gross and this is going to make it look a lot better so let's try to turn this on to see if it holds 400 degrees and if it holds 4 degrees , which I think will heat up very quickly inside, there is a lot of insulation, hopefully we won't have any problems. 400 Reis, let's try this, I bought something from the store and what I got was this little guy. thermometer, so the oven controls let you set the temperature but they don't let you see what the temperature is and after I let it go and turned it up to 400 degrees or what I thought was 400 degrees, I guess we'll see a time.
I actually have a thermometer in there because it was really hot in there, it felt like four degrees, but you know what 400 degrees feels like, so now we'll have a thermometer in there, this will be like a little extra peace of mind. so I know exactly what the temperature is. I added the thermometer. I really like how it is. It's magnetic, it just sticks there. I need a hole where I'm finally going to mount this thing, but I want to make the panel. For this first, I'm going to do a test run right now to see if it goes up to 400, see if it holds 400 and we'll go from there, but we have the oven pretty much complete, it can actually be used now.
I'm raising it to 400 degrees, what I'm going to do is the test ramp. I'm going to modify the control arm knuckle for the FC so that my wheels are very, very close even though the edge doesn't touch the lower control. When
building
the tire it barely rubs it and I want to mitigate this situation if I ever want to use wider tires and I think once I remove all the camber from the rear of the car, I think we will have more of a The problem is that it rubs because the wheel will be straighter, which means the rim will be a little bit closer to this section here, so I've already started cutting it, what I'm going to do is cut this down to here. solder here I'm also going to trim here at this mark here.I pretty much just did an inch and an inch and then I'll just flip the whole thing over or just recess it down, re-solder it so this part is actually on. This seam here, just like this one here, and I'll just square it up so we can have a little more room for the wire tires and not have any problems when we adjust, let's make the final adjustments with the alignment that we'll gain. I have no problem with wheel rub, tire rub, super excited, the powder coating oven really works, I got the first powder coated part for the FC arc seven and I must say the time spent building this thing was worth it, so I got a little less than five hundred dollars on this oven, as I said before, an oven of this size from a company, may be a little better.
The ones I've seen don't really have that good of controls, they just have like a knob. on them and you know everyone has their own, this has controls of an oven and you know this is what I use for the timer and I also use it for the temperature. I'm going to reassemble the probes, so I added the probes quite high. in the oven and I think it is very inconsistent because the heat increases, so I am going to mount the probes more in the center of the oven. I think I'll get a good temperature reading, you know, and it will control the temperature a lot. better, but for the first part this was the test and I want to say that this went very well compared to what it seemed before.
It's so cute it's shiny. You know, it's a lot better than painting something. It's just nice, clean and bright. I mean, it's a very nice way to make something visible. I mean, we'll check that this is what they look like before we do the subframe as well and this will fit in the oven. to hang it up, but this is what the knuckles looked like before they were just someone painted them with spray paint. I'm purple, they really didn't look that good and they just were. I don't know for me they're just a little gross and then someone also sprayed this with paint and you can see the needle is cracking the paint so it wasn't prepared very well and I think this is just the icing on the cake now that I have a powder coating oven that would come in handy, I could just go and polish my stuff, come coat it and it will be fine.
I don't have to wait for you, there are no powder coaters, they are usually always super backed up or say 'It's not like that and then take a long time to powder the parts this way. I could do it on demand if I need to do something that day. I mean, it doesn't take that long to blow something up, it doesn't take that long to pulverize it. cover something like that and then something else are my parts. I'm going to be more thorough when I cover it so I don't miss any spots like that, so I'm really glad I spent the time making this oven and I'm going to end the video here, the timer is just I don't know how to do this.
I think it's just going off temperature, but I'm going to end the video here. I am very happy that this oven worked. It came together so well it looks very professional and everything is really pretty. I'm going to put some bolts up here to hold it on and I'm also going to make a little access, you know, a little cover to cover this, so it fits and they're really nice, so they look really nice, so if you like these videos , make sure to click the subscribe button and subscribe, like it, leave a comment below. I'll add some links in the description of the parts I use to make this oven, but know that your local hardware store can help you tremendously in building an oven like this and as always, I'll see you next time.
If you have any copyright issue, please Contact