Building a Budget DIY Home Surveillance System
Apr 17, 2024Of all the different services I run in my
home
lab and on my network, none of them are really as important as myhome
surveillance
system
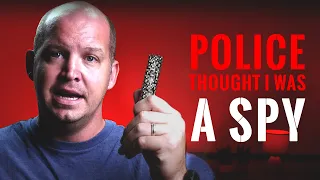
. Unfortunately, I had to send footage to the police not once but several times, but I was so glad I was able to do it. I had my cameras when I needed them, so in this video we're going to take some pretty cheap cameras, an old computer and quite a bit of CAT 5 and build an affordable but solid homesurveillance
system
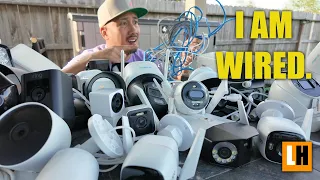
, so let's start in this video as I do. I mentioned that we are going to install some security cameras around my house and specifically we are going to use these cameras from the track, which happens to be the sponsor of this video.
I'm actually really glad that the actual link is the sponsor because well, I'm actually going to use two of these cameras to replace my existing cameras, which are also real cameras. I've been using them for almost 4 years or so and they have been rock solid and I definitely wouldn't have any problems. Recommending Real Link cameras to friends or, well, you were sent two of these RLC 510a that are extremely affordable. I think you can get them right now for under $50 and they are very high quality. They have a 5 megapixel camera with a resolution. up to 2560 for 1920 and they also have infrared night vision as well as person and vehicle detection which is pretty cool.

More Interesting Facts About,
building a budget diy home surveillance system...
Also, these are Poe cameras, so you can power them over an Ethernet cable, and realistically, Poe cameras are the only cameras I've actually used. I would like to work with them, as I mentioned before. I already have a couple of R Link cameras that are basically just an older model, so we'll be swapping those out for the older ones, but also adding a third. camera and that's this guy here this is the Rio link Duo 3 and although it looks like something out of a Pixar movie it's actually quite impressive, it's actually a 16 megapixel camera with dual sensor and dual lens with a viewing angle of 180°, this means you can almost get two cameras' worth of footage from this camera alone, which yes, it does cost a bit more, but if you're more limited in how many cameras you can set up compared to how many of money you can spend, this could be incredibly useful now, this is also a Poe camera and obviously we're going to need a way to power and network these three cameras, so that's where this little guy comes in, this is just A really simple and economical five-port Poe switch from TPL link. only 100 megabits but really that's not a big deal, when we talk about running just a few security cameras realistically you're only going to power four cameras with this and I don't think with the three cameras we have. we're going to saturate 100 megabits per second either way, so this will be totally fine and we can save a little money that way now, even though two of my cameras are technically already connected.

I'll still need to run a good amount of CAT 5 for the third camera, so I have a good chunk of cable left over from the last time I installed a bunch of CAT 5 throughout my house, but if you need anything, you could honestly make do with a few things Pretty cheap as I said we're only going to run at 100 megabits per second so realistically the cable doesn't need to be that good quality and although the cameras will be out unless a decent cable part of the cable will be outside, you're probably fine without getting a cable that's rated for outdoor use;

However, if the cable is going to be exposed to the elements a bit, you may want to get a cable that is rated for outdoor use now while you could get cables that are already cut to size and terminated. It will probably be easier and a little cheaper to finish them yourself, even after purchasing some inexpensive crimpers, flush cutters, and RJ45 connectors. You'll probably still spend about the same, if not less. that if you buy finished cables and get some tools that you can use in the future. I should mention now that if you follow me, I'll definitely have links in the description for the cameras and tools and everything I'll be using.
Okay, so we have our real link cameras, we have our network, we change our cable and our tools, but where are all our images going to go? One of the cool things about all of these real link cameras is that you don't actually even need what's called an NVR if you want, you can use an internal SD card in each camera and use their app to monitor all your cameras and playback the images from SD cards into cameras, which is great, but if you want to have a central location where all your images are stored, you'll need some kind of NVR now.
If you're like me and all you're using are actual link cameras, you can check out one of their NVR solutions which are pretty affordable and rock solid and will work great now. I personally use a surveillance station with Nas sonology and that gets a little expensive because well, you have to pay for oh Nas and then also pay for the licenses once you move on from the 2K cameras, but it's been rock solid and works great and the mobile app works well and to me it's worth the extra money but I still wanted this video to be as tight on a
budget
as possible so instead of using a real link NVR or using an analogy.Nas or something, we'll use this older PC and run some free and open source software now. If I'm honest, most free and open source NVR options aren't that good. You could use something like frig which has some really cool features when it comes to AI object detection and image recognition, but it's also a bit complicated to set up. You could go with something like blue iris which isn't free but seems to work pretty well and you can also run it on Windows but again it's $70 and looks a bit outdated although I personally haven't used it much so I'm going to do something a little different and we'll install something called saw. vison I don't really know how to pronounce it, but I've tried it before and it's pretty easy to set up and use things like motion detection and even some more AI features with object detection and even things like facial recognition, although we're probably not going to go into that in depth. on those things in this video.
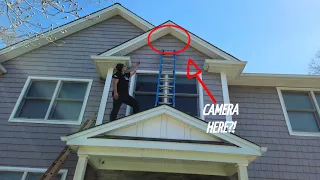
I think that pretty much covers all the equipment we're going to use. Let's start running some cable and setting up our real link cameras. Alright guys, so it'll be the next day. I wanted to wait until morning so when I had to get up in the attic it wouldn't be too hot, but we're going to go ahead and start on the first camera, which I'm actually going to put under the corner. of my roof in my backyard and I'm going to install the duo 3 just because I want to be able to show this and I don't want to show my front garden for obvious reasons but obviously to install this we need to run the cable through, originally I was going to try to make a hole through through that ledge and drop the cable, but hey, my attic made it pretty difficult to get to, so instead, let's walk around the side of the house right now we're on the side of the house that's the backyard from there and what I'm really going to do is run the cable from here, you won't be able to really see here where all this is if we went up here, it's just a few feet from where my network closet is and all my cables run through , so my plan is to run that wire over here and run it around the side of the house. where that camera will be and to keep everything organized while saving myself a few dollars and a trip to the hardware store.
I'm printing these little Clips in white pet G on my 3D printer so I can keep that cable nice and clean. I ran along the wall, so I want to be clear that there is no way my neighbor's dog will probably be working all the time, but I am by no means an expert when it comes to home renovation or anything, so take everything. I do this with a grain of salt, but I'm going to drill this hole which was pretty easy and here we go. I think now all I need to do is use some electrical tape to stick our cap 5 to the end of this guy and pull. up so I can grab it in the attic, okay, let's run to the attic real quick, so if I get up here we can see that this is where all the cables fall very neatly into my little network closet and there. it's our little flexible rod with our jack 5, so you should be able to lift it up and go.
I'm going to leave it like this for now because I shouldn't need that flexible rod anymore, so we have the cable passed now, it's time to run it along the side of the house to the backyard where the camera will actually be and to keep it clean and tidy , like I said, I 3D printed a bunch of these little guys, I really can't. hold them up I 3D printed a bunch of these little cable holders which is pretty useful and was a good way to save me a trip to the hardware store and then I also have some wood screws to screw into the wood of this overhang or whatever it's called and then I also 3D printed this little project box that I'll be able to screw into the ceiling to store all the connectors and cables when I plug the camera in and then I can close it and everything should still be nice and neat and a dummy and I didn't print enough clips so I'm printing about 18 more minutes to get everything right so at least I have the cable around the corner and I think I'm going to mount this guy over here or so and it has this little bracket that will screw on first and then It's going to catch, so I'm going to screw this bracket on real quick.
I didn't find it, it's probably much easier to do. If I just removed the camera but am lazy, okay, that's not going anywhere. I'm also going to screw this little box in here so we have a nice place to store all the cables for this guy. Now I need to cut and finish this so we can connect it to our camera. I probably should have done that before doing these last few clips, so I think I'm going to pull them out so I have a little more Slack to work with and if you're thinking I thought this all through really well beforehand.
You must be new to this channel. Okay, this will probably be a bit tricky to do outside on the ladder and at an awkward angle it's a very noisy compl. Likewise, if you've never done this before and want to learn, there are plenty of YouTube videos on how to do it, it's pretty simple, basically you just split all the wires, try to smooth them out a little bit and you get. to put them in the right order and then if you're using these little pass through connectors like me you just slide them all the way in until all the different wires come out the back end like this or the front end I guess and then you press them in and then you turn them off all the excess and I'm going to try not to lose it all over my garden.
Now I need to set up the little waterproof thing they have with these cameras, so it's probably going to be a little tricky Look, but basically you slide through this cover, let me get these little guys out of the way, put this little back cover and this front and then you put this rubber gasket on the back, it's going to be very hard to see it slide in there. I think that way, when you squeeze this, it creates a waterproof seal. I'm going to go ahead and screw the camera in, it's like everyone in their mother was mowing the lawn today and then we'll run these cables over here, hopefully.
Everything fits in this box, maybe not, that's all connected, let's see if this actually closes, hey, that's not so bad, okay, there's a camera down there, the other two should be a lot easier because they're basically already installed for me, so let's go. Go remove them and I almost forgot that we still need to run this cable up to my closet and luckily I made this rope to pull every time I ran the first cables here so I have the rope that goes all the way to the closet so Once Plus, I taped my wire to that rope and ran it through the hole there, and then I should be able to go down the stairs and just run this wire through and then finish it, however you want, that took a lot more time than I had.
I expected it, but I finally did it. Normally I'd just finish this up as usual so we could plug it into our little five-port switch, but since I'm going to use this permanently, I'm going to fix it here. patch panel where my other two cameras are, but then we'll still use our cheap little switch to set this up, how I would do it if I didn't have all this networking equipment, alright guys, so that's actually next. I finished a lot of things yesterday, but I thought it would be easier to talk about it now, so first of all, that cable that we dropped in my networking closet I finished in my patch panel like I said I would, but that's how it was.
It's going to be a huge pain trying to film in that small space. I also replaced the camera on my front porch, which I thought was going to be pretty easy considering the mounts were pretty much the same, but it ended up being a bit more. difficult than I expected, the firstreason was that I forgot to seal those boxes that I kept all the cables in, so a sweet little spider came to her home there, which unfortunately I had to destroy, don't worry, she got her revenge after coming back to going up the ladder I realized that there was another problem and that is that on the old cameras the little waterproof cover cannot be removed from the ethernet cable without cutting it and re-terminating it and I didn't really do it.
I had time and I didn't really feel like doing it, so unfortunately I sacrificed my old camera and installed the new one and then I just shoved all the cables into the box and screwed it together with the cables hanging off the side, okay I'll fix that later but we already set up our camera and it should be working. I was also going to replace my other real link camera that was pointing towards my driveway, but I decided to throw it away because A I was running out of time and B couldn't really show it anyway because, like I said for privacy reasons, I really I don't want to show my neighborhood, but we can still take a look at that other RLC 510a and the du3.
Now obviously to use those cameras we need to connect them to my network, so I connected my little five port Poe switch to my network. If you don't have a network switch like I have in my closet, you can simply plug it into the back of your ISP router or modem and then into three of the four Poe ports. I connected all three lines for our cameras and then after opening the Real Link app on my PC I was able to see both cameras and start tweaking settings like IP addresses and stream quality and everything else first, it's really cool.
The width of this camera is a little wild, it doesn't make sense in this corner of the backyard because there is much of my house that is visible, as well as my neighbor's backyard, which has a lot of satellites. The dishes are a little strange, but yeah, this is so wide it's a little ridiculous and then the front door camera is doing exactly what I need, but there are a lot of interesting settings here that you can dive into, obviously you can modify things like streaming quality and resolution, you can modify things like motion detection, like sensitivity, and these also have smart detection for people, vehicles, and animals, which is really cool.
You can modify the detection zones, like if these little plants on my front porch blow, I don't want that to cause motion and if lights appear here on this wall, I really don't want that to cause motion, so okay and then , if you are using SD card, you can set your recording. schedules and you can set up an FTP server and there are a lot of really cool things you can do with these if you're just using the real link software or if you're using it with something like syy surve surveillance station like I do. Speaking of which, I set up both cameras inside the sonological monitoring station and I'm also running an older version that comes into play in a second, but yeah, I set up both cameras so I can see this camera well and one thing. that's really cool here is for event detection.
I'm not triggering my motion detection from sonology, I'm triggering it from the camera, so the camera is the one that decides when motion is detected, so it can do all the interesting object detection for people and cars. modify those settings in the real link app and then that will activate motion detection for the sonological monitoring station which is really cool obviously here I can do cool things like set schedules to record only with motion detection at certain times and the quality of the transmission and everything. kind of cool stuff I love the sonological monitoring station, the only problem I found was that while this backyard camera is set up and working, if I try to open it in the live viewer it doesn't work in the web browser which I think which is just because I'm using a pretty old version of the monitoring station because I've seen some videos of people setting this up with the sonological monitoring station without problems so I think it's a problem and I imagine if I were using an updated version that I need to get to it would work fine, but we're not setting this up for the sonological monitoring station.
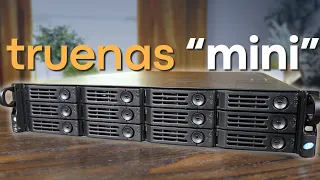
In this video we will configure it with that HP product that I mentioned earlier and vizon or vison. I'm really not sure how to pronounce it. Still, the HP Pro desktop is nothing crazy. I actually don't even know what CPU it has, it's an Intel 6G, but realistically, for some basic NVR stuff, you don't need a crazy CPU unless you're trying. I did a ton of detections and/or worked with tons of streams. I put in 8GB of RAM as well as an m.2 SSD for the boot drive and then a hard drive to store all the footage.
This turned out to be a 4 tab unit. but you probably don't need that much storage, especially just for some cameras to hold footage for a week or two. To make this really easy, I'm going to install Debian 12 and then I'm going to install something called Casa OS, which is just a nice web UI that allows you to run different Docker containers and manage files and stuff like that, and I have a video about Kasa OS, but i will also link another one from Tech Hut where you install auntu server instead of debian but the process is really easy you will just install auntu or debian server and then install C OS and then we will use it to configure vison I really don't know to start we will connect first a monitor and a mouse and keyboard and we will also connect our computer to the network, then we will connect our installation media, which for me is this Debian 12 installer and then we will turn on our computer and then you will probably need to press the Delete button or the F12 button or something like that to get to a boot menu and then select the installation media and then it will end up in the Debian 12 installation menu and here we can press graphical installation;
There are many guides available on how to install Debian 12, so I'm going to go over this pretty quickly so this video doesn't get too long, first we'll select our language location keyboard, then we'll give it a hostname of I don't know NVR and then The domain name doesn't really matter, we'll just put it home, give it a root password, username, user password, time zone, then we'll select a guided full disk usage, select the SSD, all the F files on one partition and then we will finish and yes, so for the package manager we will do my country and the top option will leave the proxy blank for the popularity contest.
We just can't do anything, then in the software selection using the space bar we will deselect any of these main options, select the SSH server and then tab and enter okay. and then the installation completes so we can press continue and then we can unplug our USB drive and then it should boot into Debian 12. Now here we are going to log in as root user so type root and then our root password. Now the first thing we want to do is install something called sudu, to do that we'll type apt update and then two Amper and then apt install sudu and then we can do a-y and then press enter, which is going to do. is to update our repositories to make sure all our stuff is up to date and then install sudu and not ask us to confirm it.
Once that's done, we can type this command user mod d to Big G and then sudu and then our username and that. We'll add our user to the sudu group, which basically allows us to use sudu so we can do things as root, essentially now we should be able to log out and log in as our user and then if we type sudu, who am I? and then we type our user password we should see that we are now root, which is what we want. Now we can continue using our keyboard and our monitor, but I actually want to access this remotely from my Windows machine, so to do that we need to find out the IP. address so we can type IPA and it should list our IP address which we can see is 1 192.168.10.0 7 now on Windows in Powershell.
I can type SSH Haven or your username at 192.168.10.0 7 press enter and then my password and you may have to type yes here by the way, but now we can access this via SSH remotely and actually , I'm going to switch to a program called solar putty, mainly just the text is a little bit bigger for you guys, okay? So the next thing we need to do is install C OS, which is really easy. First, we'll just type in the Sudu app install curl password and then yeah, then I'll type in clear so we can clean up some of that. we can type curl and then Dash FS big S Big L https colon G.A .io and then we will make this straight line here called pipe and then we will type sudu bash, then we can press enter and this is I'm going to download and then run a script to install automatically something called Kasa OS which, as I mentioned, is a nice web UI that allows us to organize files but also install Docker containers and manage them quite easily and if you're not sure what Docker is.
Don't worry about the container, it's like a little containerized application that we can modify and then spin up and run, or we can shut it down or restart it and do cool things like run something called "They saw," for example, okay, so this script. it finished running and we can see here that C OS is running and here is this IP address. Sometimes this IP address does not appear, but it is the same one we use to SSH into the system, so in this case, 192.168.10.0 7, now in a web browser we can type 192.168.1 207 press enter and this takes us to the panel cost or login so we can enter a username and then a password which has to be eight characters I think, and now we're at Now there's one thing I should mention is that if you're going to continue using this you're probably going to need to set up a static IP address in Debian or configure what is called a DHCP reservation which you would have to do on your router.
I'm not going to go into that, you can Google how to do it, but there is a chance that over time this IP address will change, especially if the system goes offline for a while, so you'll want to do it that way, this IP address 207 .will not change and you will always be able to access it, but like I said, I'm not going to go into that CU, it's too much for this video and I'm sure you can Google it and figure it out on your own, but for now there are a couple of things. What we want to do here, first of all in storage.
I want to find my hard drive here and let's create storage. I'm going to select this hit format and create it. It's possible if this drive out hasn't been erased, you might get that error that just popped up on the screen, so to fix that we can refresh this page and then we'll go back to our SSH and run a command called lsblk which will show all of our block storage devices and we can see that this SDA is our 4 terab disk and what I'm going to run is a command called DD and then if equals /dev sl0 and then o equals /dev SL SDA or whatever sea drive is then we are going to run BS or block size = 512 count equal to 1 and then we press enter oh I forgot to write sudu so we will write sudu and then we can write two exclamation marks and our password to run this command look, you are learning Linux.
Isn't it great? Now I'm going to type sudu reboot to reboot the system very quickly, so the reason why the error appeared in kasos when we tried to format the disk was that there is some kind of partition that would not be overwritten by default, so basically what What we did was delete the metadata from the partition tables so that when we run this again it should work and now if you are in the same lsblk command, We can see that in SDA we don't see those other partitions that were down there and then back in kasos we can go to storage, create storage and we'll select our hard drive again, we can call it storage, that's fine. and we will press format and create and this time it should work fine, now we have this storage that we can use, so now we will go to the file explorer and first we will create two folders in the data app. data we're going to make a folder and we're going to call it vison I think that's how I still don't know how to pronounce it and then under storage one we're going to make another folder and we're going to call this recordings now here I'm in the installation documents seen and if we scroll down we can find a 64 bit Linux machine with vaapi, which for me is because I am using an Intel CPU.
You could also set this up if you're not using an Intel CPU and you're not using an Nvidia GPU, you can copy this command and go from here, it's really the same thing, it just doesn't have this: sdd device, so we'll copy this entire command and then we will return. in C OS press thisplus button and install a custom app. Now we can complete all of this individually, but instead we can go to this import button and in the Docker CLI just paste this and press submit and it will tell us that there are other things. we need to fill in which okay, we're going to hit OK here, we're going to give this a name and we're going to call it seen and then in this web UI port, we're just going to copy this 8888 and paste it here behind the ports and then we need to map some folders and this is messed up, so what we're going to have to do is get rid of these little brackets and do recordings and a slash setup.
So inside this container seen, this is where these files go. To be, we need to map them to a location on our actual server, so for our recordings folder we'll select this here and scroll down to MNT or Mount and then store one and our recordings folder and press select. and then next to SLC config we will do the same thing but we will go to SL appdata SL seen so what is in this folder / saw what will be in the config folder here and the recordings will be recorded and then this SLC local time is fine here to be sure.
I'm going to copy this /devd to the container side and this is only if you have an Intel CPU and this will potentially help with some hardware acceleration stuff and then everything else should be Okay, so we'll hit install now while this installs we can take a look at some of the documentation to see and for the configuration it uses a yaml format, which means we have to do some things, some text based configuration, but it's not that hard, if you go to the configuration For example, you can get an idea of what it looks like, basically everything is divided into what are called domains, so there is a camera domain, an object detection domain and you can see what these domains are if you click on camera . domain for example you can go to a list with all the camera domains which is just FF imp and gstreamer but we will use FF imp so in this default setting you can see FF imp and then below that we will set configure cameras and this is a camera, another camera and a third camera and then with each of them you can give them a name, set the IP address, the route that I'll talk about on a second port and then format and others. settings that you can configure and then you can also configure things for motion detection and object detection and then also this NVR which is what ties everything together nicely in C OS, this is installed so we can click on it and it goes to Let's say we are waiting for the cameras to register but we don't have any cameras so that won't help much.
If we click on this edit settings, a text editor will pop up with these default settings and we'll get rid of some of This just for simplicity, so I'll select all of these object detection things and just hit the control bar to comment all of this out. , so it's not actually used now, we can set up our cameras, but to do it. We'll need the IP address as well as what's called the route, so the IP address should be pretty simple if we jump into the Realink app, for example, for this front door camera. I can select that and then go to network and then here. we can see the IP address that I configured manually, which is 10.75, so here in our settings under camera 1 we are going to type the name and I will call this front door and then the IP. address, we will write 192.168.10.0 now for Port, we will use rstp, which if I go to Advanced here in the settings and go to the server settings, we can see that I have this rtsp port enabled and the port is 554, so we will use port 554 and then this route is a bit complicated, it's not actually provided by default, but if you google it it's pretty easy to find, you can go rebind the rtsp route and then if you look at their support they will eventually list how find this.
There are two different flows, so this is for the main stream what the path would look like and for the substream what the path would look like, so in our setup we don't have. to type that full URL we just need to type SL h264 pre 1core main we just need to copy that a little bit and if you're curious how I know how to do this, you can go to the docs here and because we're under the ffmpeg domain or component we can click here and we can see all the different criteria and which ones are required and what our options are, for example here, when we go to the route, you can see an example where it's just this bar and and the last fragment of that URL at this point, all we really need write is the username and password, but I don't really want to just put my password here, so instead I'm going to do something interesting.
In C OS we can go to the files app data and then view it and we can see that this is where our configuration that we're currently working on is stored, but right next to it we're going to create a new file and I'm going to call it secrets. emo and once again, if you're curious how I know this, if you go to the documentation to see, this is all listed so we can make it a secret. in the settings folder and we can go edit that directly inside C OS and we're going to type something like camera user and we'll do a colon and then I'll type my user and then I'll type a colon to camera and then I'll type my password now obviously , that's not my password.
I'm going to change it here in a second, but you'll see how we can use it correctly, so I updated my real username and password in these secrets. yl and now here in our settings, instead of typing our actual username, we can type exclamation point secret and then camera underscore user and then exclamation point camera secret pass and that will pull that value of our secrets. AML that way, if we ever want to share this setup with someone for troubleshooting or whatever, you know you're not going to have your password exposed directly there for now, I'll get rid of this camera too.
I'm going to press the control bar to comment on all of this and then do the same with the motion detection. I'm going to comment that out and in NVR I'm just going to get rid of camera 2 so we'll just have camera 1 and let's see if this works so I'm going to press contrl s to save and then we'll restart the container okay so I updated it and it gave me this spinning wheel, but I did some troubleshooting and figured out why that was happening. It turns out that in our config we need to at least configure motion detection, so down here we can select everything including this MOG 2 and then press the control bar to uncomment it and then we'll change this camera 2 to camera one, for example, and that way it matches our camera up here and then we can leave this FPS as one for now and we'll hit save restart and then when the app restarts we should be able to see our camera in live view.
I'm not sure exactly why that's the In this case, I'm guessing there has to be some kind of detection for the vision to work properly, but in our main view we can see the front door, we can go into the live view and it's working as expected, so let's add our second camera upon returning. For configuration, we will uncomment this camera and give it a backyard name for the IP address, we will make 192.168.10.0 for the backyard camera and then copy, we can copy all this correctly. here paste it I don't think you need this FPS here I had it there before because when I was testing this with my older cameras I had to have that FPS value there so that I would like to correctly detect the video stream, um I don't.
I think I need it with these cameras, so we'll try it, hit save and then down here under motion detection we'll also add our camera 2 and then under NVR at the bottom. make sure you include camera 2 hit save and then we'll restart and I'm curious to see how this will work with that really wide camera angle oh that's promising there we go we can hit live view okay live view and we can see the entire backyard, it is updating in real time, the frame rate is a little slow, which I noticed earlier. I'm not sure exactly why, but it's working and we don't have any recordings yet, I can't imagine.
Because I don't think we've had enough motion to detect this, now some things we can do to better configure all of this are under our cameras because we have multiple feeds coming from our cameras that we can actually configure. that way all the motion detection can be done on a much lower quality stream which helps save cpu resources etc. if we go to the ffmpeg component documentation here we can scroll down to the substream and this also has a path port and format and everything else, so we're going to go here to our configuration and under this we're going to make two substream points and then under there we're going to copy these two variables or two values, but under path we're going a change this from Primary to secondary, oh, that shouldn't be tabbed, here we go, okay and the frame rate for this I think I have it on the main door camera.
I think the stream for the low quality stream is 10 frames per second so we're going to copy the exact same thing to camera 2 which I also think is set to 10 frames per second and then under motion detection I think which should use the secondary stream instead of the main stream and we can change that frames per second value to 10 as well and then press save oh and also here under motion detection if we go to the motion detection components and this MOG 2 , we can see there this option to activate the recorder, which by default is false, but we want to record some things, so Let's activate the recorder and we will add it as true and then we will paste it also for camera 2, so now, If we restart this, everything should work and if I go for a walk around the house, we should have some movement.
The detection is recorded fine so I just came back after walking and if we click on recordings we can see we have some recordings here so if I go to the front door camera also this is a little strange it is divided by date , which puzzled me. disabled, so you have to click on recordings again for this date and then we can see the clips here, so if I go to this first or I go to this here, for example, you can see that I went out and said hello to him and that was activated and then if I go to the backyard, we can go to recordings and then this date, for example, I have this clip here that, who doesn't want to play in the browser?
I wonder if I go to camera 2. and the files, oh, so I saved the thumbnail. I'm wondering if that's a bug when viewing with the really wide format for some reason so I looked into this a bit and it looks like the video will actually play in VLC if I download it and play it fine so we're playing this recording for some reason . This wasn't when I went out into the backyard, this was a little later so I'd probably need to tweak the motion detection settings or something, but it was recorded here. We just can't see that in the web browser I guess, because this is HC and it doesn't want to play in the browser for some reason, so I'm not quite sure why, but it seems like that's one of the quirks. maybe with using this duo3 with some software that is not very mature yet, another really interesting thing that I would like to try to briefly touch on is that you can integrate these real link cameras with your home assistant so that you can go in here and add For example , our front porch camera, let's actually try to add the DU 3, so I added that camera and we can see that we have some sensors here and some settings so we can turn the IR lights on and off, for example, we can see if Unfortunately it was detected motion, we can't activate the spotlight because that camera has a very bright spotlight and I was hoping that you could activate it with the home assistant, maybe that's something that will come in an integration update or something, but that's the way it is.
It's great that you can add these cameras to the home assistant and activate motion detection. Obviously, you might want to record if motion is detected, but you can also activate motion if someone approaches your porch and you can turn on a light or something. It's great that you can integrate them into the home assistant very easily with very little headache and yes, now clearly our NVR setup with Vé is not the most amazing thing, honestly we could have worried and had a little more control with a swipe brilliant. detection, but setup is a huge headache, none of these solutions for me are as good as using sonology or even softwarerole links that is included in the cameras, not to mention using their NVR for me.
I think it's not only important to be able to record when motion is detected and also be able to set up recording schedules so that if for some reason something doesn't trigger, you still have the footage recorded and also something like sonology or a real link in VR. a lot more control over your recordings and how they are stored, and it's a lot easier to modify them, so honestly my recommendation would be to look into the actual Link in VR if you just want an all-in-one setup or look at using something like a analogy based on two NZ to set up and run the surveillance station, but I think it's really cool that these reing cameras are quite affordable, they look good, they work well, but you can also use them however you want. buy the actual link system and use all their stuff, but they're also pretty open that you can use them with almost anything and even have access to connect them to the startup assistant, so I'm clearly a big fan of these.
I've used them in the past and you can tell this guy is pretty gross and Dusty, he's been through it, but I've never had a single problem with these cameras in the last four years I've used them and so I'm excited to try these new ones and see how much longer they last. A big thank you to reconnect for not only sending these cameras but also for sponsoring this video. I'll be sure to have links in the description to You should see not only the RLC 510a but also the DU 3 which is pretty sweet. I think that's it for this reason, so as always, thank you all so much for watching, stay curious and I can't wait to see you. the next
If you have any copyright issue, please Contact