YTread - Let's Read YouTube videos as Articles

Stormy Daniels Will Not Describe Trump's Genitalia in Hush Money Trial
Stormy Daniels Will Not Describe Trumps Genitalia in Hush Money Trial -Good evening Im Seth Meyers This is Late Night We hope youre doing well And now if...
Read More
Trump To Stormy: You Remind Me Of My Daughter | Met Gala Looks | Dogs...
Trump To Stormy You Remind Me Of My Daughter Met Gala Looks Dogs Dyed To Look Like Pandas welcome welcome ladies and gentlemen one and all down here up...
Read More
Inside the NBA reacts to Cavaliers vs Celtics Game 1 Highlights
Inside the NBA reacts to Cavaliers vs Celtics Game 1 Highlights gave him 29 a night the Cavs had scoring issues in their seven game win over Orlando the...
Read More
Boston Celtics vs Cleveland Cavaliers Game 1 Full Highlights | 2024...
Boston Celtics vs Cleveland Cavaliers Game 1 Full Highlights 2024 ECSF FreeDawkins downtown Boston on a gorgeous 67 degree New England night where the...
Read More
Thunder Blow Out Mavericks to Win Game 1 | Inside the NBA
Thunder Blow Out Mavericks to Win Game 1 Inside the NBA yeah I mean the athleticism by Oklahoma City was probably the biggest difference you know they...
Read More
Inside the NBA reacts to Mavericks vs Thunder Game 1 Highlights
Inside the NBA reacts to Mavericks vs Thunder Game 1 Highlights books it heres how it played out at paycom Center out there in KC man thats a bad stars...
Read More
Reviewing Avalanche vs Stars Game One
Reviewing Avalanche vs Stars Game One uh one refrain that Ive Ive kind of had in my brain anytime that a team that I cheer for is against Colorado is dont...
Read More
NHL Game 1 Highlights | Avalanche vs. Stars - May 7, 2024
NHL Game 1 Highlights Avalanche vs Stars - May 7 2024 we go game one round two ready to get things started fourth line starts for Dallas and the Top Line...
Read More
the met gala theme this year is a book. i read it so you don't have to...
the met gala theme this year is a book i read it so you dont have to hello everyone welcome back to my YouTube channel my name is Jack Edwards and it is...
Read More
2024 MET GALA FASHION ROAST (disappointed is an understatement)
2024 MET GALA FASHION ROAST disappointed is an understatement hello everybody my name is luk mAh and this is hotl mode and today on hotland mode were...
Read More
MACKLEMORE - The BEN Tour UK/Europe 2023
MACKLEMORE - The BEN Tour UKEurope 2023 as the Ben European UK tour comes to an end I reflect while waiting aboard a plane back home Ive lived an entire...
Read More
MACKLEMORE - CAN'T HOLD US LIVE FROM BROOKLYN | CITY SESSIONS | AMAZON...
MACKLEMORE - CANT HOLD US LIVE FROM BROOKLYN CITY SESSIONS AMAZON MUSIC This song is called K Hol us uh-huh its been a while since I performed this...
Read More
Steven Seagal Force Of Execution Is So Bad It Wears Socks With Sandals...
Steven Seagal Force Of Execution Is So Bad It Wears Socks With Sandals - Worst Movie Ever Force of Execution is the Steven Seagal Mega Blockbuster hit...
Read More
Putin inauguration: Steven Seagal and other famous faces spotted at...
Putin inauguration Steven Seagal and other famous faces spotted at Kremlin palace to call it an inauguration might feel misleading after all this was not...
Read More
King Charles 'snubs' Prince Harry during whirlwind trip to London |...
King Charles snubs Prince Harry during whirlwind trip to London Today Show Australia Harry has returned to the UK but he wont be meeting his father King...
Read More
Royal expert: King Charles III not meeting with Prince Harry 'a real...
Royal expert King Charles III not meeting with Prince Harry a real shame youre watching CTV News Channel latest on the British royal family and perhaps a...
Read More
Blippi Learns Trucks at the Fire Station and More | Educational Videos...
Blippi Learns Trucks at the Fire Station and More Educational Videos for Toddlers hey its me honey and today were at the Bellevue Washington fire station...
Read More
Podcast #262 - Playing Incohearent
Podcast 262 Playing Incohearent welcome back to the Julian podcast these marvel cosplaying here ladies and gentlemen we have Kermit on the table today who...
Read More
Ellie Saves James! | Fireman Sam Official | Cartoons for Kids
Ellie Saves James Fireman Sam Official Cartoons for Kids yes james how many actual fires have you put out lots james i bet she hasnt put out as many...
Read More
The myth of globalisation | Peter Alfandary | TEDxAix
The myth of globalisation Peter Alfandary TEDxAix I sometimes describe myself as a culturally conflicted Englishman I am first generation born in the UK...
Read More
Archeology - exploring the past with modern technology | DW History...
Archeology exploring the past with modern technology DW History Documentary the technical technological advancement is rapid so rapid its almost...
Read More
From landscape architecture to conservation agriculture | Thomas Woltz...
From landscape architecture to conservation agriculture Thomas Woltz TEDxCharlottesville the conservation agriculture studio at Nelson Burt waltz...
Read More
1000 COMMON ENGLISH QUESTIONS AND ANSWERS for beginners | English...
1000 COMMON ENGLISH QUESTIONS AND ANSWERS for beginners English Conversation me are you American no Im not Im Canadian do you speak English a little but...
Read More
Pull Up Wit Ah Stick: The Music Video that Took Down a Neighborhood
Pull Up Wit Ah Stick The Music Video that Took Down a Neighborhood police are trying to find the shooter or shooters involved in the murder of a man in...
Read More
Finding f(x): Why I teach for the Philippines | Delfin Villafuerte |...
Finding fx Why I teach for the Philippines Delfin Villafuerte TEDxXavierSchool Im gonna try something Ill say class and you will answer with yes but you...
Read More
Magpakailanman: Revenge body against my body-shaming crush | Full...
Magpakailanman Revenge body against my bodyshaming crush Full Episode Adrian goes to beta the ease of course in the mutual understanding at io that...
Read More
I Found a MILLIONAIRE Only Server in Minecraft!
I Found a MILLIONAIRE Only Server in Minecraft I have found a millionaire only server in Minecraft look at these millionaires on the server always coming...
Read More
Cathering mcbroom ass - Catherine Paiz | Before and After...
Cathering mcbroom ass Catherine Paiz Before and After Transformations Plastic Surgery Transfor A few of you requested that I do a Beforeand After vid on...
Read More
Desert Survival, Tame Craft Build | Starsand Gameplay | First Look
Desert Survival Tame Craft Build Starsand Gameplay First Look how is it going this is game edge and thank you so much for joining me this is star sand...
Read More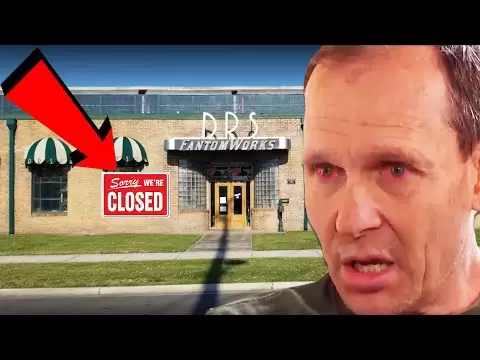
FantomWorks Officially ENDED After This Happened... IS FANTOMWORKS...
FantomWorks Officially ENDED After This Happened IS FANTOMWORKS STILL OPEN IN 2021 phantomworks officially ended after this happened i pull into the garage...
Read More
IELTS LISTENING- ITALIA BREAKS - EBENZ DAY 51"},"lengthSeconds":"2246"...
IELTS LISTENING ITALIA BREAKS EBENZ DAY 51lengthSeconds2246ownerProfileUrlhttpwww section one you will hear a man telephone a travel company to book a...
Read More
PORQUE MARK SLADE ( BLUE ) DEJO LA SERIE EL GRAN CHAPARRAL ????
PORQUE MARK SLADE BLUE DEJO LA SERIE EL GRAN CHAPARRAL hola amigos que tal soy jota y bienvenidos a mi canal hoy veremos porque mrquez ley de abandono...
Read More