youve been lied to for years
Jun 20, 2024You've seen tons of tools on YouTube claiming to be the best solution to all your problems, but today I'm here to reveal the sneaky truth behind one of the most popular items in woodworking: How You've Been Brainwashed Without Even Knowing It Reveals Multiple Products that I regret buying and how really the best solution to all your problems has
been
right in front of your eyes this whole time and it's incredibly cheap, but first I need to make a confession and talk about something I should have said. you a long time ago I think it's finally time to admit that I made a big mistake.
I built this workbench exit table about a year and a half ago thinking it was going to solve all my problems. My first workbench was made of scrap metal. Plywood And I didn't really have a way to hold anything down, so when I made my second workbench I added some tea trck on top because everyone on YouTube loves tea trck, but actually tea trck sucks, the t-ra worked great for a couple of weeks and then glue and other things got stuck in it making the trra effectively useless, not to mention when you try to attach things to the TR it only holds on with a few screws, so it lifts off the bench again, leaving it useless for what it was designed to do, so I built this workbench to try to solve those problems and prevent something like glue from sticking to the workbench and ruining that flat surface .

More Interesting Facts About,
youve been lied to for years...
I found this laminate coated MDF and while it worked fine at first, this material is such a thin layer that eventually it starts to peel off and now everything is stuck to this workbench and as far as holding the work goes, I made it The edges of this workbench extend to the side so I can easily hold things on the workbench, but I can only get stuck. clamping things to the side of the workbench isn't really the best solution, so that's when I bought one of these self-adjusting workbench clamps, but it still didn't solve my problems, because it's even more expensive than trra at $70 and I can hold things only in a specific place again is not a good solution, so today let's address all those mistakes I made and find a solution that makes the perfect work table.

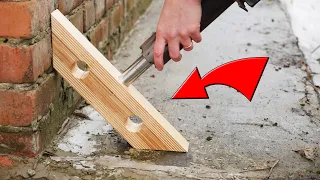
Just a few days ago I started experimenting with these dog holes. They allow you to use tons of accessories like these clamps to instantly clamp things to the workbench anywhere, so let's get started. The workbench is one of the most ubiquitous elements in the carpentry workshop. Each person has a completely different configuration to the most basic piece. OSB plywood on some cheap sawhorses to completely custom workpieces made from several thousand hardwoods with more dovetail joints than you can count, but here's the problem, on the one hand, these temporary work surfaces that come together do the job in the moment they take a few seconds. to build and allow you to start working right away, but it leaves a lot to be desired, you can't really hold things, they aren't flat and things like glue and epoxy will stick to them, making them even more useless over time, but on the other hand On the other hand, spending hundreds of hours and thousands of dollars on a custom workbench with all the bells and whistles, in my opinion, is a complete waste of time.

I want my workshop to be functional but still usable as a tool if I spend months building the perfect one. workbench You are most likely afraid to use it for what it is intended to be used for at work, so my goal is to create a highly functional, very useful and cost-effective workbench that will stand the test of time and, If I end up hating it and it doesn't work for me. I'm not wasting a lot of money or time on this build. I want to show you several ways to do things regardless of the tools you have, surely a clue saw as you saw.
The process of breaking large sheets is very easy, but it comes with a high price. I recognize that not everyone has one, so check this out. You can do the exact same thing by holding a large ruler like this piece of wood and running it with a circular saw. along the edge which will give you a perfectly straight cut like the track saw, but the obvious disadvantage is the extra prep time and as you can see it's incredibly fiddly but it's still a perfectly straight cut. The first incredibly important thing for a workbench is that it's actually, I'm sure I could use solid hardwood, but that would require me to mill all those boards perfectly flat and make sure they never warp over time, not to mention the enormous amount of time, effort, energy and money that goes into that.
Some cheap MDF sheets MDF or medium density fibreboard is basically wood ground into sawdust mixed with resin or glue that is pressed into sheets, resulting in a product that is super dense, hard and super flat. The only problem is that one of these 4x8 sheets weighs over 100 pounds, so moving them is a nightmare, but that weight will come in very handy if it doubles as a workbench, as it makes everything much more stable. What you see me doing here is laminating two sheets of MDF together to create a smooth surface. thicker, even heavier and even flatter workbench, which will be about 1 and 1/2 inches or about 38 mm thick.
A vacuum press would be ideal for compressing these two sheets together, but placing tons of tool boxes on top and lining the edge with clamps. I will do the job very well during this paste. I really wasn't too worried about getting everything to line up perfectly. You're probably thinking it's crazy that you want those edges to be perfect. Well, I know my limitations as a carpenter. I'm far away. Since perfect I'm not a machine, so I develop tricks to achieve perfection that just involve a little forethought, so instead of cutting all those pieces to the exact size I want for the workbench top, I cut them large. size, I laminate them together and I can return with my tracka to cut the slab to its final size leaving me with the edges perfectly aligned I achieve a perfect result which is what I am looking for the only drawback is that I spend a little money on materials speaking of spending money one of the tools that What you'll see me use throughout this project, what I regret buying is the red woodpeckers track Square, it's incredibly expensive, incredibly heavy, it goes out of calibration frequently ever since.
I bought this Square track from TSO which works much better at a fraction of the cost. price I'll leave a link to that and all the other tools I'm using in this video down in the description. One of the disadvantages of using MDF is that while the faces are quite strong and durable, the edges are a different story. them with a hammer and they will instantly deform and form mushrooms. Which is not ideal for a workbench to combat. I'm going to surround the entire workbench with some hard maple, believe it or not, hard maple is really hard, which will help protect the edge of my workbench from dings, but also let me do more than just You won't see it coming, but we'll talk about that later.
I need to get the raw wood perfectly flat and I don't have a jointer so I use this sledding method which I have talked about in virtually all of my videos, however I recently stopped doing this whole process and upgraded to something different which is one of the many behind the scenes videos I post all the time on my Patreon page and it doesn't just help the patrons. support the channel, get access to all my behind the scenes videos including things like tool reviews, unboxing videos, plus weekly and sometimes daily updates, plan discounts, free merchandise and tons more, my patrons already know about the update I made so I no longer have to use that incredibly time consuming sled milling process and you were able to watch this video in its entirety before anyone else.
There is a link in the description where you can join the community and help me get one step closer to being able to finish my day. I work and take this channel full time, but as always there is no pressure. Another tool that YouTubers tell you you need to spend tons of money on are expensive clamps. I need to fasten the hardwood to the ends of this workbench, but I don't. If I have clamps that big, I could buy some larger ones for about $70 each or I can just daisy chain the clamps I already have. I'm all for saving money when things aren't entirely necessary, sure having super long clamps would be nice and I rarely need them, but there are always solutions like this to help you in a pinch.
Just be creative. Another creative solution. Place some tape on the ends of the boards to help keep them in place while you set things up. It's like having more pairs of hands. I intentionally left the edge proud of the surface because, again, I'm not perfect, just like laminating the MDF panels before. I'd rather make things too big and then come back to refine them. Now hand tools are something that until recently I refused to use. I never saw the purpose of them until I tried one at a friend's store. I can quickly and easily remove a super small chip and even have things perfectly flush, making the maple look like it originally did. part of the MDF and for the ends, take the saw tracks once again and let it do its magic.
I attached a few more strips of maple to the long edges of the bench using the exact same method I just showed. The manual brush creates those super satisfying curls. but let's not overlook the fact that the manual plane is also very expensive to buy and can be an absolute nightmare to set up and sharpen correctly. You could use a flush cut bit on the router to locate things here or just get out a sander to clean things up the only thing you need to be careful of is not to tilt the sander which will cause you to accidentally round the edges but that's not too difficult to make, all that's left to do now is trim off the excess and this artboard will be ready.
Well, not so fast, so now that the main panel of the artboard is built and built, we need to turn our attention to protecting this. My friend Ronnie has a great-grandmother who always told me the importance of protection, so I'm going to listen. to it like any sensible person would and for that protection I'm going to use a thick black laminate. Some people refer to this as a microphone, which is the same thing that's plagued by shitty apartment countertops like the ones I've had for
years
. Basically just a thick sheet of plastic that is super durable and virtually nothing sticks.Wood glue finish, even epoxy, will come off, ensuring my work surface is always clean. The only problem is that it comes in these huge rolls that are super flimsy and can be a little difficult to cut down to size, but I got it. The other problem with using laminate requires you to use contact adhesive which smells absolutely terrible and probably kills more brain cells than watching stupid videos on Tik Tock, so wearing a respirator is essential. So is making sure you're using the right filter, which is the organic vapor filters, not the dust filters, those won't do anything against these things.
This is the first time I've used contact adhesive and it was incredibly easy, but this process is a little strange, you paint it on both surfaces quite generously, let it dry completely, which takes about 5-10 minutes, then press the pieces to get an instant and permanent bond and to really make sure the pieces are glued together well, I used this special. laminated roller to apply tons of pressure to the surface again. I made the laminate pieces intentionally large, so I put a flush cut bit on my Radder to cut them perfectly to size. Now beware of cheap flush cut bits that have straight cutters. a super high tendency to rip, split and tear out the laminate, that's why I'm using a special spiral type trim here which gives me an absolutely flawless cut.
If you want to buy one for yourself, there is a coupon code in the description and I promise you will never go back to those pure bits again. One of those other things I will never go back to, as I mentioned before, is T trck. Have you ever noticed that you see tons of videos about people making workbenches out of canisters full of trra in I'm talking hundreds, maybe thousands of dollars worth of trra, but you never actually see them use the T trck on that same bench working on a future video. As my channel has grown, I have become more aware of many of the marketing efforts. that happens behind the scenes trra is just extruded aluminum which is incredibly cheap to produce but T TR is expensive to buy it's the perfect product for a company to push and no you're not crazy why don't you seethe blue.
Teack built into every workbench here in 2024 is because that company took all of their marketing money out of YouTube. I'm a man of the people and you deserve to know the truth, they make huge margins on these things, but I'm dramatically cheaper priced. stronger and dramatically more useful holding solution, but we're not there yet to finish the laminating process. I need to apply a large sheet on the top of the artboard. The other method of cutting the material involves using a ruler and a special tool. scoring knife to mark the cut, then you fold the laminate over itself and place the application directly on the line, it works, but I still think a saw is a much better and much easier solution.
I'm paying special attention here to vacuum up any pieces of sawdust or other debris before placing the top sheet on the workbench because any and all pieces between the laminate and the MDF will show on the top and leave bulges that will definitely I want to avoid if you are looking for all the details, measurements and steps. Step by step process to help you complete this project or any of the other projects I have created on my channel. Check out the plans link in the description below and yes, because I know a large portion of people live outside of the US where we are. they still rely on an outdated measurement system, the plans are also available in metric for you I should also mention that MDF is very porous so it absorbs a lot of this contact adhesive so I recommend applying several coats just to make sure you get a super strong bond and because the adhesive sets immediately. some clamps to create a barrier between the MDF and the laminate and I slowly worked my way across the entire surface making sure to use that laminate roller to get nice, even pressure everywhere.
Now here's an extra tip: be careful when applying pressure around the edges with that roller. as you can easily break the protruding laminate, which would be a huge pain at this point in the project. I need your help if there is anyone looking who works at Facebook or meta or knows someone who works there and is willing to help. You informed me of an account issue that I have
been
trying to contact someone for over twoyears
to help me resolve. I would be very grateful if you could email me at Eric Spencley Design Code.com.Thanks, that would be a monumental step in getting me one. one step closer to being able to quit my day job and take this channel back full time. I use that special spiral meat trimming bit to cut the laminated pieces perfectly to size, but a close look will notice all that nasty junk underneath that is excess adhesive, but you can fix that quickly with some mineral spirits and a little elbow grease, just be sure to wait about 24 hours for the adhesive to complete The Cure on the surfaces before removing this excess. Now it's perfectly clean. Now it is one of the big problems. about laying laminate on a surface like this is that these edges are very sharp, no problem, although I can put a super super small round bit in my router and go over all the edges so nothing is sharp.
Bonus tip, run the router in the opposite direction. direction by making an upward cut and you will get an even smoother finish on the edges of the laminate. This new workbench is a big change in my workshop and another big change is that I just got married a few days ago and I couldn't be happier when Going through big life changes, things like making healthy food choices can come to a head. background, but that's where Factor comes into play. You can exceed your wellness goals, this can be with dietician-approved meals and ingredients you can trust, plus you can keep time in the kitchen to a minimum.
Meals are ready in 2 minutes, which means no shopping, prepping, cooking or cleanup now. I could definitely take more laminate and put it on the bottom, but I don't have enough left to help me save another trip to the store. I came up with a quick solution. The solution of applying a little polyurethane to the bottom of the work table to prevent moisture absorption and my solution to not make another trip to the supermarket to buy food is to have my meals delivered fresh, never frozen, directly to my door with Factor. In fact, I have been a factor. client long before I contacted him about sponsoring a video and I love how flexible he is.
I can easily adjust my order size, enjoy meals with loved ones, or even skip a week when I have a special event like my honeymoon next week, head to factor75. .com or click the link below and use code SDC C50 to get 50% off your first box of Factor and 20% off your next month's orders. That's code sd50 at factor75.com for 50% off your first box plus 20% off. your next month of orders so now that I've got my wood wrapped and protected I can focus on putting in those attachment points now if you remember I tried these dog holes before and ended up really liking them so that's what I want. to place over the entire surface of this work table and well, yes, you can just take your drill and measure.
Mark, drill all these holes, but I have a much faster and more accurate way to do it. This is a jig that I bought with my own money from woodpeckers and I know, I know what you're saying, oh cool, I'm not going to buy a woodpecker tool, they're too expensive, most YouTubers would justify the cost, but I'm gonna tell you. Honestly, don't buy this. I was so mad I wasted my money on this, but we'll get to that in a moment. What I'm doing here is putting a set of sockets into my router and adding a huge.
With a half twist drill bit, the bushing will sit inside the holes of the jig, allowing me to plunge all the way through the top of the workbench and leave theoretically perfect cuts. In theory, this is a lot of material to remove at once, so I'm making several passes slowly. diving to the full depth, I also can't recommend enough purchasing an accessory for your router that allows you to extract all the dust from the cut. I'll show you what happens without it in a moment, but it really is a game-changer and worth it. the money for whatever router you have so after all the holes are drilled I can insert these logging pins to make sure the jig doesn't move and have access to the rest of the holes since the whole corner is taken care of so I can Work to the edge of the work table.
Tasks like this are very tedious, time-consuming, boring and repetitive. These are the exact types of tasks that can lead to carelessness, which often leads to injury, so be very careful when doing things like this. I highly recommend choosing Install a pair of Bluetooth hearing protection which prevents you from having to listen to this for hours and instead you can enjoy music audiobooks or my original podcast that is published every week on all things related to tools for woodworking and everything behind it. scenes, things I'm doing, there's a link for that in the description below. Also, if you're interested in a pair of Bluetooth hearing protection like the ones I'm using, there's also a coupon code for the ones below and if you are.
By doing this, here's why you want to get a router that has built-in dust collection. The first thing you'll notice is that it creates a huge pile of dust that is messy but also jams the router bit and impedes the guide bushing. Since it sits completely against the jig correctly, meaning the hole being drilled doesn't actually go all the way to the edges, the second thing you might notice is a little smoke coming out around the part. The extra sawdust is causing excess friction that generates heat, this not only produces a poor cut and burns the wood, but drastically shortens the life of the router bits, which can be very expensive, so it is really worth spending the extra money to buy some kind. of the router dust extraction attachment once you have it you will never regret it unlike this jig let's talk about that so now that I have all the dog holes cut out in the side of the bench I need to start working more towards the middle and This is one of the most common complaints about this system.
It looks like you should be able to put them here and get going, but when you put these little pins in a straight line, this thing has the ability to slide back and forth, now it's so small. The amount of movement may not seem like a big deal, but if you're someone who's going to use these dog holes for alignment, that's not going to work, so instead of lining up the pins in a straight line, what you really want to do is set everything up. up so that it is a more triangular fixture that will ensure that this thing doesn't move at all when you go to make the other holes in a w at $220 for this jig from a company that claims precision is the cornerstone of what they They do this.
The squad is tremendously disappointing, yes. In that clip you saw me triangulate the pins to hold the jig down and it worked great right there, but to be 100% transparent as I continued on, the small amount of slope on this jig got complicated repeatedly, leading to the holes a I became more and more careless as I progressed, if you look closely you can even see a hammer on the bench that I used to hit the pins and some pliers that I had to use to remove those pins, which led to the pins were completely destroyed by the Once I was done I wasn't going to mention this, but I want to be totally honest about all my experiences with the tools I'm using for $220 of my own money, this jig was a huge disappointment and I can't recommend it. no one spend money on this since i searched the internet and found a significantly better solution so i picked one up and tried it even though it's $20 more than what junk woodpecker sells.
I can attest that it's much easier to use, more precise, and only requires you to have a drill, not an expensive router with dust collection, seems like a win in my book, so I'll leave a link to that performance system in the description below. Thank God that's over, not so fast because I'm somebody. who likes to have my output table at the same level as my table saw. I need to cut some holes that will allow me to use my miter gauge without any interference, so while I have the router out, I'm just going to cut a couple.
One thing to be careful about right now is that the surface of this workbench work is extremely heavy. I would easily estimate it to weigh around 150lbs, which is like 70kg for people using a sensible measurement system and was a big challenge for my weak body to move, but getting it out of the way and temporarily storing it on some sawhorses allows me to unscrew the old frame work table. Speaking of the frame, this is not sponsored in any way, but I love this frame. a solid metal frame from Craig that screws together has height adjustable legs and wheels that allow me to move it when needed and lock it when it's where I want it to be, plus metal is much more durable than wood and saves a ton of time per having to build my own base with the new top in place.
I can mark large rectangles from my miter. Slots on my table saw to extend them. Now it's tempting to want to make them absolutely perfect in the same size as what's out there. your table saw, but I don't want to risk interference or the bench not being exactly parallel to the slots, so I make them a little bigger because I know you're going to ask, is there a link for this magic pencil with white. Lead you can also write on any surface in the description with some pieces of wood and some double-sided tape. I prepared this template to mill the hole.
I should let you know that if you ever need router bits, I have a coupon code below that will give you 10% off all of my favorite bits and a ton of other coupons as well. Anyway, this worked perfectly on the first one, but after routing the second recess, as you can see, I destroyed my template trying to remove it. Don't worry, I'm done here, so no harm done. Now you'll notice I have bare wood exposed, but I have a plan for that. I picked up some of this new UV curing resin that is quite slippery. I mixed it in a little bit of black pigment then covered the gap with a thin layer now here comes the cold part.
I can use this UV light to instantly cure the epoxy, giving me a rock hard epoxy finish in just a few seconds. Now this won't work for something like 5 in Deep anyway, but for repairssmall things or things like this, this is better than having to wait a full day for typical epoxy to cure. Innovative products like this are something I really enjoy learning about and finding that I never want to be the person who is stuck in their ways and refuses to try something new, even if I find a tool or product technique that I love and that works great for my.
I owe it to all of you viewers and myself to try something new every once in a while. That's why he will do it. watch me experiment with new techniques experiment with new types and brands of tools and experiment with finishes, epoxy paints and glues. It's all about being curious and learning a thing. I learned, although I don't want to use this milling jig again. Finally I finished. with the router now that I have these holes I finally rounded it off the first thing I want to show you is how easy it is to clamp anywhere oh they don't fit because of the thickness of the workbench top when I put this on. here it gets stuck and cannot pass completely.
I think I have a solution, although it was at this point that I realized that all those dog hole tables, like the mft, are made from only 3/4 inch or 19mm thick MDF and that doubling the thickness It would not cause any problems with traditional dog hole fittings that have a straight shaft, but it would cause interference for these specific types of clamps. It really is a big oversight on my part, but there is always a pivot that can Unfortunately, I had to go back to my router bit collection and pick up this huge 60 degree champer or champer champer huh, now I'm wondering which one is right, a 60° bevel bit and created a bevel on the bottom of each and every dog hole.
Now a bit this size removes a ton of material, so I had to do the full dip in several passes, which was a huge pain, not only because it was time consuming, but it removed a lot of the polyurethane I already app
lied
at the bottom of the workbench, so after removing all those shampoos, I guess let's not talk about that again, I applied
a little more polyurethane off camera. What happened? This is a quick build and now, really, this time I can put my clamps anywhere on the bench and easily clamp things wherever I want, but Eric, you don't have a vise, how are you going to be able to clamp things to the side of your workbench and work on the sides, don't worry, I have a plan for that too.This is one of those things I never thought I would care about. I'm talking about holding things to the side of my workbench, but as I've learned more about woodworking techniques, I'm curious about the possibilities that vertical work can bring me, so this was something I had thought about before starting this project. , requires no expensive accessories and is significantly better than trra, but hanging. In just a second, I first came up with an incredibly boring sound, a bit incredibly direct tull to create data along the edges of the workbench, nothing exciting, but then I switched to this dovetail piece.
I know what you're thinking Eric, you started the video by saying that building a dovetail workbench is a waste of time, yes, but wait a second. With that dovetail bit in the router, I routed the exact same path as before. The reason for making a pass with a straight bit first is because it helps decrease the load on the dovetail bit, which is not only safer but also reduces the heat on the bit. and it makes it last a lot longer, for all my friends and my fiancé, well I guess now my wife always likes to remind me that I'm cheap, so not having to constantly buy router bits is a nice bonus, just keep in mind that you will have to climb. with some sort of sketchy fix to route some of the edges, but damn my middle name, I'm serious now.
I'm done with the router for this project for good, seriously, now with these dovetail clamps I can slide them onto the track. I just routed it to that hard maple for some Rock Solid vertical work so I can do things like smooth wood edges by hand, pretty clean, now yeah, I can clamp on the top and I can clamp on the sides, but I know there will be someone who is going to be feverish. attacking the comments section telling me that I missed a big problem because there are many holes all over the surface of this workbench, if I have small parts, like screws, they will instantly fall through these holes, but before I get to that there is another issue I need to address first now, even with using that super expensive router jig, unfortunately some of these holes are still not exactly the right size, so dog hole accessories, like a clamp like this one, They don't necessarily fit every hole, no need to fear, there is a simple solution for this and it's one I covered in my 10 tools.
I regret not purchasing the previous video. It is a dog hole reamer. Pop it into any drill and it is precision ground to be exactly 20mm in diameter. cleaning up any bits of sawdust, epoxy glue or just flattening out bumps and bruises inside the dog holes and I know I know this build has a lot of repetitions but that's why you need some headphones to listen to music books or podcasts while you build I find it relaxing to unplug and do things like this after a long hard day at work, now all the accessories in my dog hole fit perfectly but there is more that I didn't show you but a keen eye may have noticed what's going on. here, so not only does this make sure that all my accessories fit inside the holes because now they're exactly the right size, but it also adds that little change in each hole and what that does is it allows me to do this, remember. put screws in those holes, yes not anymore, these are dog hole plugs that fit perfectly inside the dog holes and leave a level surface on top, you can easily pop them out from the bottom or since they are magnetic, use any type of magnet that can quickly and easily get them out of the holes of the stops Downs, clamps, all kinds of things, there are endless accessories you can buy and make for workbenches with dog holes and the best part, everything All you have to do is drill a couple of holes. on your work surface and you truly have the best and most versatile work table on the market.
Now I could spend forever going through all my favorite accessories, but I'll save that for another video, see you in the next one.
If you have any copyright issue, please Contact