Working with Text and Fonts in Cricut Design Space - Beginner's Guide
May 29, 2021Hello and thanks for joining me for another cricket tutorial today we will take a look at the
beginner
'sguide
toworking
withfonts
andtext
in Cricutdesign
space
we will learn about thetext
editing menu how to work with script text writingfonts
when to use attach and solder, as well as how to load and use new fonts, let's get started, so here we are indesign
space
, since we are going to work with text, we don't really need the grid lines right now and I prefer to work without them, especially for video purposes, so to turn off these grid lines, go up here, in the top left corner, right between these two zeros, and click on that little blank box once you get rid of the quarter inch. grid lines, click again and it will delete all the grid lines.
I think this makes it a little bit easier to see what's happening on the screen when we're
working
with text, so let's click on the text and add some text. I'm going to type in my perfect name and once we've selected the text, you'll notice that the menu bar at the top turns into a text editing menu and there are a lot of buttons here, let's go through each one. I'm going to show you how they work, so when you click on this down arrow, you'll notice that you'll see a bunch of fonts. These are fonts that are in Cricut design space and your fonts that are already there. on your computer system, that's one of the amazing things about Cricut Design Spaces - it allows you to use not only your Cricut fonts and there are tons of Cricut fonts where you'll probably be able to find what you need right there in the Cricut Library , but if you have favorite fonts on your computer or if you're a font collector like I usually am, you can use all those fonts that are already on your computer, so that's what you'll see when you first click.
More Interesting Facts About,
working with text and fonts in cricut design space beginner s guide...
On the down arrow you will see that the All button is selected and that means you are viewing all of your font selections. Now you can click on system and that will remove all the Cricut fonts and only show you the fonts that are. on your computer or you can click and that will only show you the fonts that are in the Cricut design space. Now you will notice that some of them have an a, which means that if you are an Access subscriber member, you will have access to those fonts as part of your subscription, there is no additional charge to use those fonts if they have the a and you are an Access member and then some of these sources have a price next to them and right here this is all mixed up. the maximum is 498 once you buy that font it's yours you use it forever you never have to buy it again but that just means I no longer own that font.

I can play with it, I can design with it and if I want to use it to actually make a project to cut it or print it and cut it or write it. I'm going to have to buy that font, but again it's a one-time purchase, once you buy it, it's yours forever. Now you'll notice a couple more pieces. information here when you look at Cricut fonts, they also tell you if it's a multi-layered font, meaning it has multiple layers, usually a shadow layer, it will tell you if it's a cut font, if it's designed to be cut or if is a writing font, which means you can put your pen on your Cricut and write with this font, so we've covered this button here that will show you all the fonts that are in the Cricut design space and all the fonts that are on your computer, please note that this will show you fonts that are not only fonts that you have purchased or are part of your access, but it will also show you fonts that are available for purchase, so let me change this back to Cricut sans font.

Just to make it easier to see now, let's move on to the filter button here. If you click on the filter button, this will show you only the fonts that I have that are part of Access if I'm a member of Access or the fonts that are on my computer, so if we click on that filter, my fonts, this it only shows me sources that I can use without paying anything, so if you want to save some time, know that you don't want to buy anything, you just want to work. With fonts that are on your computer or that you've already paid for or that are part of your Access subscription, you can simply click on my fonts.
This will show you multi-layered fonts, meaning they have a shadow layer or maybe these circular layers or some. type of another layer, these are just single layer fonts, they won't have shadow layers and this right here will remove all those fonts that aren't going to give you nice writing lines, so it's a quick way to filter them out. We will give you fonts that will give you nice lines to write with the cricket. Well, that's the first item on the menu. We've covered the font and style buttons and what they are used for. This is the font size.
If you're familiar with word processing programs, this is your font size, so it's a size 72 font. You could change it to twelve, which is a typical font size for writing, or you can change the size by simply doing click and drag if you drag in this corner here. it will keep everything in proportion to each other if you unclick this lock button you can move it disproportionately click that back next we have letter spacing now this comes in handy sometimes if you're trying to fit text inside a box or something like that too This is useful when working with cursive text, but if you simply click the down arrow, the letters will zoom in closer.
Clicking the up arrows will move them further apart and move the space between each one. In proportion to the letters, we also have leading, so let me put another line of text here and I'll actually put my name underneath, perfect, so if I were to use this in a design, I might not want as much space between they. the top line and the bottom line, so I can click on the down arrow and move that space between the two lines of text is pretty simple, then we have the align function, which means everything will align to the left, This is how it is currently.
Is everything in the center or everything to the right? Very easy. Now let me edit that text again and bring it to a perfect line. The next button we will look at is the curve button. This is the curve function for Cricut design. space and this is how you get that curved text, we are at the zero mark, that means it is not Kurt, if we move it to the right we will curve it down, if we move it to the left we will curve it up, this is Great if you're trying to put the text around a circle and again you can play with this and then go here and move the spacing, so if you're trying to put the text around a circle you might not want that to be the case.
Bent over, I could raise it again and if you want to imitate this text, let's copy this text. I'm going to duplicate it, so let's say I'm going to go around a square and I want to go up our self around a circle and I. I'm going down one side and I want to go back up the circle on the other. If you click on this curve and you see the number twenty-one point seven eight nine, if I click on this one-click curve, put that same number. but with a negative number, so I'm just putting: in front of that 21 point seven eight nine, click enter and now we have a perfectly blended curve with the text going in the other direction, so it's a little bit of a fun way to use the curve. text function, let's move this back to zero or we can just type zero, which will return me to a straight line of text.
Now we have this advanced feature, so if you look at my name, when I look at it, I think it looks to me like there's more space between this e and the K than the rest and I don't particularly like that and this is a feature that you'll use a lot with text script, so I'll show you You get it in just a second, but if I wanted to move this e closer to the K and I hit the letter spacing, unfortunately, it's moving everything else with it and that spacing stays proportionally different, so I want to change that , that's when you use this. advanced feature, you will click on it and click on ungroup two letters.
Now what that will allow me to do is be able to move any of these layers on its own and you'll notice that everything went to its own layer here, our text. it was all on one layer and now each letter is its own layer, but now I can click on just this E and just use my arrow keys and move it and now to me that looks more proportionate and now that we have all these separate layers Each one of these layers I can also adjust them in the text menu, so if for some reason I wanted to make this particular letter bigger, I can do that and I'm doing it with the buttons, so maybe I'd like to do something fun. like this and it makes this one big, so now I have the ability to work with each of these letters separately.
Now keep in mind that if I wanted to move this word, I can't because each letter is separated, so let's get back to this. the correct size so that they are 108 point two four. I'm going to change all of this to 108 point two four. Take this back, so now we have our word. If we wanted to be able to move it all together, we would select it. everything, right click and attach and now we can move this as an element again or you can group it either way. I prefer to attach because then it still gives me the ability to move all of these.
You can also solder it, but if you solder it. Look what's going to happen in the layers panel, everything's back to one layer which is nice, but I can't edit this as a source anymore, it's a shape now, so to keep a word together but still be able to go back and I edit the text if I want. I click attach, if you click weld, it's no longer text, it's now a shape, it looks like text, but the Cricut design space sees it as a shape and if you save the file, it won't. You will be able to unsolder it and the only way to unsolder it now is to click Undo and undo any steps you did afterwards, so I recommend that when you are working with text you don't weld it unless there is a reason to do so.
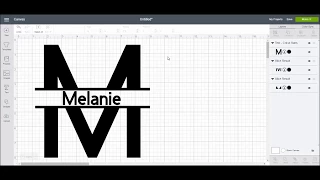
I'm going to get rid of this and I'm going to put some text back here, we're going to make my name again and I'm going to make my name like this, so again we go back to this advanced menu. You'll notice that when we click on the dropdown, we also ungroup two lines. What that means is that if we click ungroup two lines, now I can edit this line of text and this line of text. I just created two layers from the one layer per line, so that's a great way, if let's say I wanted to do it, I was trying to do something like this and make a logo.
You could do this without having to undo or reset the size of each letter. I can change the text. ungroup two lines, does it make sense? Let me show you that text message again to Loree, so here we are, we have this text. You'll notice that there is only one line of text here. I can't resize one word without the other, so to be able to be I can resize or change the font of maybe one of the lines without the other without having to ungroup each letter. I can move forward ungroup the lines and now I have two lines of text.
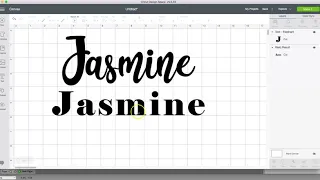
I can click on this and change maybe this font to this maybe. that's the look I'm going for, but this allows me to edit different lines of text. Another thing I want to show you. I'm going to add my name again and we're going to choose a script font and I'm going to click on style and click on normal, that means it's a script font. I see this in the design space, very often people will have a really nice script font, but they're not connected like they should be when you're writing a script. be connected and it's meant to be connected so the first thing I do is I start with the letter spacing and I lower this letter spacing and I see if I can connect it like this and I see that it's starting to connect, but now they're coming off of they're getting too close between here and these two are not connected, so that's another reason to use the advanced feature; clicks ungroup two letters and now I can move these letters manually, maybe don't move that one as much as move this one. one, so now I can make them look however I want.
I can also select it and drag it if I want to have a little more control to make it look more like the script text, so it looks more like that instead of, you know, six separate scripts. and letters that aren't connected that's another reason to use isolated text now another thing I'll tell you if you're cutting vinyl a lot of people will say "OMG I cut it and I'm cutting it between each letter." I don't want it to do that, on the screen it looks like they're all touching and I can do them a little bit.
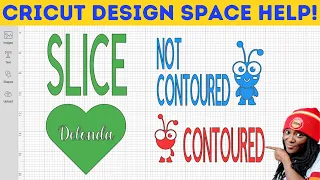
There we go, it looks on screen like they're touching, but when you cut it, it cuts between them. This is because these are all separate layers, everything looks like it's going to be cut individually, let's press "Do It" and you'll see what I mean, it's cutting each letter separately, it's not like they're not connected, they're not even in the order that I want them so that's when you select them all and click solder once you solder something anything that touches or overlaps will be stuck in quotes to the next letter so if you look here now everything It looks just the way we want it.
I can see if we zoom in, there are no linescut between those letters, the next item I want to cover is another issue that I see quite often and I probably get messages at least once or twice a week about this that a lot of people want to write about. On their Cricut they want to put a marker and have it on a card or write on a project and what happens is they choose a font and they go here in the layers panel and they change it too well and this is exactly what is going to work well, will write the outline of the letters and the message B and say "OMG, I just want you to write a single line, why doesn't it work so well?" that's because they've chosen a font that, if you click here on the style menu, doesn't have a script style, so if you choose your fonts, we covered this when we looked at this menu, but you see how one says cut of single layer but it doesn't say writing look what happens if I choose one that says single layer cut write by comma this one has a writing style so let's change this to writing and here in the style menu up here we're going to change it to writing and that's it, now you have a single line that you can put a marker on in your Cricut Explorer, your Cricut maker and it will write simple lines instead of an outline, so if you get an outline when you try to write, it's probably because You haven't chosen a script style font, so when you choose your font, make sure you choose one that says script, if you choose one that doesn't, when you go to the style dropdown right here, the script option won't be shown and you'll get the outline of the letter, so let's click undo and go back to how it was now, let's look at these menus here at the top, we have undo and redo, that's self explanatory.
If you change something and decide you don't want it, you can press undo, decide you want it back, press redo, deselect it. the selected source if I click deselect now the edit menu is not selected, this means I can cut, that doesn't change it to a cut file, that means it will delete it. I cropped it, so if I click on that, I'll remove it. press undo press edit I can also copy and paste it. I can hit copy and paste, which is the same as duplicate, copy, edit, paste, the difference between copy, paste and duplicate is copy, you can copy it and do other things and then paste it again. where duplicate is or duplicate is instant, so that's the edit button, we also have flip, so if I wanted to flip this horizontally, I could do that, I can flip it vertically like this, hit undo now if you're working with vinyl and you need to flip.
You can do it on the cutting mat screen, you don't need to do it here, but maybe you're working, you want to say, let's duplicate this and maybe you wanted to do something nice like this horizontal flip and you wanted to do that. do it in your design like this, you can do that. I don't really use that feature very often with text size when you're measuring a width or a height, keep in mind that it will resize whatever is selected, so if I'm looking to make four inch letters, I want that each letter is 4 inches and I write 4 inches right here.
It doesn't measure each letter at 4 inches, but instead measures the entire word at 4 inches. You can see the 4 right here, which means from this end of the sun. to that end the sunlight is 4 inches, if I want each letter to be 4 inches wide or 4 inches tall then I would have to do the advanced isolation of 2 or ungroup 2 letters and then manually tell it to position each letter. ungroups 2 letters, so then I would go in and press H and change that H. I would say I wanted each letter to be 4 inches tall. I could do it, so keep in mind that when you work with a word, when whatever you choose Everything that is in that box will take the widest width and convert it to the width that I choose or the height that I choose.
If you want to resize things out of proportion, you can unlock this or this lock up here between the height and width. it does the exact same thing now it allows me to say I want my width to be 5 inches but I want the height to stay at 2.4. Now I can do it if it's true, if it's in the locked position and I choose the width that it's going to be. automatically adjusts the height, so the next button we have is rotate and this will do exactly what you think it's going to do, it'll rotate and go back to zero, so if you were working with a design and you said you wanted to make sure everything was with exactly the same rotation, maybe you're going to make a slanted text, you can just type, let's say, 45 degrees and then you can make the next text and type 45 and then you know they're all going to be in exactly the same position.
The angle position is the next menu item, so if we move this text here, you can see that the x axis is where it is horizontally, it's right here, it's at thirteen point nine seven seven and the y axis is where it is horizontally or vertically. Sorry, it's up here, it's actually above zero, there we go, so that's where it is on the mat. I really rarely use those buttons that you used to use to line things up like you want to make sure you have two words. in exactly the same alignment, you would use it a little bit more, but now they have the alignment feature, we don't really need it, so that's the Edit menu and that's the basics of working with fonts, so another thing I wanted to cover Maybe you have a design and I just wrote this.
This is a little silly, but you have it all set up and you're like, "Oh, this is exactly what I want to put on a t-shirt. I want it to print like this." you click do it and you say oh no that doesn't look like the way I set it up everything is on the left it's hearts not where I put it the reason it does that is you need to attach design space look at it . and it says oh, this is a cut file, this is a cut file, this is a cut file and it's also.
I'm just going to put it on the mat so it's cut the way it's going to be stored. Most of the material I don't really care how you laid it out, but you worked a long time and you want it to stay that way, so what you do is select everything you want to keep in place and click. attach that is say layout space I want you to keep all of these words exactly where you had them, so now if you click and do that, it will keep the settings just as you had them and it will be clipped like you did.
Did it seem good to you? Another thing I get asked a lot is how to add your own font. I'm on a Mac, but a PC is very similar, so I like to use dafont.com. All I do is go to the font and I'm just going to choose a font here. I'll click on this, one-click download, it'll download to my computer, I'll open it, open the file and you'll see an OTF font or a TTFN font if you're on a Mac and you have the option to use OTF use OTF if you're on a PC you can use any and if you are on a Mac and you don't have OTF If you only have a TTF file you can use it but if you have the option on a Mac use OTF so I just double click on the font and click install font and now that font has been added to my font book which is called the path ahead, so you go to a design space and you press text and you search for that font in the path ahead and you see it says there are no search results.
The reason is that when you start design space, it looks at all your fonts and sets everything up so you don't know that you just added a font, you already searched and found out what's in your font catalog, so what you need to do is close log into design space and then it will log back into a new project and now you can type text and look for that path ahead and there's that font that I just installed so you don't have to do anything in design space to get a source, you just need to log out and log in again.
That's the end of this tutorial. I hope that answered any questions you may have about working with text or fonts. I have many other Cricut design spaces for
beginner
videos. I'll leave the link to the playlist right below this video. If you have any questions related to this tutorial, please leave them. Leave them in the comments below. I will be happy to answer them and help you if I can. If you liked this video, give me a thumbs up so I know you want more of this type of content. Subscribe to the channel. Click the notification. so that you don't miss any future videos and don't hesitate to share the video I hope to see you later as always never stop doing it byeIf you have any copyright issue, please Contact