Painting My Old DIY Squishies (Pt. 1)
Apr 17, 2024Hi, it's me in a care bear shirt, so I love how I remember to point out my care bear shirt, but I forgot to mention that I cut off half my hair. Look, this was my hair before. Now he's gone, let's not be scared. about it because it's just a haircut okay so let's start the video today. I'm going to do something that I'm actually very excited to do. It's one of those projects that's been on the back burner for a long time. It's been so long that I forgot about it for seven years. I don't know if it's been seven years, no, it's been more like five, so it's time, so let me understand what I'm talking about.

Here is what it is. that pink thing, this is a box of
squishies
that I made myself when I first discoveredsquishies
. I felt the need to make them myself because I hadn't actually discovered that you can buy cheap squishies and paint them, and it probably turns out to be about the same price or cheaper. This method has to use a silicone mold so you can only get soft in the shapes you have a mold for, so you end up making the same shapes over and over and over and over again. and that's probably why I abandoned this.
More Interesting Facts About,
painting my old diy squishies pt 1...
I still have this whole box of squishies I made. I would have liked to make squishies for days so I could finish it and enjoy the
painting
without having to worry about where my next squishies are coming from, but come on. I thought I broke my nail, let's take a look at what's really here. We have this rare rose. I think it's supposed to be a palette. Lots and lots of cupcakes. Lots of donuts. Looks like I startedpainting
this one. What is this? It looks like something I shaped by hand. It looks like it was going to be an eclair.
Knowing myself, I'm debating whether I should focus on the quantity or quality of this video. If I only make a couple, but I make them really well and I put a lot of work into them and everyone will say, "Oh, you had this whole container of squishies and you only made three, but then if I make a bunch of them, I won't be able to spend as much time to each one and Then people will say, "Oh, you didn't even try, they're so basic, so we'll move on to the painting part of this video and at that point I'll have made a decision, let's move on to that, I decided To." start with something very basic, just so you know, getting my feet wet, yeah, no, I don't mean let's not start the video talking about wet feet.

I chose one of the many cupcake squishies that are available in this treasure as you can see that. these softies aren't really soft, they should really be called sparkling, I don't know, they have a very interesting skin and the top has a very bubbly surface like little grains, it's a delight to take it up a notch I'm going to add this to my cupcake. I found it. It looks like a lot of frosting. It has a very large air bag. He is breathing. It has life when I used these softies regularly. An air pocket like this would have been devastating.
I had no idea how. to fix it, so I'm going to make a small cut in the skin over the air pocket and then I'm going to take this piece of memory foam that I think was on its way to becoming a delicious soft eclair and after years and years of waiting. that neglected, forgotten container has finally been rescued and taken out where I will finally finish its journey by using it as waste foam and basically just cutting off pieces like that fixed air pocket now to use this piece as frosting. We're going to need a little modification because as you can see it doesn't look good, it has a very puffy bottom because it's actually the top and when the top of the foam expands above the mold it becomes rounded, we have to remove it. there the icing looks much better now getting out my fabric glue oh there's a little clog just a second oh eww eww why did I do that taking some of that glue spreading it on the icing icing the icing isn't funny and then throwing some rubber bands in there to keep the pieces together and about an hour later it should be dry, take them off and poof, yes it looks perfect but not interesting enough.
I was trying to use as many squishies as I could and found this little piece of rubbish junk, it's kind of a scraggly little candy, the foam I was using didn't work very well at capturing small details, maybe I can fix it by starting by cutting off the puffy back and then just carefully tearing off some of that excess. I trimmed the skin a little and it still looks torn at this point. I'm not quite sure if this will benefit my cupcake or just make it look worse, but I'm invested at this point and finally introducing my friend Paint, hey hey.
Dude, this is purely puffy paint that I'm using to cover the entire surface of the little candy. There were supposed to be all these cute little swirl details in the candy. Clearly, they are stolen. I won't even try to save them and bring them back. Put them back, I'm just trying to smooth everything out at this point, plus seal the seams and that little patch I did and once it's all dry, it looks pretty decent, so it's time to paint with chocolate. I opted for a chocolate cupcake. that a real chocolate cupcake is actually very dark, but I wanted this cupcake to have a nice, airy feel, so I tried using a lighter chocolate, but it looks a little strange, so I thought maybe add a bunch of orange would still fix it.
It looks quite strange, it looks more like a very cooked vanilla cupcake. Maybe it's a hybrid between chocolate and vanilla. If you mix the two, is there such a thing? I think we need there to be a new flavor of cake, ladies and gentlemen, I call it chakila killa killa okay. Anyway, we can finish with the chocula. Next I went and tried to cover up the ugly puffy yellow paint and also painted the entire frosting area white. Now I get a little excited. I'm painting the cupcake liner. I'm painting it rainbow. I'm just going to come out and say it and I'm just working with the colors there, figuring out the space and then I decided to go ahead and paint the candy with purple while I'm ready, boom, I went over that again two Actually, I'm not going to lie, I like it how it looks like this, but I need to carry out my original mission, so I'm going to work on blending the colors from here to create a nice rainbow gradient now again.
The day I designed a cupcake that had a rainbow lining like this, I painted the rainbow around it in a line like one color at a time, but it always bothered me that you couldn't see the full rainbow, now that my skills are so much. more refined, I'm painting the rainbow this way. I have made progress, but this was actually quite difficult because each color is a very narrow section, there is very little room to mix, but I finally got this rainbow looking good, yes, it looks fresh. Hey, I want to take a quick break because I have a very special announcement.
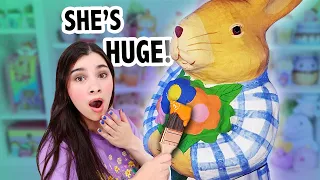
It's Shelley and Eustis who like the spectacular lighting effect. You can thank my dad for that, thanks dad. That's right, ladies and gentlemen. They are Shelley and Eustis in person, the plush flesh. They have the perfect expressions and all the little details to make them like the originals but in plush form and they are huge, okay they are huge, they are available in my store for pre-order, they will be available to purchase for next month only, so yes You want one or both, by the way, if you buy both, you will get a discount on the bundle.
Be sure to place your order before February 28th. Don't miss out this month when pre-order is open. collecting all the orders so we know how many Shelleys and uses we need and then we start production on them, so you are basically ordering one to be made just for you. If you have any additional questions, go to the link in the description there is all the information there these items will be ready to ship in May so we have to be patient. I know it's hard to wait, but it's worth the wait if you choose to order them.
I know you'll love them, so that's it. Let's go back to the normal video. I didn't know what to do with this candy, so I just painted a heart on the front and hoped I could fool everyone into thinking it's cute. Oh, look, it's a heart. He is so cute. Oh, it is, but now that I look at it, why the hell is there a piece of candy stuck to the front of a cupcake that doesn't make any sense? Finally, I'm going to take this puffy color paint. hot chocolate oh wait no it's just brown and I'm going to paint some fudge all over the top which again, makes sense?
I don't know, do they put hot fudge on the cupcakes? I don't believe it. I did it on this one, well, I did it. This was a perfect opportunity to add sprinkles and I decided I liked it as it was and didn't need it, but now that I'm watching this, I wish we had the ending here. soft, it looks cute, I mean, the candy thing doesn't make sense, yeah, but if you can try not to question it, it looks really cute and that rainbow gradient is from now. I didn't do a before and after. because in my opinion, this isn't really a makeover, it's more like I just finished something I started, but I pulled out every one of my old mushy cupcakes.
I clearly still have quite a few, most of these were made between four and six. years ago, this is one of my oldest, but it has a logo, oh wow, you missed the point, dear, oh, this was before the fully developed logo, the e and the heart don't touch, come on, little buddy, just reach out and touch that heart very ugly evidence that I hadn't yet figured out how to cover those holes and also who told me I could stop painting this clearly needed another two or three coats oh my god I forgot about this I used to design matching labels oh God, I can't decide if that's really cool or if he's really a loser.
I found the two muffins of the group. You all are a little ugly. Another major. Why did I feel the need to write that? Why oh I found one of the squishies from the original squishy making video and there's carrot cake, no one likes carrot cake, in fact that's Jordan's favorite cake flavor. I think he's sick, this rainbow you've already seen, it's one of my favorites, even with those globby sprinkles, so I got bored. the cupcakes flat and started adding things to them. This frosting was hand cut from memory foam very roughly. Someone taught this girl how to use scissors.
I really wish I had put a few more coats of paint on there to cover up all the holes. Another one with the same concept kind cute kind of weird color options oh cherry kiss did you see they sneaked it in? these two have some fancy whipped cream. oh, I actually like this rainbow whipped cream, this one is pretty bulbous and then there's this one, those gummy ones. The bears are so cute, I love it, I love it, so I have this great set of six cupcakes. This is my rainbow fruit series. In fact, I keep them on display in my art room because I still love this set.
Finally, this set of seven I completely forgot about. about these, each one of them is themed to a different disney princess, oh my gosh the tag attacks, i actually really like snow white, rapunzel, ariel and belle, it's also okay if you ignore the fact that the frosting looks like poop, it really does look like poop, but cinderella jasmine elsa y'all a little basic wait where's anna where's tiana and where the hell is aurora anyway here's the final cupcake not really sure why that long detour was necessary but it happened and we sat well, then I chose this soft donut I'm already removing the skin, oh, what is this?
A small tag on the skin. Okay, the donuts are ready, but I felt like it was a little boring to make just a simple donut and after seeing that gummy bear cupcake I got inspired, so look what I made. I discovered that I had a few more gummy bears that she had made. I think these were the rejects from the batch I made for that cupcake. I mean, you know they're a little rough, but I think I can work with them, so first. I'm just removing them from that overflowing foam, let's free them all. They've been stuck like this for five long years and we finally release the gummy bears until I have a handful of cute, loose gummy bears.
I'm so happy to be back with a donut, unfortunately the freedom didn't last long for these little guys because now I'm sticking them to the donut permanently, they'll never be free, it's okay, don't feel bad, I have a feeling they won. I don't even realize it, here we go. I'm going to try to fill in some of the little holes with my puffy paint and basically rebuild his limbs. Don't tell me I've never done anything good for the world, okay? I just spent an hour reconstructing the limbs of a set of five-year-old gummy bears, okay, so I let everything dry for a moment and boom, here it is, it feels weird, I'm going to start painting now, I I'm going back vanilla.
I immediately noticed the texture this foam had after a coat of paint, it looks very rough, so let's go over that again. Splendid, I'm going to wrap the vanilla color on the top of the donut, which I remember for much of my old donut designs, I would just paint the top one way and the bottom another way, but then I realizedI realized that donuts don't really look like that, so I modified my shapes. I'm going to use some puffy paint to glaze the donut with a nice thick layer around each gummy bear and once that's dry, I'm going to add the colors.
These are the same colors I used for the rainbow cupcake wrapper and I debated whether to go with a traditional set of gummy bear colors or How to Do My Own. I was a little worried that painting them in non-traditional colors would take away their gummy beard and maybe they wouldn't look like gummy bears at all, that happened. I mean, you can say they're gummy bears, but they don't look like any gummy bears I've ever seen, not that they're super realistic. I also wanted to say at some point in this video that yes you can and I made squishies from scratch, but I wouldn't recommend doing that.
You have to be very careful because foam can be harmful in its liquid form if you don't take proper safety precautions, which is another reason why I stop doing it that way, just buy cheap squishies and paint them, you don't need to make them from scratch , okay, and here is the finished donut that I make. I feel like the pastel colors look a little weird on the gummy bears and the brighter colors look more edible, sorry but I wanted the colors to match the cupcake because I may be working on a set here, we'll have to Look when it goes on and I also feel like I definitely could have used more gummy bears, of course this was all I had so I was a little limited with it, I'm just a little picky but I actually like this one and I think its alot. better than some of my very old creations, oh look at that, here they are, hello guys, I remember this is one of my favorites, this one is a little and we have miss basic and then there is miss basic's cousin, this one in rainbow, actually I'm still kind. of surprise and this, what is this?
A cookie ice cream sandwich donut. How does this work? Oh, this one has rainbow frosting, but it's not good. What's the mix there? My God, what is this, chickenpox? they were magical, I don't know, finally this little watermelon is kind of cute, but I think it could be better, honestly, it's okay, and the next squishy I worked on was this one, but well, there have been certain developments and it's clear for me I need to explain this to you, so let's let my face take over at this point, take it off, okay, thank you, voiceover, I feel like a very bad news reporter, so that was so ugly, ya you know, at the beginning of the introduction of this video.
I couldn't decide if I was going to try to make a lot of squishies or just spend a lot of time on a couple. Well, I decided on both, so I'm working on a total of five squishies, which is a decent amount and for those five I'm adding things, gluing them and repairing them, so you've seen two of the squishies I made and you'll see all three remaining next week, yes, that's good, please don't kill. Me, some people really hate when I split things into two parts, um, because you have to wait and I understand that I ended up putting a lot of effort into the squishies and I wanted to keep it up and not rush it, plus I ended up spending.
I spent a lot more time than I expected looking at my old squishies and talking about them and that ended up being a lot of footage to edit and now I realize it's going to be too much to fit in this week. I hope not. It doesn't matter, I'm really excited to show you the three remaining squishies I'm going to make. Thanks so much for looking. I hope you enjoyed this video and I hope to see you next Friday for part two. Bye, now I have to film the. Part two intro, so let me do that now.
Hey, it's me.
If you have any copyright issue, please Contact