Upgrading My Desk AGAIN! (Ikea / Amazon)
May 10, 2020What's wrong with everyone? So today I'm once
again
updating mydesk
top, gaming and editing setup. Basically, I've updated a couple of times and there are a lot of parts and today I'm going to paint the walls back here, so it's all good. blank, this is where all the videos normally take place, but I thought it would be a great opportunity to go through my entire setup piece by piece, that way you guys can get ideas on how to set up your owndesk
tops and gaming setup etc. With that I'm going to go ahead and begin the first step.
I'm going to paint all these walls a dark gray back here so it's a different day all the rooms are painted now and I'm really happy with the way everything turned out here and I also want to do something to make my room stand out and It's not just the plain white that you see in everyone's houses, so today I'm going to take the first steps. and put the desk back together and also when I can I will mention cheaper and more affordable alternatives to some of the parts I am using, so the desk I am using is from Ikea, it is not the cheapest desk but it works for me good and I like the look of them, so we'll start with the Elledge drawers from Ikea.

More Interesting Facts About,
upgrading my desk again ikea amazon...
They come in a couple different colors and I find it very easy to keep my desk clean when I have drawers, but they are a little pricey. So you can always save money by simply purchasing table legs instead of drawers. So I have two of these regular ones and I just bought a third one that has an extra large filing drawer on the bottom, so I was going to set them up like that. so I have a desk here and another one here for el-sheikh, this was going to be for my computer and games and all that editing and this was going to be just for working on bits and showing things on YouTube videos, stuff like that, so but to not have too many drawers, I was going to put legs on that back corner, so we just put the legs on my new desk here.

I just lined it up next to that drawer so they wouldn't stick out when it's all set up, but I just want to mention that these are not normal legs. I think all of these legs are IKEA Olaf legs so somehow they are height adjustable and I am doing this because I have dividers for these drawers to make the desk. a little taller so I removed these brackets, technically they are furniture legs but I have them in this nice black finish that I was looking for, I think even though this table is thinner than the actual desk I think I'm going to screw them into the drawers that way I can move the drawers wherever I want and the desk will always be on top of them, whereas if I did it any other way I would have to read well if I ever decide to change something, so we stayed up late last. night and I installed all the dividers and put the two desks on there so let me go over a couple of things so there are the dividers I don't know why but they came with these screws that look like gold but I forgot to mention they are four inches another Maybe the reason I bought these is to make it a comfortable sitting or standing height so I can stand and work on things here or sit and use a computer there.

I've heard from some people that raising their desk a little makes it more comfortable for them to sit. I was fine with how it was before but I wanted to lift this side up so I didn't want to have too uneven desks there so these desks are also from Ikea and they are called karlby. counters because technically they are in the counter section and they are both about 79 inches long or 200 centimeters depending on where you live and as you can see on this side below, I actually put four legs on just because I believe in their weight limit. each one weighed about 25 to 30 pounds each and this desktop already weighs a lot so I just put four in there that way I wouldn't have to worry about how much stuff I put on top of it to make them look great but
again
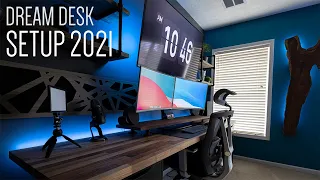
If you want to save a lot of money, you can get a key tip on desktop computers and finally I have two vivo monitor stands.They sell a single mount which would cost you less than buying two, but I found that when I had the single mount on so that the two screens were touching in the middle, the elbows were bent and the screens were a little far from the wall with these two mounts. individual, I can push the monitors further back and these actually come with two of these together, right? here I ended up getting rid of one on each side that way, these have room to be in the middle, they don't stick out from the end or anything ugly that looks like that, so I'm happy with how this turns out, but if you want to save money you can get that unique double stand, that's what the monitors look like when they're mounted and they're pretty close to the back wall, there they're still, you know, touching in the middle and stuff, there's no awkward gaps and I also like how they stand you see the two mounting posts there because if I didn't remove that extra piece, the posts would actually stick out over the edge of the monitors stuck in here and that wouldn't look good, so there are actually clips that help. you with your cable management on the brackets and at the bottom you can see and the cables are hidden behind the posts and you can make it a little neater than that with the help of some zip ties so today I'll put some acoustic foam on the wall.
I'll do this mainly for appearance, but it will also help a little with the echo here. The couch has already helped a lot with that, but you know, it came with these stickers. stuff and I tried one on the wall inside my closet and if you can see it just totally destroys the wall if you need to replace it or readjust it another recommendation from other guys I'm going to use these T-pins so they are like nails but you can push them in nicely , so there is all the foam on the wall. Now it turned out pretty good.
I don't know how well you can see it on camera, but some of these thumbtacks work something like that. They stand out a little bit but they made it really easy to install all of this because each panel isn't exactly the same size so there's some stretching and squishing and everything to make everything look nice, that's your call I guess so you want to use sticky things or thumbtacks like that but I'm happy with the result if you remember I had an LED strip on the back of the desk before and it looks good but I wanted to try something new so I'm going to put an LED strip on the back of these monitors, I'll put one on the back of the PC and then I already have an RGB light for that lamp so I can change the colors and all that and finally one of the last things. for my setup is my chair, this is a dxracer Ohr vol 1 and B and I feel like a lot of people like to hate dxracer chairs.
I just think they expect them to be perfect, they're not perfect, but they are good chairs. I'm definitely getting a better chair than a hundred dollar chair at the store or something, but yeah, mine is definitely comfortable for me and I like that blue color, so I tried not to have too many colors in my setup here, so that now. that I have all my lights installed, I will make them all blue so that everything matches well, there it is all done, all the lights on and combined and everything this room looks completely different than it did a few weeks ago and I still have a lot of work to do on cable management down there, but I'm happy with my gaming, working, and editing space up here.
Also, with this new desk I can have enough space for my two 24-inch monitors and my audio monitors as well because I move the PC there and I wanted to know that too. I only put LEDs on the back of the PC on this side and on the top, not on the back, because it would light up all the cables in the back and it wouldn't look good and then every time I make a video and show you something, I always have to clean my area, so I'm excited to have this side here now so I can know. put things there, eventually I want to get some kind of overhead camera mount so I can have a roof and have a camera there and just display things here, you know and I don't know, I think it will be easier to do. videos here now and also it looks good and then possibly one of the biggest improvements here is having this couch here because now you know there was nowhere for anyone else to sit and now you know my wife and the baby they have.
You're a lot more patient with me when I'm editing or whatever just chilling here hanging out with me in the same room and I was going to put some shelves up here and then I thought I'd maybe put a little more foam in here and then I thought I'd hang some guitars on the walls or something so that wall is still undecided, but that's the nice thing about desks and setups is that you're always changing, you're always updating everything and as you go along you figure out ways how to do it. you can set things up to help you better and do things so it's been a lot of work changing this whole room over the last two weeks and my wife helped me a lot and I'm just looking at it and my camera monitor here. for the first time and it looks great, it looks totally different, you wouldn't even think it's the same room, but yeah, I'll try to link as many things as I can in the description below to help you with your setups.
I hope this has inspired you. I hope you learned a few things from this, so I'm excited to do more videos in this room. Thank you all for all your support in my videos. Umm, sometimes it's a little overwhelming, but I'm very grateful. and that's it, see you next time
If you have any copyright issue, please Contact