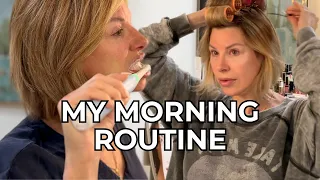
THE MAKEUP FACELIFT by Dominique Sachse
May 29, 2021♪ ♪ Welcome to this week's Facelift Makeup Tutorial. Yes, it is that powerful. Many of us have genetically inherited crisis traits or, as we age, our traits tend to move down and sink a little. The power of
makeup
to change shape and create lift is amazing. So this goes from a decline to an improvement. This is how you erase 2020 from your face and regain happiness. It's the beauty ofmakeup
, in my opinion, it's one of the things I like most about it, it's the transformative effect if you choose. I love being without him. I love it naturally. I think that's also the beautiful thing about being a woman at her best, the love and acceptance of who she is and what she has.
But at the same time, if you have the tools in your toolbox and the skill set, you have an incredible opportunity at the right time to be able to create powerful change. And that's what I want to impart in today's video, the ability to do it if you want to. I'm starting with a bare face. I've parted my hair down the middle, I'm just clipping it back. I feel like a 12-year-old today, but that's okay because I'm basically going to split my face in half. I'm going to do bad makeup on one hand and good makeup on the other.

More Interesting Facts About,
the makeup facelift by dominique sachse...
So for the moment I'm going to apply foundation, concealer, primer and all that, not necessarily in that order. I'll also provide you with a link to my No Smudge No Budge makeup tutorial to help you keep your makeup in place, but I'll check back in just a second when everything is applied. Good, excellent. Here is the starting point. Everything will be listed in the description part below, so you can find all the products used. We're going to start with the eyebrows and I'll show you, since they're the window to our eyes, how framing them can really determine whether we're going to have an upturned eye or a downturned eye.

For full disclosure, I had my eyebrows tattooed and microbladed about a week ago. So thank you, Connie, because now I feel like I have thicker brows again, but I'm still going to use a brow pomade to emphasize this and show you the difference between how you fill in your brows. So let's use this side of my face, which is the right camera, for the downward side, the left camera will be the top one. So when we go in with the brow and fill it in, the area we have to be very careful with is the outer part of the brow, the part that turns down.

We have to be careful not to overemphasize that. So since this is the wrong side, I'm going to follow this line and make it a little bit longer because sometimes we do that when we lose fullness and definition of the eyebrows, we thicken them and thicken them. , we lengthen, but we make the mistake of lengthening and pulling the shape down. So this eyebrow is going to be my droopy eyebrow, and I'm just going to bring that tail down. Alright. For comparison, on this side, we're going to change the outside of the eyebrow and bring it out a little bit.
So I'm building my foundation underneath, and this is where it's different. When I come out next I'm not going to go as far as I did on the other one. And I'm going to continue this line a little bit outward and up. Do you see how my strokes go up and out a little? So I'm going to complete it like I did with the other one, but I won't do the downhill. I'm actually going to get to the height of the eyebrow and continue a few strokes outward, like this. So it will be a little shorter than the other one.
But I think you can already see the difference in the shape, how this eyebrow comes out and this eyebrow is more severe and lower. It's also going to change the way we do our makeup. For eye makeup, I love this palette. I showed this before in a previous video, it's COVERGIRL Chocoholic Scented. Is very cheap. The colors are beautiful and it smells like chocolate. So it's also perfect for vacations. So what happens is that our eyelids start to get a little heavier and often we are used to putting the lightest shade on the eyelid. And what that can do is it can actually make the lid heavier, make the lid look heavier.
So on this side, I'm going to use the light shade on the lid. On this side, I'm going to use a warmer tone, a little more purplish oxide. Today I'll stay in the plum purple family, just because of what I'm wearing. So I'm going to keep it a little bit warmer and darker. And when you have heaviness in your eyelids, it helps hide it and highlight the crease. This is the important part of this process: this is the eye that will have the rebound. So to do that, we have to be very careful not to drag the makeup down.
Just like the outside of this eyebrow came out, the outside of this makeup will also follow that line and just go up and out. A lot of blurring, a lot of softening, but we follow this line, this frame that our eyebrows have created. So I'm going to stop right there. On the eye, that will be the mistake, I will take the same darker plum color and now I will follow the natural shape of my eye, which is more of a rounded fall. So I'm going to go to the crease. I'm going to make the mistake of not reaching high enough in the crease and I'm going to follow form.
So I won't make any adjustments in terms of altering the shape. I'm just following my form and getting that down. Well. So here we are showing the difference that you are already seeing, fall in the forehead, fall in the makeup, the makeup here rises and comes out. So let's complete the eye makeup and focus here on the outer corner. I'm going to use... I used this kind of rusty color as the color for the crease line. Now I'm going to go in with this darker brown and I'm going to build on this side, but instead of going all the way down, I'm cheating a little bit and creating a new end point for the outside. eye.
And I'm lifting it up to find the area I just built. Perfect. So what you're seeing now are two things happening. You're seeing a lift in the outer corner of the eye, you're also seeing a lengthening because I'm going to slowly soften and blend this shadow so it comes out and matches this outer corner of my eyebrow. On this other side that I'm doing incorrectly, I'm just going to follow this natural lash line and block in with that darker brown. Where my eye really ends. Okay, now I'm going to take my blending brush and beat this to lift it up a little bit and soften it.
This I'm just following the shape I created. Now I'm going to use the light highlight color. And here I am, just sweeping to the right, hugging myself very, very tightly against my brow bone. And just below my eyebrow, without going too low, because we don't want to create too much heaviness on that side because we brought up our warmest color. The common mistake on this side, the droopy side, is to do too much white here, which really emphasizes the orbital bone and the drooping that occurs naturally in the eye. I'm already seeing a big difference. Liner is really going to emphasize this.
So on the right eye, I'm using a black eyeliner. I go to the top line, which means I come from the bottom and hug the lashes that come from the bottom. So you're basically going back and forth. I won't go back down at all. I remember I created that artificial endpoint. So that's where I start, right there. And I'm just moving my lash line and I don't want this to get on my eyelid. This really helps create an open-eyed, non-top-heavy look. Basically we are doing the antithesis of heavy. I'm going to make the mistake on this side of my face.
I'm going to come from the top and draw in my upper lashes, which will remove a lot of my eyelid. The biggest mistake we make in terms of drooping features and emphasizing that, and it's something you never see me do, is taking an eyeliner and dabbing it on the lower lash line. Now there is a difference when I do a smoky eye, I'm actually doing an inner edge and then I use a very light medium shade to blend my lashes, but still my emphasis is on the top. This doesn't mean you can't put shadow on your bottom lash line, but it should be on the lightest, lightest, medium and not dark side.
But a lot of times we take a dark eyeliner, and this is a dark chocolate brown, and we line the lower lash line. So what's going to happen now is it's going to really emphasize this lower eyelid and the lower droop that happens here in the outer corner. Blur my shadow. So now I've basically followed this eyebrow shape line. I've followed the natural curvature of my eyes and in doing so have created a heavy blocky look that looks a little sad and older. This side so far seems much lighter and more youthful. I'm going to leave the bottom lashes alone, because today I'm wearing the darkest lipstick.
So I don't want to go overboard with the appearance of the bright side. So at this point I would take my eyelash curler and curl my eyelashes. And we'll do it on this side too, so you can see. And now the mascara on the good side only goes on the top line. ♪ ♪ And in doing so I continue to draw attention upward. Well. On the wrong side, obviously, we will apply mascara to both the upper and lower lashes. God, this reminds me a lot of the 80s. Oh. The same with the eyeliner higher up, you can hardly see the length of your lashes because you have covered the eyelid too much and, therefore, your upper lashes don't stand out either.
Alright, now let's put on some bottom lashes. I haven't done this in decades. They look like little spider legs, and this really exacerbates the falling problem. It's just pulling everything down. Well. Big difference, but I'm not done yet. I still have another trick that I like to do to really help lift the outer corner of the lashes, create a cat eye and a nice lift. You know I'm a big fan of magnetic lashes...wow, the outer wing magnetic lashes. They're just floating around in this tray here. Wait. Well. Magnetic outer eyelashes. I'm going to use the outside for the left side that you're looking at.
These are the 0.2 millimeter ones, and they just go right here on the outside corner, but they really create a little added lift to the eye once they're on the eye. And you see how that gave me that little extra pull, thickened the lashes here on the outer corner, but also created such a nice lift up and out compared to the spider fall that I have here on the right side. Alright. Then the eye makeup is ready. Concealer. ♪ ♪ The other trick is with the good eye, I use the concealer to clean up any dark things that might be hanging underneath and it really helps keep that line nice and clean, without going beyond the outer corner of this eyebrow.
Everything adapts to it. On this side, I am now agreeing with this downward turn. Well. I'm just going to set the area with powder. And now I'm going to set my foundation with powder because we're going to move on to the contour blush and then finally the lipstick. Well. Here's another area we struggle with: contour and blush placement. Where you place it is everything in terms of how your cheeks will lift and how your face will lift. So here you have a palette of contours and highlights. I'm going to use the darker contour shade on the wrong side.
I'll contour the low side a little bit. So I'm in the hollow of my cheek, going a little lower. On the right side, I'm going to hug just below my cheekbone and not go as low. So I'm going to hug myself right here. It is a little higher than the other side. And I'm not going to go down as much as the other one. So this one, the good one is here, the bad one is thicker and lower. On the good side of the face, I'm going to contour the forehead a little bit just to give it warmth.
Additionally, as we age, our nose lengthens. So on the bright side, I'm going to do... it's a little weird to do a half contour on the tip of the nose, but I'm going to try and very lightly also to the thin eyes, very light. . Here's the other trick for contouring. Faces tend to sink, here we have a double chin and heaviness. So on the bright side, to combat that, I'm actually going to bring my jawline up a little bit more, okay? Because what you want to do is not highlight the areas that are starting to get heavy and prominent.
You actually want to hide them. So let's do a real... Let's not talk. Let's make a very nice straight line, just a little higher. And then gently pull down. I'm basically creating a new artificial jaw. I will leave this side alone for the full effect. Blush placement, blush placement. Okay, on the wrong side, we're going to take our feathery colored blush and we're going to go right above our contour. I'm going to fill it in here on the bottom side. Oh, I used too much. Wait. Well. The blush comes forward and is a little heavy and a little low, that's the mistake.
The correct way is a little, little bit. And this may surprise you. It's very high. Alright, do you want an instant face wash? You put the blush on very high, starting right here on the cheekbone. We stay aside. We are high and we are up. ♪ ♪ Surprisingly high. But this immediately creates the illusion of not only higher cheekbones but also an illusion of elevation. I mean, I can see the difference when I look in the mirror, of it being a little softer, but placing the contour and blush higher up and more to the side is reallytransformative in how your face is read.
Okay, now comes the next part, probably the most important. This is how we draw and define our lips. So, as you can see, I naturally have a depression in my mouth. I always have, always. So my lips always protrude and arch downwards and as I get older it becomes even more pronounced. So how can I counteract that? Simple, it's where I draw my lips. So, on the bad side, mistake number one is using a very thick lip liner, equal to or darker than actual lipstick. So that's what we're going to do on the wrong side: deepen, darken, and overdraw.
So the last thing I want to do is follow the natural line of my lips, which is what I'm going to do, and go slightly outward. ♪ ♪ I basically followed the shape of my mouth. It has gone down. I found myself in the corner. And this is what a lip line drawn according to your natural shape looks like. This is how to correct a droopy mouth. You are actually cheating. I'm going with a lighter, more nude lipstick, which will match almost any lipstick shade. This is actually just to create a framework. So the key is you're coming from the bottom, you want to get rid of this roundness and this drop here, and the way to do that is to come from the bottom and create a new line. ♪ ♪ So instead of summarizing here, I'm also going to emphasize a little more here.
I've come under this round, slightly flattened curve, and then I'm cheating. Like when you smile and your lips come out to the side, creating a kind of line at the bottom a little outward. I am down. ♪ ♪ It's okay. To help with that, I have a highlighter pencil that I lightly go over this newly created line to help block in and eliminate that natural boundary of my lip and highlight just above the area where I used my lip liner. Alright. So the lipstick is a matte, plum-colored pencil. I'm going to follow the natural line of my lips on the wrong side. ♪ ♪ And now on the right side, I'm going to follow this new line. ♪ ♪ The color does not go outwards, but comes from below. ♪ ♪ My goodness, what a difference.
Well. Just to help, let's do this. Ready? The wrong side. Do you see how following my own natural lines and shapes created such a crisis? The right side, how to use what I have, cheat and get out, has now created a whole new line, a new look, and it's like going to a doctor's office. The power of makeup is profound. I think this really shows how with the right technique, you can completely change the look of your face. I mean, I'm surprised at the difference. And I honestly love how makeup technique has evolved. I mean, when you think about it, that's what we did in the '80s.
We did that and we weren't doing our... I mean, sure, we were younger, but we weren't doing ourselves any favors. But now that we are older, more mature and wiser, we now have the ability to take. And here's the thing, I wear dark colors. People always say, "Oh, you know, don't wear dark colors. That emphasizes all the wrong things." It's not true, it's how you do it. You can wear reds, you can wear plums, you can wear anything, the right shade, the right hand and the right application make all the difference in the world. I want you to be able to sit in your bathroom and feel empowered, to feel like you have ways, that you have tricks.
You know, these are your scalpels, okay? That's how powerful they are. Everything is in your capacity. Take the time, figure it out, enjoy learning. It's always wonderful to learn new things and you can see, experience and feel the difference immediately. I would love to stay, but I have to wash half my face and reapply it before I go to work. But I loved being here for you. Set what you want to see. Follow me on social media, subscribe to the channel, ring the bell to be notified every Thursday at 1:00 when I post a video, share me with friends, family and neighbors because I love you and I want more people to love me.
Go out, be brave, be blessed, be amazed. And we'll see you next Thursday. Bye bye. ♪ ♪
If you have any copyright issue, please Contact