The BEST way to join LED strips with no gaps or seams + make waterproof power injection connections.
Jun 10, 2021Today in Connection, I will show you how to
join
LEDstrips
like a pro, whether you have traditional LEDstrips
or three, four or five individually addressable wires or IP30, IP65 or IP67waterproof
ing, I will show you thebest
way to splice your strips. and injectpower
for long-lasting, trouble-free installations. Let's start with why most LED strips today come in five meter sections. If you want tojoin
two strips together, the most common way to do this is with the included one. wiring harnesses that come pre-soldered to the strips, the problem is that it is almost impossible tomake
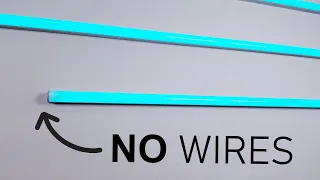
a transition between two strips look seamless and good luck installing those connectors in an aluminum LED channel, what you may not know is that although Your LED strip comes in five meter sections, those five meter sections are actually made of five one meter sections that are soldered together at the factory, so tomake
your LED stripconnections
look perfect , the first thing I'm going to show you is how to replicate those factoryconnections
.
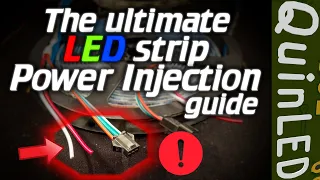
The second thing I'll show you is how to connect additional
power
to your strips to avoid color inaccuracies due to a voltage drop. This is called powerinjection
and I'll show you how to do it so that your wiring is completelywaterproof
and fits inside a standard aluminum LED strip channel (fair warning). I'm going to show you thebest
way to do this, which involves soldering. The soldering iron I use is called a ts80 and it costs about a hundred dollars and I love it, but honestly a 20. iron will work just fine, the real secret to soldering is using high quality thin flux core lead solder that melts easily and creates a strong and malleable connection.
More Interesting Facts About,
the best way to join led strips with no gaps or seams make waterproof power injection connections...
This video is sponsored by pcbway.com if you are an inventor or tinkerer and haven't checked it out. Obviously, they produce full-featured printed circuit boards with a ton of different materials and options, but now they offer basically everything you need to turn your ideas into a physical reality, whether you need 3D printing,
injection
molding, machining. CNC. or just manufacturing old PCBs. PCBway can do it all at highly competitive prices. Check out pcboa's amazing services using the link in the description to support this channel. The easiest strips to join are the non-weatherproof IP30 strips. The bottom of these strips is usually enamel coated, so we will make our connections on the top.
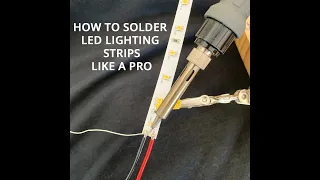
If you join two hole strips together you will first need to remove the factory wiring by desoldering those wires and the nice thing about doing this is that you will be able to end up with a complete soldering pad. If you're using a cut strip, you may only have half a pad available, which makes it really difficult to make a strong connection, so it's better to sacrifice one LED and have a full pad for the bottom. strip for your connection remove some of the adhesive and stick the bottom strip to something that won't be damaged by the heat of your soldering iron and then place the top strip halfway onto the soldering pad with your soldering iron, start with the solder on. bottom pad and pull it toward the top pad.

The goal is to have a nice round, shiny piece of solder that covers both pads without any indentations or sharp areas. Once those connections are made, the joint should be as strong as the rest of the LED strip. and you shouldn't need special considerations for power injection, one of the things I learned after doing dozens of LED projects is that there is no reason to inject power at the same point where you connected the two strips and doing so only provides another point of failure at that location by moving the power injection point to a continuous welding platform, you can concentrate on obtaining a strong solder joint without jeopardizing the existing connection by injecting power for individually addressable strips, you will need to solder an additional connection at both positive sides. and ground wire, while a traditional RGB or RGBW strip usually only needs additional power on the positive voltage connection, since the ground is shared by each of the other three traces, which is how those chips regulate their colors for my five to six inch power injection cables.
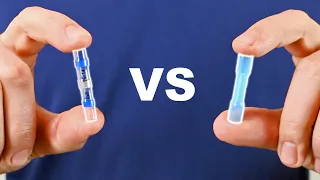
I use stranded copper wire because it is more flexible and won't break if I need to bend it inside the aluminum channel to get a good connection. Strip about half a centimeter of insulation from each wire and then apply a good bead of solder. on each pad and tin the wires you just stripped, then simply apply a small amount of heat to the wire and pad to melt them perfectly. Having these wires pre-soldered means that when I install the strip I don't need to waste time with a soldering iron because I just use solder seal butt connectors to connect them to the actual power injection wires.
If you're curious about where and how often I inject power into my strips, you can watch this video I made on that topic, to use the solder seal butt connectors, simply strip about a centimeter from each wire you're connecting and then insert them. on opposite sides of the connector with the stripping section of both wires crossing in the middle of the connector. heat the colored bands on each side of the strip, those colored bands melt to create a tight seal and hold the wires in place, then you simply apply heat in the middle until you see the solder in the center section start to flow towards both. cables and then you are done, the process is pretty much the same for the ip65 strips except you will first need to remove the silicone cover before attaching the strips and then do some extra waterproofing at the end to safely remove the silicone cover Without damaging the strip, you should use a pair of tweezers to gently cut from the top and then lift the cover towards the cut end.
Do not remove the silicone cover from the cut end because it can easily lift the soldering pads and damage it. It is impossible to connect those strips together, then cut two sections of 3.8 inch thermal chain that are the same size as the space between the LEDs and slide them onto the LED strip and then follow the same instructions as before attaching the full copper . pad on the bottom and half the copper pad on top of that and then pull the solder from the bottom pad to the top pad until you have a smooth shiny connection with no indentations to waterproof your connections, you will fill the joint with glue hot At this point don't worry about getting full coverage or making it look nice you are just trying to get a good amount of glue on the joint, once the glue has cooled slide the heat shrink tubing over the joint and use a lighter or heat. gun to not only shrink the tube but also to melt the hot glue inside.
If all goes well, the hot glue will melt again and ooze out the sides of the tube, letting you know you have a strong waterproof connection on the inside. Use the same process to create your power injection point on your next continuous set of solder pads. Use your tweezers to remove a section of silicone and then apply a bead of solder to each pad, then strip and tin your braided wire pigtails. and connect them to your strip and then cover the assembly with glue as before and slide it over the second section of heat shrink tubing.
Finally, use a lighter to shrink the tube and melt the glue again to get a nice airtight waterproof seal. After using the butt connectors you can see that this entire system fits easily inside a standard aluminum channel and is just as waterproof as the original IP65 strips. IP67 strips are my least favorite LED strips to work with and in my experience have the highest failure rate, but if they are absolutely your only option it is possible to create an airtight channel. seal when joining the strips, the key is to cut the strip inside an LED shorter than the outer tube, which will allow you to overlap the tube after finishing the connections on the inside to pull the silicone tube back, use a pair of needle nose pliers or use minimal force with your tweezers to grasp the strip and then slowly stretch the silicone tube back.
There is no quick way to do this, so take your time and make sure you don't tear the tube. The nice thing about IP67 strips is that they are generally unglazed on the bottom of the strip, allowing you to make a good soldered connection on both the top and bottom for a stronger connection. This also means that you don't need a full solder pad on the bottom like the previous joints, since we are actually going to solder the bottom of the strip, apply a bead of solder to the top of the bottom strip and then we place the top strip on it and apply heat to the top solder pad.
You should feel the bottom solder melt and come together. Put the two pads together and then follow the normal steps by applying a bead of solder to the top and bottom pads until you have a nice smooth round connection. After soldering the strips, begin the painstaking process of stretching one side of the tube over the other and then you are happy with the overlap, which should be a little larger than a centimeter, stretch the tube and insert the hot glue gun to fill the entire Hot glue the gasket on all sides, in my experience there is no good way to do a power injection on an IP67. strip and every attempt I have made to get a wire to come out mid-strip has resulted in a leak and subsequent strip failure.
Honestly, you should avoid ip67 and ip68 strips whenever possible. All the tools and connections I used in this video are linked. below in the description if you want to use the exact same thing as me, but again, as much as I love my ts80 soldering iron and highly recommend it for its portability and ease of use, any iron will work as long as it can stand up. at around 340 degrees Celsius and just remember that high quality solder makes the biggest difference. Many thanks to my amazing patrons on Patreon for their continued support of my channel. If you are interested in supporting my channel, check out the links below. the description, if you enjoyed this video, hit the thumbs up button and consider subscribing and as always, thanks for watching the connection.
If you have any copyright issue, please Contact