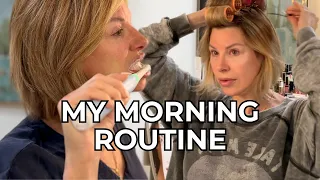
Simple Makeup Tips To Look 10 Years Younger
May 30, 2021hello. Good to see you this week. It's a
makeup
application and I think this audience could appreciate it. How to do yourmakeup
tolook
at least 10years
younger
. The key is in the formulation, in being heavy-handed or, in this particular case, being a little lighter and simply aware of certain rules that seem to apply once we reach a certain age. Also, the key is that this doesn't take too much time. We don't want to always go aroundlook
ing like we have a more youthful glow. So, I'm going to show you how to do this. I have 10 steps that are very basic and easy to follow that you can use...
I bet you can even use many of the products you have now. So, first of all, I'm starting with a blank surface. And the key to a youthful glow is radiant skin. And the way to achieve this is hydration and more subtle coverage. So instead of thinking about a thick formulation foundation, I want you to think a little more about a lighter wet application. And there are several ways to achieve this. You can leave your foundation and switch to a BB or CC cream. The two that I have used repeatedly here are the Garnier SkinActive BB cream and the IT Cosmetics CC cream.

More Interesting Facts About,
simple makeup tips to look 10 years younger...
Both have sun protection, so there is no need to apply sunscreen. Or another trick you can do is, if you don't want to invest in a different product, take your current foundation and cut it in half with moisturizer. And that will give it a little bit more of a minimalist look and also a little bit more of a dewy finish. So there are many ways to make this happen and the key is obviously not to go over budget while doing it. I also have another little weapon in my arsenal, and this is the Laura Mercier Tinted Brightening Moisturizer.

And I'm going to take this and mix it a little bit with my base. It gives it a sort of sun-kissed summer glow, a little bit of shine. And the key is that you don't want to go overboard with the shine, but you do want a little shine. So, I'm going to use the IT CC cream. And a little goes a long way with these things, so I'm going to make a bomb. And this color is medium, alternating between medium and tan. And I'm going to add a little bit of Laura Mercier and just mix it up.

And here we go. Simply using a brush to apply. The key is that it will give you good coverage so you feel like you have something on your face, but you want to be able to see your skin. And that's a big part of having that glow. And it's what we love so much about our
younger
kids, you know, our teenagers and twenty-something girls, you know, their skin is so beautiful and it has a little bit of a glow to it. So it's really just about recreating that look and giving you a little bit of coverage at the same time.Well. So now that that's happening, I drop it on the neck as well. And that is. Quite, quite quickly. Any residue I take from my hand, I hate leaving some on my hand and not getting it on my face. Very good. So from here, the next step... I forgot to take this out of my drawer, give me 2 seconds here. And that's an eyelid primer. And I think it's very important to give your eyelids a good base and something to help the makeup adhere. So, I'll list everything for you in the description part, as always, but this is just a great way to reduce redness on the eyelid and provide a good eyelid base for the eyeshadow, which will also be a very neutral shade. clear. application.
But you don't want your eyelid to turn red and you really want to start with an even palette. Well. And I always take the residue and pass it a little bit under the eye. And this is a great trick to capture the eye makeup underneath. It will keep things from moving south and tends to keep things north, which we all love. Well. So, the next step is to hide the discoloration. And for that I'm using the Tarte Maracuja No Crease Concealer. It's my all-time favorite. A little bit goes a long way with this, so you'll want to go right into the under eye area, right here.
And if you want, you can save this step for after eyeshadow if you feel like you have too much shadow left under your eye. And you can always clean up a little afterwards too. I'm not going to set this with powder yet. So if I need to add more, I will. But I'm really just taking and pressing on the areas where there is discoloration. And I want everything to be equal. And, if you have blemishes, sun spots, or whatever, you can always apply them there too. Well. The next step on my list is to fill in the eyebrows a little.
You don't want to create an eyebrow that's too thick because here we're going for a more natural, minimalist look, a more youthful look. But, as we age, our eyebrows tend to thin out a bit, so they need help. And I'm just going to use this Anastasia Strawburn and a brush. And I'm just going to create some feather-like strokes with the brush. Well? So, you just go in and follow the line of your own forehead. And it will be very light again. But just giving the eyebrows a little lift. I'm lucky with the eyebrow tattoo I've had and microblading.
It's much easier and faster, as you can see, to just drill down and follow a line that's been created. I have always said that this was one of the best investments to do this. So if you are undecided, trust me, it was a very good choice. And I find that, with my no-makeup look, I don't even feel the need to do my eyebrows. Alright. So again, that's just giving our eyes a frame. And now what I'm going to do is move on to the eye shadow. And for this look, again, a very nice matte neutral palette.
I love this Japanese eye palette, I've had it for a while and I've featured it on this channel. But, as you can see, it is a range of very pretty neutral colors. So again, with a relatively light hand, I'll start with the lightest color and go over the inner corner of my eye and then work my way up to my brow area. The same on the other side. Next, I'm going to use this bottom section and start with this one on my eyelid. You can't go wrong with pretty tans and browns. I use khaki green a lot because of the greenish color of my eyes.
Many of you blue-eyed girls could use a little gray here. So, you have some options. But the key is simply a very light approach to eye makeup. We're just opening the eyes, really focusing on the center part of the lid, up in the crease, not going too far with this mid-tone. Well. And I'm going to use this darker brown, and we're going to go out. So this now goes to the outer third of the eye. Well. And last but not least is going to be the darker color, really focusing on the outer lash line and then just a little bit, a little bit to the side.
Just to give it more depth and definition. Helps create a broader look. You don't want to go too far to the side, but just block a little bit outside the lash line here. Well. And I'm going to take a blending brush and then I'm going to swirl it all together because the key is to keep it natural, without any lines or hard edges. So, I just spin and mix. And then I'll follow up. A little more highlighter right here. And just wipe if there is anything underneath with the lighter color. Basically, you are looking at your eye as if it were cut in a third.
So this third one, this inside corner right here, is the lightest. From the middle section to two thirds would be your middle tone. And your outer third is your darkest tone. That helps create width in the eye and opens things up. So, that's the extent of the eyeshadow. It shows that I stayed up, nothing happened down. There is a reason for that. So the next thing we're going to do is adjust the eye. So this isn't the smoky eye where we do the waterline, it's a little more dramatic look. The tight eye liner keeps the pencil basically on this upper lash line, and it really defines that upper lash line and creates an open look.
So, you're going to grab a good eyeliner, you can do it in dark brown, you can do it in black, one or the other, just depending on your lashes and the color of your skin. And you're going from the bottom and you're basically pushing up. So let me get a little closer so you can see. And I go underneath, and I'm hugging my eyelashes and drawing this black line. So, it really makes your lash line stand out. And then just a little whisk to the side here. The same with the other eye. Going from below. So we're not going to go down because you ruin the eye shadow here and you close your eye by doing that.
So at the bottom, kind of a smudge on the lash line, and then a little beater in the corner. And that's a tight liner, and it really opens up that lash. So now we're going to finish this off with mascara. Again, just the top lashes. The reason we focus on the top instead of the bottom is that the moment you start putting on shadow and mascara, you create the focus down and a fall is created. We are trying to lift. Then everything is up. I have been a big fan of this mascara, Thrive Causemetics. Between that and the lash augmentation I've been doing, it creates an amazing false lash effect or lash extension look.
And with these two, I feel like I have eyelash extensions, but I don't. Alright. And so, our eyes are finished. Now what we're going to do is... you have options here. If you have very dry skin, you may not want to use any powder. If you want to control the shine a little, very little powder, I am using Laura Mercier's translucent loose powder but with a brush. And I'm just going to tone down the brightness a little bit, a little bit, a little bit. And I'm not going to put on powder that's too heavy because I still want to have that youthful glow.
Well. So the next step is to strobe or highlight, contour, depending on how you want to look at it. You have options here. I'm going to show you a couple of options. If you want to stay on the matte side, if you feel like you're developing a lot of lines in this area and you don't want to use anything shiny here, this Smashbox contour palette is a good option because it gives you ways to continue contouring, highlight the cheekbone area with a little bronzer. Then this is an option for you. Or you can do something that has a little shine to it.
Therefore, in this area it is completely up to you. But strobe, like highlighting and contouring, is great for that kind of summer sun-kissed glow. So, I'm going to use a bronzer and a brush, and I'm going to do it... you know, you can go in here, but to make it easier for you, it's like doing number three. You go here and here, here and here. So, we put on some bronzer. And here and here. It is a kind of place where the sun welcomes you when you are outside. And the great thing about using bronzer up to this point is that it helps accentuate your jawline.
So, we're doing our number three. And it really pops up with a nice little glow. And you can also use bronzer if you want to sculpt or contour the cheek area a little more, you can do that. That depends on you. But we're not doing any heavy carving, no dark contours or anything like that. Blush. Blush, blush, blush. So again, a very light pinky peachy nude, nothing too bright. This is a color called princess by ULTA. And we want to be careful not to use large apples right here because they can get very old. So, we want to keep the blush right along the cheekbone here on the side.
So again, it's just a little beater here towards the side. Right along the cheekbone area. Just to give it a pop of color, again, like he's been outside playing all day. And you can continue this now with your highlighter options. If you want to do a powder highlighter, you can use a flat brush like this one and brush it over here. Or, if you want, again, a little bit of glow, you can use some sort of highlight stick. And instead of applying it directly, I'm going to take a little bit on my finger and then blend it here along the top of my cheekbone.
And it just gives a little glow to the cheekbones. But again, it's up to you to decide if you're comfortable with a little shine or if you want a matte finish. That is a completely personal decision. Well. Wow, we're almost done. The next step would be the lips. And in the case of lips, again, the secret to a more youthful appearance is to lighten them as we age. Darker colors can be very harsh. You know, I'll limit them to maybe an evening look, especially in winter. But for the most part, I'm going lighter and tend to like peachy cream colors.
So one of my absolute favorites is... if I could read... it's by Marc Jacobs, and it's called In The Mood. And, again, it's a real peachy cream color, like I said. But before applying lipstick, you should definitely use a lip liner. And you want it to be as close to the lipstick shade as possible. And I'm fishing around here... Okay. Wait. Be patient with me. There is. And again, this is from NYX, I'll list everything in the description box, but this is a very nude color. And it serves as a border and limit, so that things do not bleed and move where they should not move.
We want everything to remain in its place. So follow us. Well. Follow with a light application... of lipstick. And I like to give it a little, a little, a little, little bit of gold shine, but justin the middle. And it's not a glitter, it's just a little glitter. Which, again, for me, since I use a little bit of bright lighting, everything plays there and plays together. But this is a very
simple
basic makeup application. Allow your skin to come through, allow people to see your skin. It gives you a little shine, it gives you a little warmth to your face.As we head into the spring and summer months, it's wonderful to add these colors to the spring hues we wear. And, you know, you get a little bit of sunshine outside and it's very... I don't know, just a very warm, summery, sunny, fun feeling. But again, all of these things help lift and at the same time create dimension in the face. But we think lighter as we get older, we think less is more and we play with what we have. But it's really about being aware of how we use what we have and not overdoing it.
Like I said, again, with my line of work, I have to go overboard because the lights and the camera cut through the makeup that way. And I'm grateful that I had to learn all of that because it's given me a skill set to really learn how to recreate things. But it's really nice to be able to bring it back to what's natural and show what you've got, celebrate what you've got and then be able to take it to the next level and surprise yourself. So, I hope you found this video helpful. I hope it made you think about how I can reuse and rethink my app, my colors, my location and all that.
If you have some wonderful
tips
and tricks that you use to help you let your inner glow flow and really de-emphasize age, please leave them there. I know my base here would love to hear from you and again, we are a great community. We share content, we support, we encourage and I love how we help each other on this platform. So I thank you for being here. I appreciate you following me on social media. And I hope to see you next week. As I always say, go out, be daring, be blessed and enjoy. ♪ ♪If you have any copyright issue, please Contact