Set Up Your Own VPN at Home With Raspberry Pi! (noob-friendly)
Jun 02, 2021So if there's one thing I've understood about my audience over the last 3 years or so of running this channel it's that you guys really seem to like my VPN videos. The 2 of my VPN videos seem to get the most attention on my channel by a huge margin and, well, I like the attention. So here I am back with another hit I guess. Many of you asked me in the comments of those 2 VPN videos: "Wolfgang, look, I don't trust those VPN companies and VPS Companies. I don't want to spend my hard-earned money every month to pay some kind of VPS or VPN service.

Can't I just host a VPN at
home
, in the comfort of my ownhome
? and the answer to that question is "Well, it depends." So let's talk real quick about why people use VPNs in the first place. place. Here are some of the most common use cases for a VPN: Accessyour
home or corporate network securely while you are somewhere else Protectyour
self on a hostile or unsecured network at an airport or coffee shop Wi-Fi OR. In some cases, avoiding tracking and surveillance by a malicious ISP at school or at work tricking websites into thinking you are in a different country to gain access to some type of restricted content. and gain access to things that are normally blocked by your ISP or your government.
More Interesting Facts About,
set up your own vpn at home with raspberry pi noob friendly...
And last but not least, piracy: downloading illegal material in countries where doing so over your normal ISP connection would result in a hefty fine or warning. Now, obviously, those aren't all the things you can use a VPN for, because if I listed all the cases used, you'd be sitting here all day. But basically one thing that is common in all of those cases is that people often use a VPN to pretend they are somewhere else... for many reasons. And if you want to host your VPN at home, it will only come in handy when you need to pretend to be at home...

Does that make sense? For example, you want to be somewhere in a coffee shop and you want to connect to an unsecured Wi-Fi hotspot and if you don't entirely trust the network you are connecting to, you can simply establish a secure encrypted tunnel for your own home to surf the Internet safely as if you were at home. And of course, if you have a homelab or home server, you can access all your local services securely without exposing them to the Internet. You may also find this setting useful if you frequently travel to countries where you cannot download torrents or visit certain websites or perhaps if you want to watch your local TV shows while abroad.

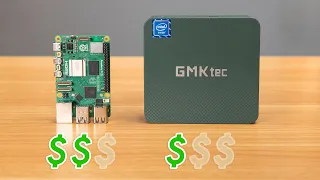
So all this begs the question: why not just use a VPN? Well, first of all: no monthly costs. The only thing you have to pay is the initial cost of the hardware. I'll be using a Raspberry Pi here and it costs around $60 with all the accessories, but we'll also talk about cheaper alternatives later in the video. The second reason is that you don't have to trust any third party. If you watched some of my previous VPN videos, you know my opinions on VPN providers. They can be pretty vague, but in this case you are literally your own VPN provider.
As long as you trust your ISP more than a random unsecured network at a coffee shop, you'll be good to go. And last but not least, access your local services safely while you're on the go. I already mentioned it, so I won't go into it too much here. Now let's talk about the requirements So, what are you going to need for this project? First of all, you need basic technical skills. We won't do any PhD level nuclear sciences here, but you'll need some basic knowledge of, you know, using a computer, some Google-Fu, and basic problem-solving skills.
A lot of people in the comments have been asking me, "Look, Wolfgang, is there a way for less technically savvy people to do all that?" And unfortunately that's just the price of admission you have to pay for that kind of thing. You can get a VPN service subscription and have no idea what goes on behind the curtains, or who gets your data, where it goes, etc. or you can spend some time and do it all yourself and yes, it can be a technical challenge. but you have some control over what you do and where your data goes.
I will keep this tutorial as simple as possible and the video will be divided into chapters and you can use YouTube speed settings if you wish. It's a little too quick for you and I'll also include a text version of this guide in the video description, so be sure to check it out if you're more into this format. All in all, I think it's a great weekend project and definitely a good learning experience. So let's talk about the technical requirements now. The first thing you'll need is a dedicated Internet connection and access to your router's management panel if you're connected to the public Wi-Fi network in your student dorm;
Unfortunately, that is not the case. going to work. Then you'll need an ISP that's okay with you hosting things at home. Here in Germany where I live, most ISPs will let you host things at home without problems. Except mail, for some reason. Many ISPs are blocking. port 25 for outgoing mail here. But in other countries, some ISPs may put their Internet connection behind a shared IP address and only offer a dedicated IP address as a commercial service or something they have to pay extra for. If you want an easy way to know. Whether your ISP is dedicated or shared, you can go to a website like whoer.net and see if it says it is behind a proxy.
If so, it's a good indicator that your PC will not be accessible from the Internet, so unfortunately, that tutorial won't work for you. You will also need a router that supports a feature called "Port Forwarding." The easiest way to check is to open your browser and go to your router's admin panel (usually something like 192.168.0.1). or 1.1) and look for a feature called "Port Forwarding". I've had about 4 routers here in Germany and they all support that feature. One more thing you will need is a computer that basically lives in your house and is available 24/7. It doesn't have to be super powerful or robust, if you have an old laptop or netbook lying around, that will work just fine.
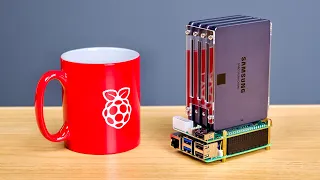
However, for this tutorial I will be using a small computer called a Raspberry Pi. I'm sure many of you know her. It is small, relatively cheap and has very low energy consumption. You can even run it with solar energy. If you want, keep in mind that in addition to the board itself, you also need a power adapter and at least an 8 GB microSD card. I wouldn't spend money on microSD cards because, you know, cheap microSD cards from Aliexpress tend to break a lot. faster than, you know, Kingston, Transcend and other brands, so keep that in mind.
Optionally, if you have a monitor, keyboard, and mouse somewhere in the house, I would suggest purchasing a microHDMI to HDMI adapter. That way you can connect your Raspberry Pi directly to your monitor's keyboard and mouse and it will be a little easier. set up But if you don't have a monitor or TV that supports HDMI, that's okay too, we'll go over the whole setup process later in the video. You'll also need an Ethernet cable and a microSD card reader if your computer doesn't already have it. Otherwise, if you don't pay a lot for electricity where you live and don't care about where your computer occupies or To eliminate the noise, you can handle whatever you have lying around, just make sure it has an Ethernet port and is capable to run 64-bit operating systems.
That said, in this video I will only cover the Raspberry Pi setup process. But let me know in the comments if you want to see a separate video on this topic, on how to set up a VPN on a regular computer, like a laptop or netbook. Now that we've cleared up all the requirements and disclaimers, let's get started! The first thing we must do is download the operating system of our Raspberry Pi. Depending on whether you are setting it up with a monitor or without a monitor, you can download Raspberry Pi OS Desktop which looks like this or Raspberry Pi OS Lite which looks similar.
That way, if you do it with a monitor or a television, although the former has the advantage of being able to open a browser and copy commands from my useful and excellent text guide that I will put in the video description below. Now I must say that the Raspberry Pi operating system is a bit controversial and has gotten into some trouble lately for including Microsoft repositories in the installation. So if you are a die-hard Linux veteran and don't want to pollute your home network with evil Microsoft software feel free to choose something else. Personally, I can recommend Ubuntu MATE or "Mate" if you prefer as a solid alternative.
The next thing we need to do is download Etcher Etcher is a tool that will help us write the operating system that we just downloaded. For the micro SD card, I chose Etcher because it runs on Windows, Linux, and macOS, but if you have another tool you prefer, like dd or Rufus, you can use it after you have Etcher and Raspberry Pi on your computer. Now you can insert the microSD card into your computer. Next, launch Etcher, choose the Raspberry Pi OS image you just downloaded, select your microSD card, and click "Flash." This will take some time, so feel free to grab a cup of coffee or tea while you wait.
Once the update is complete, you'll see a new volume in the "This PC" menu called "boot." Go to that volume, create a new text file and name it "ssh". Be careful! It's not "ssh.txt", it's "ssh", without any extension. To do this, you must have the "Hide extensions for known file types" option disabled in the File Explorer options. Once this is done, you can now eject the microSD card from your computer. Now place the SD card into the Raspberry Pi, connect your Ethernet cable to the router and to the board. Then finally, connect the USB Type C cable in case If you want to set up your Raspberry Pi with a monitor, you should also connect the monitor, keyboard, and mouse at this point.
So once you've booted up your Raspberry Pi, you'll be presented with a very nice setup. wizard that will actually allow you to skip a large portion of this video. Simply follow the on-screen instructions and restart your Pi when prompted. And now you can jump to this timecode. I see you there! Now you need to wait a couple of minutes while your little computer boots up and then let's open the browser again and go to the router management panel. Go to the page that lists all the devices connected to the network and there you are! Simply copy the Raspberry Pi IP address here.
Now we need to open the command line interface. On Mac and Linux it is called Terminal, and on Windows we will use PowerShell. That's really the only difference for us as we'll only be using it to talk to our Raspberry Pi, so if you're on Windows, go to the Start menu, search for PowerShell, open it and type this command: "ssh pi@" you can use Cmd +C as usual on Mac, on Linux you can use Ctrl+Shift+C or sometimes Ctrl+Alt+C and on Windows just right click in the terminal and it will paste the text.
Answer yes to the following question and type "
raspberry
" when prompted for your password. The password will not be displayed on the screen, not even asterisks or circles, and that applies to all password fields in the Linux command line interface, so don't worry about that. The first thing we need to do is change the default password to something more secure. We won't be exposing a Raspberry Pi to the internet per se, so you'll only be able to access it from your home because of that. I won't go into depth about advanced SSH login security in this video, but if you're interested, you can check out this tutorial of mine where I discuss different methods for securing remote access.So, to change the password, you must type "passwd", type your current password ("
raspberry
") and then type your new password twice And that's it! The next thing we will do is update our operating system to the latest software versions. For that, type "sudo apt update && sudo apt Upgrade". This will take a few minutes depending on your internet speed and in the meantime you can do it yourself. another tea, look at the blinking lights of the Raspberry Pi or sing some sea songs. After completing the installation and seeing the green command prompt again, type "sudo reboot" to reboot the board.Now that we are done with the initial preparations, we need to get a dynamic DNS hostname. The thing is, unless you're using a business broadband connection, your external IP address isn't static, it changes every week or so. IP addresses work in much the same way as physical addresses, so let's say you have a house in New York and you're waiting for an important letter. But next week you have to move to, say, Los Angeles, how can you be sure of that? Did you receive that letter? Well, you set up a mail forwarding service, which receives all the letters for you and forwards them to yourcurrent address.
A dynamic DNS service is a kind of mail forwarding service, but for computers. There are now many DDNS providers, some free and some with a subscription plan. For this tutorial, I will be using a free plan from freedns.afraid.org. That said, you can use any service you want. I don't recommend any in particular and the only reason I chose freedns.afraid.org is because it is the first free dynamic DNS service I found on Google that doesn't have any weird limitations. After registering on a website and activating your account via email, click "add a subdomain." " Here the things we need to change are the Subdomain, just put whatever you want here, I'm going to put "wolfgangsvpn".
Domain, there are some fun domain names here to choose from and I decided to choose the destination "crabdance.com". So By default, it will have your current IP address there, but we need to change it to 0.0.0.0 that way After that, we can test if our dynamic IP assignment software really works, type the captcha and click "Save!". Now we need to log back into our Raspberry Pi by typing "ssh pi@" in PowerShell or terminal You can also just press the up arrow key and that will give you the last command you entered. Then enter the password we created earlier.
I need to install a piece of software called ddclient for that type "sudo apt install ddclient" and press Enter It will ask you a lot of things, just pretend you don't know anything by hitting Enter until it gives up. that type "sudo nano /etc/ddclient.conf", let's just delete all those lines and replace them with this convenient template that you can find in my text guide in the description that we need here. to replace several things: "login" and "password", replace them with your scary.org credentials and "somedomain.moo.org", replace it with the domain name you chose.
Once done, press Ctrl+O to save. the file and Ctrl+X to exit. Another file that we must edit is "/etc/default/ddclient". Here we must change everything to "false", except this option, "run_daemon", this one we must change to "true". Once done, press Ctrl. +O, Ctrl+X Now that all the configuration is done, let's restart the ddclient service using "sudo systemctl restart ddclient" and see what it has been doing by typing "sudo systemctl status ddclient". As you can see, it actually says "FAILED". " in all caps, but if you go back to our browser and refresh the page with our subdomain, you'll see that 0.0.0.0 changed to our real IP address, which means it worked.
Finally, let's make sure that ddclient starts automatically every time we turn on our Raspberry Pi, typing "sudo systemctl enable ddclient". Now, one last thing we need to do before setting up the VPN is to make sure that our VPN is accessible from outside the home network, go to your admin page. router and go to the port forwarding settings on FritzBox routers, for some reason it is called "Allow access". from a list, so I will choose Raspberry Pi here. Then we need to create a new port forwarding entry. Here in the "Application" field, I will select "Other application" and for the name we will enter "WireGuard".
For the protocol, be sure to select "UDP". the port we need to forward port 51820 on many routers you will need to select 2 ports so the "from" port and the "to" port just select 51820 on both and then make sure internet access is allowed through of IPv4. and IPv6 Then apply the configuration and that's it! As is usual with computers, the most difficult part of a project is usually preparing. Now we're finally ready to install and configure our VPN and this is actually the easiest part of the setup video that we're going to use. a WireGuard installation script from Github user Nyr.
I've been using this script on my personal machines for a few months now and it's really solid and reliable like clockwork. Let's copy this command from the Github page. Let's go back to our terminal and paste it. As you can see, this command actually needs root privileges to run, so we need to type “sudo bash wireguard-install.sh”. The script will ask us for the hostname we want to use for the VPN: type your dynamic DNS. domain we created earlier. For the client name, simply enter the name you want and for "DNS", this is a personal preference.
I like to use the third option, 1.1.1.1, so if you're not sure, use that and you're done! Let's just press F here and the installation will begin. As you can see, Wireguard VPN is now installed and we have a nice big QR code here on the screen that we will use to connect to our VPN from the phone Now you can simply download the WireGuard app from the App Store or Google Play, launch the app and do Click the "+" button. Here choose "From a QR code" and scan the code on the screen And that's it! Now you might want to ask "why try it on a phone?" "Why not use the same computer we're using to set everything up?" Well, the problem here is that we can't test our VPN on the home network because... we're already on the home network.
So what I'm going to do now is turn off the Wi-Fi network. -Fi on my phone and then try to connect to our VPN on the cellular network to see if my IP changes. As you can see, after connecting to WireGuard VPN, I can now see the IP of my home Internet connection and since I am technically browsing the Internet from home, I can now access all of my self-hosted network services as if I were at home. And that's him! Now, connecting to our home VPN from a computer requires a few extra steps. First we need to move the configuration files to our home directory.
To do that, log into the Raspberry Pi from the terminal and type “sudo su”, Enter and then “cp /root/*.conf /home/pi” Next, we need to create a folder for all our WireGuard configuration files. Now let's go to that folder, hold down the "Shift" key, right click on the empty space and click "Open PowerShell". window here" Here you can press the up arrow key, replace "ssh" with "sftp" and press Enter. After entering the password, you can now copy all the configuration files to your machine for that type "get *. conf" and press Enter. Now that we are done here, let's type exit and close the PowerShell windows.
WireGuard VPN is cross-platform, which means you can use it on Windows, Linux, and macOS. For Windows, we need to download this file, click the executable and now we are ready to install our configuration file. Launch WireGuard from the Start menu and press “Add tunnel configuration from a file”. Now, I will create a Wi-Fi access point on my phone and connect to it. on my computer and I will try to connect to the VPN. As you can see, after refreshing the page, my IP changes to the IP of my home network. And that's it, this is how to configure a VPN at home.
Thank you for watching this video! , I hope it was helpful. If you have any questions, feel free to leave them below in the comments. And as always, I want to thank my Patreons, the people who support this channel. People like Tim, Mitchell Valentino, Ray Perea and many others. Thank you all for watching, once again, and we'll see you next time! Bye bye!
If you have any copyright issue, please Contact


![Building The \Ultimate\ Router - [PFSense + Pi-hole + PIVPN]](https://i.ytimg.com/vi_webp/8QTdW0Q8U3E/mqdefault.webp)