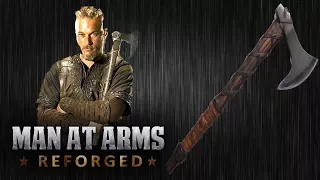
Prince Nuada's Sword - Hellboy 2 - MAN AT ARMS: REFORGED
May 31, 2021I'm Matt, I'm Kerri, we are the deer, my brothers, a knife and a
sword
from Baltimore. Let's build some of your favorite weapons. A weapon you've never seen before. This is the men-at-arms
forge in Hellboy. Prince Snowfall of the Golden Army throws hissword
at Hellboy to use against him, so we'll show you what kind of damage that sword would actually cause. It will include skills from the entire team. There are some complicated pieces to actually putting this together. together and in the words of Hellboy World Buraco, so I'm going to cut a pretty important template so that we have a situation where Ilya, who is forging in that room, can make a sword that matches what Ference is doing in the workshop of machines. we're going to do the Masters of which we're going to make molds for the guard section, so I'm just going to take the plasma to go over it real quick, cut this template out and both guys can work with it. doing the same thing in the movie, it looks like it's a butcher knife or a razor for that purpose, I'm going to use the hot dog and bun technique to assemble my blade, that is, I'm going to take this piece of 10: 45 Make my freeform very rough, take this piece of w-want steel and insert it, which will become an edge.
If you coat high carbon steel in a medium carbon steel jacket you will have the optimal combination of excellent edge retention and a hard point, we are making these in cast metal, we will probably make them in bronze I think, so I The first thing we will do is put together some waxes, this is the knob, we are done, this is what we are doing now. We're going to take some more wax and we're going to create some big blocks. The bearers poured me another block that I'm going to add to this for this piece here on the sword, let's start shaping it and start.

More Interesting Facts About,
prince nuada s sword hellboy 2 man at arms reforged...
To make some of the carving patterns with the completed preform, Ilya will now begin part of his beveling on the mechanical hammer using a special dye, then move to the anvil and a hand hammer to finish his work, the sign of a true. The blacksmith can afford to shape the blade 90% from here, the grinder can take it and smoothly navigate from there with the blade practically to shape. Ilya can now continue to forge it in the gutter, he will use a tap under the electric hammer to start the flight, open it a little and we will do the rest on the sharpening.

Italy has done an amazing job forging our blade mainly into the shapes and making my sharpening job much easier because that center ridge is already defined, but before we move on to polishing our deep hollow ground edge and coming back fuller, I'll move on. and I'll define our point a little more and move on to the vise with some hand tools. The entire area that will use the large diameter wheels to hologram these blades. What you normally see us do is ride Fleck where we will go down the shape of the wheel. In this case, we will go sideways across the wheel putting the convex surface of the wheel on the side of the steel, what we are doing is taking the dremel tool and taking out part of the largest piece of the material, starting to make the turns of the chain and patterns, then We'll go in with the hand wax carving tools and clean this all up.

We are working with three different types of waxes. It's a really big piece here, so we've had to combine some pieces, some are a little more flexible, so there's a bit of a challenge to work all three together, it's almost like that good mood palette, so a Once we have some carved areas, we take the blowtorch, we're going to heat this up a little bit and that will really smooth out the top surface and set it firmly. the blade in the vise that is now starting to form the intestinal hook, we're going to go ahead and hollow it out so it's a little bit lighter and pass it to Lauren so she can cast it.
Philia takes this blade to a critical level. she temperature and then cools in preheated oil while this blade is still cooling, she has time to straighten it, takes it to the vise and makes sure the entire blade is straight and firm. Okay, the blade has now cooled and Elia did a quick torch tempering on the surface of the blade just to make it safe enough for me to polish, we're definitely going to have to go back and do a full tempering cycle after we've done it. polished so that it is safe to use. but I want to give this shape to ground and on the parent stand so that she can apply the actual wax layer on the actual leaves, which is just our template.
I'm going to change the 12 inch one I'll make on the back for an 8 inch one if you look at the one in the movie, this is a deeper recess than the front edge. Another thing that is very important is that from now on I will use new belts after the treatment, we do not want to exceed 450 degrees. anywhere you will ruin the heart, so now that the parents finished carving the crayons, let's make molds with them. I added sprues that allow the wax to enter the mold when I go to pour it, one allows the wax to enter the mold. between air and one allows the air to escape, so what I do next is I tape the metal sleeve around it and then mix the mold compound and pour it in as Matt starts to polish this sheet.
I'll have to be careful since the entire piece is sacred ground. You have to match these radii as you change on each individual grain. We have our waxes in the mold. The mold compound is set. We've let it sit for two days so it's completely cured. What I'm going to do now is take a couple of scalpels and I'm just going to check it out. I'm going to cut this out to make sure I have that piece of rubber that in the cavity is still attached somewhere so I can take out the wax and pour in new waxes that will give us the ability to really detail the piece before we get into casting, take out our teacher now that we have a cavity, here I am.
We're going to scale it down just to make it easier to pull out chunks in the future. A little baby powder. We'll put those metal side plates on a rubber band around them and then we can pour wax. With large moles like this we don't use an injector, we simply heat some wax in a pan and pour it into the hole. I also made sure that in this mold there is a vent for air to escape and Hellboy from the Golden Army, this blade is monosteel, meaning it is made from one to eight filled pieces. Now in this build we've gone the extra mile and given it a rolled edge, so I'm going to go ahead and sharpen this blade just a little bit. to show the two different steels, then I will be able to harvest Allah will give it to the parents and he will do the design work here on the shoulder, okay, let's see what we have.
Black is our hardened edge. You see the white line. is our actual weld line and then we have some black bleeding into the softer steel which is probably due to a carbon migration during forging or possibly just a natural hormone that occurred due to the shape of the blade during e3. The great thing is that it's going to leave it here for a couple more minutes, polish it, we'll be ready, here we go, it looks really good, so I'm going to do a little detail work here where we have some arrows and we're going to shoot.
Look how this one looks. I have to cut the sprues and this one is even better. We just have a little detail work to do around the edge. I have some little air bubbles to fill, so it's just a little time consuming. We're doing some work and are ready to start the process we use to transfer the artwork. I took a marker. I created a dark field. I'm using a wax-free transfer paper so that texture and steel and stuff. just a little bit of texture in the marker on top is giving me a mechanical bond for the tracing paper to fight with, so when I trace the artwork it will give me some good, clean lines to follow.
To put this here and start with the diamond and the sauce, I'm using two different types of etchants. They are both reciprocating, meaning they go in and out like a small jackhammer instead of rotary like a dremel tool or grinder. With the smallest one I can make it much finer. Laurin now inverts the waxes, this involves putting them inside a steel casing containing the gypsum with silica, which we refer to as inversion, they will then go into the kiln and burn. Overnight before we can pour the molten bronze, we will bring it to a boil. We make the air come out from above by shooting it slowly so as not to trap air under the knob.
Okay, so the punch of this sword is held on with a nut that screws on and comes out the back like a little Luke Dover flare, it's got a hole in it. I'm going to do it directly in bronze instead of casting it. able to slide through the pommel, it will attach to the tang of the sword and drag it into the handle, so from here it will be easier to finish this between the sanders and some files, since this bowl not only has to be round, but then it has to have a flat side and then drill a hole through it, it will be much easier to handle freehand than setting it up on another machine after all the wax carving on the molding. and all the work up to this point now comes down to whether this bronze will come out or not.
Carrie took the molten bronze out of the furnace, then moved it to the casting machine and quickly poured it into the cavity, now we just have to wait. and let's see if everything turned out, it doesn't, we will do the process again and we just don't have time, as you can see here, butter and taking a brush with a steel handle, I cleaned part of the surface and removed part of the initial investment pieces and scale, however, we need to go in a little more aggressively, so what we're going to do, we're going to take the wire wheel here, clean it up a little bit more before we get ready to go. to our polishing phase, the reference is basically retracing the steps that you did while carving and waxing and now doing it on the bronze, clean everything up and just give it that crisp look, okay guys, we're almost done, the reference has made a amazing job, not only carving the waxes, but then after casting and REE carving all the bronze, one of the last things we have to do before we can put the whole shop together is darken our bronze and then polish some highlights in it, just as I am.
What I'm going to do is use some liver of sulfur in gel form. I'm just going to scrub it with a scotch brite pad and one thing to remember is that water activates the liver of sulfur, so after I scrub it let me see how it pours. a little bit of water and repeat the process until it gets nice and dark, then we'll just polish it to show off some of those highlights, the stuff smells so bad the sulfur is pretty overpowering, but pretty appropriate for an episode of Hellboy, you know , once they sit for a while.
I won't think any more just to get the highlights, all you have to do is brush the surface, there you have it, let's do the little end cap piece. Very quickly the knob is ready, we will only polish it to highlight the reflections that you can. I hear the reference is there carved into the handle, as soon as that's done we'll repeat this whole process on the handle and put this bad boy together as well. Hello, my name is Jim Frank, well, friend to carry the rest of the guys. They called me to do a special wrap on the Hellboy type so you can see there is a wooden handle that goes between the guards, first they wrap it with black cake that way, if there is any gap in the braid they will wrap it. be and then we are going to wrap it with a cowhide that has been treated with grade soap so that the braid is nice and soft.
This wrap is a double helix wrap wrapped from both sides at the same time as one side passes over the other. When we first saw this weapon we knew it was going to be a good cutter, but it also has a lot of intricate details. It's really nice to have parents here. He's a big Hellboy fan. He was able to do this etching and keep the feel of the movie in this full bill, click here to subscribe or click here for more episodes thanks for watching Man-at-
arms
Reforged we need to know what you want the guys to build so Tell us in the comments below what weapons you want to see nextIf you have any copyright issue, please Contact