PERFECT BEAM INSTALLS | Best Tricks for FAST PERFECTION
Apr 30, 2024Hello and welcome back to the channel. We have a beautiful project here on Lake Manitu in northern Indiana. This house is coming together beautifully. It's going to be an amazing project today. In this video I did an installation of these white oak
beam
s here behind me. I get tons of questions and I took my time and really did a high level step by step overview on how to install all thebeam
s like this at an elite level so I think you guys will find a lot of value in this video, they look absolutely fantastic. They came together very well and I share my process that I have developed over the years to execute them at a high level quickly and repetitively, so enjoy the video, thebest
finish carpenters are very intuitive, they know how to choose thebest
process , the best process. tools, the best assembly method for any given circumstance, in any workplace condition, so here we have a unique situation: we are in a tray that is very shallow now, whenever you want to choose the best way to do something, It is better To begin with the end in mind, what must we achieve?
The first thing we need to do is have very precise final cuts here, this is a stained quality material, where these studs meet our drywall, we need to have precise and tight cuts. Right there we also need to have the right length, we need to fit them tightly on both ends of these beams, so that will also influence how we install them, whether we pre-assemble these beams or whether we do it piece by piece. piece we also need to have a very tight fit to the ceiling so these beams need to be marked and snapped into place so we fit the ceiling again stained grade we are not using putty we are fitting everything nice and tight Lastly, whatever the The method we choose to make these beams must be
fast
, precise and efficient.
More Interesting Facts About,
perfect beam installs best tricks for fast perfection...
It has to be profitable. There are many different ways to achieve
perfect
ion, but we are production finish carpenters and we have to do it one way. The effect of time is so the approach we take will always be dictated by how much time and effort is required to achieve a good result. As I was looking at this job and thinking about what my plan of attack was going to be, I had two different options. I could prefabricate these beams and build them as a box beam in the shop, option one or option two. You could install these beams piece by piece and fit them piece by piece on the job site.
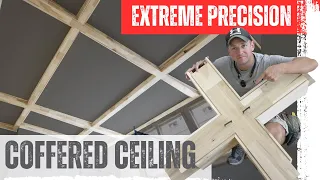
This was a unique circumstance I have. 16 total beams to install in this house in trays which are like this, the tray is only about 6 inches deep and that greatly affected my ability to pre-assemble these beams, basically in this my only option to pre-assemble these beams would have worked if I could. I cut a square of Dr. drywall. I placed one end of the stud in place. I lifted the other end. I traced it. Take it down and then it leaves a hole basically around the edge of the stud, which the drywaller comes back to and tapes and mud on later.

Because of the way this installation is, you'll notice that my corner trim is down here near the bottom of the stud, there's no way I could have cut it off and left that for the drywall professional to try. , and I would have done it with mud and duct tape. It was a disaster, so our only option here was to attach these beams piece by piece. Our first step will be to install some blocking for these beams. You can very faintly see my blue chalk line crossing here. Yes, they have their lights in the shape of a can. wrong place, but we'll go ahead and move our scaffolding under the next section of beam.
When you're setting up your scaffolding for the next beam, you'll just want to stand directly below where that beam will be and use your center post to look out. with that beam it will work better if you have it
perfect
ly centered. If you watch my videos you will notice that all of my scaffolding is what is called double ladder scaffolding. Double ladder scaffolding means that you have the ladder rungs on both sides at all times. Most typical scaffolds will have steps on one side and then be open on the other side. The reason I use all double ladder scaffolds is because I am always working on ceilings and want to be able to adjust them. the height of my planks on any ladder and I want to be able to put a plank on both sides, even my shortest scaffolding, the yellow scaffolding that I use which is like 5 feet tall, I custom welded it to install the double ladder on it.I bought this from scaffold express.com. It came as a double ladder scaffold, but I think at the time I was looking for a double ladder scaffold I couldn't find any that were 5 feet long, so that's part of the method here. Part of working efficiently on roofs is having a good scaffolding setup. Now I get a lot of heat from people because every time I work on roofs, I'll be 25 feet up in the air and I still only use two boards like this. and having a space in the center there are a couple of reasons for only using two planks, one is simply because every time you place planks on any of these middle bars you can't have three planks across because of this center bar, so any setting you have here you're only going to get two boards because of that and basically on the top bar that's the only place you can put three boards continuously so over the years I've gotten really used to working. on two boards it's natural for me to walk back and forth some people say well man I'd fall down that crack the reality is I'd have to work really hard to fall through this, if I lost my balance I could easily catch myself with my hands arms uh, no big deal, like I said after you've done it for so many years, it's a natural thing to walk on top of it like this, the other thing is when you're really working. high, it's actually nice to be able to climb up and down between the planks instead of having to climb all the way around the outside of the scaffold and over the edge.
I fit in pretty well between these so I get a lot of comments about security there's a reason I do the things I do this works great for me starting to install our lock here the first thing I want to do and I shouldn't is locate my uh my lock which has actually been pre-installed jammed, look I actually have a beam going through here in this particular spot, we had a pre-installed jamming all over this ceiling, but it looks like there is one, so it looks like I have one right here, one right here and I miss this one. around here for some reason every time you try to locate a lock but you're not 100% sure what you're picking up.
I always carry these little finishing nails on my tool belt, that way you can just tap them in there. and make sure that you're reaching for something positive, because here I thought you had something and when you go up, you know you don't actually have a block there, but here nothing more, we have a beam that goes up here. I came here. I have a solid blocking so it's just a matter of trying to find it with the stud finder and then trying, once you pick something up we'll go ahead and nail our blocking with our framing nailer.
Here, these were super heavy. joists, maybe I would add some grk screws too, but since these aren't very heavy, I'm fine with scissoring some framing nails in there, one of the most important pieces of block to install is a small piece at the end of the joists, this will help keep our side beams plum each time we put them in position, if you don't have this little locking block on the end your side beams may want to lean and it's much harder to get an accurate layout. It also helps keep the beams square later when we assemble them when I'm making Beams.
I always like to use finger jointed pop material as blocking material, it's much straighter, has a much sharper edge than frame material and is generally easier to work with other small things, but the important thing is that I always like to try to do is if I use an inside blocking that is a 1x6 material that is 5 1/2 inches wide, I will strategically make my beam 7 inches wide 5 1/ 2 plus 3/4 in both sides equals 7 inches and that gives you a little bit of room with a 1 by 8 to rip a little more off both ends if the board is not perfectly straight and creates a 7 inch wide beam, so that's a tip Whatever your blocking material, design the width of your beam to save you work by not having to tear all the blocking material to a specific width.
Ok, we have our lock installed, now it's time to start installing our side. pieces to do that we need to know two things we need to know the length and we also need to cut the angle for the ends no, they are not going to be square, they are not going to be square, sorry for the noise in the background, we have a lot of things going on in this work site, so they are not going to be square. Where do we want to take our measurements? We could take our measurements from the top of the beam or from the bottom, it does much longer.
It makes sense to take the measurement from the bottom of the beam. I'll explain why and it will make more sense in a moment, so we're going to want to go where the bottom of the beam is going to go. to the center of the beam and then carefully take your measurement with your laser. I shot it three times here. I shot it all three times and got the exact same measurement all three times. That's a good sign. I got 139 and 716, so there I am. I'm going to write that down and now I'm going to move on to figuring out what my angled cuts are going to be.
Note that it is very important where I take my measurements because the corner edge that is on this drywall has a large angle. happening here, so here I have 139 and 716 three times if I move down and take my measurement on top of this corner bead. Look what happens. I'm going to shoot a little lower. I lost an eighth of an inch right there. there I have 139 and 56 T, so it's very important that you shoot from the exact position where the bottom of the beam will be so that we have our length measurement, but if you've done carpentry for a long time, you know. that you can't just cut things square and have them fit here, we have a drywall corner bead that will usually always cause mud to build up so this area is way out of Plum and it's going to be slanted.
I already made these other four beams and had a point that was almost 1/4 inch outside of Plum, so how are we going to get the right angle at the end of these beams? The answer is you always use a torpedo level um one of my most used tools when making beams is a torpedo level it's a must for measuring angles. The other tool we're going to use here is a small pipe gauge and you'll see that it has numerical measurements. written on it, this is very useful for measuring angles whenever you use this pipe gauge in combination with a torpedo level, it works very well.
I'll link this in the video description to get our angle. Let's take our torpedo level. Raise it up. here and find out where Plum is here in this one. I'm actually very close to Plum, which is surprising. As you can see, I actually have a little bit of a curve in the drywall, but I might add, let me see here. I'll add a 16 to the top of that cut. I'm going to keep going here. I'm going to check this side and I'm also going to put my level there and about a 16 16 as well, so my reference measurement is down here.
I'm just going to mark more a 16 up here now let's go here and do the other side this one is not as good as you can see I'm very wrong there take my angle meter again I'm going to put it on the eth mark see how it looks in terms of Plum, It looks like it needs a little more, actually let me try 530 seconds, no, too long, so I'm going to add an eight to the top of this cut. the material for my side beam stage down here, I'm not sure if I mentioned it yet, but I actually received this material at my shop and I actually ran it through the power feed of my shop saw and I already mitered it at 46 °, so this is ready to bevel.
I just need to cut the ends and put it in place to cut it to size. If I was around my miter saw, I would just use it. I'm in the basement, far from my miter saw, so I'm using my trusty HKC 55. This is a fantastic tool. I use it all the time. It is very useful when you want to cut things but you are not near a miter saw. To start here, I'm going to make my cut on my first end, this is the bottom of my beam right here and I'm just going to draw a square line across this nice and square, now I knew that on this end I needed to add a 16, so I'm going to mark an extra 16 right here and connect the points from this end to this end and cut it at that angle.
The great thing about the HKC is that it's very easy to connect dots like this, so I'm just going to line up my chip guard here on the top and my chip guard here on the bottom and I can here you can see my pencil line right there we're going to sand. this a little so it's not a big deal, but if I put my square up here you'll notice I have a 16ºextra material on top so it is cut at the correct angle. I'll also notice that I'm cutting if you can see it at about a 6° angle, so this cut is at about a 6° angle, which is going to make it easier to get these pieces into place nice and tight if remember our measurement was 139 and 716, so I'm taking my measurement from the bottom edge where the bezel will hook, there 139 and 716, if I want something. be a little below this measurement.
I don't want to go overboard otherwise I'm going to fight this part to install it. Here we are 139 and 716, so I might be a little strong on that, I don't want to. Right now, on this end we needed to add an eighth or maybe a strong eight, so I'm going to very carefully square that mark and I'm going to add one eighth, so right there, now connect the dots from the top edge to the bottom edge, there we go and you can see our square line. This is cut from Plum, so it should fit quite well.
We cut our side beams to size and it's time to start typing them into place. something very important that we must pay attention to before starting this process. You'll notice that I already have these other four beams in place and a very important detail is that at the bottom of all of these beams they are exactly the same distance from the bottom of the beam to the corner chord, that's a detail critical, we don't want to put these joists in place and have a joist a/inch from the corner joist, the corner chord, and then the next joist an inch up from the corner chord, that would look like a shit, so our baseline to start describing all of this should be the same and that baseline should be derived from this corner bead that way, when they all click into place, we'll have the exact point. same space under each joist between the joist and the corner chord, you may not be able to see it when the joist is lower, but here you will notice these pencil lines under the joists that are 1/2 inch from that line of pencil to the corner bead right here, if we go down here, you'll see exactly the same thing is our baseline where we're going to start Str our scribe, hopefully I can pick this up with the GoPro, we're going to use our level, get it. here on the edge and let's see where Plumb is, this is almost Plum, in fact the drywall has a little curve due to the drying of the mud, but let me take my gauge here, I'm.
I'm going to put it at a 16 and as you can see, it's pretty close to Plum, so I'm going to mark it. I'm going to put more of a 16 on this side. What I'm going to do here is use a gauge block that's 1/2 inch thick to mark a half inch from the heel of the corner, then I'm going to use my torpedo level and level both sides of the beam and that will give us a good baseline to start with and will align our side. beams with that pencil line on both ends. I use Grk cabinet head screws to secure the joists in place for marking.
I'll put a screw in the center and then both ends to hold it in place when we nail them into place. We'll line up the bottom edge of the beam with our pencil line here and then we'll trace about 38 of an inch from the top and that will rise 3/8, which you'll notice there about where the beam ends. 3/8 above that pencil line takes our drill and this is where careful measurement really pays off. We want to try to do this with as little damage to the drywall as possible and remember we put that about 7° bevel on the end which is really I'm going to help slide it into place right now so it's a tight fit so that I can, maybe it's not quite perfect, it might be a long hair, but I can see down here that I'm lined up nicely with my pencil line, so I'm going to To go ahead and hold this now, I'm going to move over here. my other end.
One good thing is that if you tighten the fit enough, it will stay in place. I can shave the end a little bit, I mean it fits. it's nice and tight, we don't have any gaps, but it does damage the drywall a little bit, which is to be expected, it looks pretty good there, so now I'm going to tack this end. I'm going to leave the center um loose for now come here to the other end or the other board we'll do the same thing I want to put this end in place try to place it on the pencil line and I'll move this other end in um when your board is a little long Flex it in the center to reduce the length and it will allow you to position it and then snap it into place, so I'm right on my pencil line here, go ahead and twist that a little bit.
I go down here sometimes I like to use my torpedo level just to check it out and see what it looks like, it looks like it needs to go down a little bit. I'm going to use my lever to micro-adjust it, that should be right on the money. Now before I tack to the center, I'm going to go back to the center and use my torpedo level because a lot of times the boards will have a crown of one shape or another, so I can see that I need to push this one up a little bit. a little, check it again, that's perfect, always remember that when you work with white oak that has a miter, you are basically working with a heavy guillotine right above your head, so you always want to make sure it is firmly nailed into its place and Don't let your guard down because if it fell on your neck or something, it would leave you open, so let's look a little closer.
You see my pencil lines and you'll notice that the bottom of the beam is right above it. Those pencil lines also know to notice my final cuts. They fit very nice and tight to the drywall on both ends, so I've been putting up studs for almost a decade and I can tell you that this torpedo level method is the best way to do it. I know to get the beams to fit together really well, just use Plum as a reference line and then make a note of what you need to add or subtract from one end of the cut and you can get perfect angles every time with these grk screws, all I do. is just turn them slightly, you'll see the space behind the washer there, you don't want to get them in, otherwise you'll leave a big indentation right there, so now we're ready to start laying out our beams in the million dooll question.
What plotting tool to use? You've probably seen me often use tracing tape. We would have taped the top edge of the beam before placing it. Place it if we were going to use tape and then we would use the knife. here or a falcon knife like the one you see here we're not going to use any of those that I could use today uh this write easy I actually don't know what it's called this is a pencil writing tool here I'm not going to use that works great to lay out baseboards, you probably saw it recently in the baseboard video. um, this plotting tool I carry on my tool belt at all times.
This is a great tool. It's adjustable, but I don't want it to be adjustable in this case. I want to maintain accuracy. same offset distance on each beam so I don't really want to use this which leaves me with my favorite tracing tool a block of wood and a pencil here we go the truth is all you need is a block of wood and a pencil, we're just offsetting all these beams at exactly the same distance, so by using a block of wood we don't have to worry about our easy scribe moving or anything like that on us, it's going to stay nice and consistent, it's cheap.
Reusable, it is available in every workplace, so sometimes when you need to write, just grab a block of wood and it will work just fine. If I need absolute
perfection
when writing, I'll use masking tape and then a razor of some kind. but in this case we are tracing beams on the ceiling, it's extra labor and extra cost with consumables taping each beam together. I just don't think it's necessary for something like this. I can see my pencil line very well and this works perfectly well. So that's why I'm not using tape here, it's a little overkill for this type of situation.I have 18 of these spokes to make, that's a ton of tape, a ton of tape to remove, it's just not worth it for me to write with. a block and a pencil is pretty easy the key is having just the right amount of pressure. In fact, I'm making it sound much harder than it is here. I'm breaking my pencil too much. um, you want to have just the right amount. of pressure on the block and pencil and it will slide nicely along the ceiling and wood. You want to make sure you have enough pencil line so that you can easily see it every time we go to cut the Write a little on the table saw, don't make it too light.
Now that we have our writing line marked, we can go ahead and bring these pieces down and cut our writing line. I'm going to remove the screws. ends first, then I'll come back, get in the center, make sure you have a firm grip on the board so it doesn't fall. This is a press fit, so it's not going anywhere. Take out my screw again. I always try to keep one hand on it just in case just to make sure it doesn't fall and damage the work piece or hurt me to pull out one end, this is really easy to do, it's very systematic after doing it so many times, It just becomes second nature.
The next question is what is the best method to cut our scribe line To answer that question, we have to ask what tools are available to us what tools are close to us what is the most accurate method we have what is the nicest method, what is the safest method? For me, when I'm scribing beams a lot of the time I just use a regular circular saw set on a bevel and then use a block plane to clean up the edge in this case. my table saw is right up here, we have a good exit. I also have a dust extractor attached to the table saw and it's very accurate and very nice to cut a scribe line on the table saw, so that's what we're going to do today.
There are many different ways you can achieve a good cut. I mean, you could use a planer, but that would take forever because you're removing a ton of material. You could use a jigsaw. Again, it's not a good tool to use because it's too slow, so my default is usually a circular saw and a block plane or a table saw to accurately cut a layout on the table saw. We want to go ahead and raise our bevel to about 7°. or that way, if we don't hit the pencil line perfectly, we can clean up that edge very quickly with a blocking plane or a sander.
Then you'll want to have a good exit support and a good entry support if you have one that will help you maintain control of the workpiece a little better. If you want to look at the right side of the sheet and you want to cut the pencil line with that right side of the sheet, keep all your attention on the right side of the sheet. and just feed it in slowly breaking up that pencil line as you go, if you leave just a little bit of P pcil line, don't worry, we can sand it down a little bit after I've cut my plotter on the table.
I'll place it on the wings of my miter saw and sand it quickly before sanding the face of the material. I want to see that cut, that trace cut, the edge real quick, if I see any area with a pencil line, I'll go. go ahead and hit that with the sander real quick that way we have a perfect layout so we took our p pieces from the basement to our table and we saw that we ripped our scribers here now I have my pieces etched here on my miter saw Next thing I go What to do is sand them before sanding them.
I want to take a look and you'll see I have a pencil line here. I want to go ahead and delete it, I mean. It's really close, but I'm going to go ahead and remove all that pencil line to make it as perfect as possible. You have a couple of options, you can use a block plane, just hit it real quick since we have a bevel. We're not removing a lot of material, it's pretty easy to do because we have white oak here, depending on which direction the grain goes, sometimes you may want to grab a little bit with the plane of the block yesterday when I installed the other four beams that were.
I just use my sander, so before I go ahead and sand the base material, I'll just turn the sander like this and remove all that pencil line. Before sanding the face, our side pieces are sanded. I'm going to take them back to the basement and then I'm going to cut off the bottom piece and we'll be ready to put this together. I have my material for the bottom of the beams here again. I ran this through the entire table saw in my shop with the power feed, so the miter quality is absolutely excellent. All I have to do is cut this to the proper length and sand it and now we'll take it downstairs to cut it. bottom piece we're going to cut it square first and then we're going to bevel it, so now I'm going to take it down to a bevel of about 10 or 15° and I don't want this bevel to come all the way out. the path to the top edge I want it to start about 16 or 8 down from the face.
This is one of those really important little details, so why not start with it at 10° and cut the bevel off thatmanner? Go to an extra step, well if you are cutting a bevel and your workpiece is not perfectly flat, you will cut at an angle and you will not have a square cut if I am at zero and my workpiece is not perfectly flat. on the table it's still going to cut at zero so we cut it at 0° first and then we'll move on to our bevel and we'll cut it and we'll do it so that the cut starts about e/ down below the surface and then that bevel will allow The piece will slide up into place much more easily.
Another key thing to talk about now is remember that at the beginning of the video we talked about where the length of the beam is measured because we measured the length of our beam from the bottom of the beam instead of the top. We can cut this piece exactly to that measurement. And we know exactly what that measurement will be if we start our cutting process from the top edge of the beam. it ruins everything and makes it much harder, so take your B and your measurements from the bottom of the beam. Here you can see that the bevel cut actually starts right here where it makes an angle, so we have a nice square edge for that top. 8 inches, maybe a quarter of an inch and then from here it forms an angle that will make it slide into place easier.
We're also going to go ahead and sand this piece and have a little real rant. To me, one of the saddest things is that every time homeowners and builders pay for expensive materials like this white oak and then the carpenters don't prepare it to stain this material, white oak is so expensive that to me it is a tragedy TR that I would do it. install without a good sanding before putting it on, it comes out of the mill pretty good but there are still noises, scratches, dirt etc, sand the material well, it will stain much better and it does, it just does the material justice. um, it's a shame to install a beautiful, expensive material like this and not sand it first festal ETS ec150 5mm travel with a vacuum cleaner.
Must have a tool that sits next to my miter saw at all times. um I think sanding is just an essential part of this business. often falls by the wayside, okay, we're going to install the side beams at this point, this is one of the easiest steps in the whole process because we've already placed them, we know they fit, it's just a matter of pushing them up. Place it against the ceiling and uh, nail it in, so go ahead, put one end there, push this other end in, um here, it doesn't matter if you want to start at the end or in the center, the most important thing is that it's pushed in.
Pressed against the seat until late, I actually moved forward a little bit and on this end my uh, my end was actually not completely against the lock, that's better, okay, ready to install, the bottom sides are in place, I have the background here. This is our most important tool when installing beams piece by piece like this one on the ceiling. I mean, this tool is worth its weight and gold. The problem you have with most blue bottles is that when they are partially empty you have to tilt them like this to get the glue out, so if you try to stick something on top, squeezing the bottle doesn't work very well.
This bottle is designed so that it has a tube here that goes all the way to the end. bottom so you can have this perfectly vertical and squeeze it and the glue will come out the top so it works great for working overhead miter gluing so we have our glue robot. One of the most underrated skills in woodworking is getting just the right amount. of glue on a miter, so it takes a lot of experience to get just the right amount, but what we really want here is minimal squeezing of the glue. We want to have good glue coverage all over the glue joint, but we don't want to have a bunch of glue dripping everywhere that we have to clean up now you'll see some people using it as a brush on their glue joints.
I would never make your finger the best as glue. joint because you can control the thickness of the glue that is applied to that joint with your finger as if you had too much glue. I can feel that I can clean it and get it out of the joint, so now that's not going to tighten. I can apply just the right amount of pressure to get a nice even layer of coverage and I also want to make sure I'm getting glue on the tip of that miter that will help later when we sand it. sand and be completely invisible afterwards, so this is a little art, a little science, a little experience, but try to put the right amount of glue that you will need, even by the way you hold the glue bottle right there .
I'm not holding it right so it was falling off if I have it at too much of an angle so it's not spreading you want to get coverage for it to cross there now if I put that on my account it was a little too thick. I'll be able to feel it with my finger. As I push and pull it you can see the excess glue starting to build up, just wipe it off somewhere else, you don't want all that on your joint or you're going to have to wipe it off on the outside of the miter and it's going to be a big pain so it's a very underrated skill but we want to get just the right amount of glue to have a strong miter a wet glue joint on both sides but not too much it's very important that whenever you're making a beam like this one, glue both sides of the miter, you want them both wet with glue, sure if you have one side. dry, it's going to seriously compromise the strength of that glue bond.
I want to have glue on both sides again. We will do the same. Use your finger. You can see. I'm even kind of deflecting the excess glue. Up and away. Your finger is him. best tool for spreading glue, I'm going to take it to my grave and again I want that same tip of that miter to have some glue on it because every time we sand it, our sawdust is going to mix with that glue on the tip of that miter and it's going to make make that joint absolutely invisible, okay it's time to put the bottom piece in place, we don't want the glue to have too much time to stick so this part is a little tricky if your cut is a little too long it may be a nightmare to put this in place.
I have to deal with a corner of drywall, so I have to have an idea of whether this is going to go into place or not, remember that if we lower it, it shrinks. The length of the board and will help it sit in place. I have this one a little too long, so you saw how I lowered it to reduce the length of the board and now we can put it in the POS. a little better, the biggest mistake you could make right there is to nail the bottom of the beam in the center before you have both ends on top of the corner bead because if you do that it wouldn't have stayed in place and I would have destroyed the bead from the corner trying to force it into place, so I like to turn the center now that I have both ends in place, I didn't do a great job getting this one in place, so it's fighting me a little more. than normal, if your miter needs a line, the rubber mallet is your best friend, so I'm going to go ahead and nail that center and go down to my ends and set them up a little bit better like I said.
I just, uh, did it. I didn't do a great job of getting this position this time, so now my ends are nailed in place and I want to go ahead and nail this, so we're going to nail from both edges on both faces, I should say now with the nailer. If you notice the corner is sticking out in a certain direction, use your rubber mallet to line everything up and then nail it down so it's just a matter of working your way down the miter if you notice you have nails sticking out as that changes the direction of your nail and usually that will solve the problem, so again I'm fighting myself a little bit, it wants to stay down here a little bit, so I'm going to keep using that rubber mallet to bring it in.
A light is the other absolutely crucial tool you want to have every time you start mitering a beam is a clamp, sometimes it's just going to fight you and the beam or a clamp will help you get it to where it needs to be. I didn't really need it that much in this case, but I wanted to demonstrate it because it is absolutely essential to have it on hand before you start placing a beam, don't run after it while you have wet glue, always have it beforehand. You even start working on your miter after you've nailed it, whatever glue you have, try and just wipe it off, remove most of it while it's still wet before it starts to stick as big as possible.
Because you have to waste labor sanding , there is excess glue everywhere, so you don't want to have a bunch of excess glue. In my opinion, this looks pretty good. Now the next step, while our glue is still wet, we just finish nailing it. We can polish it if we want now because I broke these miters on the table and I saw that the quality of the miter is so good that I don't really even need to polish it, so I'm going to save that, all I'm going to do is take a piece of paper from 20 sandpaper, sand one face like this, make sure you see all the glue come off and then switch to the other side and look at that joint, it just disappears completely, if there is even a small gap your sawdust will mix together. with the glue and it will fill that crack and it will be completely gone so you can see how it works throughout all of this and the miter looks perfect with minimal sanding effort, very good, this side is all done, smooth as silk, come here.
On the other hand, you have to be careful with these guys. Stick your hand into one of these protruding nails and you'll regret it, just bend them back and forth to break them and we'll do the same job. going down the miter make sure all the glue comes off and do the opposite side and look how crispy it is we're just softening the edge slightly on this but for the most part it's very square it looks great something I want A quick touch is an idea about pin nailers, so first of all, you'll notice that I didn't have my Milwaukee M12 cordless pin nailer doing this.
The reason is that you realized it was shooting a lot of pins. Those cordless pin nailers have a very limited life. I shouldn't say they have a very limited lifespan, but they're only going to shoot a limited number of pins before they need to be replaced and I don't want to wear them out prematurely by shooting tons and tons of pins into studs like this and the other. The thing is, the air sets the pins much better than a cordless nailer, although the Milwaukee M12 works very well. The air really sets them very well. I like this Seno nailer.
He's been good to me. Will shoot up to 2 inches. Nails, my favorite nail. 23 gauge, um, it's inch and 3/16, that's what I use 90% of the time I shoot pins, so it works great, so the other thing is these beams are about 9 or 10 feet off the floor. and I absolutely can't see any of the nail holes with your height now, if we get here you'll notice it was shooting pins about every 8 inches. 8 to 10 inches is about what it takes to actually join these miters together, so that's what I recommend now most of the time when I'm doing beams is almost always stain grade beams, so whenever the painter comes back and clean the stain, those micro holes fill with stain and you absolutely can't tell they're there, so I have no problem using nail holes in studs like this and having those in quotes exposed.
The
fast
ener holes aren't a big deal because you can't see them. Last night I was talking to one of my good friends, Carpenter friends on Instagram. that makes a lot of beams and uses tape and we go and tape all of your miters so you have tape probably every 12 inches or so to put that miter together and don't use nails, um like I said, I feel like nails with pins you can't see them, just use pin nails and the advantage of using pin nails instead of using tape like this is that if I use this tape I have to come back later.I have to remove all this. and I can't sand and finish my miter while the glue is wet. I'd be sanding over the top of the tape and stuff like that, so it's trickier. I don't want to have to go back and take them out. Remove bits of tape later and I also want to be able to work on my miter, sand it and finish it right now and move on to the next thing and not have to worry about coming back to finish it later, so that's my philosophy. The thing about pins versus tape in this application, so I talked at the beginning of the video, whenever we choose our process and technique to do something, we start with the end in mind, the end in mind was the first thing we needed for our ends will fit perfectly.
Go here to make the process great. We needed the top of our board to fit nice and tight to the ceiling, as you can see we made it look really good. We needed to have a miter that looked great all the way up and down. as you can see it looks great and lastly we need to have a method that is quick, efficient, easy to do, not too strenuous and overall productive and thatlead to high quality, cost effective work, so I haven't done many beams in my career, this is the process I'm using right now at the moment.
I think it works very well. I hope this has helped you. I am very happy with the result of the product. I have two more beams left. In the next one, I might let the GoPro break down and do an initial look at the whole process, but either way, I hope you enjoyed this video. I hope it was really useful. It's made my day exceptionally unproductive, but I'm happy to help. help so like if you liked it leave a comment check out the affiliate links to the tools in the video description all that good stuff I'll link there and I'll get a nice cashback every time you go buy it so I appreciate it . very much see you in the next video
If you have any copyright issue, please Contact