My Proxmox Home Server Walk-Through: Part 1 (TrueNAS, Portainer, Wireguard)
Jun 18, 2024Today we are going to build a multipurpose
home
server
with multiple virtual machines and containers using this used Lova workstation. I am going towalk
through the entire process step by step to install Proxmox True Nas Scale for network attached storage system. so I can run Docker containers like Wire Guard Jelly Fin to stream my personal media collection and even a Windows installation for remote gaming and I just make a bunch of silly mistakes along the way, so stick around before you start. I'd like to take a second to thank the sponsor of today's video Nord Pass.
If you're watching this video, I imagine you spend quite a bit of time on the internet and have quite a few different accounts, and if you're not using a password manager, you might have some problems, luckily there is Nord Pass and an easy to use password manager created by the same cybersecurity experts who created nordvpn. Nord Pass allows you to store all your passwords in one place so you never have to worry about forgetting them. generates complex passwords to keep your account secure. I have no intention of creating fear, but in the current climate, cyber attacks and, more specifically, data breaches are a significant threat if you use the same or similar passwords on your social media, financial and e-commerce accounts.

More Interesting Facts About,
my proxmox home server walk through part 1 truenas portainer wireguard...
You could be in serious trouble if any of those companies mishandle your valuable data by having random and complex passwords on all your accounts, you're much less likely to be left holding the bag and Nordpass does all that hard work for you. You can use Nordpass on up to six devices, including your mobile desktop web browser and more, and one cool feature I personally appreciated is the ability to import passwords from a CSV file, which made getting started with Nordp Pass literally just It will take a few minutes, there are many. Of other exclusively security-focused features, from its data breach scanner to its advanced encryption algorithm and zero-knowledge architecture, right now you can get an exclusive Nord Pass offer plus four additional amounts for free by visiting nordp pass.com Hardware Haven or you can simply use the code Hardware Haven at checkout, improve your online security and sign up with nordp pass today.

I want to make it clear what this video is. I would consider myself more of a hobbyist when it comes to self-hosted networks and things like that. of that nature, so it is very possible that I will make some small mistakes in this video, since this is a tutorial. I would describe this video as more like, look, what this did is because I filmed the entire process of building and setting this up.
server
, so I forgot a few things along the way, although this may not be the clearest and most concise tutorial. I think it still has some value since you'll basically be able to see the entire process I went through to configure and troubleshoot the server.
Also, this will be a two, possibly three
part
series on this video. I will configure the hardware, installproxmox
and create two virtual machines, one with Trunz Scale and the other with Debian in the scale VM. I'm going to install Painer, which should make it really easy to run and manage Docker containers once we've set up pain. I'm going to activate a wire protection server so I can remotely connect to this server or any other devices and services on myhome
network on the second. Aspart
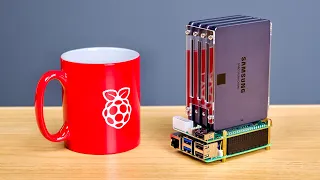
of this series I will be setting up a Windows virtual machine for remote gaming using parsec and also a Jellin server for streaming movies, TV shows and more, after that who knows let me know if you have anything you would like to see running on this . server in the comments below with all that out of the way, let's talk about the hardware.I bought this Lenovo p310 workstation a while ago for around $200 including fees, taxes and shipping. It comes with a 16GB quad-core, 8-thread Skylake Xeon E3 1275 V5. of DDR3 memory and an Nvidia box k1200 which, as I mentioned in the original video, I would probably sell to bring our total price between 120 and 1 15. The system also came with a 400W power supply, but unfortunately it died shortly after that I started working on it. system and despite a valiant effort I didn't manage to save it, so once again I will be using my EVGA 650 W Gold power supply. In previous videos I installed a 240 GB SSD as a boot drive and that is exactly what I will also use for this build, the system is pretty solid for the money, but to make our server more interesting I will make some updates, the Most of them were bought on eBay or Amazon warehouse deals first.
I added 16 more GB of RAM to bring the system to 32 total. I then installed a 2 and 1/2 GB Ethernet card, this will give our server and more specifically Traz, more than twice the bandwidth of a standard gigabit connection when connected to a 2.5 Ethernet network. GB. switch like this one here that the Asus store was kind enough to send us along with one of their multi-gigb USB adapters with a multi-gigb switch and adapters like these we can connect our server with other devices like my desktop PC, a laptop or even my dri store 4 Nas which I currently use for local backups.
Also just a quick note: I'll have links for most of this stuff in the description if you're interested and also want to help support Haven Channel hardware. Next, I installed this LSI. 9240 d8i it mode SAS HBA, which I will later move to the Truez virtual machine so we can directly connect some SSDs to connect to the SATA SSDs. I'm going to use a SAS to SATA patch cable that I picked up. used on Amazon, the last thing that can be put in a PCI slot is the same GTX 1650 super that we used when converting this system into a gaming PC, this will be moved to a Windows virtual machine for light gaming and video transcoding for storage .
I'll still be using the 240GB SSD for the boot drive, but we're going to add these four crucial 1TB SSDs to the system for our true Nows installation. I only have two of these so the other two are solitary, that's why the models are slightly different to help fit them into the system, we will use this mb24 sp-b that icy sent to place the four 2 and 1 SSDs/ 2 inches into one of the 5 and 1/4 inch bays. This guy is simple. and straight to the point with a trayless, doorless design and four SATA ports plus a single power connection on the back.
I installed it in the bottom 5 and 1/4 of the drive bay and removed the optical drive to preserve more space for cable management. It's definitely not the system you should try to replicate yourself and there is definitely some overspending in some areas. I created this system because I felt it would allow me to play with a lot of different software and services, although it's all a bit tight. It fits perfectly and I don't think we'll have too many issues on the hardware side, although GPU temperatures may be a bit of an issue, the 1650 super shouldn't get too hot so I'm not too worried about there being too much to cover.
In this video, I'm going to jump right into installing Proxmox. Well at this point I plugged in my ventoy drive, but the HBA we have for our SSDs has a pretty long BIOS boot sequence, taking about 5 minutes. Now I could remove the firmware from this, but since I don't see myself rebooting this many times, I don't really feel like it's worth the effort to do that process, so we'll just sit here and wait a few. minutes I will obviously skip it for the video, but we will wait a few minutes until it boots and then we can enter the BIOS of our motherboard.
Okay, now that that's done, we can go ahead and press. Enter here and then F1 to enter the BIOS and most things should already be set when I tried this, but we can go ahead and make sure that we actually have 32 GB of RAM and then all of this should be Okay, in the video settings , normally this would be set to Automatic and for later when we start playing with the GPU. I found out that you actually had to select this as Peg. I originally thought of selecting this as Integrated Graphics, so in my head I was thinking that the graphics card would become available at that point for PCI you go through, but you actually have to select pcie graphics otherwise it will just be disabled and you won't be able to use it even because of the PCI that it goes through, so we'll make sure that the graphics card is selected as our video device and then everything else, I think, should be.
There are a few things you could maybe do here if you wanted to in the CPU settings, surely we have to make sure virtualization is enabled and vtd is enabled and I think everything else is pretty good, so yeah, let's move on. , press save changes and exit even though we haven't changed anything and then, unfortunately, we'll have to skip this. Boot up again in 3 to 4 minutes, so I'll see you when we go into ventoy, okay, we'll come back and here instead I'm going to press F12 so we can temporarily make sure that we select our ventoy Drive, um, it should be. capable of doing UEFI, it should be fine, and then I'm going to go to our
proxmox
V ISO and here we're going to hit install and then okay this should all be pretty straight forward, but I'm going to go through it anyway.Okay, so we're going to go down to our drive here and here we can see our four 1 TB SSDs, which is great, but we're going to make sure to select this 240 gig SSD that I have there as our boot drive. and in options we could install this as ZFS or xfs. I'll keep it as ext4, that's fine and we'll use the entire hard drive in the next countries, the United States, and then this would be going to Chicago, which is my time. zone keyboard layout next password I'm going to put a super strong password here and then I'm going to send an email, then go ahead, okay, now this is where we're going to select our management interface and press this en01, which is our gigabit.
Ethernet, which is what should currently be active under the hostname. I am going to call him. Let's make p310 in the process. local looks a little ugly, but whatever and then we have a DHCP address here because we have it connected to my home network, but instead I'm going to give it a static IP. I only know it's available, so 192.168.1.3. a good subnet, the gateway is good, we will press next and everything looks correct, so we will let it automatically restart after a successful installation and we will press install and then come back in a few minutes once this restarts successfully.
We've rebooted again and, yeah, there we go, we boot into proxmox, there we go, so I'm going to press Enter. This would happen automatically and realistically we should be done by now on this physical computer, we should be able to do everything now. through the proxmox UI, so I'm going to double check that everything boots fine and then we'll disconnect it, switch to our desktop and use, yeah, there we go, we can see it says 192.168.1.3 and we don't. I don't need this anymore, so just give me a minute and I'll switch to my desktop. Well, I no longer have our Proxmox server connected to my capture card.
I now have my camera connected to my capture card, so this is new. see how it goes I'm going to do this pretty much live so apologies for any errors or anything but let's go ahead and jump into this so we can go to our browser and type in that URL directly from before and just make sure to do the port 806 and we should be done here, we can press continue and then our username should be root, okay. I always forget if it's root or admin, okay and we're in, we can see our proxmox p310 here. we have our local storage, our lvm, everything looks good, we can see that we have looked at the Swap at the beginning, we have our 32 gigs of RAM, so everything looks great, so the first thing we are going to do is install true naaz de that way.
We can use our SSDs as storage. We could set this up as local storage, but it's going to be great to set up and it's true for a few reasons, so let's go ahead and get started, but before we do that, we need to set up. up IU um and that's so we can do pcie transfer with our HBA and our 2 and a half GB card, so to do that it's pretty easy, just a little Google search, so we'll search for proxmox IU and this link will pop up. here and we can follow these instructions to do it, I'm actually going to make a new connection here, this should allow s H by default I think, so we'll set up something new here in solar putty and create new usage credentials. root and our super secure password without private key credentials name p310 procs and we will press create yes and that's it, now we are connected remotely to our proxmox server so we can copy this because I used ext4, we are using grub I'm going to copy here paste, we will edit this , we just have to enter here where it says silence and we are going to add Intel omu in ah, I continuedoing that, I think we put a comma, is that correct?
Oh, it's a space. I'm going to fix this just to make sure that I don't think it should matter if these arguments are in a different order, but just to make sure that I'm going to paste it in this order here, press control. X and then enter to save, we are really going to make a small quick and now we have this, we just need to update Grub and then I think we just need to restart now, so now we will wait a few minutes until this. See you then, okay, so after a quick restart of Noto, we're back up and running and we should be able to verify that we have it enabled, to do that we can go back to our shell, we'll just run this quickly.
A little command here that should bring up some things and we can see that in fact UI is enabled so go back to full screen here okay and go back to proxmox we can go to our p310 and we're going to load our image from trace I don't have one for trace, okay, so I didn't have one for trace in that folder, but I just plugged in my ventoy unit and we canIn fact, we see that we have this true scale, we'll press open load and we'll give it just a minute to load. I said charge like six times in a row.
Okay, we're done and let's go ahead and create our virtual machine. I'm going to create VM p310 procs Nord pass is trying to complete some things for me that's funny okay we can leave this vmid as 100 that's cool next OS we'll use me okay yeah let's use . CD DVD and our ISO image struggle to talk here and we'll press we'll leave this is the Linux version um it's a big hit next and then for the system I think we'll leave this anyway we'll do the machine here we want to change this. to Q35 and I think we can leave this as bias C if I remember correctly and then disks, we're just going to add a disk here.
I'm going to make it 42 gab, we just have a little more. but we can leave this as version, everything is fine, next CPU I'm going to go ahead and give these four four cores, not four sockets, and we can leave it as the default KVM 64. Next we're going to give it 12 GB of memory and I can never do my math so we're going to do 1024 * 12 12 288 great and then for Network we're going to do yeah we're just going to have this Linux bridge and then we're going to add our 2 and a Card half GB also with PCI passthrough, so all this is great.
We want to leave this as version, which is actually very important because it will give us very, very fast access to our back storage without having to go over a physical network. connection, everything will just be a virtual network connection and it will be super fast, so we'll hit the next click on confirm and now we're going to go up to our I don't want to do, that wasn't my intention. Double click, we're going to go here to Hardware to add PCI device and we're going to add our HBA and we're going to add our 2 and 1/2 gbit Ethernet, so let's go ahead and add this 2 and 1/2 GB here and we'll press.
Advanced PCI Express we want that because I'm pretty sure you would be limited with PCI to 2 and a half gigabits because I think you can get gigabits with PCI, press add, we'll add a PCI device and We'll scroll down until we find our HBA here, we'll click on it and we also want to make sure it's PC Express, then press Add and then I think we're ready to press Start, so we'll go ahead and press. Start double clicking on this to bring up our VNC window, okay and now we can go to the tr now installation, which was done automatically, we'll hit install SL update and then here we'll select our installation device, which is the hard drive virtual. unit that we did with proxmox and we don't want to select any of these so we just press OK, yeah, super secure password, OK and the installation is complete so what we're going to do is press OK and then we're just going to close, exit from this VNC window, go to our VM and in Hardware we are going to delete this ISO or this CD DVD drive, we will simply press delete yes and then we will start the backup while that. was happening, I went ahead and plugged the 2 and 1/2 gbit card into the 2 and 2 gbit switch on my Asus store, thanks for sending it through the Asis store and that switch connects this server now to my tunaz server which I use personally and also. my desktop and my ASA dri store 4 which I use for some backups this should allow us to get much faster read and write speed on our naaz from my desktop so again on traz we can just run the OS , which is what I would do. run default awesome and we're set up, we can see we got an IP address here from my dhtp server and we're going to go ahead and log in to this address and then start setting true now so we can hit X here.
We'll open a new tab once again, we'll skip this because we know it's safe. I'm going to type root and then our super secure password and here we go, we're on trace, the first thing we're going to do is great. What we do is we go to storage here, we don't have a group, so we're going to create a group and call it. Let's do a group of procs, that's fun. Pro Group and we will select the four. the ssds here move them to this data See Dev and we are going to set this to raid Z which means that one of these ssds can fail without losing any data, now we can be safer and go to raid Z2 which means that even two of these might fail, but I'd rather have a little more capacity, so yeah, and then we can hit create, this will delete everything from the drives, but that's okay because there's nothing really on them to begin with, okay, now we have our process group configured. here and we need to add a data set to this and this is going to be the share that we're actually going to connect to so I'm going to call it Pro share why not it's fun and we should be able to leave basically everyone This is the same thing except we're going to use SMB to connect to this, so we want to make this type of SMB share press save and then now we're going to create a user and these credentials here that we can use to connect to this without having to use the root user, so we'll press add.
I'm going to call this user Haven Haven no email okay now you might want to set up an email here for alerts and stuff like that, but I'm just going to leave it blank for now super secure password user ID uh yeah we can create a new primary group okay we can have a Haven group we don't need a home directory so all of this should be able to say it stays the same and we I'll allow pseudo sudo however you want to say it don't leave a comment or I guess leave a comment whatever whatever helps me, so sure, yeah, Pudo sudu, whoever bothered you the most, leave a comment below, okay, we'll hit save and so on. now we have this Haven user and we should also have a Haven group.
Right now, a few more things to configure. First of all, I'm going to go ahead and configure our network stuff. Here you can see we have cool stuff, I only have one interface, can I add something weird? Maybe I have to come back to this. I'm not sure why our 2 and a half GB card isn't showing up. I'm wondering if it needs to be fully featured, we may have to reboot for that. so we'll do that, we'll go back to that, we'll go back to the 2 and a half GB card. For now we have this. I don't want it to be on this DHCP 238 so I'm going to change this to a static IP which we're going to add here so we're going to do 192.168.1.3 2.
I'm going to have all my proxo stuff in this range 3. Here hit test changes , we will commit to test the changes and do 192.168.1 32 and this should work, we can press continue route and press save changes because it actually works, so we are on our new IP here static IP, we will need to make sure that this Glo in this configuration global I'll need to configure a couple of things now, alright, in the future Colton will be here explaining what I'm doing because I didn't do a great job at the moment so I have a py hole that operates as my DNS for my local network and I just wanted to make sure that when I use my router it's the default gateway and DNS, it's going to go ahead and pass it to my Pyle DNS, so that's what I'm doing here.
I'm just verifying that DNS is in fact working most likely. you can use your router as a DNS server or name server, okay, I'm getting DNS, that's fine, so this works. Sorry, I'm doing all this on the fly just to make sure I'm actually getting DHCP from my router. I should forward it to my local DNS. I'm running P Hole, so yeah, next we need to set up a share so we can access all of our stuff from our drive, so let's select our process share. let it be called proc share and we'll hit save, enable the SMB service and then here we'll change the file system ACL to give access to our Haven user, so we'll add an item, we'll just do the Haven group. and we'll say permission type full control save access control list and now if I go to the network here, we can do SLB slash 192.168.1.3 again and then process share, oh, I'm an idiot, share 32 Pro and we'll do Haven. our user password and look at this, we have stuff here, you should be able to copy something, so you should be able to copy something, read it, look we're on our Nas, alright, alright, so we've got a Naas up and running, we don't have a 2 and a half gigabit network, so it's a little unfortunate, but yeah, it's true, Nas is up and running now.
Some things I would definitely do here would be set up some data protection, but uh. I'm probably not going to leave this server running for long after I finish this video, um just because I don't really need it right now. I already have everything I'm setting up in this video for the most part and what I really want. or I need it to already be running so yeah after I make these videos the server will probably take it down and sell it or something so I'm not really going to worry too much about this normally what I would set up is for them to happen periodic snapshots to have snapshots so if I delete some files or something like that and then I would also set up cloud sync and um rsync yeah I've used rclone which I'm pretty sure is what rsync uses but set up sync with your local backup if you have a local backup and then if you were going to backup to something like Dropbox or, um, Blaze or something like that, you could use these cloud sync tasks to make copies of periodic assurance of that.
I'm not going to go into that because it's not really a trace video, it's more of a proxmox video, so yeah, we'll call it here. You could try to play around with that 2 and 2 GB network card, um, and we'll see if that helps, so let's try restarting it after making that change. Well, good news. I clicked that little all features checkbox and I guess it was required for this card. I'm not entirely sure what the full function is. To be completely honest, yes, it works now, so if we go back to the back, we can go to the next interface and we'll call it 2 and a half so we know which one. it is and we're going to set this to 10. 100.00. five, why not?
I know it's open and that's the subnet I use for my little half gig Local 2 and 1 network and after updating we see it's up and running so just out of curiosity you should be able to go here go 10.1 100.1 100.5 procs share press enter credentials and here we go and now if I were to try to copy something, let's see, okay, I have a video here, I'm going to paste, let's see what happens, okay, it looks like we could have been limited to I'm going to copy this to my desktop real quick and see , okay, no, yeah, we're getting our full 2 and a half gigabit connection there, so everything's fine, we've got our 2 and a half GB connection up, we've got everything behind us.
I'm ready to go, I think so, and let's create a Debian virtual machine that we can run more easily so we can run some Docker containers. It's going to be great, so let's go ahead and get Debian up and running and then we'll install Painer and then we'll start running a couple of Docker containers, so to do that, I'll upload another ISO here, hit upload. Yes, I have Debian 11 here, I will press load and once again we will wait. this to load, okay and then basically the same way we did our last virtual machine, we'll do this, yeah, so we'll leave this anyway.
In the next operating system, we will select our Debbie and ISO for our installation system. Linux, everything can be the same, we will use all of this exactly the same. Yes, we won't be doing any PCI steps, so it should be pretty straight forward. Let's keep this pretty small. I'm going to leave it. I didn't think about this, yeah, we can actually leave this pretty small. I'm going to leave this at 32 GB because most of our storage for our container will actually live offour part in our NASA, so we'll just get to the next CPU that We're just going to give it two cores because we're not going to be running a lot of very intensive things, well, yeah, let's give it four, why not the next one and then the memory, just let's do whatever 4096, oh my god. no wrong place 4096 that fixed this, we'll just do it, then Network, we'll leave this anyway, we're going to use our Bridge here for networking and vert IO, press next, confirm and let's go ahead and get this guy up . working fine, so here we'll go ahead and press, just do the installation.
I don't need the graphical installation. English United States American English Hostname, we'll call it Deb procs, okay, continue with the domain name, we don't. I really need this, so we'll keep the same debt prox. local super strong password super strong password our user who also has a super strong password creates a central time zone for me and we are just going to use the entire disk here all the files in a partition are fine, finish and write everything to the disk right, we don't have any additional installation media, so we'll press no, we'll just use the United States for these mirrors, the default here is all good, we don't have a proxy, leave it blank, okay, we might as well participate in this survey. sure, okay, here we are going to disable the Debian desktop environment and gome gome.
I'm never quite sure how to pronounce certain things in the Linux community and I'm always nervous that people are going to get mad at me, but we don't want any of these desktop environments, anything like that, we just want an SSH server and we'll go down and hit continue. , okay, install the GRUB bootloader on your main drive. Yes, okay, the installation is complete, so we can press continue, then. here at proxmox we want to remove this installation media. I keep right clicking on delete. Yeah, I guess we can really do it, let's see what's going on here.
Oh no, it worked fine, so the next reboot should remove it, so Debian should be active. running so here you should be able to type root and our password and I'll run it while I'm root for a moment. I'm going to run apt update and then I can't type apt update Dy, which should update all of our repositories there. they are repositories, why am I blinking anyway? It will make sure we have all of our latest packages. It looks like we're fine and I'm going to do apt install. Oh God, I'm afraid to say it. They could sudu as they want.
To say it, now I should be able to do it fine, let's see if I can run my Linux stuff. I'm going to see if I can add Haven to the pseudo-user. I think you should now be able to log out and log back in. like Haven and I should be able to run sudu who am I password yeah okay so I can do things as a Haven user as root now which is cool so the first thing we're going to want to do is be able to log in our trace shares and to do that we'll need to install a couple of things, so I'm going to do sudu apt install cifs utils CS utils.
I'm not entirely sure how to say it, but this will allow us to do it easily. Mount our SMB share and then we're going to need to create something for this to actually mount, so I'm going to ah, I can't talk, create a directory on SL MNT and then cut, slash, prox, the share forgot to do sweat everything. right and then if we change the directories to that we should be fine, so we have a directory that we actually want to mount our share in, so the next thing we're going to do is edit our fstab FS tab.
I'm not entirely sure which one it is and I'm sure they'll let me know, but we'll do the Sudu Nano SLC slfs tab and then down here we'll make an entry, so we'll do1 192,168 1 point and we want this to be 32. I almost forgot. and then SL proc share, then we're going to make our mount location so SL MN SL proc share and then now we're going to type CFS and then the credentials are equal to us. We're going to say "root slash, forward slash" and we'll get to that here in just a second. Oh, SMB credentials, it would have been fine as long as the file was the same, but then I'm going to write the Z space 0 and This all looks fine to me, so let's press command X, yeah, okay, now we really need to do that, so we're going to do sudu Nano slash root SL SMB credential and then here we're going to type user equals Haven. and then password, I won't show it to you, but I will write my password here because it will be plain text, so I won't show it to you, but I will write my super secret password. here and then press command contr , so I should mount any of those things that are there, um, so I hope this works and I should be able to test it.
I forgot the command, I just want to double check, yes, just sudu and then mount a mound, good Lord, and now if we are lucky, if you are not bad at doing this, you should be able to go to proc share and see the file that is in our proc share. Alright, alright, and I'm going to create a directory. Let's do what it would be, let's call it Docker. I have to do sudu I guess I should probably um I think I can fix this wait in a second, so let's change one thing here, we're going to go back to our FS tab, we're going to add credentials and then we're going to say comma uid equals 1000, which should be our Haven user and then comma group ID GID should also be 1000 and space z space zero do this yes Save and then we'll run the appropriate amount a again and then we'll list Okay, and now I can do it without running its root.
Damn, okay, we'll just run his route. I'll take care of all this. I'm not. I'm not an expert at this guys, I'm just having fun. Okay, so after a quick reboot, we have our permission set correctly and I was actually able to create this Docker container here without having to run um or the Docker container, this Docker directory here without having to run as path, so now we need to install Docker, which is not too difficult, we can just go to the Docker installation. Debian should take us to the website here and they have some neat little scripts that make things very easy.
Where is the script? Yes. Convenient script, it's quite easy. We'll just copy and paste this. I need to install curl first although it should be pretty easy we'll just do sud apt install curl now we can copy that oh no we can't copy. I keep going up. I should open this in solar putty why won't it let me paste? I don't think it's going to let me hit here, okay, let's open this in solar putty. Here we will call it procs de21 1681. What is our IP address? There we go, we are 19,192,168. 1.2 we could configure a static IP.
I'm not going to worry about that now. 250 new credentials super secure password credentials name prox deab secure create yes okay hopefully this should be a little bit easier to see and now we should be able to do it yes we can paste that command curl and then we should be able to run sh get Docker Dosh run it and this should handle installing all the Docker stuff for us, which makes it pretty easy, it looks like it's done and if we run this, hello. world image everything seems to be working fine and we can do pseudo Docker PS to make sure nothing else is working fine, but we don't want to have to run sudu for Docker, so we need to add our Haven user to the Docker group so I can do sudu uh user mod d a cap G Docker Haven and then now if we log out okay and now here you should be able to say Docker PS cool we don't have to do that that's good so we'll install Painer once.
Again, Google is your friend because this is usually pretty straightforward, so the first thing we're going to do is create this volume. We'll do exactly the same thing as they do here so that we have our ptena data volume and then now we can copy. this command here and I think everything is fine. I don't think we need to change anything, so we'll just copy, paste and run everything right so it looks like everything is installed and ready to go. We can run Docker P. Oh gosh, we can run Docker PS here and we can see that our pain container is running, so now we should be able to log in to the web UI and everything should be fine, so let's do this real quick to that we can go full screen here.
I already forgot the I already forgot the port, I think it's just 8000 so we can go to 192.168.1.2 Port 8000 oh 9443 I'm stupid, go ahead and here we go once again we will create a super secure password oh no, it's actually forcing me to create a super strong password let's make uh super password plus two little exclamation points for our strong password um three exclamation points for our strong password omg create user okay let's start using this local environment everything is fine . we can click local and now we should be able to SPO some containers to have containers.
I don't know what, oh yeah, this is our hello world that we did before, it stopped, we can just delete it, okay and We're going to add a container and we're going to add a cable protector, which will be a VPN server that will allow us to access from remotely to basically anything on our home network while we're somewhere else, so it's great, like a private tunnel to access. on our home network, so let's install the cable protection container now to do that. I'm going to go to linuxserver.io, they have some great containers that they keep here and we'll go to the docks and then up to The wire guard and the wiard can be a little tricky.
This container makes it a little easier. We're going to skip a lot of this and go to the CLI here. I'm going to continue like this. and pain okay, so let's name this container here with guard, we can leave it the same for the image, let's copy this here, always pull the image, yes, that will do it every time we restart the container. In the most recent image, we now have a lot of things here that are normally command line arguments and we're going to have to do them here, but it should be pretty simple, we'll need to configure a port. here, um, so what we're going to do is we only need UDP at 5182, so we're going to change this to 51820 and then 5182 to 0, okay down here for the environment variables, this is where we're going to have to do quite.
We'll click a little bit on Add Environment Variable and then here what we're going to do, we're basically going to copy all of these commands and put them here, so puid and then 1,000 gu ID 1,000 also, uh, this is the Pu ID and gu ID from our Haven user add environment variable TZ I'm going to do America SL Chicago uh let's leave this these two optional types here blank guys um this is important so you can put a number here, but I think you can I also put a list from and will actually give them names, so that's what I'm going to do for now.
I'm going to add pairs of environment variables and here I should be able to write a list like this. I'm going to say iPhone for my phone and then MacBook for my MacBook, no spaces or anything, add environment variable again, bring this automatic peer DNS back up, we'll leave it for now, we could go back and change it here in a moment. if we wanted this to use um like Pyle or something like that, we'll see if this works automatically; otherwise we may have to change this internal subnet. Normally you would leave this exactly the same, but since I'm already running Wire Guard just to make sure we don't have any problems there, I'm going to change this internal subnet to 10 points, let's make it 14 13.0 and then allow IPS, we'll just leave this, all of these optional, we'll leave them as they are and then we have We need to mount a couple of volumes, so for this what we need to do is basically copy and paste, but this configuration folder we need to create our own directory for this so we can come back here.
We'll probably have to do some things here, so we might as well just burn it to CD. Oh, what happened to our process share? Okay, for some reason it doesn't mount on boot, so we may have to figure that out, but we can mount it. manually, so whatever, okay, we have our Docker folder here. Okay, so what we're going to do is create a directory and then Docker and then we're going to call this wire saver, so if we look at what's in our Docker, we'll see that we have this wire saver. folder, so what we're going to do in
portainer
now is create these volumes, so allocate an additional volume and we're going to do a link mount so that the path in the container is do this first, slash the lib SL modules, same thing here on our host machine and then here we need another map, additional volumes bind Mount and for our configuration, so in the container it will only be the SLC configuration, but here we are actually going to do slash MNT slash Pro share slash Docker slash wire guard cool great and then I think that's it except thesecapabilities, so capabilities here we need to add net admin and the CIS module, so net admin CIS module there we go, so we have all that, it looks like we have everything we need, we just have to get it right. yeah how do we do this so fast?I realized that I had never done a CIS control argument in
portainer
. I had only done it on the command line, so I finally found this place here where all we have to do is copy and paste. the name which is netore ipv4 dot dot dot and give it a value of one okay let's press deploy container haha there we go it's running it looks good we can access the logs uh I don't think I had this in upper case let's try this again replace container press logs okay now because we had that Pier variable there it should be in server mode so it will generate pairs and we have some QR codes here everything seems okay so what I'm going to do is Actually , I'm going to connect to my phone real quick and to the Wire Guard app.Okay, so here in the Wire Guard app I'm going to turn off Wi-Fi real quick so we know for sure that I'm just on mobile and I'm going to add a connection here from the QR code. I guess I actually have to figure out how to get this QR code where I can see it. I'm curious to know if we're going. Well, if I'm here on PuTTY, it will actually show this QR code. By the way, I'm going to delete all of this, so don't try to get sassy or anything with me, so I can move on.
My phone now scans this QR code and I'm going to name this tunnel process, why not hit save? And then if I open this, I look at the settings here. Oh my god, I'm an idiot. I forgot, we have to port forward. the video is getting a lot longer than I expected okay on my router I have um it's wherever the foring port is. I'm not there, I'm here, so on your router, wherever the port forwarding is, you're going to have to go to that and do some port forwarding, you can Google how to do port forwarding.
I'm not going to talk too much about that, uh, I'm just going to do it, so I already have some things about port forwarded that I'll have blurred out, I imagine. I'm going to hit add name, call this proximity wire shield interface W External Port ooh okay, so what happened here was I forgot to change the port of our wire shield container because I'm already using wire shield on a different server and they are both using the same port 51820 so what I should have done was change the port on our container but what I do instead is go ahead and change my port to our proxmox server instead my original cable protection server.
I set up and I forgot to set up some kind of dynamic DNS or anything for wire protection, so it just uses my public IP, which is dynamic and it's going to change, so I'll set something up in the second part of this video, uh, for dynamic DNS. so we can connect to our Wire Guard server using a domain name instead of just a public IP address, okay, back on my phone, I'm going to restart this tunnel, there we go, oh, we see data received, data sent, last handshake now if i already try to go to 192.168.1.3 which is our truez i can actually access trz over my cellular connection right now i could even type a chicken coop what i hate typing on phones and then I'm going to delete this super secure password and we're in, we can see the turn.
Now not phones, but we actually can. Look, I'm in Cellia right now. I can, you know, I can try it, but I'm on my wire protection VPN. Our wire protection VPN is working. I can access anything on my home network from my phone. Well, I think that's it for now. In this regard, we have this video that has lasted too long. I'm going to have to do a lot of editing, but we've got it up and running on a virtual machine and we also have Debian with um Painer and Wire Guard so we can actually access this server or any server on our home network from anywhere, which it's great, so yeah, let's go back to Colton, which is much better produced and written to finish this video.
I hope you enjoyed it and maybe even learned something from it if you are If you want to watch the second video in this series, be sure to subscribe so you don't miss it. If you want to help support the things I do here on the Hardware Haven channel, be sure to like this video and maybe even check out my patreon, thanks again to Nordpass for sponsoring this video and don't forget to click link in the description to get an exclusive Nordpass offer plus an extra four months free, that's it for this one, so as always, thank you very much.
So much to see, stay curious and I really hope to see you next time.
If you have any copyright issue, please Contact