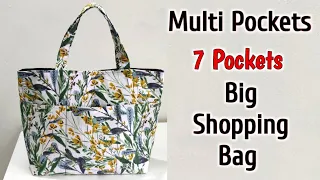
Make Three Totes / Purses With One Charm Pack!
Jun 05, 2021Hi, I'm Jenny from MSQC. I have a great little project for you. Check out this cute little bag. Quick and easy. Handles, lining, everything. The best part is that with one
pack
ofcharm
s you canmake
three
of these. Look at this. Isn't that the best thing ever? Three of acharm
pack
. You heard me right. So what we're going to do today is show you how tomake
this little bag. And it's just easy. You are going to enjoy this very much. So let's go ahead and get straight to the point. So what you'll need for this project is 12 lovely squares, just the squares, 12 of them.
I used this tapestry from Victory and Company for Moda. I love Joanna Figuroa's stuff. And really pretty, fun, fun colors. And then you'll need for the handles, the lining and the bottom, you'll need a little over half a yard. So I would get ¾ just to be sure. So you have your 12 charms and about ¾ of a yard of fabric. And you can make one of these bags. Now remember that in a pack of amulets there are 42 amulets. So if you only use 12, that's only 36 charms for the
three
of you. Then you will get three bags of a charm pack.
More Interesting Facts About,
make three totes purses with one charm pack...
And then you'll just add the lining and the handles. So here what I did was sew six of these together. And that's all you have to do. You just have to find six squares to match and put together. You're going to sew them together in two, two rows of three. And you'll need two of those. One for the front and one for the back. And then the bottom of the bag is just a seven inch piece of fabric that you're going to cut out of the contrasting fabric. Remember you have your charms and then you have your ¾ yard of some type of contrasting fabric.

And you're going to cut those seven by the width of your charms. Now the cool thing about this bag is that I made it, I came up with this idea when one of my grandsons needed a bag to carry his music. And I thought, well, I have these leftover charms, you know, we can make a nice little bag. So what I want you to remember is that if you need a bigger or taller bag, just add more charms. You know you can add another row. You can add five more rows. You can make it higher, wider.

And then what you're going to do is your butt will always be seven inches wide by the width of your bag. So in this one, you know, here we just measure our little charms. And they're, oh, they come out about 14, about 14 inches. So this is going to be about seven by 14. You know, the plus or minus part depends on seam allowances and that kind of stuff. So what you're going to do is sew these two together and make one long piece. So I'm going to go over to the sewing machine and do that. And we will be divided about it.
Back here. And then I'll sew this other half on the bottom here. Line it up. I have to keep it nice and clear. Sew a quarter inch. All of this is done with a quarter inch, like a quilt. So here we have this great piece. The two sides are sewn to the seven inch piece in the middle and we need to press them together. So I'm going to pin this seam and I'm going to press. And I'm going to do that on both sides. You want a nice flat piece for this. One of my seams is crooked.
And then just press it back. And you want it to be nicely ironed and flat because the next thing we're going to do is quilt it. I don't do much free motion quilting now. But what I do is easy. Anyone can do it. Then you will find a piece of leftover batting. We all have leftovers from some project or another. And it will be approximately the same size. We are going to put our maximum effort into our batting. And then we're just going to stitch here to anchor it, so to speak. And then I'm just going to look and estimate about a half inch from, you know, one line to the other and I'm going to sew the entire length of this over and over again.
Now I have a piece here that I've already started. And this is a completely different color of bag. And I have it almost sewn up to this edge. So I want to show you how I do that and how, you know, it doesn't have to be perfect. Nobody's coming to measure your lines, you know? You just want it to have that kind of quilted texture look. Then we'll head this way. And I'm going to come here and really, really, you know, relax. I'm just going to look at this from one end to the other. And go ahead and sew down here.
I'll go all the way down and turn my fabric inside out. And since the bag is small enough, it fits in the throat of your sewing machine. It will be OK. Alright, looks like I need one more time. So let me go ahead and do that. And you'll notice that it's not even completely straight. But it doesn't matter because it will be part of a bag that will, you know, be folded and have handles. I mean, and no one is going to touch it and look at it. Okay, what we want to do here is move this.
And now we want to trim our top. So we'll just take our ruler and I'll go over here and clip this out. And I'm going to trim the batting and quilt and make a nice, clean border. Because this top is now going to become my lining pattern. What I also love about this is that I often have a few, you know, I just, I don't know, have a dozen charms left. And you know how much I hate waste, so this gives us something to do with these little charms that's quick and easy. Ok, now I have this piece here.
This now becomes my eyeliner pattern. So here I have a piece of fabric, a contrasting piece of fabric that is about the same size. I already pre-cut it out of my large fabric that I chose to start with. So I'm going to leave this here. And you have to be careful because you don't want to cut your blouse. But I'm really going to use this as a pattern. It will be cut exactly the same size as the top. So I'm going to go this way and line up my ruler so that all I'm cutting now is that bottom part, the bottom lining piece because they have to match up.
Okay, now we're going to start forming our bag. And to do this we move our, we do exactly the same with the lining as with the bag to form the bag. So, first we'll take the bag outside and fold it directly in half, like this. Line up the top edge and fold it in half. And we're just going to sew a seam on the sides like this. So let's do that. And the width of the seam in this doesn't really matter. It arrived in just over a quarter but you know if you have a good tight seam you're fine.
And you probably didn't notice that I did a little backstitching there. So now I'm going to do the same thing with my lining. I sewed the edge a little because I don't want it to come apart when I put them together. You want to make sure the seam allowances are the same. So if you decide to go a little larger than a quarter inch, you'll want to go one size larger on both pieces. Now you have these two pieces. And what we're going to do now is enclose the corners. This will give your bag a flat bottom for it to sit on.
And what I do is I just put my hand inside the bag and I just push it like this so it's flat. I want to keep that seam pretty straight. And the general rule of thumb is that how far you fit into your bag is how wide it will be. So if I go in, you know, an inch and a half, that means I'll have an inch and a half on either side of the seam line. So that will give me like a three inch butt. I hope that makes sense to you. I'm going to take a pen and I'm going to line up my ruler on my little seam line that I have here.
And I'm going to draw a rough line here. And then I'm going to stick a pin in here to hold that because I want to, that's where I'm going to sew straight. Then we'll do the same thing on the other side so you can see this twice. So, here we go. I put my hand there, I laid it flat. Make sure it's aligned in the middle and then I placed my ruler here. And I'm going in an inch and a half. Draw my line. Stick a pin there. And then I'll take this to the sewing machine and sew directly there.
Take out my pin. I don't want crazy accidents. Nothing crazy happens. Alright, let me get these threads out of here. Do the same on this side. Okay, now I suggest you turn the bag over and take a look. And make sure that butt is how you want it. So you see how he does it? And it just provides a nice little place to sit. It makes the background nice and flat. Then you can go back and cut them out. If it's how you want it, you can go back and trim it. So I went ahead and boxed the corners of my liner as well.
He did the same. We have verified it. We turned it around. You can see it well. And now we're just going to cut them. And you can do it with a rotary cutter or scissors. It just takes a moment of bravery to reach out here and cut it out. You just don't want that extra volume inside your bag. So we cut this one out. Now we have our two pieces and we are almost ready to put together our bag. But you want to make sure, when I told you to sew the side seams, we just sewed them.
But you want to make sure you leave a small opening. So if you leave a vacancy, you won't have to choose yours like I do. Because that's where we're going to turn our bags around the side seam. So we're going to leave a little opening, so I picked those two little points right there. And that will give me an opportunity to be able to turn my bag around when I have it there. So we just need that little opening there. But the next thing we're going to do is handles. Now your handles can be any width and length you want.
What I usually do when I make a bag is I put it on my shoulder. I see how long I'm going to hold it, where I'm going to want it to hit me. So I start by simply cutting a piece of fabric four inches the width of the fabric. This will give me a lot of control. You know if I want it long. When you've made more than one, you get used to how and what size you need. But it's always a good idea to have a little extra to start with because you can always cut a little.
But you can't add more to it. Then I take a four inch strip of fabric like this that cuts the width of the fabric. And I'm going to iron it in half. And then I'm going to iron my two sides towards the center. That's why I like a handle that's about an inch wide. This will be different. Everyone will have, you know, a different feeling of how they want things. This seems to work well for me. So I'm going to iron this in half like this. Fair. And then once you've ironed the middle line, it will give you a guide for ironing the sides.
So now I'm going to fold my sides almost to the line, but not quite. And because what I want to do is make a strap that's about an inch wide. So what I did was iron my strip in half to give me a middle point. And then I ironed, I just folded it, I just folded it a little bit so you can still see the middle line right there. But I want my handle to be about an inch wide. That gives me a handle that's about an inch wide. And you might want a little smaller or bigger but that's how I like to do it.
And then I'll open them up and place a strip of batting here. I have cut some one inch strips. And I'm only going to unfold one side. It doesn't matter which side and place a strip of batting there. And I've even done it, you know, I love using leftovers. So I have, I have a couple of pieces and it doesn't really matter. You know it doesn't have to be a long piece, that's what I'm trying to say. Here we go. We'll just leave that one there. So what we're going to do is we're going to overlay our piece, our handle on top of itself like this.
I'm going to tear off this little strip. We'll then take this to the sewing machine and simply sew several rows along the handle. You can see I've done that in this handle. You may be able to see easier on this side. I used a lighter thread. And you can see that they're about a quarter of an inch apart. And I just sew it. I start with the outer edge. Let me take this to my sewing machine. And I start here on this outside edge because I want it close, you know, making sure my batting doesn't get away.
And I'm just going to sew here. And once it's all folded there, I mean, you can just move them around. It's just a quick little process. Then I just turn it over and the next one I'm going to sew is exactly the same distance away on the other side. So we go from it, we sew on one side and then we sew the other side. Then we will put a filler seam in the middle. So I sewed a seam on each side. And now I'm putting the last one right in the middle. And that will give us a control that has something, you know, it's good to hold on to.
Now that our handles are finished, we are ready to assemble our bag. So I have my handles. I cut both ends to match. And I'll just hang them over my shoulder and see how long I want this bag to last. And then I'll trim them at the same time so they're the same length. And these end up, they're about 40 inches, a little bit, you know, about 38 inches. You've known that for a long time. And the way I put them on is I take the body of my bag and it's upside down. Then the exterior isdemonstration. And I make sure my handles are going in the same direction and I place them inside the bag.
So I'm going to measure inches from the seam and place a pin in that handle. And I'm going to take out an inch on this side and I'm also going to put a pin in that handle. And we're going to do that on the front and back of the bag so that we have two handles. Again we want to hold it up to make sure it doesn't have any kinks. We'll take it out like this and drop it in that bag. And we are going to put oneinch from side seam. You can use the side seam or you can attach it directly in front of the other handle you have.
And that's probably what I did. And then I'm going to do the same thing with this one. I will hold my bag so that my handles line up. You can see it right here. I just combine them from one side to the other. And then fix that. Then what we're going to do is drop the liner. Now our bag is upside down, but the lining is right side up. And remember that you have this little hole here on the side because that's where we're going to turn it. So we're going to leave this lining in here.
And we're going to line up the side seams. So I'm going to put a pin right here where the side seams are. Look, I'll combine them right there and put a pin in. And then I'm going to put my lining over where the handle is and I'm going to move my pin so that it's now holding all three layers together. So my pin will now go through the handle, the lining and the outside. And I'll do the same on this side here. And this is a good place to check and make sure the liner is the same size.
Because if your lining is a little bigger it is very easy to fix. You just take that seam a little bit. So I'm going to go ahead and pin these and pin where my handles are. Make sure the handles are facing down. And then I'll squeeze this over here and put a pin in the middle. And one here. And you must remember to make sure you remove these pins before sewing them. And you're going through several layers. And then our middle piece is here. And just guess the middle and stick a pin there. You just want to be able to sew around the top and not have to worry about it.
So now we head to the sewing machine and we're going to sew this top part of our bag. And I like to make this a little bit wider than a quarter inch. And start with a side seam. So I'm sewing this a little wider than a quarter inch. And I'm removing the pins as I go. Don't lose your pin. You don't want to find that later. I almost lost it. Make sure your handles are straight. Alright. So now your bag is all sewn around the top. And we're going to come over here and find the opening that we opened in the side of our bag.
And you can leave it, leave an opening or you can put it at the bottom or anywhere you want. It's just convenient aside. And you're just going to put the whole bag through that hole. So we're just pushing it there. You can give your handles a little tug. It will help you free things. And I stick my arm in here and push these corners so they're nice and straight. And I do it in both bags. Then we're going to go ahead and push the liner in because now you'll notice that, crazy as it may seem, everything is lined up nicely.
Our lining is lined. Our handles are correct. And the last thing left to do is go along this top edge and just sew it all the way around. And that will keep it, the lining in there folded. And it will give greater strength to your handles. So let's go ahead and do that. And make sure your handle, make sure you don't sew over your handles, that would be a terrible thing to have happened. So pull out the handle like this. And you want to make sure the seam lines up. So if you're worried about those two pieces, you know, fold them over and put a pin in there.
I'm just going to pass by here and watch as I go. Let me move them over here so we can see them better. Here we go. I have so many controls here that I'm going to run over something if I'm not careful. Here we go. Alright, now we have one more little thing to do and that is we still have this little hole in our side. So what you can do is put this seam together like this and just sew it on your sewing machine or sew it by hand, whatever you want to do. I love the sewing machine, so I'll do it real quick.
Because we don't want things to fall into the lining. And just as quickly as that you have a small tote bag. Simply easy and fast. If you want, I'm going to give you several little tips. If you want to add a pocket to the lining, you will need to do so before sewing it. If you want to put a zipper on your bag or a clasp or something like that, you'll also put that on before sewing this top lining. But you can do all kinds of things with this. Remember that they can, the straps are adjustable, the bag is adjustable depending on how many charms you put on it.
And you can get three of these in one charm pack. We hope you enjoyed this MSQC tutorial.
If you have any copyright issue, please Contact