macOS Sonoma Released - What's New? (100+ New Features)
Apr 10, 2024Apple just
released
Mac OS Sonoma and in this video I'm going to show you over 100 newfeatures
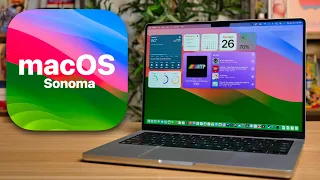
and changes included in this update and this has to be my favorite Mac OS update in years so let's start with The first thing you'll see after installing Mac OS Sonoma is the awesome new lock screen, so look at the time and dates at the top, they're more translucent than before, and then at the bottom. we have our username and password entered here is also where you can select several different users, everything happens at the bottom now and you will also notice that our background is moving, but lookwhat
happens when I enter my password and it goes to the desktop, It keeps moving for a moment and then stops smoothly, so with Mac osinoma your screensavers become your wallpapers or vice versa, however you want to see it, so we have some other wallpapers too.
I wanted to point out that you now see these widgets on my desktop. We'll get to that in a moment, but if you go into these settings here and then go down to wallpaper, you'll notice that we have a lot of new wallpapers. Mac osanoma we have hundreds of them here and that includes all the air screensavers that you have on the Apple TV so here is the Mac OS Sonoma wallpaper that looks pretty clean and we also have a dark mode version for that you can rock. Mac OS Sonoma wallpaper or you can choose to use one of the many wallpapers we have here for Earth's underwater cityscape.

More Interesting Facts About,
macos sonoma released what s new 100 new features...
You also have the antennas, so if you go to one of these random antennas you can see that it will rotate 121. Antennas every 12 hours or you can do it continuously or
what
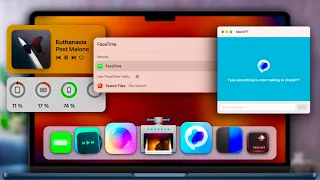
ever option you want up there, you just have a lot of options in terms of screen saver and backgrounds. screen. Now what you'll notice is that when you first install Mac Osnoma not everything is available, you have to download them individually so you can see I'm on the Dubai Skyline right now and it's not loading as my wallpaper because it's currently loading. downloading, that's what this little circle is here and unfortunately it doesn't show how long it lasts. is left for that download and also if you go to another wallpaper that is not currently downloaded you just reset the previous one, you can only download one at a time, you will see this little download arrow next to it to indicate that you need to download it, one of my personal favorites is Greenland night so we will keep it there now also at the top of the wallpapers section you will see that we have added a photo so you can easily add a photo from the photos or choose a photo to add as a background screen and then add a folder or album is now at the top before it was down at the bottom of this section, okay, so we can't go any further without talking about these widgets that you see on my home screen on my desk here. and that's new on Mac osinoma because before you only had widgets in the notification center, so you'll see them here.
These are the ones I had in Ventura and if you had widgets and used them a lot in Ventura, you could drag them around. from your existing widgets and drag them to the desktop and you'll notice that you have a lot of flexibility, you can move them pretty much anywhere you want, you have some limitations when you start getting close to the menu bar and things like that, but you have a lot of flexibility as to where you can move them and if you want to see all the available widgets you can just click with two fingers and then go to edit widgets and from here you will get a small widget tray where you can see various widgets that you could add to your home screen.

Now you may be looking at some of these and saying they are not Mac OS apps and you would be right and that is because this actually uses continuity to select apps installed on your other devices like your iPhone or your iPad and you can use widgets from your iPhone or iPad on Mac, so, for example, I have Carrot, which is an app that I only have on iOS. I can just click on it and I can add it to my home. screen even though I don't have that app installed on my Mac thanks to continuity and if you look in the top right corner when you click on that app, it even says from iPhone and the really nice thing about this is again all the flexibility that you have.
I have with it, but if you put a widget over some of your apps like I have here, watch how they move randomly around this widget and see how smooth it is. I know it's not supposed to be aesthetic, but I don't do it. I know what it is about those app icon animations, but I like the smoothness and if you don't like one of the widgets, you can press with two fingers and delete it from there, resize or edit. widgets and I'll add another one, so I'll delete this one and let's go to my purchases.
Now take a look at this because widgets are also dynamic. You know, they work on the desktop, so if you wanted to mark the dry, for example, or the bread. If I just select it, you can see it removes it from my shopping list. Carrot cake ready. I can do it even if I'm in another app, let's say I'm in my settings, right? Here I can go and press it and you can see that it works even when I'm in another app. It is very convenient. You may have also noticed that the appearance of these widgets seems to be changing, so they are now grayscale. and then when I click, you can see that they turn into full color and that's because you can adjust it yourself, so if you go to your settings and then to the desktop and to the Dock and then if you scroll down a little bit Below you will see a new section called widgets so from here you have the option to show or hide the widgets completely so if I wanted to hide them I could do so by clicking there and then we have the widget style so it automatically makes them monochrome when you're not on the desktop like when you're in another app and then when you go to the desktop they turn to full color or you can set it to be monochrome or full color at all times so if I choose full color you'll notice they change to They are in full color right there.
I personally really like the monochrome look so I'll keep it permanently and then you have the option to use iPhone widgets and you can even select which iPhone you want to use the widgets from again. continuity to resume installed apps so you can use those widgets on your Mac, and as I mentioned, one of my favorite things about widgets is the fact that you can resize them on the fly, you don't have to delete the widget. and create a completely new one, you could resize it on the fly and that's something I wish iOS and iPad OS would get now if we go back to our settings and go back to the desktop and Doc section right above where we had widgets, we have desktop and stage manager and here we also have a completely new feature where we can show elements on our desktop or only show them in the stage manager or neither, so the elements refer to what you see here on our desktop, so There used to be apps in the past that I would download to clean up my desktop just because it looked so ugly with all my screenshots, but now with Mac OS Sonoma you don't need a third party for that or you don't need to do it yourself because you could just hide them, so if I uncheck the option on the desktop, notice that I don't have any items showing up on my desktop now and it looks very clean except I have all these widgets in the way. we can solve that because here under the widgets we can disable them on the desktop and now my widgets will only show when I'm in the scene manager so you can still see them when you're in the scene manager if you use it a lot and get they can hide when you're on your actual desktop so you get some nice customization and Stage Manager also has its own kill switch here and then it shows recent apps and Stage Manager and it shows windows of an app one at a time or all at once , they are now separate sections, whereas before in Ventura you had to click customize to change these things and then last but not least in the desktop and stage manager settings, we had to click on the background screen to reveal the desktop, so this is quite a controversial feature. a lot of people love it or hate it, so what this does is let me show you if I set it to always, if you go into an app and go to the desktop to the left of it, anywhere there's a blank space and press on the desktop will hide all the windows that are currently active so you can see everything on the desktop, including your widgets and all your icons, your saved files that you have here and then press again and you will go back to seeing everything we have. a new system-wide typing indicator, so you'll see here in reminders it's blue, it's also a little bit thicker than what we saw in previous versions and then here in notes, for example, it's yellow, so the writing indicator simply tells you the dominant color of the application and it changes accordingly and if I put the caps mode on caps you will see in caps lock, now we have a new indicator to show us that we are in caps lock, so that when you stop typing it appears but as you are typing it is not there to distract you and this is great if you have a password that you are typing and you may need to know if it is in capital letters or not, this can notify you that it may be you're entering the passcode error because caps lock is on, now we also have predictive text, so if I start typing something and I press the space bar when it points me to a prediction, then it says predictable, that's what it thinks what am I going to type if I tap space, if I tap the space bar, it will drop that word and sometimes it will continue as if I can keep guessing what you are going to type and obviously this takes a lot of time for machine learning to understand how you write. on your machine, so this will improve over time, but so far I like predictive text, but at the same time, if you type very quickly or if you don't make many mistakes, you might want to turn it off so you can do that.
If you go into your system settings and then go down to keyboard and then down to input sources, if you tap on edit right there, you'll see that we have a new option here to show predictive text inline and you can turn that off and it will turn off. the predictive text autocorrect feature is also much better in Mac OS Sonoma, just as we see in iOS and iPad OS es 17. So if you type something wrong, you will see the underline and if you press the back arrow to go back to that, you will see We have a new little option here to go back to what we wrote the first time instead of correction where it automatically corrected it so we can go back to that dictation easily.
It has also been improved and now we can dictate text and then type and then dictate. again without having to press the dictate button more than once, so if we first press the dictate button here on our keyboard, you can see we have a new prompt there and it's starting to dictate what I'm saying, but if I start typing, you can see it will stop and just let me type whatever I want but when I stop typing it will continue with what I'm saying so that's new on Mac osinoma it's something we had before on iOS but this is new on Mac .OS Sonoma and I also have to say that the dictation is much more accurate than on Mac OS Ventura, so you can see what I wrote right there with my voice pretty accurate, especially since Ventura wasn't the best for me, okay?
We're in the Notes app, let me show you one of my favorite
features
in Mac OS Sonoma and it has to do with PDF editing, so when you upload a PDF to the Notes app you can just drag that file right here into the notes and Lo you'll see here first, it now gets a name, so it names the notes instead of just having a new note or a blank name. Now it shows that you know the title and then also here you will see a big difference in how that PDF is displayed, so take a look at this, we can scroll vertically and see each page of that PDF very easily.We can also show or hide the thumbnails. We have this view at the top if you click on this dropdown menu right here, no. it just shows the size right there it says PDF document and the size we also have a view as we have three different sizes we can see this so that's the small one you just saw the medium one and then here is the large one where we can see everything and again we scroll here horizontally so we can have everything in one big, nice, easy to read view now also here we have a markup and this is where the magic really happens, if you go into the markup you can see it. you have all your pages here and if you hover over these text fields, you can easily bookmark and type there, but it gets even better because if you go to let's say address, for example, now we can autocomplete an address, so if you put two fingerspress and then go to autofill, you can see we now have contacts and passwords, so if I go to contact, for example, and then I go to a contact that I have an address associated with and then I press that address, it autofills it right there . and again, the same thing happens with passwords if I go here and then I go to passwords.
Yes, I will have to enter my password and then all my passwords will be loaded and I can autofill very easily and one thing to note here as well. is that this entire markup sequence takes place within the Notes app, we're still in notes before on Mac OS, if you want to mark something up it would have to be in the preview app, so this pretty much eliminates the need to get a preview yes We are marking in notes, but that's not all because we can also highlight certain things, so if I go to this page and I want to highlight where someone needs to sign their name, all I doWhat we need to do is select that text and then we have an option to highlight and now it's highlighted so the person knows they need to sign their name there and it's the same thing if I need it, if you need to print your name we can highlight it.
Additionally, you can also delete it if necessary by selecting it again and then pressing and then delete. Now we can also link to other notes and Mac Osinoma just like we can on iOS and iPad OS, so if you type 2 signs greater than back to back you have the option to link to one of these notes right here, so if I go ahead and I link to this note, for example, it shows up there with a notes glyph next to it and if I click on it, it will take me directly On that note, if I do the same thing here to go back to this note, you can see that we can move forward and back between notes, which is quite convenient, we also get some new features for video calls and Mac OS Sonoma, so I've removed the zoom.
Up here you can see my face here and if we go up to the status bar above you'll see that we have a purple icon and when we click on it it shows our preview of our video right there and then right below it. which shows our camera and below it shows where we can adjust our portrait, our studio lights and it also gives us the reactions option so you can change the intensity of the portrait mode along with the studio lights and you can see it changing right there. and then we also have reactions, so they are actually AR based reactions, if I put a thumbs up for example, it will show a thumbs up in AR, as you can see right there, and the same thing if I do a heart, will emulate a heart on the screen I guess I'm not the best at making a heart, but if I do two thumbs up for example, you can see that sometimes it will make fireworks if it detects both thumbs up at the same time, so it's a bit tricky, you have to do it right, but there are new gesture based actions that you can do and of course if you want to do it manually you can just click on them right here and it will give you that effect, so this is like a storm, we have confetti, we have fireworks, you know, we have laser balloons, we have all that cool stuff that you can press on it if you want or you can just use your hands to make gestures and it will automatically generate that AR reaction. for you, but it gets even better because we have another new feature called presenter overlay and if you start sharing your screen, I'll share this window right here if I click the purple icon in the status bar again when you share your screen.
We'll see a new option down here called the presenter overlay and if we click on small you'll see the preview of what it looks like, we can see our little face down there in the bottom left corner and this is what it's going to look like on the screen. someone else's screen what you see in this preview right here, so just a small version of us is like a picture in picture of the screen with us showing at the bottom left and the large version inverts which is our full background with the window or our screen in the background as a picture in picture again, you can point to things like that, like the popular Tick Tock style where you see someone has their screen in the background and they're pointing at it. so now you can do it by default with this new presenter overlay feature and you can also hover over the green icon in one of these windows and that will allow you to quickly and easily share the screen in that specific window and if you are using continuity . camera in a video call like in a zoom call or a FaceTime call, now your face will be detected and you will be re-centered in the frame without even needing to be center stage and also if you are using another camera like my 14 pro here yes I'm using a continuity camera.
You can see that if I go up here to the purple color, I can change which lens is used for Center Stage, so if I turn on Center Stage it also shows my battery percentage there for the phone. new and if you go to Center Stage you can choose between the main or ultra wide lens and that will change accordingly so it's really awesome and then of course you also have all these different options here and then we have another new one. here it's called Desktop View and this allows you to basically get a top down view without your phone necessarily looking down, so if I had my phone facing up you know it would allow us to do a desktop view anywhere as well where you open a movie. recording or anywhere you can see yourself like that, you'll notice that in the top status bar you'll now have a menu item here that's purple or sometimes it could be a different color right there in the status bar and you'll be able to see your preview and you can adjust your portrait, your studio lighting and you have the reactions here along with the microphone mode, so before, on older versions of iOS or versions of Mac OS, you would have to go to the control center and then adjust it here, but now.
It's much easier with its own Separate section in the status bar, everything is in one and while we're on the topic of video calls, if you use airpods on your Mac and you like the auto-switch feature where you automatically switch music or auto switch, you know your microphone from a Mac to an iPhone and vice versa, that used to be absolutely terrible, but now with Mac OS Sonoma it's good again, so I would recommend that if you had auto switch off because before it was very bad. I would turn it back on because it's awesome with airpods and Mac osinoma heading to Safari, we also have some cool changes here so if we go to our favorites here under the address bar and just right click or two finger press on one .
From these you will see that we have a new option here to show icons, so now you can quickly and easily show your favorite icons with one click. We also have a profile and Safari, and I think these are much more useful on the Mac than on the iPad. or on iPhone, so you can see here I'm at my work and if I click on the little drop down menu there you can see that for work I have a tab and I get all these different options here where I can also open a new personal window of leisure or work and these are the three profiles that I have set up so what you want to do is go to Safari and then settings and then here you will see a new section for profiles and here you will see personal, that is the default, but you want to create a new one so you can customize it to your liking, so let's say we have one for business and we can choose, you know what icon we want, for that we can choose the main colors that go. with that profile you can choose which favorites are displayed so all of these things that you see under the address bar you can change which ones are displayed for this specific one so you can create a new bookmarks folder or use an existing one that you already had.
We'll create a new one and now once we've created it, you can see that we have our business profile set up and then here we can change some additional things so that new windows open and you can set this to be, you know, if you wanted to open it with the home page, which is what you see here, an empty page, the same page or tabs for business, so it will open all your tabs and you will have the same for new tabs open. You can change that between those three as well and then if we move on to extensions, you can change which extensions are enabled or disabled based on the profile and I think profiles in general are very useful for organizing things, especially when it comes to the toolbar. favorites, as on the right. here under the address bar, I like that it's different depending on the profile and also when you go up to the file, if you ever want to open a new window, you can choose, you know which window you want to open it in, like if you want to open a new window in a specific profile, you can do it from here and it also has certain hotkeys that you can use to open a window in a specific profile and one thing to note here also is that when you have profile set your web history your favorites almost everything is saves specifically to that profile, so if I went to apple.com, you know, Mac, for example, that wouldn't appear in my history for my other profiles, it would only appear in my history for my business profile because that's what I'm here, now you can select multiple tabs at once and move them together, so if you have multiple tabs open in Safari and you hold down the Command key and then just press the different tabs, you can see that they all turn white, in this case they will all match.
You can also press another one while holding down the command key to deselect it, but once you have them all selected, you can just drag and you'll see that we have the three little ones right there, which indicates that we have three tabs that we're trying to move and you can move them in the tabs section up here or you can even move them to a group of tabs. Right away we also have some changes to private windows, so if we go ahead and open a new private window, we'll notice that it's locked. I need to enter my Touch ID or my password to see that locked tab, so that's a It's also a new feature on Mac os
sonoma
, so if you go to settings and then privacy and then here we have private browsing, it requires Touch ID to see locked tabs, but my favorite feature in Safari is the fact that now we can have web apps in the Dock, so you can basically use any website as an app, so if you go to my website right here, if we go down , you will see that we have a new option to add to the Dock and if you press there, you now have the option to choose. how do you want it to be titled for example down here I have one called Apple Dan and I can change it to whatever I want and I can also change that URL along with the icon there if you want the icon to be different from the default favicon you can also change it if we do click add, all of a sudden that's now down there in the Dock and it's like an app, so if I open this other one that I made for Apple Dan, it opens. and essentially its own little app and you can see here, it even shows the name of that app, it's not just in Safari, it's really like it's a third party app, which is really cool and extremely useful, especially for things like Google Docs. so go ahead and go to Google Docs.Let's add this to the Dock because I use Google Docs all the time. This can be a quick and easy way to access that website from the Dock without having to go into Safari. We have some really cool security features in Mac OS Sonoma, so if we go to the advanced tab here and then in the Privacy section, we use advanced tracking and fingerprint protection so you can choose to have this only in private browsing or in all. Browsing and what this does is prevent well-known websites and different companies from tracking you with extreme precision, so a fingerprint is much worse and much more effective than cookies.
Do you know that when you have cookies on a website you can only see a limited amount? data, but with a fingerprint you can see a lot more, so these companies and these websites can see a lot more information about you and if you want that to cover all browsing and not just private browsing, you can do that right there now. Note that this will also remove different parameters in URLs, so if you have a referring URL or know other things added to a URL it will remove them and in the tabs section we have a new option to automatically close tabs so you can do it. that now after a day or a week or a month or just keep it on manually, we can now share passwords and passcodes with family, so you'll see the option here and if you're going to start, you can change the name of the groups.
If you want to name it, you know the Butch family in my example, you can do that and you can add people right here, so when you click ADD people it will have suggestions or you can add people by entering their name, email or phone number. you can add your family membersright there and then if you click create you might get this option here that says update devices to access shared passwords so these will be devices that are not updated to the latest firmware version or the latest software version where you will continue and then this is where you can choose the passwords that you want to share in this group with your family and this is what it looks like once you have everything set up, you have a manage button right here.
You can manage everyone in the group or delete it and you have this little bonus here where you can add a new password, move passwords to the group or add people and while we're in this section we also have the password options section where we have Verification. codes and you can also clean them automatically, so this allows you to delete two-factor authentication codes and messages in the mail after you insert that code with autofill, so it is definitely a feature that I recommend that you activate and if you go to the search tab We also have another new setting for private browsing where you can change the default search engine so you can keep it the same as your regular Windows search engine or you can change it to something like DuckDuckGo, but that's just for private browsing and then here we have a new developer panel, so before this was in the window section above, like next to the bookmarks, but now it's here inside the settings, you can see this is what it looked like before it was here. and now we also have the Flags feature, so this is also new here and just replaces the experimental features section of the Develop menu that we had previously.
Additionally, Apple's Password Manager is now available in third-party browsers like Chrome, so with this extension you can now autofill passwords from your iCloud Keychain along with the ability to save new Chrome browser passwords. You no longer have to be in Safari. , so this extension has been available on Windows for a while, but it just arrived on Mac with this new update from Sonoma. You now also get improved extension control, so this allows you to use per-site privacy settings to control access to all extensions that access your user data so you can see all of that in the extensions tab and, If you like gaming, you'll be pleased to know that there's a new game mode on Mac OS Sonoma, so if you open any game and put it in full screen mode, you'll notice it at the top right, so we'll go here and we will change to full screen, look at the top right.
In the corner of the hand you will see that it says game mode activated and it prioritizes the performance of this game while it is in full screen and what this game mode does is essentially reduce the use of background tasks that way your machine can give it Full priority to CPU and GPU. to the game and the best thing is that it also reduces latency with wireless accessories, so if you have airpods to listen to the game or if you use a PS5 or Xbox controller, you won't have as much lag or latency as before.
DirectX 12 support has also been added with Mac OS Sonoma which is really nice and if you have a mouse connected you will be pleased to know that pointer acceleration can now be disabled in Mac OS for the first time and I think this is much better. Instead of having to use a linear mouse to disable acceleration, the screen sharing app has been worked on Mac osinoma and there is also a new high performance mode that allows highly responsive remote access over high-speed connections. bandwidth, so it is only available for Silicon Max, i.e. M1 and later. but this is a nice addition to the screen sharing app, there's also a new print screen, so if we're going to print something right here, we'll go print.
You can see that we have the print center down here, so the print center is back with Mac osinoma if We head over to our screen time settings, we have quite a few changes here, so first of all, everything is organized a lot better, so we have header titles for communication and activity limit usage restrictions before everything was just a mess and then we also have the app and the website. activity, while before it was just app usage, if we head down to limit usage, we have a new option for screen distance, just like on iOS and iPad OS, this is to reduce eye strain and the risk of myopia in children so that you stay further away from your Mac screen so you can enable it from there and then we also have communication security here so it will detect nude photos and videos before they are sent or see on your child's device so you can turn it on from there as well and If you scroll all the way down, you can now disable app and website activity without turning off Screen Time completely, so if I turn this off for example, you can seeing that screen time is still on for certain things, like I want to have my communication. set limit, you know, and stuff like that, it's still on.
I don't turn off screen time completely just by turning it off, so if I wanted to turn it back on, I could come back here and turn it on, but that's new and then also here where it says lock screen time settings, that's new talk because before I was just saying use a screen time passcode and you may have also noticed throughout this video, as I was going in and out of the finder, we have these back and forward arrows and they are extremely useful for getting in and out of different sections and settings, for example, if I go to all these different sections and then come back, take a look at this, it brings me back to notifications if I come back again. it takes me back to sound if I go back again it takes me to focus and back to screen time if we go to accessibility now we have a change to live captions it used to say beta next to it but now it's just live captions I guess it's out From the beta, we have a new glyph icon next to the voiceover under the engine and then we have two new options here under the speech, so we have live voice and personal voice.
I talked about these in my iOS 17 video, but you can essentially create your own. AI generated voice of you to imitate you and use it for live voice in control center settings. If we scroll down to the bottom, we have some options to automatically hide and show the menu bar so you can always do it only on the desktop. Only in full screen or never in Siri and Spotlight settings, we now have the ability to not have to say hey before the S words. If you go here to listen, you can change that from hey s to just saying the S word without the Hey , before the forehand and don't worry, you won't have as many false triggers as you think, but that's where you can change that now, if you go down to privacy and security, we have a new section here all the way down. at the bottom for a sensitive content warning and this will detect nude photos and videos before viewing them on your Mac, so this is different from the screen time feature which was essentially set up for kids, this is more for you and you can turn this on if you want and it will block those explicit photos before you can see them and then if we go back to this section and we go up to the top and then we go to location services and then we go down to system services and we go to details .
We have a new option at the top for shortcut alerts and automations, so it's a new system service on Mac os
sonoma
. Also in the privacy and security section we have some changes to the lock mode, so now when you access this, it will have its own little page here. and if you press power, you get this little window here that shows what it is and tells you all that before you turn it on, whereas before, once you press power, it would basically go into that mode. We have some changes in Stage. manager, so the stage manager before on the right only had a customize button and when you pressed it you had the options for recent apps and desktop items, all that, but now everything is in this section here, you don't have to go to a separate window in the lock screen section we also have some changes here so we show a big clock and you can change this to show on the lock screen and screen saver or never and it has all these other settings here.Also for the lock screen and photos app, the people tab is now people and pets, so this includes your favorite people and also the pets in your life. Also, visual search is much better, so if you go to a food image, for example, and click I here you will find recipes that you think will make the food you have in the image. Now you can also generate an iCloud link on Mac OS when you want to share photos and videos stored in iCloud, the weather app. it also gets a similar treatment so if we go ahead and open the weather app this has also been updated just like on iOS and iPad OS 17 and I love the weather app on Mac for some reason it's so big that you can see everything at once.
Take a look without having to scroll and you can see everything new here, including the wind, and if we go into our map right here, we'll have a new wind map, so if you go to the wind, you can see the wind animations on the map. It's really cool to see, especially when there are hurricanes in the ocean. It's really cool and satisfying to see them. We have our averages, so if you go to the averages section you can see today's averages, so you can see today was a lot. Warmer than recently, so it was 93, while the normal range is 78 to 88, so you can compare, you know the monthly average and things like that, you can see all the different months, the averages for them along with the precipitation too.
In the Mail app you will now see travel-related emails at the top of your search results as your travel dates approach, so if you have an email from your airline or your hotel and you search for it , it will always be displayed at the top. The travel date is near, now you can add big emojis to your email messages. I'm not sure who emails emojis, but you can do that right there if you like, but easily my favorite feature in Mail is the fact that when you download an attachment from an email, this mail icon now appears at the top. next to it in your browser, so this is the PDF that I just downloaded and if you hover over it, it will show up in the mail and when you click on it, it will take you to the exact file. message from where that attachment was downloaded, but it gets even better because if you go into finder and right click here, you have the option to reply to the sender directly from your finder app from an attachment that you downloaded, how crazy is that when click on it, it will take you directly to here and you are already composing a reply to that message with the attachment there, the reminders app updates so now we have shopping lists so if you add a new list here on the bottom left and we go to the list type, now you can choose to grow groceries and what this does is it automatically uses sections using machine learning, so if you go down here to groceries, I have this one, for example, now let's say this layout too it's a little bit small I want to make this bigger, if we go to the view tab here at the top, now we can see like columns, so now we have a column view where we can go over like this and if we want to make this a little bit a little bit larger, you can see that now we can fit a lot more on the screen when we have this type of view where it's more of a Column Based View and it becomes horizontal and also when you add something to the shopping list, so let's say I add I don't know Diet Coke, so if I add Diet Coke right there and if I add it to produce, you can see we get a suggestion to move it to the beverage section and I can move it right there and of course if you just add a new element in general will be auto-populated or auto-categorized, so if I just type kiwi, for example, you can see it automatically put here in produce and also in notes we have a new paragraph style, so if you go to paragraph Styles when you have something selected, now we have mono space and this is what that new style looks like and now you can also finish a note on pages from the share sheet in the messages app again.
We have the same features that we see in iOS 17. but I'm just going to focus on the ones that I find use primarily on Mac OS and the first would have to be the new search filters, so if I search for messages from my dad, if I just type dad , now I have the option for dad right there and then it gives me some previews hereso I can link the location of the photo, let's say I just want to see the photos that my dad sent there, come on, now I can see all the photos that were sent. from my dad and of course you can do this by conversation as well as in a group chat or something like that you have a lot of flexibility with search filtering and also stickers are a lot of fun in Mac OS Sonoma so if you go to the right here to the left of the messages, you have stickers and from here you can see all the stickers that you have and of course you can react to a message, you can place them here, you can place them in the free format application which is where I use stickers the most of the time and you have a lot of flexibility with them and you can use them anywhere you want.
You could put them on the desktop, something like that in the Find My app you can now share an air tag or a search. my accessory with up to five people so you can see the section right here share this item also in the home app, in addition to the interactive widgets, we also have activity history, so this can be useful specifically on Mac so you can see all history for your home kit enabled devices and then for my video editing friends, there is now faster video encoding if you are using an M1 Ultra or M2 Ultra machine in Final Cut Pro Compressor and other video applications from third parties, and then a few others.
Very minor changes to the UI that you might not notice unless you look closely are that the featured search is more rounded if you look at the edges, it's a little more rounded, and the same goes for the base and even the app icons are slightly more rounded than on the Ventura, so it's Mac OS Sonoma. I hope you enjoyed this video. If you want to get your hands on a PDF file that covers many of these settings, you may want to change in Mac Osinoma and some of the other important features that you might forget in two months.
I'll have that link in the description below. You'll get it as a benefit for becoming a member of Brandon butch.com, so it also helps support me and I try to provide for you. Guys, I appreciate that membership as much as possible for supporting me, so I hope you enjoyed this video as always. If you did, I would appreciate it if you could give it a thumbs up and also be sure to subscribe. We are trying to become the biggest and best Apple. Community here on YouTube to make every subscriber count, but anyway guys, thanks again for watching and we'll see you soon.
If you have any copyright issue, please Contact