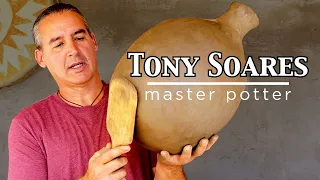
Learn Corrugated Pottery From the Master, John Olsen Teaches the Ancient Art
Jun 07, 2021I usually sit here and make a coil, wait a while, make a coil, wait a while, it'll catch up, so now I'm going to start pinching. Hey guys, a few days ago I drove to southern Utah to visit John Olson at his home there, John is the person who has been making replicas of prehistoric southwestern
pottery
longer than anyone I know, in fact, literally, since I've been alive, so I was able to talk to him a little bit about how he got there. he started out in primitivepottery
and then showed us how to make acorrugated
cardboard vessel, so I think you'll really enjoy this video so you can tell us how you got started in pottery.
I was thinking about it last night and I think it was somewhere around 1969 or '70 during a deer hunt and we were pulling a trailer with horses in it and uh, we were going to this place where we usually hunt and the trailer slipped over the side and It was hanging over the cliff and the reason it slipped off the side is because we were going over a little band of clay and I was kind of playing around with those things in my hands and I didn't really think much about it, but later when I was in high school, I remembered it and I went and gathered some of it and made a pot and talked to my art teacher about firing it in a kiln and we finished, he was a little worried that it might melt, so we made him a bowl out of regular. clay that he knew would hold up in the kiln, but it came out great and it was nice, so I started playing with probably native clays at the time, okay, the first thing I do is sometimes I roll this up and dry it.

More Interesting Facts About,
learn corrugated pottery from the master john olsen teaches the ancient art...
It sticks out a little, about the size of a marble. I'm trying to dry the clay, but I also wet the sandstone. I see that all my corrugation starts out as a small disk. Many times you will see this little disk. broken on the ground, you see the little bottom of a pot, yes, a circle, I suspect that instead of trying to build on the coil they built on a flat surface during the first moment, I will start with something basic, without pinching, but it just seems kind of a slat, so with that flat disk, the dog hair there, you have something to build on and I'm very critical of the distance between each coil, if you grow too long your pot becomes too thin, um, if you squeeze too much your pot becomes too thick, it doesn't look good, so generally a tighter coil looks much better than a very spaced one most people when they start corrugating me they try to go too fast they take two bigger jumps outwards which The best way to do it is to keep it close.

I ended up getting a scholarship and going to Dixie College. I was a ceramics and art major and my teacher encouraged me and actually the whole class to look for some native plays to be able to use instead of buying clay from factories and things like that, so we were looking around and actually we found some clays and some glazes and that sparked my interest and I started making red clothes out of all things because basically We were firing in a kiln and it was an electric kiln so there was an oxidizing and oxidizing atmosphere so it produced nice reds , so I was polishing.
I really liked some of the Hopi designs with Thunderbirds and stuff like that, and I stoned them. stone, polish it and yeah they came out pretty good on the next coil, I generally like the size of a pencil and what that will give you is about a quarter inch of thickness in your pods so when you first start out it's kind . It's hard to get a rhythm right now at this point, are you thinking about the curvature of your vessel because your record looks pretty flat? Oh, not really, it's slightly cupped, but not much, and your clay is very soft the softer you work it. the easier it is to turn it, if the clay is very difficult to pinch, you will cause a hydraulic system and it will want to do it, it will actually cut the other way, yeah, now, at this point, sometimes I'll just leave it. sit down, but I'm going to keep going up a little bit before you go on, yeah, it's still pretty small, usually I sit here and do a coil, wait a while, do a coil, wait a while, sure, in the end I decided go further. than that and I started trying to replicate things from native clay and do it in an open fire or a pit or something and had very little success.
I didn't quite understand the preheating issue as much as I should have. I did, but eventually I got it and in the late 1970s, probably 78 79, I started making a lot of different types of ceramics, I hadn't gotten too far into the black and white that I had, but I was using mineral. paints I wasn't very familiar with organic paints yet, but I eventually moved to organic paints and found better sources of clay than I had and then became interested in
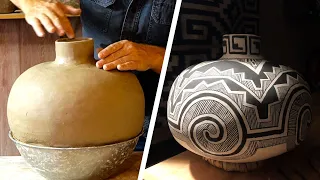
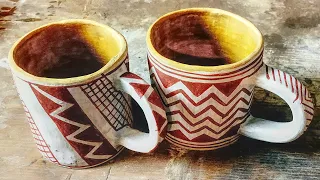
corrugated
pottery. Some of my early corrugations are so pathetic. I didn't get it, I went to the edges of the Cedars museum and sat in the back room and looked at ceramic shirts for hours and hours and hours at the end, so now I'm going to start pinching and pinching, all in one motion. no edge prep, uh, basically it's just putting the coil in there, it doesn't have to be right where it's supposed to be because I can manipulate it back and forth with my thumb depending on what type of corrugation you can lay on its side. and it lays flat, you can push back, there's the thumb that does it all, so I'm just going to do the basic standard corrugation, you need to pinch up to that sharp edge and that sharp edge gives you the next place to put the coil, no there is going back. and flattening this out there's nothing else to do just keep adding coils and pinching now when you get to the first few pinches where you start to overlap there are several ways you can do it you can pinch just above the last ridge or in the middle . the last ridge or somewhere, so I'm going to pinch right above the last ridge, there's the ridge that can give you a little bit of spiral or you can go in the middle, it doesn't really matter, it depends on what type of corrugated you are doing and when you go out it's like basket weaving, you're going to have to skip one and put two in one place because it's getting bigger.I'm sure he was actually working out in an airport and uh. On the weekends I would go home and spend all night all weekend trying to replicate corrugated cardboard flower pots and I finally got to a point where I could do it pretty well and I blossomed from there, then I started selling the stuff and produce. artifacts for different museums and things like that and that brought me to where I am today, you can see it's starting to turn mm-hmm, right on top of those other nips, now I'm widening a little bit, so I'm going to put one in the middle and then another one on top, so I skipped it but you won't be able to see it, so when you're in high speed on this thing, it's that fast, you're really moving. real quick the whole key here is the distances between these lines here if you can handle that and that's a visual thing and if you see when I press sometimes my back finger curls down and it just depends on where the coils are if I feel like I need to push the coil out, okay, I can push it out like it's too close, so I can really extend it well and extend it and hold it, yeah, and then keep it straight so you go about a quarter. inch of distance between your coils is fine and your coils are about a quarter inch thick, maybe a little thicker and that should give you about a quarter inch thickness, but as you can see the coil slides a little forward with each pinch, yes, I don't.
I really sell too much since I give away more things than I sell. I'm more interested in exploring other techniques, there are thousands of different types of corrugated, each one is unique and I have an endless supply of projects to do as far as appearance and uh. shapes and things like that um, on the other hand, I still do some red, I use polychromes and I still do some black and white, not as much as I used to, probably my heyday was probably around 1995, somewhere around there, when I was really producing a lot of stuff and eh, I had pretty much controlled everything I do today.
Do you sign your pots so that if someone finds an old John Olson they can know it's yours? I used to put in some little turkey footprints. on them and then some of them that I sold to museums required me to put a mark on them or something safe, so I used to put a lcmp on them and that meant little creek mountain pottery, um lately I haven't. signed something unless someone really wants it to be signed, that's just a preference for me because I think prehistoric people didn't sign their stuff so we know so no I don't sign my stuff um but if someone wants piece and they want have it signed, I'm more than willing to do it, but I know my stuff, unfortunately, I've seen some things in catalogs that things I made 30 years ago ended up on the black market, for sure, and so I was looking at some catalogs that have a good friend of mine and a bunch of different photos of types and different ceramics and I found three pots that he had made and I actually said, do you know what I have that pot right here? my house because it's my own design and I went in and showed him the design and it was the same one that was in the catalog this is more thumbs in oh yeah I can see it's a little different not much though but in the long run yeah it looks different okay now I'm going to start overlapping where you started that style or where I started that style uh so I'm probably going to try to go right on top of the previous one and put a pinch that's going to leave a deep hole right now my coil it's quite high so I'm actually going to drag it down and pinch it nice a slight change just small differences in the thumb adjustment create a completely different type of corrugation if anyone would like to
learn
corrugation from you you accept students I do I mainly teach in two meetings, maybe three meetings, a place called Rabbit Stick, one called Winter Count, and one called Fire to Fire.I have taught at others in California Buckeye and some. others, but corrugating is a long
learn
ing curve for some people. I think we are contaminated with modern ceramics, like using the wheel and a lot of water and things like that. This is different. Corrugating is not coil stacking. one on top of the other to make it taller or bigger, it's added to the side that you can pinch and that's basically how all prehistoric pottery was made. They are not stacking coils on top to make the pot taller or taller. they are being added to the inside or outside side so they can pinch higher they are layered like shingles they are like shingles and if you break off a piece of prehistoric pottery especially a piece of corrugated cardboard you can see those striations on them yes I have seen that and it's cool to see so it gives you an idea, you know how they were doing it and, um, so they were layering that on there and it usually overlaps two to three layers before you clear it up. off for the next coil or yes, it has about a two or three overlap that makes up for a strong bond, there's not much variation, but now it's getting a little loose, is this a different pinch here?Yes, it is, isn't it? Yes, this is it. one of those two steppers, yeah, it's a crawling pillow, it's basically the door-dragging pillow style from Elden Roger, he does it with his finger, I do it, he does it different, eh, interesting, he does it with the finger, I do it with my thumb, great, so the key. here is to leave a ridge, you still want to pinch it to the edge of the knife, you only need two steps instead of one, you come back and you're dragging, sometimes you drag that pillow almost half an inch, interesting thing, you know.
As far as the joints go, like with prehistoric people, and when you put handles on them and things like that, they would rivet things, so they would make a hole in the pot and put the handle in and smear it on the inside, it's like putting your hand in the hole and making a fist is very difficult to get it out very tight and some of these things require it because the clays that we are using are not as strong as the stoneware type clay that is fired at extremely high temperatures, so they are Um, yeah, You have to do the best you can and you know it can't have any flaws, so clinching is a very good way to do it.
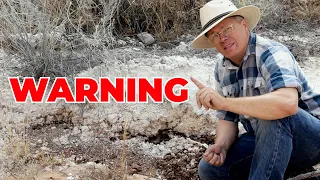
Some of these pots here have handles. Normally you do that rivet that I do. the rivet on some of the i's, if they're on the edge, I sure rivet the edge and sometimes on the corrugated ones, I rivet them like a little canteen that you can't reach when you put the handles or the little dowels on just me make sure you stir that clay into the wall you can't just rub it on there and expect it to stay well modern ceramic you know they can put slip stick it on there and it will hold because they glaze it and they actually rely on the glaze to hold it together but with these things you really have to mix it very well, so I understand that this is quite localized in elden pueblo in walnut. canyon go here straight cross straight cross half half half and half so those are my mark points so this is where I put a design on it so I made a dent there go to the next one put a dip there you bought something that was left in the city there, there, there, there and there, so I've got nice space marks, so it's a pinch on that mark, so I'll come backwhere I left my coils.
I put this coil in when it passes that mark. I go two one. two flat coils one two I went for a little walk with David Holiday this morning it was quite difficult for me to keep up with him. I told him this is really making me angry, David, because you're older than me. Oh, he was turkey hunting and he was walking up and down the creek. You found it? Did you find a hand? kind of a shell and then two three triangles over the whole pot, that's where I started basically living in a country where you knew there were town houses everywhere and I was looking at fragments and wondering if you knew that I lived in a city where basically built over a village settlement and our pie settlement and you know, it was probably occupied for seven eight thousand years, so I liked a lot of history there, we used to find arrowheads in the ditches here. and ceramic pieces and it was always an interest of mine to replicate it, um, but you know, I started with oxidizing, that was my problem, I didn't really understand reduction, I did it, but I didn't understand how to do it in a primitive type. from the oven or things like that, so that slowly came up, well, it's good that we finished this because it's drying out, yeah, the old sun is really taking its toll a lot of times, I'll just come back. and I'll look at the profile, aha, push it in, pull it too far in, okay, I'm going to push it in a little bit.
I have this lump here. The interesting thing about corrugated cardboard is that some of these larger ones were handled a lot and during the manufacturing processes sometimes this bottom part is erased, yes, and polished. This one hasn't done much because it dried so quickly, so I hope you enjoyed learning from and about John Olson if you want to learn more. from John, he
teaches
workshops and I'll put a link where you can learn about that on the doobly-doo. If you want to see another video where I'm interviewing a legend in ceramics replication, check this one out here, thanks. for looking I will see you next timeIf you have any copyright issue, please Contact