Is Upgrading Your Car Speakers ACTUALLY Worth It?
Jun 02, 2021- Do you like to play in
your
car butyour
speakers
sound like they are underwater? (upbeat, distorted music) ('Pop Up Up And Down') The Miata only has two smallspeakers
in the doors and no roof. I can't hear the music. So today we're installing a set of six JL Audio speakers and amplifier. Then I can finally start listening to the music. We'll talk about how to choose a set of speakers and how to match an amplifier to them. And finally, of course, how to install them. We'll see if all the time, money and effort involved isworth
it.
I have a feeling that will be the case. I'm Zach and this is Money Pit, it's time to listen to the music! (upbeat music) (thunder) - Thanks to Omaze for sponsoring today's video. All my life I have been searching for the ultimate all-rounder. That's why Omaze brought me here, to James's private island off the coast of Costa Rica. Rumor has it they have the ultimate all-rounder you can win. (car engine revving) - What did I say? I told you we had a TRX. (high intensity music) - One of you has a chance to win this Ram 1500 TRX.

More Interesting Facts About,
is upgrading your car speakers actually worth it...
Tax and shipping included, plus $20,000 cash. As a professional off-roader, this is the king of performance trucks. This Ram 1500 TRX has underbody protection, a reinforced frame, and 35-inch tires that let you roll on anything you want. And it's not just the exterior that impresses. Pop the hood and you'll get a 702-horsepower supercharged V8 that takes you from 0 to 60 in 3.7 seconds. (car engine revving) Best of all, every donation helps support Team Rubicon. A nonprofit organization that uses the skills and experiences of military veterans to help people prepare for, respond to, and recover from disasters. So for your chance to win this Ram 1500 TRX, visit omaze.com/donutmedia.

If you use the promo code RAM150 you will get an additional 150 tickets. That's omaze.com/donutmedia. Good luck. - Okay, now, before we install new speakers in this thing, whether we want to or not, let's take out the old decibell meter and see how loud the speaker system is now. So we can see how much we've improved in terms of volume at the end of this. (inhale) For that, there's only one song we can legally use. (upbeat, distorted music) ('Pop Up Up And Down') Alright, with my phone's volume at maximum and the head unit's volume at 25, we peaked at 87.8 decibels.

Now I'm going to turn it up and do it again, uh, but I just want to get this at medium volume and maximum volume. So, let's turn up the volume. (upbeat, distorted music) ('Pop Up Up And Down') Well, not only is it not very loud, but it sounds terrible. Oh, that was horrible. Honestly, even if these things don't get any louder if they just sound better it would be a win. But I think we can handle both. They will sound much better and clearer with better bass reproduction, and they will be much louder than that. So (laughs) we can only go up from here.
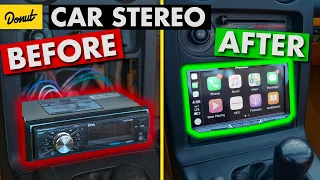
And finally we will make good use of our main unit. You may remember that a while ago we put this fancy pioneering head unit in this Miata. But the fact is that the head units don't generate that much power. They don't drain the power of the door speakers, so if you're just relying on your head unit to power the speakers, you're relying on a pretty weak muscle. That's where an amplifier comes into play. And that should really take these speakers to the next level. It will power them very well and very cleanly. It will sound clear.
The overall sound will sound much better than what this head unit can produce. So I'm excited. I think this will be a huge benefit to the old Miata. So to fulfill my fantasy of listening to music in the Miata, this is what I have. I got the entry level speaker set from JL Audio. These are their C1s in six and a half inches, which is what you need for the Miata. And then I also bought their 400 watt 4 channel amplifier. It will be a good combination with these speakers. And together they should sound great. JL Audio is probably my favorite audio equipment company, so I really hope they don't disappoint me.
Then of course to tie it all together we have our amplifier wiring kit. This is an important part of any amplifier and speaker installation. You should be able to turn on your amplifier, give it a signal from your head unit, and then send the music signal to your speakers. So in total I'm at about $500. You can do this for a lot cheaper, but I hope this sounds really good. And honestly, being able to listen to music would be great in the Miata. Installing a stereo is really easy and pretty standard. It's the same no matter what amp you have, what speakers you have, or what wiring kit you have.
So everything we do here today you'll be able to use no matter what kind of amp you have or speakers, etc., because it's all pretty easy. Now before I take anything out of the car, the first thing I want to do is decide where I'm going to mount my new amplifier. And then that will guide me through the entire installation process in terms of where I need to route the cables and where things need to go. So, it should make things go a little better as long as I have that light guiding me as to where everything is going to go.
Now space is a little tight in the old Miata, so I think we'll have to move to the trunk. Which is quite normal. Well. So I think I'll be able to build this amp correctly. It will be fine, pretty well out of the way. Still leave me whatever space I have in the trunk. I think it'll be cool with the use of some nuts, I'll be able to put some threads in here and just bolt this puppy right to that bulkhead. So this is where the amplifiers will go. So now, as I work from now on, I'm going to run all my wiring up to this place.
The battery is about a foot and a half from where I'm mounting my amps. So, that makes things pretty easy. Now let's take out those old speakers. Well. Here's our old speaker, an Alpine Type-E. And these are decent speakers, even if this one is a little worn out. But we're replacing it with something a little better. These speaker wires then run through the cabin and back behind the head unit. But our speaker signal will now come from the amplifier, not the head unit. We would then have to cross these cables behind the head unit and then connect them to the trunk.
Which would maybe save a little time. But then we're using this old, tatty, potentially corroded cable that's been here since '94. So we're going to completely rewire the speaker cable, which takes a little time, but it's
worth
it. It will give you the best results. (low-tempo jazz music) Therefore, you want to get an oxygen-free copper wiring kit that is best for transmitting signals without any loss. But you should also make sure it comes with a speaker cable if you're going to need a speaker cable. And you'll usually need at least one speaker cable. Otherwise we have our remote power cable.This will go from the head unit to tell the amplifier to turn on when you turn the key on in the car. And these are our RCAs and this is what will take the music signal from the head unit and send it back to the amplifier. These will connect together from the head unit to the amplifier. This will go from the amplifier to the speakers. This will go from the battery to the amplifier. And then there's our ground wire, which will go from the amplifier to the chassis. So, these are all the things we will need to do to get our new amplifier up and running.
Honestly, it's pretty easy and pretty standard. This is what is needed to install any amplifier. And it's not that complicated. Uh...maybe a little scary because the wiring is a little weird. But it's not a big deal. I promise. That being said, it's time to cut some speaker wire. Well. So basically I'm going to simulate this down to the area where we know we're going to install our amplifier. And uh, I'll leave them a little longer than I need and trim them to size once everything is in place. But you obviously don't want to come up too short.
You should always plan for the zigzags you will have to take when you finally install the cable. So we'll have to go up and in a little bit and we'll go through the little eyelet on the door and then we'll go into the door. So this is a little longer than I'm going to need, but I'll leave that length there and trim it later. Very cool. Now I'm going to cut the speaker wire on the amp end and do the same on the other side. (upbeat music) - Well, that's really all the cable we have. So I'm not even going to trim that down for now.
It's a couple of feet too long, but that's okay. So now I'm going to remove this door panel, take out this speaker, and run the speaker wire through both doors to prepare for our new speakers. (upbeat music) So now I just cut those wires and the ends are kind of exposed. Now it's just speaker cables, so it's really no big deal. But it's good practice, you know, when you do any type of wiring or cutting wires, to not leave any exposed copper that could touch other wires or touch the ground. And sometimes it's a little tricky to cover things like that up in a way that doesn't look terrible.
And for that, I have one of my favorite things to wire. It's liquid electrical tape. I'm going to apply a little bit of this to the ends of the wires that I cut, just to seal them, just because it's good practice. Well. Now it's time for, I guess, what will probably be my least favorite part of this. It's never really that easy. And for such a silly thing, it can be frustrating. And that's simply running the speaker wire from the cabin to the door. It means we have to go through this little eyelet and the inside of it is quite obstructed by the board.
I have no intention of taking out the board today. What I'm going to try to do is run a welding rod through this eyelet, from the inside of the door to the inside of the cabin, and then hook the speaker wire to that welding rod and then run it through the door. . That's our speaker wire through the grommet. Now we just have to do the same thing here. (upbeat music) Very good. Now we're basically ready for some new speakers. But before attacking them, let's look at them and talk about them. Alright. Like I said, we have this pair of component speakers from JL Audio in a six and a half inch size to put in the Miata.
But how did I get to these? And then how do you choose an amplifier to go with them? Well, the truth is that when it comes to buying speakers, you can spend as little money as you want and as much money as you want. And anything in between. There are cheap things, there are super expensive things, and there are things that fall somewhere in between. And these fall somewhere in between at $120 a pair. Obviously, it's great to check reviews to determine whether the speakers you're looking at
actually
sound good or not. But for the most part, most aftermarket speaker companies are capable of making a great-sounding speaker.So a lot of this really comes down to personal preference and how much you want to spend. But then the question is, once you've chosen a speaker you like and can afford, well, how do you choose an amplifier to go with it? It seems a little confusing. And as if there could be math involved. But in reality it is usually not that complicated. In fact, all you have to do is check the description on the website you're viewing them on or, if you have access to the boxes, take a look at them. So let's look at this chart right now and see if these speakers match my amp.
So in the specs here, we have our continuous power handling at 50 watts and then the recommended amperage rating. Which says 10 to 75 watts per channel RMS. So that's what we're looking for. An amplifier that can deliver 10 to 75 watts per channel RMS into 4 ohms. These speakers are 4 ohm speakers. So the resistance in your circuit will dictate how much power is drawn from the amplifier. Then you need to make sure your ohms match what we're
actually
playing. Uh, so let's check our amplifier and see how it matches. Here we have our power ratings: 400-watt, 4-channel Class D amplifier. It says 100 watts into four channels, but that's at 2 ohms, we're rocking at 4 ohms.At 4 ohms, 75 watts per channel. So you can see it's a perfect match for these speakers at the upper limit of their power handling capabilities. Meaning they will be as loud as designed and should sound clear and crisp. And I also think it's pretty obvious that, you know, companies like JL build their amplifiers to match the speakers they make. So, there's no secret there. If you mix your equipment between the same company and the same manufacturer, there will usually be a wide choice of things that will work well together. Like what we have here, with our speakers and amplifier.
Now that we know we have a good combination, it's time to place them. Okay, with the speaker wires connected to the doors, now it's time to attach some terminals to the ends ofthese cables. I have these little brass Johnnys here. I'm going to crimp a couple of different sized female connectors to match the speaker to my cable with some heat shrink. And then it's time to put on the real speaker. (upbeat music) Alright, our two speakers are in the doors and fully connected. Ready to replace the door panels. But before we do that kind of thing, we'll continue wiring.
Now it's time to take out the main unit. So on the back of the head unit, there are generally two things you need to do. You should install your RCA cables in one of these locations. We'll talk a little more about that in a second. And you need to connect the remote signal cable. That is the wire that takes 12 volts from your head unit when it turns on. When you turn the key on, it takes 12 volts from here and shoots it back to the amp to tell it to turn on. Because the amp will always have its big, thick cables to the battery and chassis always on.
But you don't want it to be always on. You want it to turn on with the ignition. That's what the remote cable does. Now, the head unit harness is pretty standardized. Your remote control cable will always be blue. Now there may be a couple of blue wires and you may be confused so you can easily test with a multimeter connected to DC volts and you can check with the key off and then with the key on. With the key off we want 0 volts, with the key on we want 12. So we'll do the second half. There's my remote cable, I think.
And we tested it with the old voltmeter. So we have a whopping 10.8 volts. Turn off the key and you will see that it drops to 0 volts. This is a quick and easy way to check the remote cable. The only thing left to do is the RCAs up here. You have your subwoofer outside. You've got your rear speakers, your front speakers, some video stuff like a reversing camera. Hey, obviously we're going to go ahead and connect the left and right front RCAs. And it's as easy as that. So I'm going to run the wires from the trunk up here under the carpet and all the way to the back of the head unit area.
Many times when you're doing a stereo setup like this and you're running your RCAs, you'll also be running the main power cable from the engine bay to the amp. And if you're doing that, it's a good idea not to connect your RCAs with your big, thick power cable, or else the amount of power the amplifier draws can interfere with the audio signal and your RCAs and you can get a sound disgusting. uh- signal. Therefore, always separate the RCA and power cable. But this little, this little remote cable will be fine. (upbeat music) 'Kay. That's back. Now it's time to mess around a little in the trunk.
Alright, to make this a little easier, I'm just going to transfer the pattern of these four mounting holes on the amplifier onto this cardboard. And then I can do a much better job holding the cardboard in place or I can even tape it to transfer the location of the holes. 'Okay, now we'll put that in its place. That's much easier. (upbeat music) Alright, to put some threads in the holes we just marked, we're going to drill and install these nuts. And we've used these on the show before, and we'll use them on the show again, because they're great.
I'm going for an M4 size in terms of the hardware we'll ultimately use. But for now, I need to drill a hole that this puppy's body will barely slide through. And then I can warp it into place and then it will be locked there forever, giving me some threads to mount my amp. (upbeat music) Alright, the amp is (hits) mounted. And it doesn't seem so bad if I do say so myself. So now we can go ahead and connect our RCAs and our remote cable to the amplifier. Uh, we can also connect our speaker cables to the amplifier.
And then all we have to do is bring our big terrain and our big power to the amplifier. And this thing should be making some music. I'm also going to clean up what I have here. Uh... this has been a disaster forever. And I don't like it. Uh, not to mention that the factory ground on the battery is the smallest little thing ever. You know, we're adding things that will generate more power and tax the entire electrical system more. So I want to clean this up, add a fattier soil and make it a little more usable. (upbeat music) Ten cuts.
Good for more than ten. (upbeat music) Okay. So I'm about to crimp this big, thick ring terminal onto our factory positive wires here, so it can go under our new battery terminal. Now these are big, bad things, and they are difficult to crimp unless you have hydraulic crimpers. I'll show you what a nice crimp we have. (upbeat music) 'Kay. That is very well loaded. Let's connect our cables. (upbeat music) (Zack screams) (laughs) I knew I was going to do that at some point. (upbeat music) Very good. In this way our terrain is effectively reinforced. Uh, I reinforced the cable that goes from the battery to the chassis.
And then I added another cable that goes from the chassis here to the chassis down here, where it's a little more solid. So our ground is settled. Now it's time to start wiring the amplifier. I'm going to run the power from the amplifier through here to where the junction will be. And then I'm going to round the amp to somewhere nice in that chassis. You know, with all these loose copper strands, it can fray and bend and end up, you know, with a stray wire potentially touching the ground terminal. What we can do to avoid this is use what is called a wire ferrule and it just slides over the tip and groups them all into one.
And they are just thin tins, so you can crimp them into place. That makes getting in and out much easier for the amp. You don't fray the cable and it looks good too. (upbeat music) So ultimately I can trim a little more of that power cord just to improve my fit a little bit, but with any of these things leave it a long time until you know you're ready to trim. So I'll leave this a little long. Maybe I'll clean it up later. Also maybe not. Uh-so, let's move on. (upbeat music) Okay, so the power and ground are connected to the amplifier.
Now I'm going to go ahead and connect the remote control cable and the speaker cables and that will complete everything we need to do on this side of the amplifier. (upbeat music) And with that, this amp should work. So in an amplifier, you will have control over how much power it actually uses. You can use an amplifier that is too big on speakers that are too small. All you have to do is turn down the volume of the amplifier. So, with that being said, we have control over the volume of our music at different volumes with the use of an amplifier.
Because I can turn it up and down. So the fact is that our volume at 25 and max is up to me and is ultimately limited by the power of the amplifier. Now let's play this at 25 and then at maximum volume and see what kind of decibels we get. I'm sure we've improved some ('Pop Up Up And Down') Okay. So the first time we had 87.8 decibels at 25 clicks per volume. Now we have 97 decibels. Heck, that's almost 10 decibels increase, not bad. Now let's see how it sounds at full volume. And now keep in mind that the only advantage here is not just the decibels.
It's also the clarity in how it sounds. If you remember the first time at maximum volume. (upbeat, distorted music) ('Pop Up Up And Down') I couldn't really imagine anything that sounded worse. It sounded horrible. So, hopefully, here at maximum volume, it will be louder and much clearer, much crisper and much more listenable. Know? Let's find out. ('Pop Up Up And Down') Alright, we're up to 104.8 decibels and that's an increase of about 5 decibels. I think there were just over a hundred of us, the first time. And things sound much better. Now you may or may not realize that it's a little difficult to tell these kinds of things through video and then through speakers.
But these speakers are still tasked with some low notes, especially in this bop of a song. There are some low notes that these speakers are simply not equipped to handle. They are not big enough. They are not woofers. This... these are not subwoofers. So to make these things sound a little better, what I can do with the amplifier, one of the freedoms it gives you is I can use what's called a high-pass or low-pass filter. And in this case, I want to block out some of those low frequencies that can only really be reproduced with a proper subwoofer.
So by blocking out some of those lower frequencies, I can make sure that these speakers focus on the noises and frequencies that they are capable of reaching and then they will sound their best. This is another reason why it's worth doing a custom setup like this. Because you end up having a lot of control at your fingertips. You can raise and lower the power. You can add speakers, you can add a subwoofer. If maybe you want to play those low frequencies. So, I think this mod is worth doing. It is not so difficult. It's something fun.
It is a very good way to delve into the electrical topic in general. And in the end, you come out with some skills and you can listen to music and it finally sounds good. And in my opinion, that is one of the most important things in life. So, I hope you learned a few things from watching this video. I hope you had a good time. Uh, I sure had a great time. And now I have a Miata that makes real music. So if you had a good time and learned things like this video, subscribe to the channel, follow me on Instagram @zachjobe.
Follow Donut @donutmedia. And I'll see you cool cats next Wednesday. For now, I have to put a Miata back together.
If you have any copyright issue, please Contact