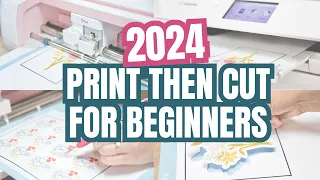
Infusible Ink Mugs with the Cricut Mug Press - Layering, Full Wrap, and More
Jun 06, 2021Hello and welcome, I'm Angie Holden and I blog at Country Chic Cottage. Today we are going to talk
more
about the qriket mugpress
, so a couple of days ago I introduced you to the mugpress
, we took a tour and saw how it worked. We made a mug today, we're going to talk about designingmugs
and making several different versions ofmugs
using qriketinfusible
ink, qriket pens and fuse ink in a variety of different shapes. Now this video is sponsored by qriket. Like all projects and opinions. They are mine, this is the qriket mug press, if you missed my first video, I am going to link it in the description below in that video, you can see all the details of the machine, if you are curious, I will also use mug blanks from Cricut today to make a small one on top of the big one.
In that previous video, I went over the sizes, mug dimensions, and the different quantities of boxes you can get if you're curious about the ones on the back. to that video so what we're going to do today is make a variety of different mugs so we're going to talk about how to make
full
wrap
mugs. We're the only blanks under the handle we're going to talk about. justinfusible
ink designs that are on one or both sides and then we'll talk about designs that you can draw with your pen and color with other infusible ink markers and the first thing we need to do is talk about all the supplies that you have.
More Interesting Facts About,
infusible ink mugs with the cricut mug press layering full wrap and more...
We'll need to do the projects we're going to do today, so let's turn the camera around and look at all the supplies in detail first, let's take a look at the materials you'll need for your qriket mug press of course, then you'll need infusible ink transfer sheets or pins or markers for transfer sheets. You can use the regular
full
size sheets. You can use sheets that were designed for the Cricut Joy, but now you'll also find some that are marked for qriket. mug press these are sized specifically to have the least waste when making the fullwrap
designs so you might want to look for them in the store as far as pins or markers you could use use any pen any marker , even freehand markers if you want.
If you want to color or draw a little, you'll need copy paper and butcher paper. If you're going to use pens and markers, you'll definitely need a lint roller and heat-resistant tape. I recommend a brayer especially for the transfer. sheets and then you may need a set of tweezers to remove the transfer sheets. Now let's look at the mugs as for the mug blanks, you can get 12 ounce mugs or 15 ounce mugs. These are the two packages, but there are other package sizes like Well, you can see the size difference between the 12 ounces and the 15 ounces. The other difference is that the 15 ounce ones come with a gift box for each mug inside the package, so if you give them as a gift or sell them, you might want to consider the 15 ounce size to get that extra box inside as well. that this is a two pack, there are two mugs and two gift boxes inside so they are a specific size to work in the qriket mug press, so both sizes will work in the press and i.

I talked a little
more
about cup sizes in my first video, so you'll want to go back there and watch it for more details on bug sizes, so now let's take a look in the qriket design space to design a surround design complete and then We'll cut and make one now that we have all those supplies, let's go to the qriket design space and see how easy it is to design that mug that way, you'll know when you want to make that full wrap design, how you do it and All the steps What you must follow to do it well.I'll leave a link below for this mug design setup project in qriket design space. This makes making a full wrap mug super easy. The first thing you want to do in this project window. Before you do anything, choose the type of mug you are going to make, so again there are large and small mugs, so the 12 ounce ones are 15 ounce ones and then the rim design is up to you, so which have straight edges, torn edges and scalloped edge. wavy edge and zigzag edge, so I'm going to pick one of each and add them to my canvas so you can see the differences between them, but let's go ahead and keep scrolling so I can tell you the materials you're going to use. to cut out everything else you'll need as well as a full set of instructions right on this page so if perhaps you're having a hard time with how to make your mug then I would just reference this page one more time for now I'm going to add all the mug designs on my canvas and then we'll come back and take a look at them once you choose the mug you want you'll just click customize to add it to your canvas.
You can see this is a ruler and it comes with a cape to show you the placement of the cape for your cut as well as a cape for the wrapper itself and we'll go over what each of those are so first of all here's a look at the packaging of the small cup next to the large one. Mug wrap so you can see the size difference between those two. There and here are your five different edge treatments, so we have straight, torn, wavy and zigzag scallop, and again you can choose those on that first screen and it will add the one you want. your canvas now let's take a look at the design with these templates so here is the small wrapper with the scalloped edge and we are going to design a mug with this so first of all let's find an image to cut out of our mug wrapper so I'm I'm going to use this image of mom and insert it, so let's talk about the template itself, this red area, as you can see, is called hide this layer before cutting, so we'll hide it later, what it's meant to do is help you to position your cut so that this is one side in the middle and you can see the handle on the left, this is the center of the mug, if the handle was towards the back and if the handles are on the right, this line indicates the center of the mug so we can resize these letters to fit however we wanted so we could go around the entire mug like this, we could do it on one side, we could place it in the center so wherever you wanted you could place it in that location, so I took the letters, I made three different cuts on them and now I can put them vertically on the mug, in the center of the front, what I would call the front of the bag and in the center of the back, so I'm going to choose the three letters and I'm going to align them and center them horizontally so they're all centered up and I'm going to group them so they stay together like this and then I can center them on the cup so it's clear. as far as it looks pretty good to me and I want the same design on the front and the back, so I'm going to duplicate it and add it to this other side once again, we can choose both groups and we can align them and we can center them vertically so that they have the same height top and bottom also on the right and then first we need to hide this, remember, so let's click on the eye in the layers panel and now that layer is hidden and now we want to attach these letters to the scalloped part or cut them any way you want, so I'm going to choose all the letters and click attach, so now all my letters will be cut from that scalloped version.
Now you can notice that there is a cut here and a cut here, so let's move this cut so you can see that this cut is going to go through your transfer paper, so we'll see how that works in a minute when we go to cut, but this cut is very important and you don't really want to move it like that, so I'm going to hit undo. I just wanted to show you what it looks like, so it should look like this when it goes to your machine, etc. I'm going to choose everything and click attach now, if I click make it everything is together it looks just perfect, so now we can click continue and cut out our design.
You can even use this template to size your designs, even if you're not going to do so. wrap around the entire mug so this green square represents the area you can press on because you want the design to be a half inch from your handle on both sides so you want to keep your design within this area so even if you just If I were to put this design on the coffee mug, I could use the stencil to size my design and get it right, have two of them and then I could just remove the stencil part and have two designs cut out.
Now probably to save ink I would just put them together, let the
cricut
cut as you would and don't separate them. Using the template can make it easier to visualize your design on the mug. Now when we click on Create, we will also need to mirror our design because it is infusible ink transfer sheets and then we can click continue, select feasible ink transfer sheets from the drop down menu and continue with our cutting now that we have our design, It's time to get out our qriket machine and our invisible ink transfer sheets and cut out our design now.I'm going to use the qriket mug press version for this full wrap design so there is minimal waste with my invisible ink sheets, so let's head over to our
cricut
machine and start cutting. We are going to use this box of infusible ink transfer sheets again. It says qriket cup press directly into the box and each of these boxes comes with two sheets that are a specific size of four and a half inches by 12 inches and what we want to do is place this sheet with the ink side up on the mat, so So go back inside below now, if you've used infusible ink before, you might be thinking that there's something different about this product, which is why invisible ink used to have a grid that looks like this.If you have older versions of infusible ink it would look like this, but they have recently redesigned it so that there are no grid lines on the backing paper, so there is nothing wrong with that, it just has a different look than invisible ink , so we'll use this for the small cup, so we'll cut out the inside. here, if you're using it for the larger mug, it's going to be very close to these edges, so you have to be very careful when placing it on the mat so that it crosses the lines at the top and bottom and then what I recommend. is that you just run your brayer over this just to make sure it's stuck to the mat.
Now we can open our qriket machine. Infusible Ink Transfer Sheets are now cut with any other Cricut machine. I'm using my Cricut Explorer today. but you can use any of those and for any of the machines you'll want to use the infusible ink transfer sheet settings which means in Cricut Explorer I'm going to change my dial to custom and from qriket design space when it tells me to . I'm going to choose a confusing ink transfer sheet for my material. I'm just using my fine point blade on my Cricut machine. You'll want to make sure to mirror your cut when cutting infusible ink.
That's because we're going to put. Flip it over and place it in our mug to make sure it reflects the design and then once you've chosen your infusible ink transfer sheet, your button will start flashing and you can load your mate and then we'll just press c. To cut the cricut all the inner details were cut out and now surround this outer edge. What happens is that it actually goes around that outer edge twice, so don't panic, it's intentional and I'll show you why as soon as it's done. Cutting is now making that nice scalloped edge that we put on the side of our mug and now it's finished cutting because the button is flashing so we can remove it from the machine.
Now let's take a closer look at this and what happened when you did that. double cut so first let's flip this over and we'll remove it from our mat so we can start by removing these internal pieces and the best way to do that is to fold and crack the infusible ink so that those internal pieces loosen up and With designs like these, a lot of times I have to stop and think about what I want to eliminate. You may want to do this before you start removing it and I like to break it in both directions.
Now what's going to happen is you remember that. Double cut around the outside edge, this outside edge is going to break because we want to be left with just the piece that will go into our mug, this helps remove any excess so we don't have all of that hanging out. the top and bottom of the cup, so now we have that outer piece and we can throw it away so now you can see how much kind of waste I have. The only other scrap I'm going to have is for my scalloped edges and for that we're just going to peel that top layer back and we're going to leave this sticky portion, so we're going to break it, peel that back, crack this side, peel that back.
I also want to talk about the color difference, so we'll look at these colors on the back. box once we press this infusible ink when the infusible ink comes out of the box the colors will always be less vibrant so don't worry but it will look like thiswhen you're done pressing so it's best to remove the infusible ink with your hands if you can you want your hands to be clean and dry so you don't want them like you don't want oils on your fingers you don't want them to be wet you don't want them to be dirty and The name of the game is patience when removing fuse ink, so just slowly fold and crack as you go if necessary and then peel off only the pieces you don't want on your mug, so in this case it's my mother. here at the top, but I want all these little inner vines and leaves, so I'm going to work on leaving them on my transfer sheet, so we're going to leave those little bits on our transfer sheet while we read this invisible ink.
Okay, I'm done removing my infusible ink, so I want to say this is a pretty complicated design. I enjoy weaning off infusible ink. I just take my time and use a pair of tweezers to get all those little bits if you want. If you don't like the weeding and ink work, you can just put the letters on, you can use the outline feature to take out some of the small pieces and leave some so you can customize this project to be however you want and however complicated you want it to be. , so I just wanted to point out that next we're going to get rid of all of these little pieces so we can put them on our mug and then we want to add the design to the mug itself, so you're going to need the mug itself, you're going to need some strong tape to the heat and you will need a lint roller, so with the lint roller you will be I'm going to clean the mug real good and I'm actually going to get a new piece, the top one was a little dirty, so we're going to clean this real, very well, so the better you clean it, the more success you will have.
Infusible ink, any residue in the mud can affect your transfer, so it can keep the transfer sheet off your mug. If there are small pieces of infusible ink, you will have them where you don't want them, so let's clean them up. Also, now we can remember that we have this sheet completely cut out. These tabs will go under the handle of our mug and we'll just wrap it around so that what you want is about a half inch from the handle on both. The sides should be completely free of infusible ink, so these scalloped edges should be half an inch from the handle on both sides now if you place the mug on the table like I did and if we look down at it to get the mug. as straight as possible, put the handle as straight as possible, run it over this one more time since I touched the cup, you can place the infusible ink sheet on the table, so now everything is on the table and as let's move it, it will be flush with the bottom and then we just want to look and make sure that our design is centered, so that they are the same distance apart, that scalloped edge is the same distance on the side, if not That's right, we'll just turn it slightly and try to close. again, so once it's the same distance, we're just going to squeeze it as hard as we can.
We'll use the adhesion of the transfer sheet to stick it to the mug under this handle. take it out on this side again, stick it in and we'll make sure it's all the way down, so it should be all the way down in the cup and it'll stick out slightly at the top. What you need to do is use some masking tape to make sure everything stays secure. This is a heat resistant tape. Remember we only want a few small pieces. We'll use a couple of small pieces under this handle to make sure nothing moves. I don't like it in my design or as little as possible, so I'm just putting it right on those pieces of transfer tape and then we want to look around and look for any loose areas and fasten them so they're loose here where it joins our mug.
You just want to get that in as much as possible so it's super tight, so I shot my mug up so it could warm up while I did this. I ended up taping around this bottom part, so I basically didn't want this. transfer sheet to hang while I put it in my mug press and for me I prefer everything to be very nice down along these edges and along the edges around the handle, the top I feel like it's tight enough so that I'm fine there. I taped the top of both edges here, so now we're ready to press.
The mug press gets hot so I have my easy press mat here so when my mug is ready I have something heat resistant to place it on. on the cup, press it's ready because the button is green and it rang when it was ready for me and I'm going to place the cup with the top facing up so the bottom comes down and we want to center it within this space as much as possible. It's possible, so I'm going to slide it in and remember that the handle is cold and the plastic of the cup press is cool to the touch.
The only part that is hot is the green part that you see inside and that you don't want to touch. that so we're just going to drop our cup all the way to the bottom and then we're going to close it carefully watching the cup to make sure it stays in the center and you can adjust slightly as you go and then once you close this lid it starts to press but I want to look from above and I want to make sure the cup is in the center and I don't like it exactly so I just want to move it a little bit now I feel like it's exactly in the center so I'm going to let the countdown start , so what's going to happen is these lights on the top are going to light up completely as you press, so you'll notice there's no time or temperature on the cup. press, that's because it's optimized for sublimation or infusible ink.
You'll also notice that I didn't have to put butcher paper in there, the carrier sheet for the infusible ink is enough to protect the mug press, so it will just count and beep when it's done, so this may take about six minutes. I will say it will depend on your room temperature, outside temperature, humidity, that kind of thing, it's optimized for pressing cups, so it'll just sit here and do it. It's thing and we're going to wait for it to beep so I'm going to turn the camera back on when it's about to finish because I can tell by these progress indicators when approximately it's going to be ready, when it's ready it's going to beep and then you can remove the cup of the mug, press the handle to make it cool, as long as you only touch the handle and remember that these white parts are cold, then you are fine, so don't touch the mug, take it out and place it on something hot. resistant and let it cool for about 10 to 15 minutes and then we'll come back and see the results.
This first mug is great, so let's take a look at the results, so all you want to do is remove all the tape, your transfer sheet. Alright, now that I've got all my tape up there, let's take a look at this beautiful mug so you can see the color on all sides and I'll go over this right here so you can see a little bit there that's just the transfer sheet and it just stayed there, you can take it off and it looks amazing so this mug looks so good and you can add whatever you want right here so you can add a monogram, an initial, a name, personalize the gift for the recipient. and use your favorite color in fuse ink okay so let's do another full wrap mug this time let's talk about making the bigger size mug so I have a weed one here and we're going to talk about two colors too so the large size and two colors but this is the infusible ink transfer sheet which is for the mug press so I just wanted to peel it off so you can see how close it goes to the edge so it's a super thin scrap piece , That's why you have to be careful. when you put it on your mat because it won't be a ton of scrap at all so I just wanted to point that out but we don't need to remove another one in the video so here's one that's cut now this one's for the big guys. mug so let's talk about making two colors in one mug so I have hearts cut out of this and then these little balloons say best mom in the world and I also cut hearts out of a purple transfer sheet and all I have to do is peel them off . hearts and stick them in the corresponding slot, so I gave them the same size as in this cutout and they will fit perfectly in these slots and now we can press two colors at the same time, so I'm just going to fill all of these hearts with purple and then we'll press our cup to make the cup ready, it can no longer be pressed.
Now let's talk about smaller designs, so these are cut on infusible ink transfer sheets. You can design them however you want in the cricut design space. You don't have to use the stencil, but you can use it to get a size and then just delete the stencil and then all I do is trim the transfer tape pretty close to the design so there isn't a ton extra. So all of this transfer tape is sticky, obviously, and all of that has the potential to pick up lint, some of the extra pieces of infusible ink, things like that because it's sticky and we'll just pick things up, so we'll just trim them off.
That's a little close, but you want enough, of course, to stick it to the cup and hold it down, but if you have some excess, we'll just trim it off and then once you have all those pieces, it's time to add them. to our cup, the first thing we want to do with the cup is find the center, so an easy way to do this is to just use a piece of tape to find the center by looking down on the cup, so I feel like that's about the center and then I'll just wrap them around the sides a little bit, so now when I look from the side I can see a center mark, so to speak, that's not permanent, now we'll want to run the lint roll one more time.
I'm just going to lift the tape up a little bit with the lint roller on the surface, we're only going to do one side at a time, so on the first side I'm just going to use my lint roller to hold it up and we can see the center mark. and now we have our infusible ink and it's already weeded and this one says allergic to mornings and now we can find the center of this, so what I like to do is not fold it, but put the two edges together and then fold order just that sheet of transfer, so now I know that my center is approximately here and I can see the center of my tape and I can center it and then the main thing you want to do is make sure that it's straight and that in the location where you want it to be, up and down you want to make sure it's in the center, all that kind of stuff once you have it in place we're going to start gluing it and I like to start in the center and I push out that way I'm getting all the air bubbles that I can and getting really stuck to the surface and then we want a little bit more heat resistant tape, so anywhere we think it might lift up, you're going to want to put a piece of tape on it, so I would say that especially in the areas where the infusible ink gets too close to the edge go ahead and drop a piece of masking tape there and I would at least put one on all four sides and you may need to put more than that just depending on the design and how close you trimmed the edge sheet, so I think it looks pretty good, maybe one more small piece on this one and we're ready to go to the opposite side, so once again we have This ribbon is still on top, so I just We'll turn around, keep going, and let it roll this way.
I'm going to lift this tape up a little bit. I'm going to wrap the tape on this side. Use the lint roller. to hold this and once again find the center of your design, just fold the adhesive transfer sheet, make sure the center is in the center of your design and something I like to do here is just press it down a little bit, slide this about don Don't leave it so you don't pick up lint and see how far you are from the bottom so you know how far from the bottom the n is so I can turn it over and make sure my n is inside. the approximate correct location and it looks pretty good so now I'm going to make sure everything is straight and then I'm going to repeat the exact same process so press it down and add tape and then I'm going to press this exactly the same way so add it. to the cup, press exactly the same way, press the handle down and wait for that time before you press this thing anymore, this tape on the top, I take it off and use it to tape around this last side that way.
Don't waste it, so don't think at all that you're wasting that tape, just cut it into smaller pieces and use it on the outside, so now I'm going to finish this and press it one more time. You can make two colors even if it's just you know, a design in the center and not the entire wrapper, so to make two colors, I simply cut my words out of two different colors and then cut the backing sheets closed so the words don't left on the support sheet of the other word and then I stuck it very well with adhesive tape and in this case I put a piece oftape it in the center because that's where the two colors meet, so be careful to tape it really, really well and I'm just going to add these to the other side and then press this cup.
My favorite part of the whole process is removing everything and revealing the design, so I left them on with just a little tape so I could peel them off and reveal the gorgeous design on each of these. and here is the full rundown where we did the two different colors you can see those purple hearts on pink and here are the two different colors with just one center design and finally just one center design with one color so now let's try some pens after I graded my design, sent it to my Cricut machine and drew it with a black fine tip infusible ink pen and then I have some more pins here to color it in now that I drew this, remember you're going to want to mirror the cut and So I want this to be the best friend mug so you can keep one and give it to your friend.
I'm going to put the best on the front of each of the friends on the back of each one for you to give one as a gift. but it would be a complete cup like the one you keep. I drew this design on regular copy paper. I always make sure the copy paper I use is laser printer friendly and that's the only thing I make sure of. now we want to color this a little bit, add a little bit of color, how much is completely up to you and how you want to color this now, I usually put a spare sheet of paper underneath while I'm coloring just in case of any ink. bleed and then I'm just going to add a little bit of color here and there and as you can see I've got some markers I've got some of the freehand infusible ink pens whatever you have will work for this and I'm I'm going to make that each one of them will be exactly the same, so it will be a mug that you can give to your friend and each one will be exactly the same, so I will continue coloring this and then we will come back. and I'm talking about pressing the pins because there are a few more steps with those here are my colored pieces and I wanted to point out that I didn't intend this to completely wrap the mug so I cut them into pieces and we're going to place each one individually so we're going to place them similar to how we place the last ones with the unique design that you once again want it to be.
Make sure you always roll your mug really, really tightly and then we're going to use our ribbon trick one more time and I'm using a large mug for this design, but it doesn't matter what mug you use for this, so we're going to attach the ribbon. again about in the center and then we'll do each side so this is the side I want to say best so I'll just hold my mug there and then we'll place our design ink ink side down onto the mug and once further. So we can fold our paper a little bit right at the bottom, very high up, so I made a little fold and then I can tell what the center is and actually, I think I want to focus on the word.
Instead, I'm going to go for the center of the best centered tape. I'm going to make sure everything is straight and then we'll just tape it down. I'm going to tape this on all four sides, I'm definitely going to make sure it's tight against the mug and then these larger mugs actually sit pretty tight when you put them in the press, so I'm going to get this bottom all the way so I don't Hang it up while I put it on my press and you might hear my easy press beep. I've got it warming up so we're ready to press as soon as we're done adding this, so I'm just going to put a piece of masking tape on top so one side is ready and then we'll continue. to flip over and do the opposite side now since it's been against the table I just like to let it roll one more time just to make sure everything is out of there and on this side I mean folks and once again I think I'm going to use the word as my center, however, we want to make sure it's the same amount from the bottom, so we'll focus on that word, place it in roughly the same place and then I'll just use a piece of tape to hold it down. , we're going to run this piece of tape over the top and use it, so once again I'm going to tighten it as much as possible with these first two pieces.
We want to make sure we cover this bottom completely now for the pins. your ink will bleed through this copy paper if you were to just put it in the mug press and you don't want any ink left in the mug press, so we're going to put four sheets of butcher paper down and I'll have them cut so that If you leave them hanging, they'll almost burn, so I like to cut them to size and actually cut them a little bit longer, so I'll trim them just a little bit and you probably won't be able to do it. reuse them so the ink will smear on all four sheets so keep in mind that you'll need four new sheets for each mug you make with the pens we'll just tape them down really well and once again.
Like these large mugs, the bottom can hang on you because it's tight going into the press, so I'm just going to run a little bit of tape over here, which isn't completely necessary, especially on the smaller mugs, you can just put a piece of tape to hold. down and you might be okay because I'm going to put like a piece of tape on the top here on the top so there's our mug ready for our mug press so here's our mug press all heated up . Ready to go, we're going to drop the cup and I want you to notice how tight it is, you think it's going to hit, but if you just put it in from the side, push it all the way to the side. and then put it on the other side it slides in like it fits perfectly with the larger cups and again you want to make sure it's centered when you close it if not just adjust the placement a little bit now these cups of course . they are larger so they don't close as much we just push that handle down to make sure everything is centered once again it will start counting down with the LED lights as soon as you close it and we're just going to wait for it to close complete our mug here are the best friends mugs and they are no longer printed.
I let them cool. You can see that the ink has seeped through and gotten onto my butcher paper, so I thought I'd peel them off again on camera. So you can see that the brown paper actually gets stained with ink. Maybe the top sheet doesn't have it, but basically you're going to have to throw it away and then we'll peel one of these off and look at the design, you can see those colors really pop after you press them, so I'm going to unwrap both of them, then we'll close this up and talk on the press and there are your best friends, so many cups in such a short time.
So, from full wrap mugs to full wrap mugs with two different, impossible to use ink colors, to mugs with infusible ink transfer sheets with just the design on the front and back, we made those with two colors and also with unique colors and then of course we did it. a couple with pins and markers showing how versatile the Cricut Mug Press is now some safety things we talked about and it's cool to the touch on the outside. You should use it in a well-ventilated area whenever you use infusible ink. So I always open the window in my craft space while using a machine like this and I also want to talk about it has an auto shut off feature so if you ever have it on, forget about turning it off and it will start. first it will beep at you and then it will just turn off so I wanted to point out that because I didn't do that I don't think I did that at the beginning of the video if you need more information about the mug press the head for our first video now you know how make all mugs with infusible ink.
If you have any questions about anything we've covered, ask them in the comments section below. If you like this video. If you learned something new, give it a thumbs up and then you might want to subscribe to our YouTube channel because I have more mug press videos planned. Let's try this with sublimation. We will compare it to different ways of making mugs. Let's try these cups. infusible ink in the dishwasher and tests that claim they are dishwasher and microwave safe, so let's test those claims and also see if I can find other things that will fit in this mug press besides the qriket blanks. so you don't want to miss any of those videos so make sure you subscribe because I have a lot more to do with the smug press over the next few weeks if you have anything you want to watch over the next few weeks like you do.
If you have questions about the mug press itself or what it can do, is it possible to do this or that? Leave them in the comments section below and maybe I can include them in a video in the future, so I hope this helped you understand a little more. about the cricut mug press and all the options you can make with infusible ink. I hope you enjoyed this video and see you next week, thank you all, bye.
If you have any copyright issue, please Contact