How To Use Photo Editing Apps To Turn Ordinary iPhone Photos Into Beautiful Masterpieces
Jun 07, 2021Hello, my name is Emil Parus, I am the founder of iPhone Photography School and in this video I will show you how you can
turn
an average iPhonephoto
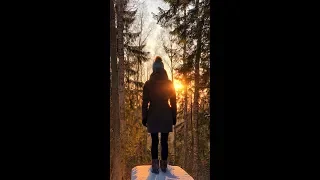
into a great masterpiece, so we will take thisordinary
iPhonephoto
. you can see on the left side of the screen and we are going to transfer this photo to this edited version which looks much better and this edited photo also performed exceptionally well on Instagram where it received almost 2000 likes. Now I want you to know that I wasn't always the guy teaching thousands of people how to take amazing iPhonephotos
and I didn't always have the biggest iPhone photography website on the internet and, truth be told, not too long ago I was too struggling to make the right kind of visual impact with my own iPhonephotos
and when I look back at the photos I took at the time, some of them were pretty good, but I still couldn't make the kind of impact with my photography that I wanted to do it, so I knew I was doing something wrong, but I didn't know what it was, but then I discovered that if I really wanted my photos to stand out, I had to improve them through post-processing because that's what the best iPhone photographers do.
In the world they do, but the problem was that I didn't really know what I was supposed to do to improve my photos through
editing
. There are thousands and thousands of photoediting
apps
on the App Store and there are literally countless things you can do with them. theseapps
, but it took me years and years to really figure out how to use them in a way that really improves my photos, so in this short video I'm going to share with you some of the most important and valuable ones. Photo editing techniques I've learned over the years and now you'll discover how you can use exactly these same techniques to greatly improve your own iPhone photos if you really want to get the most out of this photo editing lesson.
More Interesting Facts About,
how to use photo editing apps to turn ordinary iphone photos into beautiful masterpieces...
It's best if you follow the video along with your own iPhone, so right below this video you can download the image that I'm going to work with and you'll see two links for the apps that I'm going to use. take a moment to take out your iPhone, download the image that you will find right below this video and also get two apps, one of them is called Snap seed and the other app is called mirror camera. There are several ways to transfer. this original unedited photo to your iPhone, so if you are watching this video on your computer, you can just click the link below this video and then email this photo to yourself or if you are actually watching this video on your iPhone, what you can do is click on the image link below this video and then the image file will open on your iPhone and then you will need to tap and hold your finger on the image screen until you see save.

The image text appears and if you then press save image, you will save this image to your camera roll on your iPhone, so once you have the image on your iPhone and once you have downloaded the two apps that let's get to work, Then we can start editing this photo, so this edit will consist of three parts and the first part is perspective correction, so if we look at the original unedited photo, you will notice that this photo has some problems of perspective and what I mean by perspective problems is that If you look at the vertical lines in the image, especially if you look at the buildings towards the left side, you will notice that these buildings don't really look straight or natural.

You will notice that the buildings are leaning to the right side. and also the top of the building appears to be narrower than the bottom of the building and of course that is not how these buildings look in real life and our goal with this first part of the edit is to correct that problem as well that once we do perspective correction in snap seed this is what the final result will look like and you will notice that in the final image after the prospective correction we do not have any perspective problem and all the vertical lines are really vertical and the buildings do not narrow . towards the top, but now let's open Snap Seed and start with the perspective correction, so now that I've opened the image that we're going to work with, the first thing I'm going to do is step on the edit icon at the bottom. right corner, from here all kinds of different editing tools appear and the tool that we will use first is called transform, so I will tap on transform and now we are inside the transform module of the Snapseed application.
The way Snapseed works is that if you swipe vertically across the screen you can change different uh settings like vertical perspective, horizontal perspective and rotation, or if you swipe horizontally across the screen you can change the value of any of these settings like me. I'm doing it right now, so with vertical perspective our goal is to make sure that all the vertical lines in the image are actually vertical and that we don't have any perspective problems, so if we play with this tool you'll notice that. that as we move to the next negative side, the perspective problems become less serious and if we go down to -100, the image is almost perfect, you will see that the top of the building is as wide as the bottom of the building, which is what we want and overall the outlook looks much better now, but unfortunately there is still room for improvement.
We could still go below -100 if the app allowed us to and unfortunately it doesn't. No, but there is a quick fix and that is to simply apply the same effect twice, so what I'm going to do now is Ty on the check mark in the bottom right corner which will apply the vertical perspective adjustment to the image and now We're back where we started with the vertical perspective changes applied, so we can just hit the edit icon again, go to transform and do another vertical perspective correction and this time we have to be a little more careful, but if we scale it down a little more.
You'll notice that we can completely eliminate any perspective issues and now the top of the building is as wide as the bottom of the building and overall the lines and image look much more natural, which is what we want. We could still improve this image a little if we also use the rotation tool, so I slide my finger vertically across the screen to open Rotation and from here I'm going to play with the rotation until I find the right value. where all the vertical lines in the image are vertical and all the horizontal lines are horizontal and you have to be very careful with this, but I think something like minus 0.24 or minus 0.26 would be perfect for this image, so you can see it well. so I'm going to go ahead and apply these changes to the image by tapping OK at the bottom right, everything looks great, we've fixed the perspective issues but we've introduced some other issues, so if we zoom in on the right hand side of the screen, you'll notice that here we have some issues on the bottom right, so what happened here is that when we changed the perspective of the image, Snapseed had to fill in some missing information with algorithmically generated pixels and uh as you can see in the right side this doesn't look perfectly natural and if we go all the way to the left we're going to have the same problem here so these pixels were populated with snap seed because there was no information to use it there and unfortunately Snapseed didn't really do a good job in this, so what we can do is just crop these pixels that don't look natural, so to do that I'm going to touch the screen with my finger again to show all the controls from here.
I'm going to tap on the edit icon and select the top, the crop module at the top of the screen and here the first option I have is to choose the aspect ratio for this. I'll crop and this time I'll stick with free and you'll understand why in a moment, but once I've selected the free aspect ratio, all I have to do is tap my finger on the screen to exit and get rid of it. of these controls and now I'm just going to crop all the bad pixels on the right and then I'm going to crop all the bad pixels on the left.
I don't want to crop too much but I just want to make sure that everything that stays inside the frame looks perfectly natural and I think this works so I'm going to apply these changes and now you'll see that both the right side of the damage and the left side of the damage are Perfectly Natural, we fixed all the perspective issues so this is what we started with and once I release my finger, this is the later version and the later version doesn't have any perspective issues so I'm going to go ahead and save. this image by tapping Save at the top of the screen and from here I'll save a copy, which is the option you should always select when saving your edits from Snap Seed and now we're done with the first part of this edit. which was perspective correction, now the second part of this editing process is really interesting because here we are going to add a reflection to this photo and we will do it artificially using photo editing, so here you are right now looking at the image that came out of the instant seat after perspective correction and this is how this image will look once we add a reflection using the reflection app so now I opened the reflection app on my iPhone and the first thing I need to do is touch the larger sign that says New from here.
I'm just going to select the most recent photo, which is the photo that we exported from Snap Seed and at the bottom of the screen it shows the Square option, so I'm going to select that option and this will allow us to work in a square aspect ratio and In a moment you will see why this is going to work very well. If you look at the framing that the app has done automatically, you will notice that. the square crop is applied to this image in a particular way, but what we can do is use two fingers to zoom in and out and I'm going to zoom out so that the bottom of the screen is as empty as possible.
I look at it now and this may seem strange, but once you realize how this app works, it actually makes a lot of sense, so what I'm going to do is just zoom out all the way with two fingers and then I'm going to tap done in the top corner. right and now you will see that something really strange happened and all we see in the Sky image uh what happened here is that the reflection app automatically created a reflection and by default this reflection happens in the middle of the screen , but if I just drag my finger up and down on the screen, you'll see how I can change this reflection and obviously something like this looks a lot more natural, but in terms of selecting the reflection point or the line where the reflection is symmetrical.
You have to be very careful if it's too low you'll notice it doesn't look natural or if it's too high again it doesn't look natural so you have to find the perfect balance here where the coastline looks perfectly natural but I don't want to introduce any artifacts. there that gives away the fact that this reflection was caused by creating using post processing, so I think I found a good balance at the moment, so I'm not going to change it anymore, but what I'm going to do. What I need to do is make some changes to this reflection, so now I'm going to tap on the presets icon in the bottom left corner and from here I can choose from all kinds of different water presets and you'll notice how different you can make the reflection in at the bottom of the screen and here you can select what you think will work best for this particular image and after scrolling through these a little bit, I think mirror like L three is the option that I like the most, so I'm going to select mirror.
L three and I'm sticking with this type of mirroring, but it
turn
s out that you can customize it even more, so at the bottom of the screen you'll find the edit icon, so I'm going to tap my finger there and now I'll have access to three different edits of uh with which I can customize the reflection so the first thing that opens by default is the scroll and as we play with this you'll basically see how by adjusting the scroll slider you can change the strength of the waves in the water , I want the waves to look good, but I want to make sure that the image looks perfectly natural and so I'm going to select a relatively low offset value, something like 20 to 25% because I think it's quite interesting.To add some special features to this image, but it is not strong enough to make the viewer wonder if the reflection is actually real. Now, the next editing option that I have in the middle of the screen is called blur, so once I tap my finger there, I can essentially determine how blurry the background reflection will be. Generally speaking, if this were a real reflection photo, you would expect the background to be a little blurry, but just a little bit so you don't. I want to exaggerate this or else it won't look natural, but I want to add alittle bit of blur to make sure the reflection looks as real and natural as possible and something like 10% will work for this and I'm going to do it. to leave the blur at the low value of about 10% and finally the third editing option that we have here is called bottom fade, so I tapped my finger here on the bottom fade and with this again if you were to take this photo, naturally. you would probably see that the bottom of the image or the reflected part would be a little bit darker than the real sky, that's how light works in real life, but you don't want to go overboard with this, but you want to make sure the image looks as natural as possible, so something like 20% will work great for this image and will make the reflection look more natural, but it's still subtle enough that you won't feel like something is wrong here, so now I'm done with the edits and I'm happy with the outcome of this reflection so I'm going to tap the save icon in the top right corner and I have to do it again and from here I can save the image to the camera roll now before moving on to the third part of In this edit I want to quickly take a moment to show you why we had to spend so much time on perspective correction, so the image on the left is the photo we just created using the reflection app and you'll notice. that the reflection looks really nice and
beautiful
and this is the image in which we did the perspective correction, but what would happen if we skipped the perspective correction and went directly to the reflection application without solving the perspective problems well?Then you would end up with a photo that looks like the image on the right and here you will see that the problem is uniform because not only are the buildings in the upper section of the screen tilted to one side but they are also tilted to one side in the reflection . and that just doesn't look good at all because the human eye knows that if something is reflected then the lines in the reflection must be straight, but that is not the case in the image on the right and that is why we had to spend that money extra. time on perspective correction, but now let's move on to step three of this editing, which is the final step and this is color correction, so color correction is perhaps the most essential part of photo editing and literally You can improve any photo you take with your iPhone through Color correction is that important and there are simply no images you can improve by slightly adjusting the colors and learning how to do it well is really the key to becoming a more successful iPhone photographer. , so for the color correction we are going to use the snap SE application again and you can see that I already opened the photo that we said from the reflect application inside snap seed, so the first thing I will do now is step on the edit icon at the bottom right and from here.
I'm going to select tune image, which is where most of the color correction is done and again, if we swipe vertically across the screen, we have all kinds of different adjustments and if we swipe horizontally across the screen, You can change the values of these individual settings, so the way this typically works in photo editing is that you play with these settings one by one and tweak each individual value until you find a combination that you're happy with, and This could take a few minutes and these few minutes will be well spent because the difference this creates in your photos can be really substantial, but I've already done my homework and I've actually edited this image before, so I already know what kind of values I use .
I'm interested in the brightness, with this we can simply change how dark or bright the image is and I want to make the image a little bit brighter, so I'll select a value of plus 10 for the brightness, next. I'm not interested in the contrast for this particular photo because it's already very high in terms of contrast, but I want to change the saturation and for a
beautiful
sunset photo like this, sometimes you can make it pop even more by saturating the colors more and that's what I will do, but I don't want to overdo it, if you do it too much your photo will look terrible, so don't overdo the saturation.Instead, I'll stick to a relatively modest saturation value of plus 20, which makes the colors more beautiful and vibrant, but everything still looks perfectly natural, and in general, when you're editing photos, it's best to underestimate a few edits than overediting your images because it's very easy to overedit and if you overedit your photos, the results never look natural and most of the time they just look cheesy, so be careful, next I'm going to select Ambience and Ambience is a pretty unique uh effect for capturing seeds and it essentially brings out the midtones of the image, so it will need to not work in the highlights or the bright parts or the shadows of the image, but it will work in the midtones and can highlight these midtones making them more prominent and also making their color stand out more.
So atmosphere is something that is very easy to overdo, so you don't want to overdo the atmosphere, but if you turn it up just a little bit, you can often make your photos stand out a little bit more, so for this particular photo I'm going just select a modest value of +10 uh which I think works well for this image. It's easy to overdo the ambiance, so don't make the ambiance too high and eventually I'll move down to warmth and this essentially determines how cool or warm the colors are. in your image they are like this, if you go to the left the image becomes bluer or to the right it becomes more golden, obviously the sunset is warm, but maybe we can improve it by making it a little bit warmer, so for this just I want to increase the warmth a little bit to something like plus five or six and this is a small change, but it makes the detected photo look even more beautiful, but again, it's easy to overdo the warmth, just like all the other changes here , so you have to be really careful how you do them, but now let's quickly do a before and after, so if I tap and hold my finger on the icon at the top right, you'll see that this is the image before the color correction in Q an image and once you release it.
With your finger you will see that I have made the colors more beautiful and more vibrant without making the photo look natural, which is key in color correction. You don't want to go overboard with this, so once I'm happy with the changes to the tuned image, I'm going to tap OK at the bottom right and the effects are now applied and I'm almost done, but there's one more thing I'd like to do. and it's to apply a vignette to this photo, so I'm going to tap on the edit icon one more time and from here I'm going to open up the vignette module on the bottom left and the vignette essentially allows you to draw the viewer's eyes to the parts. center of the image making the corners of the image a little darker again.
It's easy to go overboard and as a general rule if you can see the vignette it's already too strong so you want to keep this extremely subtle and the way the vignette works here is that you can change the outer brightness or the inner brightness if you want and can. change the size of the vignette using two fingers, so if you use two fingers you can basically adjust the circle size or the center size and everything outside the circle will be darker and everything inside the circle will stay bright , so you can change the size. of the circle using two fingers and I'm going to leave it at something like 20 and then you can change the outer brightness which is currently set to 50 which I think is too strong so for this photo I want to add a subtle vignette that draws the eyes of the viewer towards the center of the image without this effect being too obvious and that's why I'm going to select the subtle value of minus 20 uh for the vignette and I'm going to quickly do a before and after, touching my finger on the top right, so this is before the bullet and this is after the bullet and I think that's a good improvement so I'm going to go ahead and have the OK check mark at the bottom right and I think now we're done with this edit.
I'm really happy with the kind of difference we've been able to create, so I'll go ahead and save a copy. Now this photo is saved to my camera roll and once again if you look at the original photo we started with and the final version, you can see what kind of difference we were able to create in a relatively short photo editing session. Yes, this took us some time because I had to explain everything properly. but once you master it, you can greatly improve any iPhone photo with just a few minutes of editing. I hope you enjoyed the editing techniques I shared with you in this video and while I didn't hide anything, there is a lot.
I could share it with you in a short video like this and there are literally dozens and dozens of other powerful photo editing techniques that I didn't get a chance to share with you; In fact, there are so many different things you can do to improve your photos. which actually took me 3 years to really master photo editing now, if you're really good with technology you can probably figure it all out yourself, that's what I did, it took me 3 years, but in the end it all worked out, but the most Chances are you want to improve your iPhone photos right now, not in 3 years, and that's why I created the iPhone Editing Academy, which is the only online course that will show you how to make your best iPhone photos. iPhone become even 10 times better through careful photo editing techniques.
I have to warn you that the iPhone Editing Academy always sells out quickly and registration will only remain open for a few more days, so if you want to greatly improve your iPhone photos through photo editing, you should take a look. Take a look at the course right now. Registration is still open, so go ahead and click the big yellow button below this video and I'll see you on the next page.
If you have any copyright issue, please Contact