How to Repair a DEEP SCRATCH in Car Paint (DIY)
Jun 04, 2021Hey guys Chris fix this and today I'm going to show you how to
repair
adeep
scratch
in thepaint
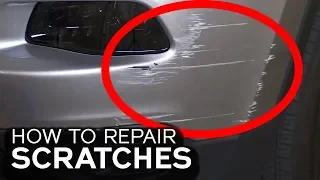
on your car. You can see here, we have a verydeep
scratch
that goes all the way across the fender, which was caused by someone locking the car. You destroyed it now if you have a deep scratch because someone locked the car because a shopping cart hit it because you scratched something or someone scratched you whatever the reason for the deep scratch. I'll show you how torepair
it cheaply. use one of these carpaint
pens now, a paint pen like this costs about 15 to 20 dollars and I want you to keep that in mind because this is not going to give you one hundred percent perfect results, it's not going to be like they were -I sprayed the panel , the best way to repair this would be to sand the entire panel to remove the scratch and then respray and blend and blend the paint with the adjacent panels.
Now doing all that painting work comes at a cost. I actually went out and got a quote just to see how much it would cost to fix this panel, just this panel with this scratch and the total cost would be 775 dollars to do it right at a body shop now, depending on what car you drive in your situation, You may not want to spend all that money to make this a perfect repair, so instead I'm going to show you how to repair it at home using one of these paint pens and get results that are good enough.

More Interesting Facts About,
how to repair a deep scratch in car paint diy...
Get results that are pretty good. You'll stand from here two or three feet away and not notice that this is damaged. The only way to notice its damage is if you get close or catch it in a certain light and look for it. Otherwise, if you stay behind here you wouldn't even be able to notice it. I wonder what, let me show you here's the panel right now before we repair it. You could easily see the big deep scratch and here is the same panel after we repaired it with the touch up paint the scratch is gone and the panel looks great so I think that gives you a very good idea of the results you can Wait once you're done watching this video and try it yourself using the tips and tricks I show you.

This will go beyond anything you've ever seen. I'm going to show you things on how to make this basically go away and we'll do it in four simple steps. First, we need to clean the entire panel to remove it. any dirt and oil so as not to contaminate the scratch the second step is to prepare the deep scratch by removing all the rust and lightly sanding the scratch to prepare it for the next step the third step which is our painting step, this is where we will use a paint pencil simple touch up to fill the scratch with paint and add a layer of clear coat and finally the fourth step is the blending step, this is where we will use some sandpaper and polish to blend our new touch up paint into the original paint of that way it doesn't stand out as much and it will be much harder to see that it was ever touched up, so if you follow these four easy steps you will be able to do it yourself at home and get great results now here are all the tools and products you will need again trying to keeping it simple and inexpensive you're going to need some isopropyl alcohol in this case 70 or more you're going to need some soapy water this is just water and dish soap and you're going to need a razor blade like this one along with some duct tape it's good idea to have a couple of microfiber towels on hand you're going to need a kitchen sponge 2 000 3000 and then some 5000 grit sandpaper and then to finish off some polish and a polishing pad and finally you're going to need one of these polishing pens.

Paint that matches your car's paint. Now I will link all of these tools and products in the description below so you can find them easily. each one now, real quick, before you go out and buy an automotive touch up paint pen like this, you want to make sure it has a couple of features. The first thing is obviously making sure you have the base coat, the color coat. what you're looking for, so we've got our target right there. The next thing is very important, you want to make sure that you have a car clear coat, so if we remove this right here, the bottom part has our car clear coat and that's important because that's going to give us those really nice results and then another feature that What this pen has is that the tip here is good for sanding, it removes rust from deep scratches and then one last thing that is very important if we take a look here at the front it shows you the different paint codes that this pen covers. paint.
It is bright white and we need to make sure it matches our paint code for our car. So how can you find the paint code for your car? Well, it's easy to find the paint code. for your car all you need to do is go up to the driver's side door open it and look at the door jam stickers located here and if we look at this sticker you can see it says pw7 paint so pw7 is our code paint now let's say for some reason you can't find that paint code on this door jam sticker it will always be a vin the vehicle identification number that is there all you need to do is write it down. and then call the car manufacturer, in this case it's a Chrysler, you would call them and they could give you the paint code just from the vin, so it's pretty easy to make sure you have the right paint code, another thing you could run.
When purchasing these paint pens, what you need to consider is whether you should go aftermarket or OEM, but I'm here to tell you to buy whichever one is cheaper. You can see the paint pens look identical, that's because the aftermarket actually makes the OEM paint. So choose whichever one you can buy and is cheaper because now they are both the same. One last thing to check is if the paint is fading, especially if you have an older car. Over time, the paint on your car will fade because the sun is always there. hitting it and although you might think your paint looks good it didn't fade over time it will fade no matter what so check to find something like your license plate that isn't moving this is what you had there. since the car was purchased and if we remove the license plate you can clearly see that there is a difference between the paint that has been protected and the paint that has been exposed to the sun and is faded, another place you can check is behind the door fuel filler because again this paint here is not touched by the sun, the sun does not hit it because it is protected, but you can compare it directly with the paint that is right next to it and you can see if your paint is discolored, in this case no It doesn't look too bad but you could see a slight difference and the last example I want to give you is this because it is so drastic that for some reason the taillight bezels on these sn95 mustangs fade much faster than the rest. paint on the car and this gives you a clear representation of what the faded paint looks like look at the difference it's huge now it's better to have touch up paint on the car than a big black cut or a white cut or any color Here below I just show you I do let you know that if you have faded paint you will see a bigger color difference between the touch up paint and the original paint, so keep that in mind now, in this case our car is less than five years old so we really don't have to worry about the discolored paint, so we can start repairing our deep scratch now.
I think it is very important to understand the different layers of paint, that way you know exactly what we are doing to repair. This, let me show you first, you have the actual panel, it's usually sheet metal or plastic, then the first layer is a layer of primer, it's usually a gray primer and it's about 10 to 40 microns thick, then on top of that primer there is a base coat, this is what gives color to your car. This color coat is also usually 10 to 40 microns thick and finally on top of it is the thickest layer, the clear coat, which protects the base coat and gives it a nice shine. gloss, this could be 40 microns to 100 microns, so in total the paint could be between 60 and 180 microns and that varies a lot because different manufacturers spray different thicknesses of paint and, just to put it in perspective, a simple sheet of printer.
Paper like this is about 100 microns thick, so it's about the thickness of the paint on the top of the panel, so this here is definitely a deep scratch, it goes through the base coat to the primer, it's not a clear coat scratch now if you do. I have a clear coat scratch like this here on my truck, don't worry this is very easy to repair and I have a full detailed video showing how to remove a clear coat scratch and I will be sure to link to it. that video in the description so you can find it easily, but to verify that it is actually a scratch that is on the clear coat, just not a deep scratch or paint transfer, all you need to do is put some alcohol on a cloth and then clean it. down and it should disappear like this and this is only temporary but you can see it disappear and after a couple of seconds the alcohol starts to evaporate and the scratch will start to be visible again but that's a good way to tell if you have a clear scratch. layer of scratch, okay now you know the different layers of paint, the different types of scratches, let me show you how to repair a deep scratch like this and remember the bigger the deep scratch the more difficult it will be to repair if you have one more little.
It's very easy, so after you see how we do this, you will be able to make your own without any problem, so the first step is to clean the entire panel. We will start using soapy water. All this is a squirt of dish soap. and fill the rest with warm water and just spray this down and what this will do is remove oils, waxes, dirt and debris, things like that that we don't want to get into our scratch so step number Once finished, our panel is clean, so now we can move on to step number two, which is preparing our scratch.
Now it's very, very important, we can't have any rust on our scratch if there is rust and you paint over that rust. The paint will bubble, so you will have to remove all the rust. Fortunately, we don't have any rust on this scratch, but let's say you do have some rust. Just take some 400 grit sandpaper, fold it over, and remove the rust from the scratch. Also use that abrasive tip on the paint pen, this is also very good for removing rust, you just want to get into that scratch and again remove all the rust, if any, once all the rust is removed from the scratch, do the following.
This step to prepare the scratch is to remove the sharp edges, so whenever there is a deep scratch, the edge of the scratch is steep and jagged, so we want to sand that edge of the scratch to round it out and make it less steep. Rather a smooth, round hill, this will make the touch up paint blend much better with the surrounding paint and make it much harder to see the repair. If you take a look at our scratch you will be able to clearly see those sharp edges that we need to smooth out so our touch up blends in better, so start by using the abrasive tip of the touch up pen and concentrate your sanding on the jagged edges, don't worry if you send a little bit over the clear coat because we'll add more later, just focus on getting those jagged, sharp edges nice and smooth, then clean the scratch with a little alcohol to remove all the dust you just created so we can have a accurate view of the progress we have made.
Now that the edges are sanded we want to spread our sanding over the base coat and over the clear coat right next to the scratch, this will give us a nice smooth transition and to do this you can use 800 grit or 1000 grit sandpaper and I have a little trick I want to show you with the sandpaper if we just fold the sandpaper once that will give us a sharp edge like that and that won't help us smooth this out this will just dig into the paint and not give us that smooth hill that we need so what we're going to do is fold it one more time but don't wrinkle it just bend it slightly so it's like a semi circle there and you can see how we don't have a sharp edge that's a nice rounded edge and we're going to use that to sand our scratch and just look at how well that rounded sandpaper fits into that scratch now to round it off that's beautiful that's exactly what you want now you're probably wondering how you know when you're done sanding you don't want to remove too well everything that What you need to do is feel with your nail if you can grab the edge of the scratch with your nail.
You should sand a little more to make it more rounded. In this case, it feels nice and smooth again. It's like a hill instead of a cliff. I can't grab this with my fingernail, so we're done, this is what the scratch looked like before with asharp. jagged edges and that's what it looks like after being nice and smooth, so that's all that's left for our second step: removing the rust from the scratch and then smoothing it out to remove all the sharp jagged edges. Now remember that the smaller the scratch, the faster and easier. Did I just do that section?
I still need to do the rest of the scratch, which is pretty big and goes all the way around, so I'm going to remove this real quick and then we can move on to the next step. what's our painting step now, although I said I'm going to remove this real quick, you want to take your time here, this is very important to do it correctly, sand and scrape, remove any of those sharp, jagged edges and that will give you the best results once we added our paint with a touch up pencil. Now you can see here.
This scratch is much narrower. It's still a deep scratch. Still.all the way through the base coat to the primer but they use the sharp end of the wrench instead of the wide end so they created a narrow deep scratch since your scratch could look like that instead of a wide scratch that I just showed you. Here we show you how. To prepare this one, the process is basically the same: you'll start with the abrasive tip on the paint pen, as before, but now the scratch is so tight that we're actually laying down both edges at the same time and for a while.
A tight scratch like this, we don't want to make it much wider if we could help you, so keep the sanding just above the scratch, same with the sandpaper. Keep the sandpaper tightly rolled and tight that way we are focusing only on the scratch and don't sand the sides of the scratch too much. Here's a really good angle to show you how tight we keep it to sand the narrow scratch and if you take a look at even this narrow scratch, we make sure it has a nice smooth transition and it's not a steep cliff, so it applies the same process.
We didn't have to make it any wider, but we wanted to make sure that you can see that the primer is there and that you can see the base coat right there. the clear coat right there so we have several coats that way when we fill this we could fill it and hide the scratch now after you're done sanding all the scratch and smoothing it out make sure you go back one more time and check that it doesn't There are no sharp edges and I keep mentioning this because it is probably the most important part of all this touch-up work to get the best results.
You shouldn't be able to feel a difference between the clear coat and the base coat all the way down. primer, this should feel nice and smooth and it is if there's a lip right here. I promise you'll see it once you add the touch up paint, so with all our nice soft scratch you won't be able to grab it with your fingernail. We're done with the prep step and we're ready for step number three, the painting step, so we smoothed out the deep scratch and now we need to add our touch up paint when we add the touch up paint, don't worry about adding too.
We really want it to overflow from the scratch and be higher than the surrounding factory paint, so let's do that before you paint, make sure you get some isopropyl alcohol and a towel and wipe the entire scratch off. Be sure to get into the scratch. the edge of the scratch and the surrounding area of the scratch this will remove all those oils waxes grease any dirt any dust we want this surface to be perfectly clean so our paint can adhere to it now and completely clean the next step is to take some tape and we need to cover our scratch.
Let's start at the bottom of the scratch and place the tape about a millimeter or two from the edge of the scratch. It doesn't have to be perfect, just make sure it isn't. touch the scratch and the reason I suggest taping it is easier to clean so with the scratch surrounded by tape we don't have to worry about the touch up paint coming into contact with the surrounding paint which saves us It adds more work later, so when you're done cleaning, it's easy, just remove the tape and that's it. Make sure you add tape to your scratch that way and you'll see how useful it will be after we're done painting, so hopefully your scratch will be small and you only need to tape off a small area like that, but in this case we have a giant scratch so beautiful that now the entire scratch is taped on the top and bottom and this is how it should look and if you're wondering, don't be.
Worry about the tape lines we'll have after the paint dries, we'll sand the touch up paint so it's level with the surrounding paint so the paint lines won't even matter, it's just a lot less work if we keep the paint . contained in a small area, so now we're ready to go, it's time to add our paint to our scratch. You want to make sure to shake it very well. This paint has primer and paint built in, so we don't need to prime it. so let's unscrew our brush and make sure we remove all the excess paint by running the brush along the edge of the container so that we don't have a big smudge on the end of the brush.
Now when applying the paint, it's important that we start with very thin coats and apply them to the top of the scratch because gravity is going to pull some of that paint down and as you can see we have a blob of paint going down the edge. of our brush, so let's clean that up so it doesn't add too much. A lot of paint on the scratch is good and now we want to continue working from one end of the scratch to the other, making sure the paint is applied as thinly as possible while still getting coverage, so now you might be tempted to go back. and try to touch up something, but don't do it, don't go here and try to play with it because this dries pretty quickly, it could dry in like 10 to 15 seconds and if you come back and try to play with it. that surface skin that forms will be ruined and won't look good, so wait, don't worry, we'll add a few more layers and it will look much better.
Another thing is that this paint is relatively self-leveling, so if you start getting in there again, it will make it look very rough, but as it dries on its own, it will self-level and be much smoother than the texture that the paint creates. brush, so five minutes later our painting will be ready. the next coat as before apply a thin coat over the scratch and go forward along the scratch and don't go back at all five more minutes later we are ready for our third coat and I think you get the idea of the whole goal.
If we want to build up thin layers higher than the surrounding paint, that way when the paint dries, we could sand it even with the factory paint and I'm also sure you've noticed that you don't need to be good at using a brush, you just need to make sure Make sure the layers are thin and even, and even if it doesn't look very good, it will sand nice and smooth once we're done another five minutes later and we're on layer four and this layer will be a little bit thicker and not we want it to be one giant stain so you could drag that paint across the rest of the scratch to even it out like this and this scratch looks like it's completely filled in so this is going to be our last layer so in this case it took four coats for our paint It will build up thick enough that it will be on top of the surrounding paint that we want to be on top because now we are going to sand it, we will sand it so that it is level with the rest of the paint, so don't worry about adding too many coats, in this case it took four, it might take five, it might take six, it might take three, you just want to make sure you have more layers than you have.
You need to make sure it's thicker than the surrounding paint that way, when you sand it, you can sand it even with the rest of the body, so four coats later and this paint looks absolutely amazing, our touch up paint came out amazing. It goes together so well, you can see how well it goes together and I can't wait to remove this tape and finish this job and see how amazing it turned out. Now after letting the paint dry for about 10 minutes we were able to carefully remove the tape and no. Don't just remove it, do this slowly, the trick is to pull the tape back on itself as you remove it, also pull the edge at a 45 degree angle away from the touch up paint, that way it will give it a nice sharpness. line without damaging the paint so take your time and carefully remove all the tape and any tape you can't peel off use a ruler to lift up the corner so you don't damage the touch up paint with your finger and once you lift up the corner and then it should come off nice and easy, okay?
Look at this. This already looks much better. Now I know there are paint lines. You can see it clearly. It's not mixed yet, but the next step is. To remove the paint lines you have to sand this so it blends with the rest of the paint and it will look amazing. This paint blends super well and you will barely be able to see this. This will look so good. I'm really excited, so let's move on to the next step, which is sanding the touch up paint. Okay, now for the sanding step we're going to use 800 grit sandpaper, so that's what I like to do with sandpaper. to cut it into a small square like that and with our sandpaper we don't want to try to sand this by hand, that will damage the clear coat, we will get uneven marks, what we need is a small sanding block, a typical sanding block size It's going to be too big for this little piece so look for something like a domino, in this case the domino works perfect, it's a small flat surface and what we're going to do is wrap our sandpaper around the domino.
We have a small, thin, flat surface that we can use to sand down the paint lines without damaging the surrounding clear coat. Now our touch up paint is completely dry. He's been here for over an hour. You don't want to sand the wet touch up. paint so let it dry and hours enough time and now we just need to sand these paint lines and you can see how the domino is the right width to sand the touch up paint and the technique here is to sand back and forth. Along the scratch until it is level with the surrounding paint you want to do the best you can and keep the sandpaper over the touch up paint and try not to sand too much of the surrounding factory paint and once the scratch is level , stop sanding so you don't do it.
Don't remove too much paint and then run your finger over the scratch and you shouldn't feel anything, it should feel nice and smooth like this beautiful now so you can appreciate what we just did and the point of sanding it. You can see our A strong line of paint goes all the way right here where we sanded it, that section over there, this is completely gone, it looks perfect, I mean, it's not finished yet, we haven't polished it yet, we haven't added a clear coat and that scratch disappeared. you can't feel it at all and it looks absolutely perfect, that's exactly what you want to do with the rest of your scratch now, since I'm working on a big scratch to keep the sandpaper from getting stuck with paint, spray the area with soapy water and then you could start sanding and there's really nothing special about this all you're doing is sanding the touch up paint so it's level with the surrounding paint so I'm going to work around leveling the entire scratch and just make sure to keep the sandpaper located on the paint dab and then once the paint is level with the surrounding area you are done and when you think you are done run your hand over the panel and see if you can feel any bump from the touch of the paint, if you feel bumps that you didn't sand enough, continue on this one, this feels nice and smooth now, although it looks great, make sure to take your time and visually inspect all the scratch if you see somewhere where the paint doesn't look good, it doesn't meet your standards, you want it to look better, now is the time to do it because once you apply that clear coat, it's much harder to completely sand it off. and then we touch up that area, for example, here you can see our scratch is pretty well blended here, you can't really see it, but once you get there there's an indentation because we didn't put enough paint in there or when I sanded it, it chipped, either whatever the case, we will definitely see that after we add our clear coat, so let's fix it and to fix it all you need to do is refill it, if you want you can add tape.
IM not going to do it. I'm going to be very careful here and I just need to fill it a little to get one coat working and 10 minutes later let's apply some soapy water and wet sand the touch of paint until it's nice. and level it with the surrounding paint, we are going to clean it up and it will look much better, so once you are happy with the result of the touch up paint, the last thing we need to do is apply our clear coat to all the parts that we touched up, but beforeAfter adding a clear coat, let's put some isopropyl alcohol on a towel and wipe the panel to remove any dust still left there from sanding.
Now we can add our transparent layer and just like the color layer, we want to add thin layers. start from one end of the scratch and work your way to the other end and it's very difficult to get the clear coat smooth especially with a brush like this so don't really worry about how it looks we just want to have a full coat that covers our touch up paint and also a little overlay over the surrounding factory paint and then after letting dry for 10 minutes apply a top coat for a total of two coats again just make sure the entire scratch is covered with clear . layer that way we could lightly sand it with the surrounding clear coat, so with two thin coats of clear coat covering all of our scratch sealing with our touch up paint, now I'm going to let this dry for about an hour and an hour more late.
I can see that the clear coat here is dry and has a nice shine to it, but it's uneven and there are ridges and good things to remove the ridges, spray it with soapy water, take your 800 grit sandpaper and start sanding it so it's level with the surrounding clear coat, then we can move up to 1500 grit so spray paint and wet sand the clear coat that we applied and start sanding on the surrounding clear coat as well, then we can move up to 2000 grit so spray down . paint and wet sand our touch up clear coat as well as a little bit of the surrounding clear coat and then let's wipe this off and see how it turned out and if you run your finger over it you won't be able to feel the clear coat. it's nice and it's up to the level of the factory clear coat and that's exactly what we want so at this point where you added your clear coat it should feel nice and smooth we sand it down so it's up to the level of the factory paint and One way to make sure is to close your eyes and simply run your fingers across the panel, you shouldn't be able to feel any indentations, any valleys, any hills.
Hit something like this, it should feel like a smooth panel and that feels absolutely perfect, so now you can probably see that there's a little bit of haze here and part of the panel is shiny, part of it is not shiny, we need to fix that. and that's the fourth step, the last step, is where we wet sand and then we polish it and make it look like a perfect panel, so let's go to that and wet sand, we'll start with 3000 grit sandpaper and then we'll move up to 5000 grit sandpaper and finally, to restore the shine, we will finish with a good coat of polish before starting sanding.
A useful trick I want to show you: don't use your bare hands for wet sand, what happens is that your fingers create pressure points on the sandpaper and you won't get an even sandpaper, it will create hot spots and it won't look good, so a The trick is to grab a sponge and place it on the sandpaper. sandpaper around it and now the sponge will absorb any pressure points so you have a nice, even sandpaper now very quickly. I want to show you up close what this will look like so you can see where we've been working, it's all there. scratched well, we're going to wet sand with 3000 grit, then we're going to wet sand with 5000 grit, then we're going to polish with some polish, which is a light abrasive, then we polish it and then that's going to blend in with that scratch, You won't even be able to see it anymore, it literally disappears, so we want to apply the same process to the entire panel and make it blend in and look uniform, so spray it with soapy water and apply some on the sandpaper. also and sand the entire panel with 3000 grit sandpaper and while wet sanding make sure to move back and forth, don't make circles because circles form circular scratches and circular scratches are harder to remove than straight scratches , then you can do it.
Clean the panel to remove the small particles that we created with the 3000 grit sandpaper and now we can spray the panel with soapy water and move on to our 5000 grit sandpaper again. Be sure to sand the entire panel so you don't miss any spots. or you will see when we are done, finally we clean one more time and we are in the last step which is the polishing step, so polish the polishing pad a little and then spread it all over the panel and finally with hard press the polish on the panel in a circular motion, since the polish is a very fine abrasive, the circular motion attacks the scratches in all directions to make the clear coat nice and shiny, so now with the entire panel polished take a new microfiber towel and wipe off the polish to reveal a nice, shiny panel.
Look at that and beautiful, we brought all that shine back to our panel and this is a really high shine right now and we mixed it in with the scratch so you can't even see it. and with that we're done and holy smokes you can't even see the scratch anymore it's gone look at that and just as a reminder this is what the scratch looked like before we started it's clearly visible it doesn't look good at all and so on it's what it looks like after you can't even see it, you would never know there is a giant deep scratch here now, although these results are absolutely amazing, it's not perfect, you can still see the scratch if you get to the right angle and you could see it right there , it's a little hard to see, but you get the idea, if you get to the right angle, if you get close, you'll be able to see it once you back away a little bit, it disappears. it disappeared and then if you look at the car from 5 to 10 feet away you will never see it so for 15 a paint pen works great and now you know how to get these types of results so with the panel everything touched up.
It looks beautiful, you might be tempted to try adding a wax or ceramic coating to protect it, but don't do it yet. Touch-up paint can take up to 30 days to fully cure and harden, so you don't want to seal it. Turn it off and prevent that from happening in the meantime, you can still drive the car, you can still get it wet, go in the rain, wash the car, whatever, but don't seal it with a ceramic coating or wax, so that's it, you know. how to properly repair deep scratches using a simple touch up pen and this came out absolutely amazing, it looks amazing and you guys could get the same results.
Another thing I want to mention is if the rocks cause small chips on the front bumper. When starting out, you can follow the exact same steps and get the same amazing results, so I hope the video was helpful if it was. Remember to like if you are not subscribed. Consider hitting the subscribe button for more automotive how-to videos. As always, all the tools and products I used in this video are linked in the description.
If you have any copyright issue, please Contact