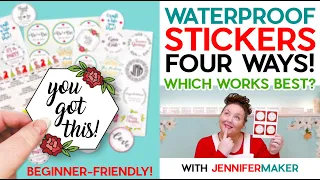
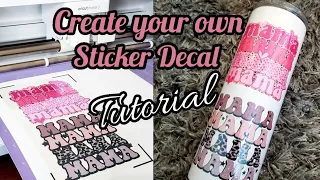
How to Make Vinyl Decals + Designs for Instant Pot, KitchenAid Mixer, & Keurig!
Jun 08, 2021Hello everyone, my name is Jennifer Maker. Today I will show you how to
make
and applyvinyl
decals
. I am the great show and tell creator so you can decorate almost anything withvinyl
. I know this because I put vinyl on mugs. Cricut machines. Canvases. Ornaments. Walls. and much more is very easy to do I want to be sure that you know how to do it too and you probably already have something in your house right now that just calls for a little vinyl customization, like your kitchen appliances, they work hard for us . and you deserve some flavor and you canmake
vinyldecals
that fit perfectly on your favorite kitchen appliances.
They will be the talk of the neighborhood. You can put vinyl decals on your Instant Pot, KitchenAid
mixer
, Keurig or your blender, and now when we talk. About making and applying vinyl decals, we are referring to adhesive vinyl, this is a vinyl with a self-adhesive backing. Vinyl like this comes in permanent and removable variations, and while at first you might think that removable vinyl would definitely be the best, it's not necessarily removable vinyl. It's intended for things like walls and other porous or fragile surfaces that could be damaged by adhesive backing and vinyl, but surfaces like metal ceramic hobs are what you'll find on most things in your kitchen, our best direct adhesive vinyl decorations permanent. because it will stick better and you can remove it from these hard surfaces later if you really want to and you can wash them better without them falling off.
More Interesting Facts About,
how to make vinyl decals designs for instant pot kitchenaid mixer keurig...
I get a lot of questions now about what brand of vinyl works best for decals like this. I did a Trial earlier this year with a variety of vinyls and honestly I keep coming back to permanent cricket vinyl. It's a great job. It comes in many colors and styles. It is very easy to find in craft stores. I also like the Oracle 651, which I think. It's of comparable quality, but it's harder for me to get hold of and therefore I don't use it much now, which I wouldn't recommend any other vinyl. However, now you may see store brands and sometimes they are heavily discounted, but taking a chance on them, it is also important that you use reasonably new vinyl as it has a lifespan of about one or two years if your vinyl is older. two years and you still haven't applied it to something like your kitchen appliance.

It's time to get some new vinyl now for this vinyl decal tutorial. I'm going to use premium Cricut vinyl as the permanent material and if you're not sure if what you have is permanent or not, it says so on both the label and the backing. Well, it usually says on the carrier sheet that removable vinyl is also almost always matte, not glossy, and just feels less sticky. Sometimes you can slide a small piece onto the carrier sheet or it's very easy. That says you can use removable vinyl if you really intend to take it off soon because it probably won't last as long, it's your choice.

You can use any color or style vinyl, but in my experience, some vinyls, such as glitter and foil, are more difficult to apply, and we need more difficulty to apply them. You're less likely to sit still, so if you're a beginner I just avoid them and stick with a basic solid color vinyl. However, I'll show you what happened when I tried to put aluminum decal vinyl on my coffee maker so you can see for yourself, in addition to the vinyl, you need transfer tape, which is not an adhesive sheet that you place over the decal to transfer it to your surface. .
I'm using Cricut transfer tape and it's important to note that you want to use regular transfer. tape, not the strong grip stuff, that's fine, you'll also want a wieder, a scraper and a ruler or tape measure, isopropyl alcohol and a lint-free towel or something else lint-free, like a coffee filter of course, you need a way to cut. To get your vinyl decal out, I use and recommend a Cricut cutting machine and that's what I'm using for this tutorial and I'll show you how to do it with the Cricut. Last but not least, you need a vinyl decal design.
I have eight previous
designs
. Handmadedesigns
with beautiful hand lettering for you to use or you can design your own so let me show you where to find my free designs on my blog at jennifermcguireink.com and how I put it in myinstant
pot, mymixer
, am ? careful step 1 measure your surface the first thing you should do is measure the available surface for a vinyl decal with a ruler or tape measure you want to know both the height and width of the available space as well as whether or not there are dials bolts, cables or features unusual things you need to fix take note of the surface space available as you will need it in the next step step 2 make a vinyl decal design or use my free SVG files you can make your own vinyl decal designs in the design space from Cricut or use my free kitchen appliance for vinyl decal patterns and SVG cut files.My kitchen appliance design files contain eight different designs that you can use to decorate your Instant Pot or Crock Pot, Keurig Coffee Maker, or any coffee maker you have. your KitchenAid mixer or other stand mixer or your blender. I keep my free designs on my blog at jennifermcguireink.com and I recommend you type kitchen appliance and here are my vinyl decals that you can click on to download to your computer or device. open it and this is what is inside that file. We have SVG DXF and PDF files. Now let me show you how to upload the SVG file into Cricut design space so you can customize it for your appliance or make your own decal, so here we are at Cricut. design space and we're going to upload that SVG file that has my premade decals and that's you can use them if you want, you want to click upload and then upload the image and browse and you're looking for the SVG File that's right here and you click open , it loads into your software and you click save once saved, you want to select it and click insert images to place it on your canvas and this is what it looks like when it first loads, there are the 8 layouts now, the easiest It's simply choosing one of these designs that works for you and that fits your appliance based on your measurements in step one and if that's what you want to do, all you do is ungroup here in the top right corner and so on. each thing is individual, choose the one you want, let's say we are going to mix sweet memories, which is right here.
I'm going to move this down, select the rest and group them again by clicking. group and then click the eye icon to hide them completely from your canvas. Now all that's left for you is to mix, sweet goodness. I'm going to zoom in a little bit so you can see it better, so let's work with this. one I want to put this on my KitchenAid mixer and we need to see if we need to size it appropriately for my mixer, especially considering it has an unusual screw head bolt, so based on our measurements we are seven inches wide. by three inches hide an area that would be ideal for a decal, so two sizes correctly.
I'm going to click on the shapes here on the left and choose square and resize this square to read the seven inch by three inch measurement that I took earlier to do that. I'm going to literally type the dimensions here at the top, but I have to click on the icon Sorry, the lock button, so resize the height and width individually, here we go. So this is the space that I have available on my KitchenAid mixer and I'm going to change the color to keep it clear in my head now that there was a bolt on it and I want to take that into account, so I'm just going to go back to the shapes and choose a circle and I'm going to go ahead and resize it to something bolt shaped, something like that, from my measurements, it was around the three inch mark, so if I move this here, The ship was right there, okay, so now let's take our decal and let's try to make it work and bring this to the front and put it right over our area.
Now, this is first of all, it's a little big, let's bring it in a little bit more. When clicking the resize handle, I'm cynical. I can drag it because we don't want it to go from edge to edge, it will look too crowded and messy. You always want to have a good margin around any design you place any vinyl decal on. should have a good margin, it's just good design principles, so of course I'm sure you can see the problem here as I do, this bolt is right in the middle of the goodness, which is not good, this doesn't it's good. but I think now we can move some things, slide them to the left and I want to show you how to do that using the outline commands very quickly, so what I'm going to do is make a copy of this design that I've resized, I'm just going to right click over it and I'm going to choose duplicate, so I'm going to drag this down to have it.
It's always a good idea to have a copy whenever you're about to edit something. What I want to do is use the outline tool and remove the word kindness and these little droplets here, so I'm going to click on this design and click on outline in the bottom right corner and I'm going to individually select each of these letters and oh my gosh hide them that's how you get rid of all of them so I just click on each shape and once it's a light color you know it's gone there we go so the goodness is no longer there and I I'm going to get rid of those two drops and I'm going to press the outline, but I'm going to hide everything in it, cleaning this up, everything is gone and I want just the word goodness to appear at the bottom, so I'm going to select all of these letters. so, just clicking and all of them and we could say at the bottom if I have it or not, there we go, okay, now we have the goodness of this layout, so I'm going to close the window and Now we can move this into position and, of course, we do the same thing before it overlaps our bolt, so I'm going to resize it a little bit with the resize handle and move it into position here, like that, which looks a lot better.
Don't you think? We can still see this. It still says Mixing sweet goodness. But you know that part of our cards we're not going to be blocked by some big lightning bolt that's not good and of course you can finish this. more, if you want, you can use the outline to move these drops a little bit more here, but I actually think this looks great, I like it and I mean, if we want, we can even make it something like this, right? we can position it and I think it looks great. I'm going to do this.
So we want to go ahead and delete our rectangle and our bolt, move this back so it weakens. We can select that circle there. Wow great now because we separated this design into two parts so we can rearrange things, we need to make sure we join those two parts back together, so we'll click and drag everything here to select the two layers that we can see here. and on the right we have both layers selected because they are a darker gray and then I will click attach and now they will stay together and they will be cut together and that is very important and that is all we really have to do to modify and customize this vinyl to our own purposes, and of course, if you want to do something completely original, you can do what I did: create a box the same size as the space available on your machine or kitchen appliance. and then you create the text in you, you bring in some elements, for example, you can just click on shapes, we can make a square, we wanted to say make something for Keurig and I think it's three by five, the little space under there.
I check it again, but I think that's why and I'll just change something similar to the color that it is and then I can click on the text and I can say I really love copying. I mean, this is totally true, but I mean, it's kind of silly, oh, whatever, okay, just put here I love coffee and maybe we'll have a picture of a cup of coffee, so I can go to images and writing coffee and I'm sure there will be something in Cricut Access. Well, I mean, I'm kind of right, here we go, this is super cute, listen, start this here, it'll pop up here and we'll drag it down so we can do this.
I love coffee, it's a little silly and we can change. the font to something more interesting, let's change it to Yellow, which is a nice font on my system. I love coffee. Bring the spacing between letters a little bit so that the letters touch because right now it doesn't look very good when you auto. Things like this will always look better if you allow your letters to touch. Yeah, I'm just trying to improve the line spacing a little bit. I guess I should have chosen something easier but you still get the idea so I love to copy and a copy the mug correctly so you can make your own stickers however you want, you do it right and then you can put your name on it and everything ifyou want what you want.
That's the great thing about using something like Cricut design space and having a Cricut cutting machine. You can really do whatever you want and then we want to get rid of the box because we know it's the right size and we select both or everything in our layout and click attach and voila, it's ready to go. let me show you how to cut out our mixer, our mixer decal on your vinyl and then we'll apply it to the mixer so you can see how it works. All we have to do is go ahead and hide this.
Suppose we're not going to do that now, all we do is click Create It and make sure your design looks good on your mat. You can make sure this is where you're going to check that you've attached everything because things will appear in the right place and you want to select your machine and then choose the right material. We will use permanent permanent vinyl, premium Cricut vinyl for this. project so it's really simple we just look for vinyl and choose premium vinyl and that's it let's cut this step 3 cut your vinyl decal design using a green standard grip mat place the adhesive vinyl face up on the cutting mat and make sure you have the fine point blade on your Cricut machine load the mat and press the flashing button to start cutting step four read your decal and apply the transfer tape now weed your design by carefully removing all the excess vinyl, go slow and be patient weeding is a leavitt or hated and even if you really like it, like me, you can still get the job done with a little patience and grace.
I find that if I store or return my vinyl to a cutting mat, a sticky cutting mat, it is much easier to weed because it lays flat and stays in place once the design has been removed, cut a piece of transfer tape from the same size as your design, remove the backing from the transfer tape and apply the transfer tape to your vinyl decal by holding the transfer tape in a dowel shape like this. and then place the bottom of your cue in the middle of your design, smooth the tape over the decal from the center outwards, this will help avoid wrinkles and bubbles with the transfer tape still in place, use a scraper tool or another hardened element with flat edges. such as a store loyalty card or credit card to transfer the vinyl decal design to the transfer tape, it is important to scrape it very well to transfer the vinyl decal, so you may have to do it a a couple of times so that it is really well adhered.
Step 5: Prepare your surface for the vinyl decal, clean the area where you will apply the design with isopropyl alcohol and a lint-free towel or other lint-free item such as a coffee filter, do not use window cleaner as this will leave residue, Be sure to allow your surface to dry completely before proceeding to the next step, Step 6, Apply the design to your appliance, Carefully remove the vinyl decal carrier sheet as the small pieces of the decal will not stick. will transfer to the tape, scrape again very carefully and pay close attention to those problem areas. Now place your design on your surface keeping in mind that it is straight and centered as best as you can.
If it isn't, you can usually peel it off and reposition it as long as you haven't. however, I pressed down onto your surface now, if you are having any trouble getting your decal to fit curved surfaces like the top of my KitchenAid mixer, here you can make small cuts in the transfer tape around where your vinyl is, not where your vinyl is but just round it off and this will help the vinyl follow the curve and lay flat now using a scraper tool scrape the surface of the transfer tape down to transfer the design to your appliance once you have done Just lift one corner of the transfer tape and slowly remove it from your decal and that's it, see how easy it is.
This is a simple and fun way to personalize your appliances or anything else in your house that might need a little customization or a little cheer or a little whatever. uh, something just to make you smile or maybe just to stand out a little bit. Well now I promised I would tell you what happened when I tried using aluminum foil, so I had the great idea to put copper foil in my copper
keurig
. That would have looked amazing, so I cut it out and it wouldn't weed, so I thought, well, I mustn't have done it, even though I chose the foil adhesive.I must not have gotten the pressure right, so I went in and changed my gear settings in Cricket. I increased the pressure and cut it again and this time it was better but it was still tearing in places and not working so I went in and cleaned my blade using a rolled up piece of aluminum foil to make sure. that there was no residue or rust and then I cut it again and it definitely cut better the third time and I was able to get a lot until I got to the lettering, this design doesn't lend itself to any kind of I.
I know it's all complicated, like paper aluminum, you always have to keep in mind what you're trying to cut and what you're trying to cut it from and in this case I totally made a mistake if this was too thin. of a design for something as rigid as a foil vinyl that is much better for larger areas and I gave it a try. I really tried to get this third one, but I couldn't get it, there is no if I was just cutting out an image of a coffee cup, but not the outline of a coffee cup, but a solid image of a coffee cup.
I'm sure it would have been fine, so always pay attention to the detail in your image when trying to crop something. difficult materials like oil adhesive or glossy cardstock or glossy vinyl or you know, any of that kind of stuff, the smaller and more detailed your image gets, the more difficult it will be in the end. I just decided to crop this into a regular old format. pink vinyl because I thought pink was cute and it would make me happy in the morning when I saw it when I was going to get my copy and it looks great and I'm happy with it so what would you decorate it with?
Let me know. in the comments below I'd love to know and if you have any questions about making or applying vinyl decals you can also leave a question here or ask our amazing Cricut crafts group at Jennifer maker.com slash Cricut craftsmen and if they need a Cricut to decorate, you can win one in my Cricut giveaway going on right now. You can participate and get all the details at Jennifer maker.com. Cricut Giveaway. That's all for today. Tomorrow I will return. I'll show you how to make an amazing bleached stencil t-shirt. This is great and you will love it.
I made this for the first time when I was at Cricut HQ a few months ago. You may have seen that video. This will be Better remember that I am always open to your project ideas. If you can tell me what you want to do, I can show you how to do it until next time. This is Jennifer Maker, reminding you to create a life you love.
If you have any copyright issue, please Contact