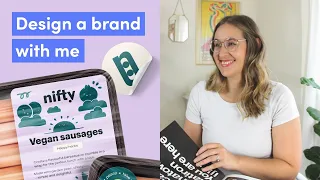
How to Design a Logo - Full Identity Design Course
Jun 07, 2021Hey everyone, Gary Simon, of
slash
and the course is structured in such a way that you'll see it after this introduction from about four years ago . ago and I'm definitely much chubbier. I drank too much beer.
course
, Etro, what the hell is up with the three hour long video? You're probably wondering. Well, I realized I had thiscourse
lying around that no one was using. I wasn't selling it anymore. Didn't we do it for free? so I decided you know what I might as well upload it and make it for free so it's about visualidentity
design
slash logo
design
and the course is structured in such a way that you'll see it after this introduction from about four years ago . ago and I'm definitely much chubbier. I drank too much beer.I deleted it anyway. At first I only introduced basic concepts that are relevant to visual
identity
design and then the rest of the course focuses on three different projects that I follow the same slash outline so you can get muscle memory designing effectivelogo
s and identity designs so that You can still follow all the information and even the technology even if it is four years old. I don't use anything advanced in terms of Adobe Illustrator or Photoshop, so you should be able to follow along perfectly, so if you enjoy this, make sure to subscribe here on YouTube and check out the cetera com course.More Interesting Facts About,
how to design a logo full identity design course...
Okay, kick ass, what is it? a visual identity a visual identity is all the visual elements that make up a company's brand, so to determine precisely what a visual identity is, we first have to understand what a brand is, a brand encompasses everything that can affect the way people perceive a company, so everything from its logo design to its audio jingles, to its spokespersons, to its CEO with his crazy, extravagant hair and attitude, everything that makes a company that is you can feel, smell, hear or taste, it even makes the brand now a visual identity, it only cares about the images that make up a brand, so this includes everything from the use of colors to the logo design, website design, printing and stationery design, etc.
Now a logo design is part of a brand and is included in the visual identity and is the visual identity represented. in the most basic and simplest way, so when you present a client with a complete visual identity, you are not only designing a logo, but you are also giving them all the visual aesthetics that they can use as a company and that is what we are We're going to focus on this course, so in the next lesson we're going to focus on the use of color in relation to a visual identity. Using color in design goes far beyond simply choosing what looks good together.
Apart from this, we must also consider the brand objectives and color psychology. Understanding color psychology is absolutely crucial as an identity designer. Each color can elicit certain emotional responses and certain colors used together can completely change those responses, so let's take a look at what colors we're into. familiar in what they normally represent for a brand black lacks color, therefore its use in a brand can be powerful can be used to represent power of prestige Authority and even fear or uncertainty white is positive, pure and safe and is considered As such much more consistently around the world than any other color, red is the most energetic and passionate color.
Common emotions that can be derived from red can vary, it can evoke feelings of passion, happiness, violence, anger, etc., blue generally represents confidence, intelligence, stability and calm when we think of blue. think of the sky or the ocean, both stable and consistent in calm, we all, of course, generally associate the color yellow with happiness and vitality, since the sun is essential for life and makes us feel good, but it is They can use different shades of yellow to represent caution or illness. Even green can represent nature and energy, as it is the most prominent color we see in nature, but it can also represent wealth or even greed.
Orange is red in yellow combined. Red is passion and energy and yellow is vitality. It relies on both colors to provoke. Feelings of joy, happiness and positivity are warm, friendly and approachable. It can be used to convey childhood in some cases or romance in others, much like green. Brown generally brings us back to nature and the organic, but can also represent honesty, connection and calm. Purple generally represents prestige, power and luxury now with that quick summary of colors in their perceived meanings, we will use that information when we design our future projects in the next lesson, we will look at typography, understanding typography is very important when building a visual identity And not only is it important for logo design, it is also important to establish a preferred font selection that a company can use throughout its visual identity.
First, it's worth defining some of the terminology associated with typography. A font allows you to set the size style. and weight of a typeface, in other words, a font is simply the delivery mechanism of a typeface in a typeface is the physical appearance and layout of the actual characters. A font family is a collection of typefaces that are intended to be used together and consist of different weights and styles. Kerning is the process of adjusting the physical spacing between individual characters. Letter spacing or tracking is the physical space between blocks of characters and should not be confused with kerning, which is the actual space between individual characters.
Line spacing is the amount of vertical space between lines. of actual text, the first consideration when selecting a typeface to use within a visual identity is serif or sans serif fonts. Serif fonts convey tradition, sophistication, established luxury, etc., while sans-serif fonts are commonly associated with being modern, minimalist, and simplistic. To determine whether serif or sans serif is most appropriate for a given identity, you should consult the project summary, target audience industry and company goals will help you make the best decision and the font you use to display the company name in the logo does not have to be the font used elsewhere of visual identity, now that we're familiar with some of the basic concepts and terminology surrounding typography, we'll use it in our future identity projects, but in the next lesson we're going to take a look.
What is a corporate identity guideline? An identity guideline or brand identity guideline is a document that describes several different aspects when it comes to a company's brand. Firstly, it will usually describe the brand's objectives as it relates to the company. It will describe the use of colors usually detailed with color codes in various color formats the font selections along with a preview of the font and also a presentation of the logo some identity guidelines provide specific instructions on how to Your identity can and cannot be used Many of the largest companies have identity guidelines that have over a hundred pages of specific information because they care about how their brand is presented.
Consistency is key, for example, some identity guidelines will show you what colors you can use with the logo, the margins that must be respected when displaying your logo, and even the orientation and placement of your logo in relation to other elements, ultimately An identity guideline seeks to display and inform others about the company's identity in the brand to ensure that it is understood and used correctly, allowing for a clear and consistent presentation of the brand and identity. We will create a corporate identity guideline in one of the projects that let's do in the future, but first let's conclude this chapter by taking a look at the various forms of logos, an identity guideline, or a brand identity guideline. a document that describes several different aspects related to a company's brand first, it will usually describe the objectives of the brand as it relates to the company, it will describe the use of colors, it will usually be detailed with color codes in various formats of color, typography selections.
Along with a font preview and also a logo presentation, some identity guidelines provide specific instructions on how your identity can and cannot be used. Many of the largest companies have identity guidelines that have over a hundred pages of specific information because they care. About how your brand is presented, consistency is key, for example, some identity guidelines will show you what colors you can use with the logo, the margins that must be respected when displaying your logo, and even the orientation and placement of your logo relative to to other elements, ultimately. An identity guide seeks to display and inform others about the company's identity in the brand to ensure it is understood and used correctly, allowing for a clear and consistent presentation of the brand and identity.
We will create a corporate identity guide in one of the projects we will do in the future, but first we will conclude this chapter by taking a look at the various forms of logos. Hello and welcome to the first follow-up project. The name of this fictitious company is you versus, or in other words, you versus someone. otherwise the name again is you versus and this company is an online gaming company that allows you to choose your favorite games and will randomly compare you to other competitive online players so our job as visual identity designers is to design first a logo for this company and then we will also provide a complete visual identity, so in the next lesson we will go ahead and start by sketching a potential concept that is relevant and unique to this company.
Well, this project, of course, is you versus and basically the idea that came to me when I was experimenting with this particular dummy project is to create a lettermark logo, so if you remember, the lettermark logo letter is basically a single initial or multiple initials of a business name combined into a unique and relevant symbol, so in the case of this first project, you versus we have the Y and the V, so the first thing I would do is draw very quickly a basic Y and a V next to each other, okay? so the idea is to try to merge them into a single symbol so that we can see right away that they are very similar, the Y in the V, and that we can take the Y and the V and transfer them here, this part like this, like this in and on its own has a reason why we can see a V in it, but if you just put the Y as it is here we will see that anyone will see that as a Y, so another idea I had was basically Take the same shape and make a V up here and make it thick something like this and then down here make the part that extends be the bottom of the Y right there, except for the space in the middle, so that in itself we can derive some different possible meanings, like this that first we have the
full
Y, then we have the V up here, but also in terms of the context of the actual project, which is a game company, we can see an idea versus here we have this basic. form and if you think about it when it comes to the idea of competition or being against someone, you have this idea of a clash coming together, so in the idea that we have the Y here, the V here, but also this advantage here, which I Basically emulates the idea of clash or competition, we have a letter mark that is effective because it represents the Y, the V, which is the letter mark and also something that is relevant to the actual company, so what I want to do It's just taking this final mark.I'll do a larger version here and we'll do the V here and of course when it comes to brainstorming, you don't have to be very specific. I mean, you can do it if you want, get out a ruler and all that, but there's nothing that says yes, you know, basically get everything perfect on paper, so I'm going to take one of my pens here and fill it out real quick and then below we would have the real guy and me. I'm thinking about using some kind of rock with a capital u and versus, okay, so I'm not going to sit here and pull that out.
We'll go ahead and do it in the next lesson in Adobe Illustrator, but this is the basics. form that we are going to use and I can also circle it and we will also experiment with using colors and do something that is appropriate and relevant to this business, okay, so see you. in the next lesson, all right, hello and welcome to this lesson where we're going to take this sketch from the previous lesson and make it a reality here in Adobe Illustrator. Alright, the first step, of course, is to go to the file and to the new and We'll call this our name u versus and the width in the height now when it comes to a vector graphics application like Adobe Illustrator, the width and height They're not too important because as long as you don't rasterize anything within Adobe Illustrator and everything stays vector, you can always scale what you design to any size imaginable, so what I'm going to use for my particular setup is 8:59 by 600 and basically i amrecording this at a resolution of 1280 by 720. and so in this browser, this size I basically want to be able to view the document one hundred percent within this visible canvas area without any vertical or horizontal scroll bars affecting the view, like this which depending on what your desktop resolution is, I can set it however you need, you can experiment and press OK and you know, press control 1 or command 1 on your keyboard just to see if you can see the entire canvas basically one hundred percent, so for me it turns out to be these numbers right here so I have points specified and everything else should stay the same here and then you go ahead and press OK by default it has me at 96% but to get to 100 again it's controlling one or you can order one on your keyboard.
Okay, so, okay, so what we need to do first is get the actual letter mark that we came up with on the canvas and so when it comes to a logo. So, especially the shape that we had with that y and the V, it's always useful to get out of the grid so go to view and show the grid and then go to view and snap to the grid so basically I'm not sure if I was able to see this but you can see the grid here these individual points here these squares what I want to do is take the pen tool here and in the foreground I have a white in the background I have a stroke of a point on its black, so to change the color, of course, and I or the other one of these, you can double click on them to go ahead and change, you know, choose any color right now, the color is not too important just so we can see what's going on with a stroke there, okay, so what we have to do first is click with the left click on one of these eye points where you can see that the squares are going to intersect at the darker lines, so here I'm going to left click and then I'm going to go down here, I'm going to hold down the shift key and the shift key will allow you to make a perfect diagonal line and then hold down the shift key again and go up there right now.
The width of this I just want to be one of these grid blocks, so I'm going to hold down shift and left click right there and then we also see this line coming in the center between them and we want you to click right there holding down the shift key again, click and basically connect everything right, so now we have the top of the Y or the V and now we need to extend this down to basically complete the actual Y, so I'm going to extend up here , so we need to keep this bottom part of why in line with this. line and this line and also end on this line, so we definitely want enough space here, so basically I'm going to make two of these long squares, so if I left click here and then hold down shift and go up here now I see which this one is right on this line, so if I hold down the shift key, it looks like it connects basically the same path and then goes down here, we want it to end on this line here, so if I hold the shift key somehow on somewhere. down here and I click, we'll see that that's not exact, it actually has to be here, okay and then just hold down the shift key, click here and then hold down the shift key one more time and then click there, right there is our letter mark, so if you press Ctrl one.
Now we can see that we have the actual letter that marks these two shapes and what we can do to combine them because right now, if we look here in the layers panel, we will see that they are on two individual layers, but we don't need them. So what we can do is just go to the window and Pathfinder and then select the shape modes under here, join them together and that takes them and groups them into one basic shape. Okay, now what I want to do is go ahead real quick and I'm going to make this black and delete the stroke, so come here, press zero and then we're going to change the foreground color here to black, so now what I want to do is enclose this and an ellipse, okay?
What we can do is left click and drag the Ellipse tool and so we can see the grid here first. I want to go ahead and take transparency on this tab and just leave this around 50%, so we'll select. Go back to the lips, zoom in once before doing this and click on the ellipse and we'll see that there's a center point between this main grid between here and that's right here if you left click and hold. Shift and Alt together as I do this will create a perfect circle around this. I'll leave it right there and then I'll release it.
I'll drag it underneath. I'll delete it if we click on the gradient. We will see that we are currently selected on the fill color. What we can do is just click on this in the swatches panel and by the way, if none of these panels are not available to you, you can go to the window and then click on them and they will become apparent and then what what we want to do is come here to trace and we'll give it a black color and we'll increase the size of the stroke right around there for now 13 points now. press control 1, okay, let me go ahead and return this transparency to 100%, okay, this is our basic shape.
What I want to do now is go ahead and take the view, hide the grid, okay, now what I want. What we do is we take both and I'm going to reduce this a little bit by holding down Shift and Alt now, as you can notice, when we reduce a stroke, the width of the stroke doesn't scale along with it, so it's still 13 points, so we must determine. an appropriate width for this actual ellipse here that surrounds this letter mark based on whether its size or a scale down is visible or not too thick at certain sizes, so we need to find a certain size of that. it works fine whether it's large or large, so what we can do is move this here by taking all Ctrl C and Ctrl F or command C and command F if you're on Mac and we'll move them by holding down the shift key.
That way, we'll just have you know what we originally created to work with and what I'm going to do here is select it at 13 points. I'm going to edit now, I'm going to object rather and I'm going to go to the path and the outline stroke. Now what the outline stroke does is it removes the actual stroke and turns it into an outline, so you can't edit that stroke anymore, so it will stay at this width and be reduced. proportionally this time, so if I take both by left clicking and dragging, holding down Shift and Alt, I'll scale it down, we can see that it's now scaled down by the appropriate proportion and I would say 13 points based on the size we started with . working here is pretty cool because we could see that on a smaller size it works well and it also works well on a larger size okay so now let's go ahead and get rid of the original and move on with what I want to do is basically expand this so that the top left and bottom right match evenly within a square portion here, so what I'm going to do is expand this, so now if we look at this square here, these are all matches the grid and the reason why I'm going to do it like this I actually mean move it to the right place on the grid so now we can add the actual type so the name again is you versus and we'll be using a font called lat oh so I'll do it What I want to do is approximately exit over here and we'll make the distance a
full
grid over here and I'm just going to click over here, it's not like that. really matters for now because the font size and everything is not correct and I'm going to change the font here tool in OU and I'm going to try to bold you versus and this is a font that will be linked and that you can download okay, I'm just going I'm going to hold down Shift and I'm going to zoom this in, and I'm going to press Ctrl Shift and on the letter O or command Shift and the letter O and Mac and that will turn it into outlines.Alright, now what we can do is make sure that this is as evenly aligned as possible in terms of having two of these grid blocks here and then to the grid blocks here, okay now when it comes to scaling in The grid is sometimes a little difficult because we want to get to this edge, so all we have to do is go to view and turn off snapping to grid, hold down shift and zoom it in so it matches evenly, so Now what I want. what to do, I'm going to hide the grid view and hide the grid and I'm going to take both and shift and alt to shrink them and this here would be our black and white concept and this is what we would provide and we'll do it and the identity guideline visual and what we want to do is just take this.
I'm going to hold down Shift and just put it there, press Ctrl C and then Ctrl F, move this and now we're going to have a colored image. Okay, if you remember, when it comes to understanding color and colors, obviously I play a very important role, so for this specific company, you versus the idea behind it is competitive online games, so When it comes to competition, a color like red would work. alright given its meaning so what I want to do is make this a red color so in the swatches I'm just going to click on this CMYK red here and I also want to create some differentiation between you and vs so yeah we want to split them all you have to do because right now since they were all on the same type layer they are all in the same group all you have to do is right click on ungroup layers and now we can select each one individually. and now we can select the two words individually instead of first pressing Ctrl G and then control G as well, so now they're all in the same group, so I want vs. have the same red color right here.
Alright, we have a black and white version, our color version and you can go a step further if you want, control C and control F and we can create a version that is a little more dynamic by having reflections if you want, like this that's what I'm going to do here, I'm going to zoom in and use the pencil tool and select the white for the foreground and come in here. Now, left click. Sometimes you can push. Control Z to undo if you want them to line up correctly and I'm holding down Shift because remember these are 45 degree angles.
Now I'm not going to hold down the Shift key here. I'm just going to plug it in like this and I'm going to do the same thing on the inside of the right side of the top of the Y, hold down shift, all good and then one more here, hold down shift, like this, take over, one we can see now has a little more precision. detail and I'm going to zoom back in very quickly with the magnifying glass, I lift my eye, I click and drag and I'm going to select this base red color and then I'm going to come here and double click on it and select a darker color. color for a shadow, so the shadow I'm going to have in this part, so I'm going to click here, hold down shift and go down and then go up here and then do the same thing here, all good, and that's it.
Basically, now we have our three different logos with logos with their color treatments that can be specified to be used in different areas and we'll go over that when we get into the visual identity guideline, but before we get to that point I want to take all of these and just drag them into up and I'm going to create a black background, so I'm going to left click, take out, select the rectangle and I'm going to create a black rectangle and we're going to make this block right here and I'm going to click on the layers down here or you can go to the window layers and I'm going to drag this to the bottom by just left clicking and dragging, if you can't stop yourself from getting to the bottom, just grab the layer that's underneath it and drag it up so now it's underneath all of these layers here and I'm going to click here to toggle the lock so we can't select it now, what I want to do is grab all of these by left clicking and dragging.
Ctrl C and then Ctrl F to duplicate, okay, now we can see on a black background, obviously if they don't change, we can't see half of them, so what we want to do, I'm just going to select up here. I know that ring is. Up here we're going to make this white and then this part and this can be white, so when we're restricted to just white or black or just one color on a black background, this is what we would specify is being used, we'll take the U here on the U here by holding down the shift key and then making them white as well, so what you want to do now is save this by going to archive and save like so you have it to use in future lessons.
So in the next lesson we're going to go ahead and build that identity guide. Well, see you then. Okay, so you need to make sure you have the document from the previous lesson open. We want to save it as a new document. Go ahead to save the file as I'm going to name an identity guideline dot AI and hit save and then hit OK, so what we want to do normally when it's kind of an identity guideline,first you want to show the actual logo. So what we're going to do is use the full version of the hat logo that has the highlights and the shadows, so what I'm going to do is hold everything down and use my scroll wheel to zoom out a little bit.
I'm going to take these and just move them off the screen as well as these, so I'm also going to expand the layers here and get rid of this black, so now we have the logo over here and I'm going to expand it and place it in the center approximately and I also want to edit this artboard to be longer, so if we click on preferences without document settings, sorry, press edit artboards, now we can adjust this. so it's longer and taller and if we need it, we'll continue and we'll only need it once we move on, okay, we've got the actual logo laid out here and this is 100% here and what we want to do is below it.
Now when it's also important to realize that when it comes to these identity guidelines, there's no kind of set standard and how do you know what's coming next or whatever, you actually have some freedom, but when it comes to some basic concepts. I guess you could say that universality is among all of these. You know they include, you know, presenting the logo in various ways in terms of colors, a black and white version that shows the logo, maybe on a black background. I also show the font facing preferences. for that and also a few other things, so what I'm going to do next is just show the other black and white version and then also the simple colorize version and then also what the logo looks like on a black background, so that's what we're going to do down here, so what I'm going to do is zoom out here and basically I'm going to take these two here and I'm going to move them here and I'm going to scale them as well. pressed by pressing shift and we'll leave them over there and you also want to make sure that you have the same amount of white space as from the top of the logo to the bottom and we're also going to create a rectangle here, a black rectangle, and I'll just go over here and toward the left. -click and drag well over there and I'll also go up here to the layers and I'll just drag this down just like that, so I also want to grab these here real quick, just these two and put them.
Right here, the pressure reduced them at the same time, but okay, I'm going to go 100% with control one and a very quick way to do that is if I put that circle right there and then scale it. pretty much the same size and then just move this to the right and I also want to add just a very faint gray line that's going to separate these sections so I'm just going to take the rectangle tool and drag it out and then do the color just a light gray or c9 c99 and now we can see that you can select it and use the arrow keys on the keyboard to move it into position.
I'm also going to duplicate Ctrl C and Ctrl F, hold down Shift and move it down right there. Alright, it's very simple, now what I want to do is kind of explain you know what this letter mark is supposed to represent, so what I'm going to do is take the black version and adjust the actual letter mark, no this. circle around it and I'll press Ctrl C and Ctrl F, come down here, hold down Shift and scale it up a little bit and, um, put this first one right over here, so of course, this letter market represents three things different, it mainly represents the real Y. for you, the V for versus and then the actual Clash, that's where I'm going to call the competition mark, so we're going to cover each of those three and show a way of how we can convey what exactly they mean, so if you take the text above this and I just put caps, all caps, and I'll change it to lat oh, and I don't want to wait, we'll try the light, okay, and what we can do is take just oh and you and we'll make the color of those be like a light gray so that it brings out the you in you so that the Y stands out and the you doesn't, but it lets people know that this full Y is actually the Y, so what? what we'll do now, let's take control C and control F and we'll change this here, we'll just select the gray portions and change the Y to a V and we'll take this bottom here, this shape and Also make it the same color as the text above so it shows just part V up here, make it a little bit lighter, so what I want to do is take this here control C and control F and move it here and I'm going to change this text to a competition mark, so how do we show What are we trying to convey with this whole crash bar, you know, sideways?
Well, what we can do is get closer very quickly and very quickly. I just want to make a quick adjustment on this so we can get rid of the space here and make this part just gray, so what I can do is grab the pencil tool right here. I'm going to come up here, you don't have To be too specific, even if there's a little bit of a border there, come up here and then press Ctrl Shift and D which will split the object underneath like that and I'll put it this color here and what we can do very quickly.
Zooming in here, select this with your Gillette direct selection tool, delete it and then just move it down slightly and then we could take this here, those two points hold down shift and move them right against it, almost done, and then , that? What we can do is take these two points and just move them up, perfect, so we'll call it proficiency mark and this is just the first part to show that you know where this is coming from within this basic shape, so I'm I'm going to take this control C ctrl F just move it here and there and I want to delete this and then take both ctrl C and ctrl F, we'll right click on transform reflect, make sure it's vertical and press OK and then hold. caps and just move it over there so this is the actual competition mark and if I move this here and very quickly I create kind of an arrow just with that rectangle and then we'll take the pencil tool, shift, left click and then shift once again basically we'll have a telling me okay, we're going to have this competition this versus you know one entity against another entity like this here it comes from the letter mark, okay, so now what we can do is sometimes it's not So.
It's necessary for every identity project, but you can come up with a pattern that can be used on various media, whether it's business cards or something, so my idea is to grab both on Ctrl G and press Ctrl C. and ctrl F to duplicate them and we can create kind of a pattern out of this competition mark, so if we take that ctrl C and ctrl F, we do this a few more times very quickly and we move it around just wanting to change ctrl c ctrl F all of those and then we have a kind of interesting pattern that we can use and I'll also consider that I'll go ahead and group them as an actual pattern that's associated with this identity, so it's important to define everything, give them these labels that way when you refer to it in the identity guide, people understand exactly what you're talking about, okay, so I want to go ahead and take them here and center them between these two here so everything lines up correctly. take the dividing line ctrl C and ctrl F and we'll come over here and move it by holding down the shift key so this is what we have so far and now what I want to do is go ahead and address the actual color scheme associated with this identity is fine, so because white is part of the identity, I want the background of this part to be light gray.
So what can we do to grab the Rectangle Tool and go ahead and left click and drag to roughly the size around it? just for now and you know I can go ahead and delete that inline split, we don't need it since we have this here and I want to make it a little bit lighter over there so now what we want to do is go ahead and just grab the rectangle tool and specify the blocks that are going to serve as our color palette basically and we'll adjust this as needed based on the color, so here we have the black that we're definitely going to associate with this brand, so I control C and control F and just hold down the Shift key and left click and drag it and move it and the next color would be of course our red right there, control C, control F and another color would be our actual darkest part when it comes to the shadow, let me. zoom out and then control C and control F and finally we have white, so control one and let's go ahead and select all of those and just zoom in as needed, so now the typical thing is to specify the actual color.
The codes that are represented are associated with each color basically and you can do that for RGB CMYK and even Pantone, we're just going to cover RGB and CMYK for this, so when it comes to black, let's go ahead and select our type tool. and we can go ahead and put in RGB and then go in and we can put in the color code zero zero zero zero zero zero six zeros and we can make this a little bit bigger than the actual value, look at it over there, okay? so we can also go down here and put CMYK.
Wow, one second, let me take this top, just copy both lines of text and then CMYK and if you want to know the CMYK color value for anything, just click on it so we have. the color here in the fill, double click and you will see my and K and these are percentage values and you can put just zero zero zero and 100 so what we can do is zero zero zero so like that control C control F move this and we'll go ahead and get the RGB value of this color, it's 237 28 times 36 Oops. Sorry, we're not going to do it that way, correct color codes.
I was going to do our G and B, but I'm not okay, so we'll take that and copy it and then we'll also come back here and this is 0 1 1 and 100 100 0 very simple control C and control f and I'll click on this to get the color code. Let's see if I can also remember this 2,100 112, okay, so go ahead and take that 12. I think that's right and then ctrl c ctrl F one last time, just know that it's 1 2 3 4 5 6 FS and this is all 0. so 0 0 0 0 okay, now let's go ahead and I'm going to select everything that is and then I'm going to press and hold shift and I'm going to select the background because we don't want that and we're just going to use the arrow keys if you want to align this. correctly vertically is fine so let me go ahead and zoom out so far so good and the other thing we have to worry about is the actual font information and when it comes to fonts you typically have a main font and you can also have secondary fonts, although it is not mandatory or anything like that.
Obviously, this is open to interpretation in terms of how you want to construct it, so our main font is going to be Lotto or Latos, so what we'll do is just put it in. here's I a a oops and then B BC C 0 1 2 3 4 and this will give us a good idea of what this font looks like and you can also specify different weights if you want. I'm going to leave this at I'm going to go ahead, leave this as a thin line for now and I'll come down here. I'm going to control C and Ctrl F and put it in main font and we'll call it lottery to make this eye light do this. bold one here, okay and we can also go ahead and put in the different weights and also some lorem ipsum text just to show what it looks like in the context of a paragraph, so what we can do is like if we click on this .
Well, if we are going to see, here we go, we have different things, we have a light, regular, bold and black line, we have to continue with the normal light, bull and black, and show them, so if I go down here and put light, although that is not light. that's the one that's bold and then if you go to a lip simcom site, you can go ahead and scroll down a little bit, you can grab some text here and we'll grab the text tool and I'll come out over here. Left click and drag and just paste it and we'll make it smaller here, let's try, actually, let's try, you know, we'll try 14, okay and you know what we don't need that full amount of text.
I'd say maybe that's right. Here I can get rid of that and I'll drink it a little bit so it's light and then this will be. I think they will have regular next yes and we will change that to regular. We will change this to regular. We have to moan. So I will do it. I'm just going to grab both, you can go back to the documents, configure, edit artboards, drag this down, wow, no, drag it down a little bit more and we'll change this here to bold, wow, control a gold and make it actually in bold, do the same. thing here and then this one will finally be black change it to black and change it to black black there we go okay, very simple, okay and I'm going to go ahead and just delete this one, so that's basically it for now. being for this identity guideline, so in the next lesson what we're going to do is go ahead and design a business card and also address a Facebook page that applies all of this information as it should be for that design and thenwe will return. and we will add both types of charts and previews within this identity guide at the end of this chapter in this project.
Well, see you then. Okay, on this lettuce we're going to go ahead and design. a front and back business card and for the first time applying the visual identity, logo and everything else that we set out in this identity guide to a real project, so a business card of course is one of the most basic ways to apply official identity. for a company so go ahead and open from the project files the card that I present well so if you control one it will reach 100% I'm going to zoom in a little bit more so we can see a little better so if I go real quick here to see and the guides show guides and you can see the shortcut key right here that I'm going to use from now on, which is control and a semicolon.
We'll have the actual guides here, so there are a few things you may need to understand when it comes to basically print design. Here this red line is what you called indentation, so every space between this black line and this red line is what is called indentation. Now the bleed is basically any type of background element. that needs to be included around the entire edge of the card, it needs to be included in this area and then you have the trim, this black line is a trim and the trim is basically where the printer is, whoever is printing.
They're going to try to cut the card correctly, so obviously also when it comes to background elements, that's why they need to extend beyond this crop line so that nothing gets cut off and then within these guides that we have here, this is the safe zone. So if it's really important elements, like the logo text, you want to make sure they're all the way in so they don't risk getting cut. Very simple, so I'm going to change. here and I'm going to grab this logo right here and press Ctrl C. I'm going to shift back and then press Control V to paste this.
Now press Shift and left click and drag down to scale now when it appears. Regarding business card design, it's obviously one of those things where there's no right or wrong way to design, so I'm just going to take one approach to this and address the necessary pieces of content that would be required for a business card. . you can see here, we're just going to do a more not so traditional type of card design. I'm going to present the logo here in this sect on this side and I'm going to reduce it a little bit more and below it will be the web address and then on the right I will have a black section where the three pieces of information will go, which is the name of the CEO of the company, John Doe, a phone number and then an email. direction, so what I want to do is go ahead and grab the rectangle tool and I'm going to start here, left click and drag to those edges and I'm going to make it black.
Very simple, and now I'm going to expand the layers and lock them so we can't select them, so now what I want to do is add the pattern associated with this identity so that if we remember, we can scroll down. Here and this is a pattern that we have, so Ctrl C and then we'll go ahead and control V to paste it and now I'm going to right click and temporarily ungroup it, move them down and just select. these bottom parts right there and press up along with this one also on the arrow key to make sure they're level with each other, so now I'm going to select them all again and press Ctrl G to group them together. so I'm also going to change the color because it's going to be black on black, so I want it to be a little bit lighter so we can see it say about two over two over two one in the hex color code.
I'm going to hold down Shift to zoom out and we want to make sure that they go all the way because this is a background element, so it's going to go past this clipping area and if it goes beyond this area, that doesn't matter either. okay, so okay, now what I want to do is take Ctrl C and Ctrl F. I'm going to zoom in real quick and move them around and try to tile them very quickly on top of each one. another one, so I'm going to take both, hold down Shift and then I'll press Control G to group Ctrl C and Ctrl F together again and we'll do this Ctrl-G one more time and then Ctrl C and Ctrl F and I'll move it down. one over there okay so now I want to go ahead and add some text on top of this and this will be white text using the main lacto font so I'm going to take the type tool and I'm going to lock both layers right here and I'm going to type John Doe and the text is black right now, we're going to change that and then CEO below by pressing Enter, so now I want to make it white and also change the tool to O and make it clear, we're going to make this in bold the actual CEO part and we'll also make it smaller, so if it's like the move tool, shrink them down there, take just the CEO part and we'll try to make this around 6 no. that works now I'm going to do control C Ctrl F hold down shift and left click and drag this is where the phone number is going to go so I'm going to put 5 5 5 5 5 5 5 5 5 5 and this is it's going to be cellular and then we'll take this control C control F again hold down shift, left click and drag down over here and we'll do this I on you versus communication and this will be changed to email and finally I'll do it. take this control C control F we'll move it here near the center make it black, we'll get rid of the email part and then Nate we'll do this WWE versus calm and I might make it a little bit smaller, yeah, that's good.
Okay, now let me go ahead and zoom out a little bit so we can see it. If you want to hide the guides, the shortcut is Ctrl or Command if you're on Mac, Ctrl and semicolon, it's fine and very fast. I want to get rid of that top part right there and press Ctrl and Shift on the letter. Oh wow, actually those need to be unlocked first or you can go to the object, the path splits the objects next. I had the wrong shortcut by accident. I'm sorry. Ctrl Shift and Emn and delete the ones right there because I don't want to go too high, so that would be the front of the business card and you want to go ahead and save this as front without outlines and I say no. schemes because we maintain this text.
I always like to do that when it comes to business cards, just in case in the future you need to create more or need to edit the text, but every time you send them to print, they have to be converted to outlines, so let's save this again. I'm going to call these front dash outlines, press OK and it's going to take all of our text fragments or just all Ctrl Shift on oh and that's going to turn it into outline, it's the same thing as I go to the object path and I mean, I go into the object and I expand the appearance, so now what we want to do is create a previous version, so we'll save this and save the file as we'll just call back. the back won't have any text on it so we'll have to worry about the outline issue so delete that, oops, we'll delete that and all this and then we'll unlock on the wall that black part, extend it all the way and then take these two pieces and group them control G control C control f move them adjust them as needed and also take these and with the direct selection tool and delete them and then I want to come here, we'll go back and just grab the white Y letter marks control C and then we'll control V and expand this a little bit.
I would say it's over there and then you can use horizontal alignment and also vertical alignment right here, okay and that's it, so save. Okay, and then we'll come back to another lesson and this visit to these wool business cards, we'll work with them a little bit in Photoshop to create a cool 3D preview perspective of the cards and then we'll bring them over here. In this identity guideline, well, in the next lesson we will do the second project, in which it is not about applying the project, but about applying this identity guideline to a real project, and this would be designing a Facebook page using this identity guideline for you. versus okay, then I'll see you, then okay, so go ahead and make sure you have the Facebook template PSD point open.
This is something I created that reflects the current specifications of Facebook Pages, so if you're seeing this and scrolling down the line somehow you know they've changed it, which they'll probably go ahead and do a quick Google search and They'll do something like the Facebook page specs and tell you any details they need to beef up, like a cover photo or anything else they decide to change or add, or as it currently stands, there's a cover photo that's 851 for 315 and then a profile photo that shows at 160 by 60 160, but you can upload this one at 180 by 180, what do we do?
What we want to do is we want to go back to Adobe Illustrator and make sure we have the business card post AI open from the previous lesson and we want to just export or yeah, basically export this pattern right here, so there's a couple of different ways in which that we can do this. I'm going to try to take both of them, group them together and then press Ctrl C to copy them, so I'm going to go back to Facebook, I mean, on Facebook, sorry, Photoshop and 4i the cover photo. which is this layer here.
I'm going to double click and make it black and then hide mine in that dimension group, so if I press control V paste, I'm going to use a smart object that way we can change and we can scale. This is holding down Shift, I would say right there select the Move tool and press Place, right click and click Create Clipping Mask so it stays inside this black part and then I also want to duplicate that control shift in D or to the right. click and duplicate the layer, move it by holding shift, press ctrl e, select both and merge them together so it looks pretty good and now what I want to do is take a profile picture and I'm going to duplicate it. click on that to change it from that degree to white and I'm going to go to render a new file, choose 180 by 180, we're going to fill it with white and I'm going to go back to Adobe Illustrator and we're going to take our logo right here and press Ctrl C to copy it, go back to Photoshop, control V and the smart object press OK, Shift and Alt to make it a little smaller with Ctrl T and then select move tool into place, very simple as you can see.
I'm going to take this right click and rasterize it and control EA, then I'm going to press C just the smart object layer and then I'm going to press Control V and I'm just going to move it here to scale it down Ctrl T Shift + Alt + left click and drag. reducing it a little bit like that gives us kind of a preview of what it's going to look like because it reduces it from 180 by 1 80 to 160 160 right now, so now I want to add a final file element here, it's just nice. Sometimes you can add text, although you should try to avoid adding text as much as possible because on different cell phones, basically, or whatever, it will cut off a lot and it won't look good on different devices, so keeping a general InDesign is usually the best option, so I'll come back here and we'll open the u vs. file.
Logo design lesson AI and I will select this correct one. here I'm actually just going to take just the letter mark on the circle control. I'm on control C instead of copying it and we'll click right on top of the cover photo layer and control V. Make sure there's a smart object and press OK. and we're going to increase this a little bit and say right there, select the move tool, press the place and we'll drag it up, right click and click create clipping mask right there and then you can move this of all modes. you want move tool, wow, I think it looks pretty good there and that's it, so now what we would do is come back here, we're going to save this for the web so the files are saved for the web or alt ctrl shift + Yes, that's what I usually do and you can see it's 180 by 180.
We'll save it and name this profile as jpg. I've done it once before, right before we recorded this, and then we'll take a cover photo. I will hide the profile image layer. Hold down the Ctrl key. and left click to go to edit and copy merged now what is different between edit copy or control C between copy merge means that whatever is inside this area, it doesn't matter what layer it is on or what layer you have selected , it will be copied, it's something like Taking a screenshot of whatever is inside that selected area, so we'll go to the new file Ctrl V to paste and we'll go ahead and save that for the web and we'll give this cover a name and we'll hit replace, so I went ahead and that's it.
I uploaded this from the first time we recorded it before making this video and this is basically what it looks like. Yes, it works fine, so that's it. Now what we're going to do in the next lesson, we're going to go ahead and grab the front and back of the business card along with the Facebook page that we just designed andincorporate it into our guiding line of identity between these different things that we have here, okay, see you then, so what do I want to do? Here in Photoshop, let me continue with the new file and we're going to specify a resolution of 8:59 by 600 pixels and 72 hit Enter.
We'll fill the background with a light gray so EA EA EA is the color code and fill it. Inside and before I import the business cards, I want to do a quick adjustment, so I'm going to open them up so we have the outlines of the front and also the back, and these are a little bit too dark in the actual pattern, so I change it to just this color. and that CMYK at zero zero zero 90 and I'm going to go ahead and save it and I already did the same thing with these colors before I recorded it so yeah, just make sure you make that change and then once you have it ready. to go, you can go back to Photoshop, we're going to go to open file and, wow, I'm not really sorry, we're going to open and we're going to specify from our outlines and hit open again and skip it. 300 for each, okay and this includes the bleed, so what we have to do is specify with the rectangular marquee tool the fixed size and choose 1050 pixels by 600 and that is 3.5 by 2 inches with a resolution of 300 and that's how many pixels that specific size is so if you left click once you'll get the actual cut size of the business card so you don't have to be perfect on the alignment just to that it's somewhere around, you know where it is. would be which is good, so Ctrl C goes back to the original document that we filled out with a light gray and Ctrl V and then we'll also come back here, we do the same thing and Ctrl C and then Ctrl V now these little lines here.
That was an issue that when you were duplicating or replicating them it wasn't a big deal, it's not a real project, but that's something to keep in mind, make sure you scale them down enough, but we'll scale them down so they should. It won't be noticeable anyway, so take both coats. I'm going to rename this one in front and this one back here and grab both layers by holding down the Shift key and before you do that, right click on the front to convert to smart object, right click. on the back, make it smart object and grab both, we're going to zoom this out Ctrl T hold down shift somewhere out there it's like move tool, press Apply and we'll grab the back layer, move it here, we'll grab the front I'm going to zoom in a little bit and in the front I want to duplicate that so right click and duplicate the layer here or set the hotkey and that's Ctrl Shift and D and press OK and I'm going to press Ctrl T and then just skew this a little or rotate it instead of selecting the Move tool, press a place and I also want to darken the background a little bit so we can double click on it and we can choose the color overlay and I.
I'm going to make this black, but I'm going to bring down that Pasady right there, press OK just so we can see that it's a little bit darker and if you want, you can do it a third time, it's like the one below, like this and Go back to the overlay colors on this one and make it a little bit darker, and then we can also do the same thing here with the previous version. Oops, sorry if you press Ctrl. If you hold down Ctrl or Command on your computer you can do that or on your keyboard you can left click and automatically select that layer and you can do the same thing. what we did here.
I'm going to try to play around with this a little bit and try to make it look like it's on top of the front of the business cards so you have all these tools. If you're going to edit, transform, you can skew it, you can put a perspective on it, but it's better for you to, you know, leave these things, you know, try not to skew them too much or distort them too much or it won't look really real, so if I press skew, maybe move this up, put Ctrl T, press place okay and then what we can do is add some shadows here to make this look a little more realistic, so let's bring all of our layer films to the center, press Ctrl T to zoom in, maybe that's right. at that size, hold down Shift and press Alt and because these are smart object layers, we can scale them up without loss of quality, so just the toe there and okay, underneath all of this, I'm going to press Ctrl Shift + n, press OK for a new one. layer and I'm going to go ahead and use the pencil tool and we're going to use a darker color and make sure the shape is specified.
I don't want a stroke and I'm not going to start here, I'll click once and up there. once you get down here like this, I know you're thinking, okay, what's that thing that doesn't look like me, but where do I click and we'll rasterize it and we can go to the blur filter and Gaussian blur and maybe right there? okay and then we can reduce the opacity a little bit or a little bit and that way it looks like there's a shadow briefly there and then also on our top layer we can press control shift and finish and turn it into a clipping mask.
We'll take the brush tool and make it black and put it on that feather brush a little bit bigger and go down like this and maybe take that path down a little bit that way we've got a little bit of a shadow there, okay, yeah, and that's a pretty decent presentation of business cards, so what we want to do is save this, so Ctrl s and we'll go ahead and move it to the right project. and I paused and went to the right folder and I'm just going to name these current business cards, we're going to save them and then what I want to do is close all of this and I also want to go to my Facebook book. here with the face book layout for the page so I'm just going to take a screenshot of this specific page so I'm going to press Alt and print screen and of course you know if you wanted to you could have created your own page like Okay , on Facebook it is very easy, just use Google and type Facebook, create a page and I will take you directly to the page to create it.
That way you can experiment with this, so we'll go back to Photoshop, control and press Enter. Ctrl V to paste and we will get just the part. Wow, make sure it's normal, just the part where I actually know what. We could include Facebook, this bar at the top if we want and around there should be fine. Okay, control her. a new pasted document that's okay, now if we go back to Adobe Illustrator and open up the identity guide line, this is where we can put our previews here for the actual business card presentation that we made, so I'm going to open that backup real quick and it's there control a merged edit copy and then paste this here okay and we'll also continue with the document setup and edit artboards and put this down there okay let's look and see what it is this.
It looks like it's good so far and then I'm going to come back here and I want to take this and go file a new file very quickly and we're going to use 859, I'm going to try 600 again and I'm going to take this copy. control a C control, paste it and I'm going to press Ctrl T to shrink it, press Apply and then I'm also going to create a new layer Ctrl Shift and Enter, grab the gradient tool, make it white, make sure it's this one. right here, that's in the foreground to be transparent, start right here, at the bottom, hold down shift and go up there, okay, edit, copy, merge and go back to Adobe Illustrator, paste that over there, it's Okay, so what would you basically do for a royal official?
The identity project is to go ahead and continue to apply this identity to other media using the same techniques that we used, obviously we just tackled a business card design and then also a social media design, but obviously there are a lot of other letterheads that you already know . There are many other things that you can do and then integrate them into the visual identity and yes, that's it for this project, so in the next project we are going to go ahead and start with a second visual identity design. See you then, hello and welcome to the second follow-up project on behalf of this fictional company: cut cake, so not cup cake like P, take that P and change it to a T and we've cut the cake, so what It is basically? is a fitness nutrition company that takes foods that are commonly associated as unhealthy like a cupcake, except I make them much more nutritious and healthier.
So our job as visual identity designers is to first create a logo that is relevant and unique. to this business and then provide a complete visual identity. Well, in the next lesson we'll go ahead and start brainstorming and sketching out an idea for this company. Well, welcome to this lesson where we will focus on outlining a concept. for the fictional company Cut Cake so just to reiterate that Cut Cake is a fitness nutritional company and the idea is to provide typical foods that are unhealthy in a healthy way so we have the cake cut and the idea is to drink that tea . changing it into a piece and taking the cupcake and making it cut, since you can have your cupcake, you know, of course, and also be able to maintain a healthy lifestyle, so instead of going the route of a letter mark this time we're going to make a real, unique symbol, so the idea that I came up with was basically sketching out just, you know, a general shape of a cupcake, so if you think of a cupcake, it usually looks like this and I'll make it real. quick if I can and this would be, for example, the frosting on top and then the cup portion underneath, so how can we take something like that and turn it into an actual relevant symbol that has some kind of nutritional meaning so that the La The idea I had is to take this basic shape at the top, so we'll forget about the bottom and we basically have three different dimensions here and you know, when you have a cupcake, you usually have the frosting and if some people can, they really like them. draws attention but this is the general idea so we have three servings here so one thing that is generally associated with weight loss is exercise equipment or steps so I thought of the idea of taking those and try to represent them in the idea of steps or step aerobics, for example, and it will also have the meaning of cutting the way I represent these steps, so we want it to look like a cupcake and we also want it to look like steps and Also I want them to look like they're cutting, so the idea I had was to basically create the next shape here to have the top part that we would emulate the smaller one here and it would go down here and go up. a little bit like right there and then the last part over here, okay, so if you can see somehow, there's a similarity between the top of this cupcake and these steps, so let me real quick so we can see that.
You better go ahead and fill that in with the pen and there you have it, basically, as I mentioned before, it has the same idea as a kind of iteration of steps I and it also represents a little bit, if you look at it from a general perspective, the actual cupcake, etc My idea for the type is to have the cut layer that is cut to form a cake underneath and for the colors we are also going to experiment in Adobe Illustrator in the next lesson. Well, see you then. Well, welcome to this lesson. I'm going to go ahead and make the cut cake logo design a reality here in Adobe Illustrator, so I'm going to go to a new file.
I'm going to make the name of the cut cake and go ahead and make sure the width and height are fifty. nine by six hundred points and press OK control one will take us out to one hundred percent and we'll continue here to see the grid view and snap to the grid and make sure we have the pencil tool out and I go to the left - click once here , not three grid blocks. I'm going to cross holding shift and then I'm going to move up a grid block and then I'm going to connect it right, so now I'm going to zoom in here a little bit and I want to control C. and then Ctrl F from that, I'm going to move it up right over here and I'll right click on the transform scale and I'll try about 66%, which is one third, I mean, press OK, okay, control C. control F and we'll do the same thing up here, right click on transform scale and leave it there, so now what I want to do is drag us down so that this point touches this tilt and about the same area here and I'm going to go ahead and go to view and turn off the adjustment to aim like that.
I can zoom in closer here and I can adjust this with the up and down arrow keys so it's more aligned with this, now what? What I want to do is very fast. I'm just going to give you their colors, this one first for the color. I'm going to make it more on the feminine side since the target demographic is going to be women for this and I'm going to make this here pink. I'm going to get rid of the stroke and I'm also going to come here to the gradient stroke and I'm going to get rid of that very nicely and very quickly.
I'm going to grab both of them by holding down the shift key and left clicking on them to grab the eyedropper tool and make them the same color that way I can get rid of the stroke real quick, although each of these will also have different colors, so I'm going to do this color right here. Oh,do it too horizontally right there, so when it comes to the design of this, you know, I came up with a way to really reinforce the identity colors and stuff. is just doing this really quickly, so I'm going to take Ctrl C and then Ctrl F and get rid of the guy.
I'm going to right click and ungroup it and that way I can take the type and just press delete and I'm going to zoom this in a little bit and what I wanted to do is create some straight lines because we applied that roughness tool to these, so I don't want to that necessarily and I want these lines to be kind. coming from one side like this and I want them to be at the same angle as these three bars, so what I can do is very quick. I'm going to right click and ungroup them and we're going to get our green color first and I'm going to use the pencil tool and I'm going to start on one side here and then I'm going to go down at about the same angle as this part and then what I'm going to do is I'm going to go ahead and press Shift and connect it. good.
So now I can go ahead and get rid of the logo underneath and if I move it away real quick, I can get rid of them and then move it up about here, I can scale it up just a little bit. a little Ctrl C and Ctrl F and we move it down, this will be the blue and then this one here we will also move it down and it can be the pink color, so now what I want to do is go. I'm going to get rid of the guide, so Ctrl and semicolon, then I'm going to take the Rectangle tool and I'm going to exit right at the end of the document, sort of there, control Shift and D will split those objects next and I can delete them with the selection tool direct just doing that, press delete twice and then do the same thing here on the right, coming right there, control the shift on D, grab the direct selection tool, select just the right part, press delete, okay, so basically This just gives us some color. some design and shape on the actual card so you know again a lot of this is just experimenting and if we bring back our guides we'll see that this will be the actual cut part so we'll have enough of each color to make a impact here so now what I want to do is add the actual information so I'm going to continue with the text tool and if you remember we're going to come back to this identity guide line and the main font is prosto 1 so come here and I'll put a name and I'll change here to the font and what I could do is put them all in uppercase.
I'll narrow it down there and put in the following information that we can put in. an email, so we'll put John at Kut kake.com and also a phone number like that and finally we can also put in a web address, so we'll have our four bits of text here and I'll line them up like it's going to look pretty good and to give it a little bit of color I'm going to take that and make that name the actual primary pink color and that's it to take care of the front card of the cupcake business. card and I'm going to go ahead and make sure I save that and I've called that front and we can also take all control shift and Oh to turn it into outlines and then save this again and call this front no outlines and press Okay, so let's go ahead and let's save this as back and then what we're going to do now is we're going to go in a different direction and what I'm going to do is I'm going to get rid of the guy and also get rid of these. there and I'm going to press Ctrl + semicolon to get rid of those that we don't need and I'm going to ungroup them to get rid of the type and I mean, I'm going to group them, I'm actually going to leave them the same.
Real quick, I'm going to get the color, the primary color here in the foreground, I'm going to take the Rectangle Tool and place it there and then I'm going to drag this here to the bottom, we're going to click on our icon and this time we could center it vertically and horizontally sort of like this , and that will serve as the back of the card, so now save that and that's the front on the back of the business card to cut the cake, so in the next lesson we'll be. I'm going to go ahead and do the facebook design for this company and apply everything we need based on the identity guideline, okay, see you then, so make sure you have the face book dot PSD template open and what we want to do is to also switch to Adobe Illustrator and make sure you have the identity guideline to open and what we are going to do is take the logo as a posture eye and also for contrast in the first project, you know, we include the complete logo with the icon or the symbol and the actual type.
This time we're just going to use the three slices up here, so what I'm going to do is I'm going to go ahead and ungroup this real quick, grab these Ctrl C, go back to Photoshop and I'm going to open a new file. We will make a new one. 180 by 180 document for the profile image and make sure the resolution is 72 and set it to RGB if it is not already and the background content can be left transparent and press OK. I'll fill it very quickly with white and then glue it on. as a smart object, wow, don't place it yet and we'll shrink it down so it fits here properly pretty decently and I think it works pretty well, press the move tool and select the spot, so what we'll do is we'll go ahead. and I'm going to press Ctrl to select everything and then just edit copy merge because we have two different layers here, okay, now what I'm going to do is create a new layer Ctrl Shift and turn it into a clipping mask right here, paste. this, oops, I did that on the cover photo, sorry, let me back it up real quick and I'll go to the profile photo, there we go and this will be the clipping mask on that pair and we'll paste it in and that's it.
It doesn't appear immediately because it was pasted here. I'm just going to drag it over there, delete the dimensions, and scale it down a little bit so we can precisely match it to the right size. We can have a good idea of what this will look like, so now it's done and also something I didn't mention in the first project. You know, this, of course, also shrinks to a much smaller size every time a person. whenever you post a status update or whatever, that's why it's always important to keep it as simple as possible and if you're going to have a type, make sure it's easily identifiable in that smaller size, so now we'll move on and we will worry about the actual cover photo and just for this dummy project I am going to use a free resource image from a user on deviantART comm and they have a resources section where you can search for random things, if you need stock photos and as long as Yes you review their requirements, you should be able to use them freely as long as you respect them, so I'm going to use this and we'll modify it a little bit, so I'm just going to hit download and of course the URL is here and once I click download, It will download in a larger size in another window.
I'm going to right click and copy the image, which I should be able to do in Firefox or Chrome, so I'm going to go back to this area and the cover photo. I want it to be this color so it really stands out, so I'm going to control the end of the change for a new layer and we can call it cupcake and make it a clipping mask. So if we paste this, we'll see that it has a black background, so if we want to fix that real quick, we can go to the new file and we can paste it and then very quickly, just select continuous here as well and the tolerance as long as you've set it to a highest number like this and can enter or affect that area, you know we also want to experiment with the background erase tool, so if you select this one you can get rid of it quickly, it depends on the tolerance set.
So let's take the size real quick to something a little big so it does a pretty decent job right now the tolerance is only 14% so you could try something like 50 to see how well it works and be able to support a several times just so we can get to that area and that seems to be it, so you want to go down there, but that becomes a problem, so you can go up here and if you have to put that scope right there, okay and take the size. down just a little bit, okay, so what would be really quick to get a nice crop is to just use the pencil tool with the shape or path selected and just go really quickly over here, you can hold down the Alt key and do left click to undo. of the steering angle and we'll go down very quickly here you can also left click and drag to affect where the next point will go and this doesn't have to be perfect, I don't even think it's going to be. showing the bottom anyway, but we'll see appear and then what we can do, it just appears here, the crop area, right click, make the selection, press, make sure it has anti-aliasing and press OK, and for me, it's reversing it, so Ctrl Shift.
I'll fix that and then press Ctrl C to copy, so now we can paste it and we're not going to have a large size where you can really notice the block, the very faint black outline, we might need to fix that. What I'm going to do is just scale this down a little bit, maybe about there and apply it, and I'm going to move over here real quick to fix this area with the path tool, just pop up, right click and make selection , press OK Ctrl. change I and remove BAM, so now we can play with a layer blending mode just to see what it would look like because I don't want it to just be like a photograph there, so if you select twice in the blending mode Up here for that layer and press the down arrow key, you can start experimenting with different views of this.
I like that, no, actually, and again, this is all about experimenting. You know, I think what I want to do is luminosity. What you need to do is image adjustments and then desaturate and when you get back to normal now it's black and white and you can filter them to see if there's something you like too or you can also pull this down and you know what I do. I want to get rid of it and I'm going to do a very quick job on that outline because it's kind of noticeable and it's going to go up and around and come out here.
Oops, right click make selection Ctrl Shift I and delete Oops, gotta do. Make sure you're on the actual layer before you do that, okay and then the same thing here and I'm going to go quick because you know if this was a real project, you want to make sure everything is really solid there, okay and Ctrl Shift, I delete everything . Okay, that looks a lot better, so let's go back here to the identity guide and I want to take this one here, the white version 2, so I'm going to copy it and create a new clipping mask layer. yeah sorry, if you select a smart object just create a new layer anyway and what I want to do is I think maybe I want yeah, okay, what I'm going to do is I'm going to leave it like this place and I'm going to right click and rasterize it and I'll copy it there, I'll take the ER tool, mark up and just copy the wordmark part, delete it and then paste it that way, wouldn't it be there on two separate layers and then we could take this? one and place it right here like this, so I like that look and that concludes the design of the Facebook template and for this project in the next one I'm not going to bother with the section where I imposed the graphics for the business card and also this Facebook page simply because we already did it in the process, it's the same for that, so if you want to do it on your own, you're completely fine, you can check out the first projects section versus where I went, I think so, it refers to bring it all together so now we're going to consider this one complete and we're going to move on to the third project and I'll see you later okay hello and welcome to the third follow up project and the name of this fictitious company is photo graphics so the first part would be photography and then the next part would be fixed so I would photograph GRA and then fix its Photoshop magic to repair the photo, so it is a photo restoration business that basically uses Photoshop, so our job adding visual identity desires again is to design a logo and then provide a complete visual identity that this company can use in any of your future visual media.
Okay, in the next lesson we're going to go ahead and brainstorm and sketch out a potential concept for this business. Well, welcome to this. lesson in which we will focus on outlining a concept for the fictional company Cut Cake, so just to reiterate that Cut Cake is a fitness nutrition company and the idea is to provide typical unhealthy foods in a healthy way, such as is that we have cut the cake and the idea is to take that tea, change it for a pea and take a cupcake and make it a cake cut, since you can have your cupcake, you know, of course, and I can also maintain a healthy lifestyle , so instead.
To go the route of a letter mark, this time we're going to make a real, unique symbol, so the idea that came to me was to basically sketch out a general shape of a cupcake, so if you think of a cupcake, it's usually see something like thisand I'll do it really quickly if I can and this would be, for example, the frosting on top and then the cup portion underneath, so how can we take something like that and make it into something really relevant? symbol that has some kind of nutritional meaning so the idea I had is to take this basic shape at the top so we forget about the bottom and we basically have three different dimensions here and you know when you have a cupcake it usually has the frosting and if some people can really pack it in there but this is the general idea so we have three servings here so one thing that is usually associated with weight loss is exercise equipment or steps so I thought of the idea of taking them and trying to represent them in the idea of steps or step aerobics for example, it will also have the meaning of cutting the way I represent these steps, so we want it to look like a cupcake and we also want it to look like steps and we also want them to look like they're cutting so the idea that I had was basically create the next shape right here so that we have the top that we would emulate the smallest one over here and go down here and go up a little bit like there and then the last slice over here, okay, so if you can see somehow, there is similarity between the top of this cupcake and these ordered steps. so let me real quick so we can see it better go ahead and fill that in with the pen and there you have it basically like I mentioned before it has the same idea as kind of an iteration of steps I and it also represents a little bit if I would see it from a general perspective, the actual cupcake, so my idea for the type is to have the cut layer that cuts the cake underneath and for the colors we're going to experiment with Adobe Illustrator as well in the next lesson.
Okay, okay, so in this lesson we're going to go ahead and take the sketch that we did in the previous lesson and make it a reality here in Adobe Illustrator, so I'm going to go to a new file and I'm going to name this photo arrangement and I'm going to I'm going to be left with 59 by 600 points and I'm going to press OK and control one to get to one hundred percent and then I'm going to go to see show grid and see snap to grid, so this time I'm going to left click, drag and select the rounded rectangle .
Now, if you go to edit the general preferences, you'll see the corner radius set here. I'm going to leave mine at 80 points and you can set yours like Okay, okay, if I left click here and drag, I'm basically going to make these three grid blocks long and this will serve as the actual band aid and then, inside, let's create another rounded rectangle. This time I want to make the border radius smaller, so if we go to edit preferences and general, we can change this here to about 8 points. Press OK, so I'm going to zoom in a few times.
I'm also going to select. this and change the opacity to 50% just so we can see. I can actually make it a little bit more than that, maybe 20% just so we can see the inside here, so grab the rounded rectangle tool again. I'm going in. a grid block here and do it basically here like that, everything is even and aligned in the center, so now what we need to do as well is add some circles that will serve as the type of eye that they are. Like holes inside the band-aid, we don't want to add too many because otherwise the smaller sizes will look blurry, but before we do that, I'm basically going to change the colors that we're going to use so that the opacity is brought back up to the 100% and I'm going to select both by holding down the shift key and I'm going to come here to the gradient and you could also do the same thing here.
I'm going to change. I'm going to get undo the stroke and I'm going to change the color to a brown, a light brown color right there and then I'm going to double click on it and then I'm going to make it a little bit lighter over there and the color code for that is d 6 B 3 9 0 if you want to use the same colors now we have a good general band aid color here and on this one I'm going to make it a little bit lighter so we can see it and that's EB D 1 B F okay So now what I want to do is take this again temporarily and reduce the opacity to about 20% and that way we could see these areas of the grid right here, the grid points, so I want to take this and turn it into an ellipse and these.
It's going to be basically white, so what I want to do is put one over here and hold down Shift so it's white so I can get in a little bit closer, I want to zoom in or zoom in and I'm going to put one right there. I'm going to press Ctrl C and then Ctrl F and drag it over to this one here and I'm going to grab both of them. of these control C control F move this right there I'm going to move this one to this part make this one down too and take both control C control F and put it there now let's see what it looks like if we press control one and go ahead, we'll do it a hundred per hundred, so these are a little bit too big for my taste, so what we can do very quickly we'll go see and turn off snapping to grid. make sure you only select the white ellipses and press Shift and Alt to shrink it, control one and let's move back to see and turn on snapping to the grid, we'll make it happen again at this 20% and we can move them back into place and they'll be placed on the correct position right there, okay, so if there is a control one, now we can return it to 100%.
So what we can do now is take both. I'm going to grab them all and press shift to deselect the actual band aid and let's zoom in again very quick control C control F right click on it and go to transform reflect leave it vertical and press OK now we can drag this by holding shift and that should line up basically the same way. Okay, now that we've done that, what we want to do is go ahead and grab everything here. I'm going to press Ctrl G to group that and so we can see now on the layers that we have a group of layers and I.
I'm going to do it, if you go down here with everything selected, you'll see that you can rotate it by moving your mouse over here, hold down the shift key and just go up once, so now it's at a perfect 45 degree angle and now what we want. What needs to be done is to duplicate that, so Ctrl C Ctrl F and then we can right click on that transform reflection and make sure it's vertical and press OK, so I want this one to be below it, so this one is now up and now what can we do.
It's going to go ahead and make this band-aid a little bit darker, so when you click when you use the normal selection tool and you click on a group, the entire group will be selected, but we just want the actual band. -help form so you can use the direct selection tool right here to click on it and that way it will just select that, so let's go back to our foreground color here and we'll make it a little bit darker and I'm using BF. nine eight seven nine okay okay and I also want to add a very brief shadow here so what I'm going to do is I'm going to zoom in and I'm going to grab the pencil tool and I'm going to click on first I want to go to view and turn off snapping to grid. , so I'll click there, you can hold down the shift key and then up here randomly and then what I can do is if we take this right here with the Gillette direct selection tool and then this here and temporarily just move it.
I can go to the object with that path selected, split the objects below and I'll go ahead and grab those three layers now and we can move this back here with those three selected. and just move it around a few times to make sure it lines up or as needed, let me go back right there and then I'll take this one here that we split next and change the color to be a little bit darker. Basically, we want to ungroup them right now, so right click on ungroup, right click and group and then we want to grab the outer bandage layer, so we keep these changes like that and then this one darker in the middle.
There we go, once you've selected them all, press Ctrl C and then Ctrl F, grab them and drag them to the bottom and if there's a layer that won't, it won't go underneath, all you have to do is just drag. that's fine and then press Ctrl G and once you have that, fast forward to the Pathfinder window and click Unite, then press Ctrl H, let's change our foreground color to a darker color right there and then let's go to well, actually we could do this. There are two ways to go to the object's offset path or give it a stroke and we could just give it a stroke and around 10 points works fine so now what we want to do is add the actual frame pieces and the corners to do that .
Let's go ahead and zoom in here on the top right or top left and I'll use the pencil tool with view and snap to grid and we'll make these two grid blocks long, these individual parts hold down shift and select up there . and then select here and if we go to the gradient, let's remove the fill, we might want to make it bigger, but first it's definitely too big. Wow, make sure you select it and then reduce the stroke size and control one and I think around there three points is pretty good, so we could take this control C and then Ctrl F transform reflect press okay, we'll drag this over here tomorrow shift grab both control C control F right click transform reflect and this time horizontal and then drag and down using shift and then control one now with both of them are all selected by holding shift and left clicking and dragging we can change the color to black for the stroke, all good, so now at this point, nothing becomes outlines as far as our strokes are concerned, so if I move it to the left, control C, control F, I move it here to the right and I go to the object path outline stroke, now we can zoom it out to see what it means. it looks like in smaller sizes and it looks pretty good, so now we can go ahead and get rid of this one, delete it and now we'll move it, we'll reduce it, let's say we're over here and we'll move this.
Now let's go ahead and get some kind of photograph and then let's set press shift, control, shift and the letter O which turns them into outlines, right click ungroup, select, we're actually just going to back up real quick, sorry, we need to do this first, if we control H, we can see that FI this, I want to make it a little bit bigger, so if I hold down Shift and scale it. up and place it right here. I want to shrink this slightly by holding down Shift and Alt. Okay, so if we scale everything down and see what it looks like at smaller sizes, everything is readable and looks good.
Now what can we do? What I do is I come here control C control F and we're going to go ahead and make a black and white version of this, so I'm going to come here and this is going to be a black and white version and I'm going to make this part the outside part and this and this wait change we're going to take that little shadow and then this too and we're going to make them black I don't think that black has been selected this wood can be white like this and control one okay there we go so now what we can do : I'm going to hide the grid, very quick view and hide the grid, and I'm going to select our black color, just like the rectangle tool, and I'm going to go ahead and drag this to the very bottom and lock it take all of these control C control F move it right there and here you go good tip if you select all of these press Ctrl G and control H to get rid of those points and you're going to edit edit colors invert colors it will invert a selection automatically so we don't have to change them all by hand, okay, and we also have the type here which can be white and then we have our supports that we have to worry about being white, me too, okay And that's it.
When we go to open this, we disapprove, pigs. When we open this up, we don't want the black background as part of this, so I'm just temporarily going to hide it. layer right there that way it's transparent, so go ahead and make sure to save this as an AI file to use in the next lesson, where we'll go ahead and start with the visual identity guide, okay, see you then, okay, so make sure you have the identity guide from the previous project, open cake cutting and what we want to do I already saved for the third one, so save yours too so as not to overwrite it if you want to save it and also make sure the s--by AI photo files are open here, so we'll take this and press C to copy it and then delete this, delete and paste this one inch offset and scale it to a pretty good size right around there, okay? so what we want to do is get rid of these three andI'm going to show this one, so we'll copy it and put it here and then these two as well, this time if we take all the layers very quickly. this part, with the exception of that dividing line, scale it down maybe a little bit more actually because these are horizontal logos and not vertical like they were before this one down here, it would be worth making it bigger, just like that and we can move these more inline vertically so that's fine so far and on this one it's not really worth describing the icons simply because it's pretty evident that you know what the photography is about here and then the solution is the band aid so it was worth it describe the previous two or give you some kind of explanation, but this one really isn't worth it at all, so I'm going to delete it and come down here and take all of this.
Actually, this here is locked, so let me find that layer and unlock it in a layers area and select all and we'll put this here and we can specify our actual. I'm going to group it real quick and Ctrl C and Ctrl F and we'll move. is over here temporarily okay, so our main color scheme we're not going to use black this time, we're going to specify that I'm going to use the direct selection tool because this is a group where we're actually going to use this color. We'll start with the darkest, the darkest, which is right here, so we'll go ahead and yeah, we can select this and then select that stroke and then also specify the darkest, the slightly darker and lighter version and then this version that is. a little bit lighter and then this here is also okay, so let's go ahead and delete that and now what I want to do is go through this process of lining them up, so since we've already done this, you don't want to see me sitting down.
I'm doing this, so what I'm going to do is I'm just going to pause it and then when I have the right values, Reba I'm going to restart the video. There are the values associated with these four colors and the typeface of the font without Pro. I think so. What I want to do is open up the identity guide for the first project we did, which is right here, and I'm going to zoom in on this part and then copy everything I see here because the source doesn't exist. Pro has different weights so what we're going to do is close it, delete them and then paste them in there and I'm going to go ahead and select everything so we're without pro change this to font without pro okay and this I thought has a lot it has normal light or extra light, you know you see them all, so we're going to stick with this normal, bold, black light, so by default, it's extra light, so what I want to do is change that to light, wait a second, where did this go?
He must not have copied you coming back here, damn, sorry, actually you know what, instead of doing all that again, I'll bring him back, we'll go. a uh, we'll do the pasting again, yeah, because that's no big deal, sorry, they're a lot easier than what I was about to do, so change them all again. Font sans pro will start everything with light, wow, yeah, light and then. change this again and it will become normal bold and black, and then what we'll do is, yeah, this looks pretty good on its own, okay, okay, so that completes the identity guideline for our third project for graphics photographic and the In the next lesson we're going to go ahead and make another business card, okay, see you then, so we're going to go ahead and apply this identity to a real project, so we're going to make a business card again and so on. make sure you have the photo identity guide and also the blank AI card template, so what we want to do is take this control-c again and then paste it here and we'll shrink this sucker down quite a bit. a little bit, let me shift and alt and this time we're going to center this again horizontally, so I'm going to click on align and then I'm going to make sure that these groups know, so first we need to make sure that there's a group before we align and then we'll go ahead. go ahead and we'll press horizontal alignment Center and we'll just drag it down a little bit while holding down the shift key, so this time I want to create a horizontal block portion and I'm just going to use one of these colors, I think the lightest one.
So what I'm going to do here is I'm going to left click and drag over there and then use the eyedropper tool to give it that center color and I'm also going to drag this down a little bit and center it vertically between this. white part, you can use the up and down arrow keys, that looks pretty good and I want to go ahead and lock that layer so I can't select it and then what I want to do is take this control C and then Ctrl F. I'll drag it to the top of that layer.
I'm going to right click and ungroup it and just delete the type and then just to create an additional element of the layout. I'm going to create a watermark from this specific Band-Aid going in that direction, so I'm going to zoom in real quick and I'm going to start getting rid of using the direct selection tool up here on some of these layers, so if I just select that part and press Ctrl or command H you can see exactly what you're selecting it would also be worth right clicking and ungrouping these layers that way you could get rid of most of it.
This is also a stroke so that we can get rid of that, get rid of these, this and all of these. and I also want to do these areas right here. Actually, I'm going to use a quicker way to select everything, hold down the Shift key and deselect these parts so that we have the white circles covered and then make it that color right there, all good, and so on now. What I want to do is take these, I'm going to group them Ctrl G Hit Guy control zoom up a couple more times there I'm going to zoom this in and move it roughly around here for the scale size. and move it up a little bit, okay, and then what I'm going to do is I'm going to go ahead and unlock this layer and duplicate it, so Ctrl C and Ctrl F and then move this to the top, now I grab both layers and I'm.
I'm going to go ahead real quick and select this layer Ctrl Shift and D to D. I split the objects below and that way I can ungroup them from time to time, just select the top parts to get rid of what was cut off and that looks good there same. now I'm going to go down here and deselect this group again okay and then we could take this again and lock it okay so just kind of a faint watermark and just accent adds an extra design element so if we press Ctrl + semicolon we will see on the right.
I'll have enough space to see it in its entirety at least in this part. Okay, now what we want to do is go ahead and add the actual type, so we'll leave these guides. above just to give us a point of reference and we're using Pro font supports for the font so I'm going to go ahead and put in the name and you can always change it in terms of knowing how you're representing people. Me and all the other bits of information, so I'm going to switch here to non Pro source and we're going to use lights for this.
I'm going to use bold for the name and then we'll go ahead and copy that and down here. I'll put an email again and I want to go ahead and take both of them and shrink them down a little bit and put this over here and then under this, go ahead and put a number in and then copy the actual C. Ctrl F and actually at this point I think I could put the Dover online website address here so the photo communication becomes a little bit smaller, just like that and I think we can take all three and scale them up a little bit.
Yeah, around there and if we want we can also increase this just to fill in more of this right part and that's okay, okay, that takes care of the front, so go ahead and save this as the front card, you know? I've made it so you can also take everything here, convert it to outlines, control the bill of exchange. Oh, and save this too. Oops, I'm going to make a backup. I overwrote my initial. Save that takes all control of the bill of exchange O and then also saves the file as. and the front outlines are fine, so we'll quickly save this again as back and we'll go ahead and get rid of the type here and we'll get rid of this and we'll also get rid of the type Oops. second right click and Ungar if that's okay and then we'll move it down real quick and we'll go ahead and increase this size just to match the top.
I'm going to press Ctrl semicolon to get rid of them. Oops, and this time instead of centering it, we'll do something slightly different and place it over there, okay, and then I'll bring out the rectangle tool and we'll split everything underneath so that Ctrl Shift and D take the direct selection. tool and it's like right below everything press delete twice and do this one more time Ctrl Shift D take the direct selection tool and delete just the edge of that circle okay and that's it so yeah obviously when it comes Of a business card design there is no right or wrong for the most part when it comes to designing cool things like the back of the card, so yeah, that's it for business card design, so in the Next lesson we will go ahead and address the design of the face book again. applying the specifications in the identity guide line, okay, I'll see you then, so make sure you have the Face Book PSD template open and also in Adobe Illustrator, make sure you have the identity guide three open and this time for the profile picture.
We're going to just present this symbol here, so I'm going to take this Ctrl C, we're going to go present a new file real quick 180 by 180 and we're going to make sure it's RGB because we're not working with print, fill that with a color white and paste it as a smart object. Wow, we did it last time we went and we make it about that size by holding down shift and everything and press place, okay, so now what we can do is go ahead. and edit, copy, merge that and I'll select the profile image layer control-shift-n to a new layer, make it a clipping mask and hide the dimensions area, paste it into control V and move it here and shrink it a little bit Press Apply and you can use the arrow keys on your keyboard to adjust it.
Okay, now for the cover photo I want to use this color here. Hit OK and I'm also going to use deviantART again for the resource images. I found just a random old image to use here, so I'm going to press download and right click and copy the image and come back here, we'll create a new layer, change Ctrl and turn it into a clipping mask on OK and then Ctrl. V to paste that in and I'm going to make it pretty big and I'm going to take the blend mode with my down key on my keyboard, I'm going to keep Donaire and I'm just going to filter these out and try to find one that I think will work.
Alright, you can always adjust the opacity as needed and I think something around here might be decent. Let's go back to Illustrator and I'll grab the white version down here. Ctrl C to copy it. Let's go back to Photoshop and we'll go ahead and create a new clipping mask control-shift-n and oh, you know what I think I did wrong, we want the black version, there we go, we'll select all of that, there we go, sorry. about that, we're working with a light background, so we want the dark one, so come back here and we'll paste this into a smart object and you know I'm not going to include it because it would be a little redundant. let me rasterize that quick right click, rasterize and delete something like this and if you want, I make it look like it's a little bit more of an old film photograph, what we could do is create a new layer and oh, this is already a empty layer, so we'll use that one, take the brush tool and you know, somewhere around that size, I think around 180, I'll take the eyedropper and choose a pretty dark color like a dark brown and circle the edges like this and then you can adjust the opacity down a little bit, yeah, I think that will work well and as you can see, it's very simple, you can also include a website address, you know, I think.
I'll do that. I know this is non-pro font, so we could just put photo graphics. Wow, fi X, let me change that font real quick. Font without Pro and change this to bold, this is too light and then put calm control. put it there, what's up, move the tool and press apply, make sure everything is lined up, like that, like that, that concludes the Facebook template designed for this project and that's it, so go ahead and watch the closing video where I'll do a quick overview of what we learned and I'll also introduce you to the design course communications mentor program so see you and then bye.
If you have any copyright issue, please Contact