How to make great videos ANYWHERE with AI ENVIRONMENTS
Mar 14, 2024In this video, we'll show you how we use the new generative fill feature in Adobe Photoshop to create new
environments
for ourvideos
. This technique essentially gives you an AI-powered matte painting artist. In the past, Hollywood used real matte paints on glass to create images like this now and with basic Photoshop skills you can create customenvironments
to expand your sets and breathe life into dull spaces; However, like the matte paintings used in the past, there is a big limitation with this new process: you cannot move the camera if you move the camera at all, the illusion is broken and because this channel is called epic light media and we love lighting, I'll show you why knowledge of cinematography is important when creating realistic environments.
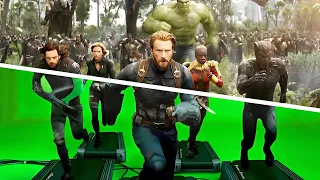
The following commercial was made using generative fill AI matte paintings to find the right cell phone service provider can be tricky, especially when living in an apocalyptic environment with no cell phone service. The best thing to do in a situation like this is to stop trying to find cell phone service, look for food and water, and hope the radiation doesn't. I won't kill you first for more information visit Giveup.com let's go over the basics of how we film our exterior plates. The first camera placement is very important when you are going to do these things.

More Interesting Facts About,
how to make great videos anywhere with ai environments...
You have to look at your horizon. What we have. What I noticed is that you can get a lot of easy shots when the camera is up high, so I'm on a hill looking down to get a usable wide shot without green screen work. You must
make
sure that the subject does not cross any. areas you want to change later with generative fill Because of this, in some cases we found it necessary to use our film cart to raise our camera to the proper height, it's funny, but while we were filming high up, I remembered seeing old camera photos from Hollywood.
The operators were on wooden platforms and I realized they must have needed to film that way for the same reason. However, we got creative with some of our setups and chose to film Alex from an angle so that his body would be blocked by this freeway overpass guardrail. and this concrete block, so I think that's the key here, if you don't want to do any green screen work with it, which is still possible, just find a place where your actor can do their scene without interacting with that background . We then went in and chose to film some setups against the simple gray wall of our studio.

We rotated our camera vertically to maximize resolution because the sides of the image would be covered anyway. I just need to capture my body and the generative fill will take care of the rest of this room. It's super boring, all we have is a gray wall, so imagine this space with a window here and some other things. The trick here is to think okay, if I'm going to have a window there, then I need a light coming from that side and I think these elements will
make
the scene more realistic, dramatic and more intense, so let's start with our light key and I'm going to place it in front of me.This paper here you place on a support arm C if you want. I have a C mount and you can lower it all the way up, imagine there's a wall over here with a bunch of windows and now through the diffusion I'm going to actually put this Nova aperture on and the reason I want this light is because it is already a soft font, aha. I'm going to look for support for this. I'll be right back, so I'm going to put the light over here. This aperture light has a junior pin, it is very large. you need to get into a combo bracket like this.
I'm going to dial this in so we're at 5600 Kelvin, that's like daylight, let's see what it looks like, okay, that's what we look like in this light, I think. It looks really cool, but what's happening is this light is bouncing off the wall here, so I'm going to block this out, let's see how it looks next. I want to have a warm glow coming from the other side. Me and since we will be putting in a lamp later, I want to use a light that is two-color and small, so I have this in mind. This is the Amaran two foot tube light.
My number one goal with this light is realism. It has a battery but I'm going to plug it in, we'll see how it looks, well here we are, I'm standing in this beautiful room and with a big window and this beautiful lamp, and I love being in this. Space is a comforting place for me. It's a joke. I promise we'll get into the details of how we designed this room in Photoshop soon. Okay, it was fun. Let's do another setup now where I'm sitting like at a coffee table. We have not made it. I turned this on yet, but we've put the camera upright again, so I'm going to be sitting here now in this restaurant.
I want big windows again. Big windows are a cinematographer's friend, but I want them to be extra soft, so I'm going to rotate. I lowered the intensity of this light, but this time I'm going to have this paper very close to me. Maybe in the background we'll do some different colored lights next, now a lot of cinematographers say you shouldn't have done that. lights near people you shouldn't have things too close I don't agree I'm going to move this light over here now I'm going to lower the intensity of this light at this point I also chose to move the light tube two feet closer to me, but I turned it down. intensity, let's go to 25 percent, look at this, so now we have evidence of a warm glow from some kind of warm light on the ceiling and a window below.
I want to add some blue fill to my face for the blue light. I want to use the Aperture MC Pros that just came out, so these little aperture lights are
great
. I know I always talk about opening themes, but they really are my favorite lighting company. I would even talk a lot about openness. if they didn't give us free stuff, so I marked this blue light, this camera is recording, we're just going to do this little sequence here, after bringing this footage into Photoshop, we decided to create a modern dining area instead of a cafe Originally I thought that the blue light could be motivated by a neon sign, but since that didn't work, I'm sorry I used it for this setup, let me know what you think in the comments.Well, next let's finally talk about how to use generative filling. In Photoshop, export a still image in your editing software first, but be sure to scale the subject to the desired size so it's easier to bring back in later. When you bring the still image into Photoshop, the background will be black, so you'll need to take the photo. the background becomes clearer that way the generative AI will be able to do its thing, then highlight what you want to change with the AI, click on the generative fill and see what you get. The AI gave us three options, but we decided to use this as our base layer afterwards. that we were not very happy with the window so we highlighted the window area written in window as message and it gave us three options, we chose this one, this process continued as we refined the image for about an hour, here is the rest of our the Work sped up to 30 seconds, as you can see there are a lot of decisions to make but it's a fun process.
It's important to note that creating something
great
with this AI tool still requires an artist's eye and some decent Photoshop skills. Generative fill can create something unexpectedly. really great or really bad, so you have to be patient after some finishing touches the image was ready to go back into our editing software. At this point, hide the original layer and export and save the layer as a PNG. Then open your editor and drag the file. image there will probably be a color space issue so the clips don't match in our case we needed to change the image to a Rec 709a color space, at which point our colors matched again but there was still more work to do on our editor.The colorist was able to incorporate all the elements more completely by correcting the color and exposure in different parts of the image, plus some brightness around the lamp and window added realism. Here is the final video with all the effects applied. Well, here we are. standing in this beautiful room and, oh, one more thing, we were able to zoom in so much because we edited it on a 12K timeline. This was possible because we filmed the plate vertically with a 6K camera, so let us know what you think. Do you think this new tool looks realistic enough to be used in professional
videos
?Could you tell what was made by Ai and what wasn't? You may not have noticed, but the narration in this video was done with AI and the voice you are currently listening to. it's fake hahaha
If you have any copyright issue, please Contact