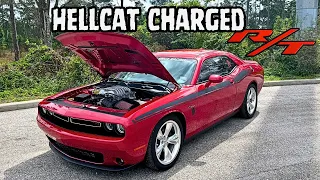
Hellcat Supercharger on a 5.7 HEMI With E85 - Part 1
Apr 24, 2024Hello everyone, welcome back to the channel, in this episode we cover installing a Hellcat
supercharger
on our 57 Pursuit. If you plan on building one, check out my new website where I get all the hardpart
s you need for your Hellcat project. I also provide one to one. -a virtual training to help you get back on the road. Now I'm really excited about this episode because it combines two things I've never done before. I've never added an Electric Adder to a car so I've never supercharged or turbocharged a car that was originally naturally aspirated and I've never added E85 but today we're going to do both and I'm going to show you how easy it is because I have the fullpart
s list with everything you need. need to obtain.
It's done from start to finish. Everything you see on the channel today is not sponsored, so you'll get real reviews of how I feel installing it for the first time. Let me explain some of the basics that I'll need you to go to the great people at CFR Performance and get two of their kicks. The first is for our drive belt, so it adds two idler pulleys and allows us to use the 5.7 serpentine belt system to fit the Hellcat
supercharger
pulley. It comes with all the hardware you need. The second kit deals with the assembly of the supercharger.
More Interesting Facts About,
hellcat supercharger on a 5 7 hemi with e85 part 1...
These are adapter plates that allow you to place your 6.2 supercharger on top of your 5.7 or 6.1 block. It comes with the gaskets you need. You can't use factory. It is now gasket free because it has no O-rings and this is all you need to be able to attach the supercharger to your existing cylinder heads. You will have to do something with the valve covers because of the way you fill the oil. and the way you use your PCV system is through the inlet to 57, so I'm going to use these as well from CFR. I'm going to use this oil filler, I'm probably going to put it in there and I'm going to drill additional holes for my PVC system and run it using this.

I thought they were powder coated when I first bought them but they are painted and comes with the necessary hardware so you have pretty much everything you need including the standoffs for your coil packs, we'll see how this turns out. working with the coil packs here because there are some differences in the Hellcat valve covers that end up flipping the coils so I wanted to do without that let's see if this will work while it's not necessary. I feel like it will give a very nice look, I'm not sure if I'll be able to make it work or if it will fit but we'll see if not we'll just be left without it.

I'm sure I can get a really good deal on these. I have the ECM from a 6.2, but we are going to do without it, so it is not necessary. This will be a great way to recoup the $1700 I bought the supercharger for so we have the Monstrous supercharger from our 6.2 Hellcat and it is one of the newer versions of this Supercharger so luckily it will be able to work very well with our setup and then we went to eflex and got their E85 Pro kit which will allow us to upgrade everything we need. to get E85 working around here so we can increase the Boost even more, we can safely install it in our 57 and keep the temps cool, there are a couple of details you need in addition to what you've seen so far. having to figure out how to cool the supercharger how to get fuel to the supercharger things of that nature so with that let's jump in head first we need to remove the inlet on this 57 if we see down here we have inlet gasket leaks I think we have a gasket leak valve cover, so this is the perfect time to get all that stuff out of the way and make way for our new supercharger.
If you look here under this intake air temperature sensor, you'll see this bolt. We need to remove this casting, get all of this out of the way because it's going to come into contact with the front of our supercharger. We'll have a little more light on this and I'll start to wrap things up. We will remove the windshield wiper arm. caps with a flat head screwdriver Mark the orientation and then remove the nuts with a 15mm socket remove the arms and the plastic retaining clips and you can remove this so much better we have opened ourselves up to more activities we can Get to the final bolts that are on the back of the intake, especially for when we put our supercharger in there, we needed that scream, now we can unscrew a lot of the things, we can disconnect our IAC, our intake Dodge likes to do these tamper proof clips so you will have to press the clip and then you can press the button that will release the harness and that clip method applies to our fuel injectors as well so you will lift up this orange tab, press down on the black button right after it and then it will take out the rinse and repeat for all the injectors along this side.
We also need to depressurize our fuel system. This car hasn't run in over 24 hours. so I'm less worried about fuel spill. What you can do here you'll see there's two clip ends here so we're going to lift them up and back up to get rid of this clip and then we can push down on the connector like that, press this gray button here and pull it out and that releases the fuel depending on How long has it been since the car has been running, there may be fuel pressure built up in the lines, so make sure it has been at least 12 hours since the car has been running or go to the fuse panel, hold the relay your fuel pump and crank the engine several times until the vehicle no longer runs, which will ensure there is no excess fuel pressure trapped in the system.
Let's go ahead and we're going to come over here and disconnect the sensor from our brake booster and then I'm going to pull the vacuum line that connects to the brake booster and I also want to remove this solenoid so we'll do the same thing. with the red clip off, off, we're getting somewhere now and on the other side of the car it's the same thing, the injectors you have to disconnect and then there's this sensor right at the back that you have to push down and do the same thing and with those 10 bolts removed you can now go in and lift up the inlet and take it all out wow wow wow not bad it looks like no one has been here before we still have all the foam in place everything looks nice and fresh.
It's timely that we're here, so I'm really happy that we can take a look because I want to clean up everything here. I also want to replace the valve cover gaskets and look at some of the debris. around some of these openings. I wouldn't be surprised if we had an intake gasket leak. It also gives me a good time to take a look at these coolant lines that run along here because they rust over time and can break, but it's never too hard to get to this and fix it, so let me vacuum them up. here and clean everything up, then we can take a look, inspect our valves and make sure everything looks good from there, so take a look down here.
The intake valves look great, they all look great, so I feel pretty good about the health of this engine. I just want to clean the gasket. The services make everything nice and tidy and then we can screw our adapter plates on tight. so we clean up all of our intake services, next step, before we bother with the adapter plates, we want to get rid of this hanger here, so we need to cut here and remove this piece like I mentioned earlier that's going to get in the way of the path of the snout of the supercharger, so I'm going to throw plastic all over the engine and cover part of the engine bay as well so that we don't have aluminum everywhere and once that's done, we can take our cutting disc and start cutting this.
I'm going to use a combination of my cutting disc and my belt sander to get a finished product. The 4 and 1/2 inch Cute Blade BL is perfect for this. uh just take your time, go over the whole area and there will be a certain section that you won't be able to reach with the tool, just grab a pry bar and pull it out, after that I just go back with my belt sander and round everything off. of the jagged etchings, okay, so that's it once you remove so much from here. I just buffed everything gently and that's it.
I'm going to remove the valve covers and coil packs, then replace them with new ones. from CFR, one of the main reasons I chose these over the originals, besides looks of course, is that I need to make provisions here for oil and PCV fills. I need to drill a 1 and 38 hole, maybe right here so I can get my fill tube in place. First I want to remove the existing valve covers so I can see what kind of clearance I have that may alter where exactly I placed this oil filler cap and PCV system. Now it's always a good idea to place it. your coil packs in the same order you plan to reinstall them, although it is not necessary, it is just good practice to remove the air box and get to the 10 8mm bolts around the valve cover, which will help you take it out and it will allow you to get to the lower bolts here everything down here is 8mm everything for the coil packs is 10mm looking closely at the valvetrain everything looks really very clean it's an OED for regular service intervals courtesy of the state of Ohio, so I have my valve cover here for the driver's side and I'm getting ready to drill it out.
I have my Harbor Freight Arbor saw with the Hol 1 and 38 saw and I want to demonstrate what this oil filler will look like so what I have in my hand It will go under the valve cover and the o ring will apply the seal. This ring will go on the top side and it will screw into this and we lock it in place with this Allen wrench and then this cap will go on top and serve as ours. oil filler cap the only question is if the thickness of the oil cover plus these ribs are too much for these threads to overcome, if so I will take my belt sander and sand them down so this collar screws on smoothly Let's look for it and yes, it is as I suspected.
If I put the collar over here, there aren't many teeth for the collar to bite on, so luckily I've already marked what I need to remove. Get our belt sander and fix that real quick, and here we are, what I did was I beveled all the edges, so we got a really nice gap and I put the lid on there, that O-ring creates a really nice seal, so it fits. looked great. Let's move on to the next thing, moving on to the passenger side valve cover, this is the front and we're going to cut a hole right here so we can put our catch can in and because we're not trying to over pressurize the crankcase , it's important that we put one in to vent the upper valve train of the car and make sure we're all okay.
In some of the research I've done, it seems more effective to just put one on the passenger. I've seen a lot of dual catch can setups being eliminated in favor of a single catch can on the passenger side so that's what we're going to do here and here's the catch can setup, it has some hoses , the support of the deposit. to hold the drain tube down there, all the fittings you need and the hose ends, the hose barb right there and a little bit more tube for the other side of the fitting to finish off the valve cover on the Passenger side.
I have this vent kit. and what you do is you take an o-ring on the back inside the valve cover and you put this nut on the outside and you have this step now that you can get the vapors out of the inside of the crankcase, so we just insert it into the threaded end , we put our nut on the outside and then we're done, so this side is pretty much done. I've tightened everything down here and covered up our intake ducts to make sure nothing flies down there. Now I loosened this valve cover and I'm ready to remove it.
I just wanted to let you know that this is pretty complicated. You have to use a combination of short and long 8 and 10mm twist bolts to get to the cap. The coils and valve cover, so be prepared, have a good variety of tools and be patient, luckily. The factory gaskets work on this. Looking down here, I'm not sure where it came from. It appeared to be the gasket material that came with it. Let's see if I can. Take it out, yeah, I'm not sure where it came from, but it feels soft now, so it looks like I ruined it.
I have a valve cover here, but where I drilled a hole for this step, it is pushing against the rocker arm, so I can't get this in there without contacting it. It should have drilled a hole further down or somewhere else, so let's remove it and see what we can do to fix it through the magic of YouTube. I epoxy welded this in and drilled at the midpoint of this where I should have done it in the first place, so now we're ready to reinstall the best way I've seen to put this valve cover on is without having an inlet, that is, first and foremost. , align everything from front to back. and then turning it towardsinside, I bent both the transmission dipstick tube and the oil dipstick tube and pushed back this harness that's in this corner just enough to give me enough room and you want to make sure you clean up the oil cover gasket. the valve so that it doesn't Don't dislodge yourself while you're trying to get it to work, but be patient, give yourself a little Grace and you should be able to get in, but don't go too fast from one side to the other, here we go and if you can, try to do it. a final check of the perimeter of that board to make sure that it's sitting, it's sitting flush.
The last thing you want to find out later is that you messed up the gasket somewhere along the line, everything looks and feels good, let's zip it up tight. Let me break down the hardware you get in the CFR kit. You have 16 spacers that go to 16 bolts. That will take care of your ignition coils and secure them to the top of the valve cover. You have 10 of these bolts with the locknut washer and they go into these recessed sections for the adapter plates here. It has 20 hexagonal. headers here that will go around the perimeter of the valve cover to secure them to the header.
It has three blocks that could surround the entire supercharger, meaning one here, one down there and I think a third around that side. They will serve as a lock if you don't want to use map sensors and then here you have your adapter plate that will precisely space it from the front timing cover and secure them with longer bolts so you can add two of your tensioner pulley will make a lot more sense and it I'll take it step by step as we add them to the car, but it's just a reference point so you know I didn't think of this before, but you'll also need two. gasket sets that go under and on top of the adapter plates to mount everything enough to your block, so I'll use HZ 7765 as the bottom gasket and then mount my adapter plate on top of that and the adapter plate.
It will only go in one direction so you can't mess it up, the joint is the same on both sides so it doesn't matter which way you put it, this is how it will go if you're worried about it wobbling you can always put a little RTV on it to keep it in place. still, but the adapter plates are very light so I wouldn't bother with that right now, the most important thing is to just clean the surface, make sure everything looks clean, that's better. make sure these are pointing that way towards the valve cover because that's where the supercharger bolts on and then they line up with these holes right here one thing to note about these adapter plates there may be some burrs on the inside you'll see that right there, here too, there's a little bit of extra material left and you just want to make sure you clean up all that thread or even just a supercharger screw just to clean them up, make sure Everything looks good because you don't want to end up threading something because that foreign material it's there so we're going to clean it up and screw everything up nice so now it's time to take care of my tensioner pulley. setup and I'm going to use these spacers and bolts to remove one, two and three and put in the replacement system.
We'll start by removing the 13mm bolts so here are the bolts I removed in the order I removed them and there are no instructions with this kit so I have to figure out which replacement bolt goes where based on the bolts how it fits. will align this thing and how the spacer interacts with the back of this so it looks. like that big one goes there this other one goes here and then because it's threaded it means it has to go up so it needs to be screwed in like this the medium sized bolt we'll go here and before we tighten it all the things need to be done something here where we put the washer on top, we bring this bolt over here and then we put this spacer behind it and it should be the correct length and orientation, it looks like it might work but we have to get our old belt out of the way. with a 3/8 ratchet on the tensioner then turn that tensioner so we can loosen the belt let's try that one more time now that we have our clearance which is boom boom and then since this one is bigger I can do that and then I can put that here and now for the other one.
I can do the same thing, but I know I'm working with the smallest bolt, look at the washer, everything that can go underneath, okay, so this bolt here is as far as it goes. and all the other bolts work pretty well, so what I'm going to do is measure what I just marked, cut it off on the threaded end and then put it back on with the pulley system completed, it's time to turn my attention to the pulley system. fuel, now there is a factor line that connected the driver side fuel rail to the passenger side that was cut before I got the Supercharger so I have to recreate that line and I'm using the eflex pro hose and connector kit to do just that, by cutting a piece of that hose.
I'm going to use two of the fuel Lin connectors and just plug it in. I'm going to cut this line a little later, when we get to our ethanol. sensor installation here's the line I'm going to use for the supply line coming out of the rail to the supply line coming from the back of the car and first there's this really Nifty 8 connector that snaps into the fuel rail like So, it allows me to use that connector without any problem. I really like the look of these final lines. I like how secure it is and I know the system will be secure so I use this quick connector to connect the converter and this is it. the factory line that fits on the 57 rail that goes on the driver's side.
I'm going to continue using that line. The next section only applies if you are doing an e85 conversion, so here is our ethanol sensor and this is where I want it mounted. To do that, I'm going to have to cut the midpoint of this hose, so I'm going to break it off with some scissors, cut it some more, and then the rest of the kit pieces will fit together. place and then I can secure my harness right under here and that's how it's going to look really nice and out of the way professional installation nothing to worry about next step is wiring the fuel injector fuel injectors need power and ground to spray fuel The Dodger's fuse block constantly supplies power and the computer sends pulses on the ground side for each individual cylinder, meaning all eight power wires at the injectors will be the same color, as will this brown and white wire.
Use your multimeter to confirm that the red wire goes further than the red. tab on the injector connector so now you can do that for all eight connectors making sure you hear the click each time the pin is inserted like this, everything is done, this is the original fuel line, it's on the '57 that came from that line Harden metal on the rear passenger side and we're going to put this back in as this end puts us perfectly in the position where that supercharger line comes from, we reach back here, wait until we hear the click there. is and we'll keep it out of the way and we'll be ready to plug it in once we get the supercharger here and now it's time to install the supercharger for the first time and my cheat code is this, turn it down so that the rear passenger side goes in first, they are alignment pins only on the passenger side and once you align one it is very easy to make sure everything else fits, it looks beautiful but I have a problem: I didn't clear this section enough and if you look very close, it's bumping into it and it's not fully seated on the adapter plates so I need to get back to this.
I need to remove the supercharger and trim it down a little bit more, but at least I know the measurement, um, maybe a quarter of an inch would be enough, but it just goes to show you that you're not really done until you're done, but it fits relatively well. I had to remove the shock absorbers from the hood and raise it completely. I had to take the strut bar off as well and I had to bend this driveline to clear my fuel line, but the plan is to bend it back a little so we can leave it here, hopefully in front of the coolant passages but behind the fuel.
The line should be good enough, so I'll lift it up, trim it a little, and we'll tighten everything up. Seeing the supercharger sitting on top of my first cut was really helpful because it helped me determine where exactly. I needed to get my cut finished and having that lift worked great. I highly recommend it, so it's officially done. I have to screw in the five bolts on each side, but it's finally here and no longer on my workbench, so I'm very happy. Looks great. I know the hood isn't going to close, although notice it's higher than the hood right now.
I don't even know if I'll be able to put that Bo strut back on, but we'll see. I'm elated about that. this fits and looks good and from here we just have to connect a few wires we have to power up the rest of the E85 system and we will be ready to start one thing I noticed and I didn't understand why people were buying the upgraded pulley but yeah You look here, that's clearly one reason why the belts don't line up with the pulleys, so we need to get something, we need to get a replacement belt pulley that will bring this here and that.
The way we're going to be able to put the seatbelt on and turn everything around, we've got the rest of the free space down here, it looks very, very good and that shows that on that side you have to take it pretty much all the way. down, um, make sure you don't cut the timing cover if you see oil, you've gone too far, but that's perfect for me and it looks so good I can't wait, I can't wait, we can't say it, celebrate too. early, although I didn't tighten these bolts for a reason, we're going to have to lift the supercharger cover, lift the supercharger up a hair and remove this snout so we can replace this pulley we're going to need to buy and install the metco pulley kit and turn it so that these ribs align with the rest of this pulley system.
We'll start by removing all the T30 bolts from the cover and the five that are right at the top, we'll pull it out. By the way, a little bit of oil, but nothing too crazy. Check out some oil that's part of the core so I'm not worried about everything spinning freely. The impeller looks good. Those fins look great. Take out our bypass valve. Likewise, we'll raise the supercharger up a little bit, we'll put a block of wood underneath it just to support it there and then there's six bolts around the snout, three on the top, three on the bottom, we'll remove them and get everything out of the way, okay, there it is, it's off, make sure you don't miss any of those.
I'm going to make sure they stay on the other side so I can place it exactly how it came out. No, I don't think it's necessarily necessary, but you can never be too careful. This board looks in very good condition. I don't see any rips or tears. It appears to be synthetic in nature. It's not paper, so it's amazing and everything is here. It looks reusable which is, as I said before, a big plus because we know how long it takes me to get some of these cooling supercharger items and we don't want any additional delays thanks to the folks at hhp racing.
I have my Metco install kit with my 2.85 supercharger pulley now you can drop the stock down to 2.4 but 2.85 will give me plenty to work with as much as possible to spin the supercharger and I can always adjust it with my Boost controller to include it. with the kit you get the 2.85 pulley with the adapter, the cover which we won't be using for this application, the pin holding tool which is responsible for holding the back of this supercharger snout and then the pulley tool which will go on the front of. after we remove this dust cover and we can turn and remove the old pulley, connect and install the new one and we will be ready to reinstall the clip, here it goes, we will start by disconnecting the pulley from the adapter now remember that we are going to have to turn this one over pulley so that it stays like this when we go to reattach it to the snout of the supercharger, that's why you see a lot of the conversions done with this sticking out of the snout because you need to give it that distance from the new one and we'll just line up here and reconnect.
What I've also heard is that this doesn't give you enough clearance, you actually need to put spacers on the face to make it stick out even more, so I can wait to reattach that pulley until I put everything back on the car and that's it. way I can take a look at the belt and how the rest of the pulleys align to get To remove the cover from your old supercharger snout, you have to use a flathead screwdriver and get under it, so get really close to the edge of that side and use a lot of strength because you will need it once you are here, you can use it. your hp1000 stick it in there and then you can use a 1516 socket and your hp2000 clamping tool to start achieving this.
Your hp2000 comes with a retaining bolt that we will use to secure it along the supercharger clasp to align this until the post lines up, then we will rotate the housing assembly until the bolt hole lines up and then we will secure it like this,It doesn't need to be super tight, but we just want to make sure that This paddle isn't going anywhere once we start applying tension, so here's what it looks like on this side and then on the other side we'll put our HP back in. 1000 and our plug and we will use an impact to break them if you don't have one. a shock, it's going to be very difficult for you to try to do this, but a lot of leverage on both sides will be your best friend, hopefully this works, it was easy, it was very easy, it's old, we'll get it. our new one per the instructions in this kit we're going to hand tighten it and then apply 40 pounds of pressure to secure this center bolt and from here we can put our supercharger snout back on being careful to line everything up now it's time to put it back on our pulley.
People have had to use spacers or washers to reconnect the pulley to the adapter. Everything seems to be lining up to me, but you can only tell once you start applying torque. If everything looks good, we'll get it back. Power off, apply Loctite to these threads and then tighten it again with the connected, we can put the belt on. Here's the belt I've been wearing. It comes highly recommended on many of the exchange sites and I'm using a smaller pulley so I'm hoping the detent can take some of the slack off of that, otherwise we may have to go down a size but let's see how it works and that is how.
You see it with the belt on, everything seems to be really good now with this 2.85 pulley, this tensioner is close to its maximum. If you look down here, you'll see that's the maximum tension you can apply. It's really at its limit, so what I would do if I were all of you, I would buy a larger pulley or a smaller belt. This is good enough for us to run, but I'm not going to put it under a big boost. I'm not going to put it under a boost at all until I get a smaller belt for this, next up is our oil catch can.
We're going to use the short bolt that we got from our adapter plate swap with this hole that's right here on the head combined with the lines that came with this kit and this line coming off the supercharger that goes right here on the inlet, none of the lines that come with the kit are big enough to fit in here so we're going to use this spliced with this and luckily this line is going to be a really big size for our valve cover work so we're going to connect it everything, so here is our original supercharger line.
We're going to cut this insulation and get right to the plastic line and I'm really glad we separated it because look at this, I'm going to try using this end, you can really use either one, or the main difference is a second O-ring here that usually goes here. I'm going to keep this end as a good end in case I want to use it in In the future I'm going to cut and peel this piece of plastic and then adapt it to fit our line here once we have it we can connect it to our can of capture with our connector looking like this, you can start to pull out what The rest of the system is going to look like and this is what it ends up looking like: We have our bolt secured, we have our lines running with no kinks and a clamp right at the bottom, so we Next thing we need to do is hook up our eflex Pro kit and run E85 through our injectors.
Now there are eight injectors on this and we need to run four on this side, four on that side and since that's the opposite side, we're going to run our injector extension cables through there. Now these injector extensions are quite long and will be great to wrap around the back of the engine, secure them really well and make sure we have a really clean installation. Let me show you on this side what it's going to look like so You can see from here that our four injectors are disconnected. Each injector extension has these three wires, this one goes to the injector, this one goes to the injector wiring harness and this one will go to the eflex pro wiring harness that goes on the passenger side. from the car, so we'll make that connection, we'll connect this one to the injector and we'll run our wire behind the engine and we'll mimic that connection to all three, making sure our wire routing looks nice and clean.
I have done the same with the cable routing on the passenger side, everything looks nice and neat, finally we have our temperature sensor. Now this is supposed to go near the engine block. I'm going to route it very close to the supercharger down here. I will help the eflex pro kit know how hot the engine is getting and help prevent detonation. We also have a ground wire here that I'll connect right here. There is a 10mm nut that comes off and can be zipped up and then I can run additional inputs through this cable and I will use a map sensor to drive it as well.
I just have to run power and ground and then I can use this as a signal wire for that, let's take care of some emissions controls on this solenoid. it's usually routed here on our base 57 and we're going to do it the same way for this one, the tube is routed back here and it's too short for our supercharger, we need to reconnect this line that goes right behind the throttle body and then I'll use a piece of hose to join this to the factory line here and then that will bring us down here. We can build a bracket that comes out of this nut here and then reattach it just like that if you end up using the engine covers, all of this will be hidden, you can even tuck it in or get a 45° angle right here so it sits nicely behind of the harness, now on the other side of the connection.
We need to cut this like this and then add some extension so we can connect it right below here. Be sure to save this connector so we can still get a positive connection here on the back of the solenoid. Here is the support for that. same solenoid and we're going to reuse this on our supercharger, we're going to clamp it in the vise and then we're going to cut this end off here and once it's back in we can reconnect it now that we've cut this tube and then we have this other end that goes to the solenoid , we need a way to close that gap and I use a few inches of 5/8 hose to connect the two ends of our factory replacement map sensor.
I'm going to remove this one that comes naturally out of the Hellcat and replace it with the original. I added an o-ring here and shaved those lugs on the ends and just to start I want it to be able to read the map sensor. voltage, but in the meantime I have a SRT4 neon map sensor that has the correct connections and will fit the screw hole in the perfect place with the map sensor ready. I ran a new line from here and it will connect to our brake. booster right behind here I have the sensor that I took out from the old intake and finally I took out the old intake air temperature sensor and I need to work on an extension harness so I can bring it over here where we have a new Hellcat intake coming in, so you guys have been with me through this whole event and we're getting ready to run it for the first time with the Hellcat supercharger in there.
The first thing I'm going to do is calm down the fuel system, so I'm going to start the car a couple of times to make sure I have good fuel pressure all the way to the rail and then the third time I'm going to crank it up and we'll see the first good start, so I got the system ready and now it's time to run it and see what it does. It sounds good it's the coolest sound ever so the first start up went well it was exactly what we expected and the wine is really prominent especially with the smaller supercharger pulley with the eflex pro kit we can start tuning everything, take a look at our sensors, see how we're doing there, and make sure you check everything off so you have a safe tune that doesn't blow up this engine in our next episode.
What we'll do is set the crank, start tuning, replace the map sensor with an SRT4 one and do all the supercharger cooling efforts so we can have a really safe system if you like what you see. on this video leave a like let me know how it went in the comments like share subscribe talk to the next k
If you have any copyright issue, please Contact