Engine Block Preparation For Performance And Abuse - Best Practices For Inspection And Detailing
May 15, 2024So I started going over the
block
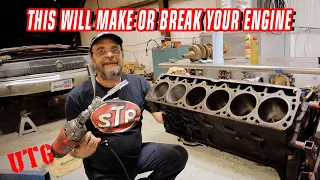
for a mission impossible build, that's what we're doing with David Vizard and Andy from Unity Motorsports and I thought this is a good time to talk aboutblock
prep because if you're building a highperformance
. Engine, you really have to go one step further and you can't let any detail go unnoticed, like the things that would be fine in a normal passenger car if you drive to work, you drive to school, you can get away with it when you start push. Anengine
sees that these things are designed a certain way, they're designed to withstand a certain amount ofabuse
, a certain amount of flex and harmonic vibration, but when you start pushing beyond that, the things that would normally be fine for the driver daily start to become a problem.
These are general good
practices
, you can apply them to anyengine
, but especially when you're doing something highperformance
, these are the areas you need to brush up on, so the first step with something like this is to give the block a good foundation. cleaning is not a final cleaning, don't go crazy because it still has many phases to go through, but obviously you want to remove all the dirt, dust and loose oil, and get that oil out of there because you have to. give the block a good thorough visualinspection
, you need to look at everything because things like cracks, thin spots, occlusions, any defects you might have in a mold, this is when you need to find them, you need to know if you're going to continue. with it or you're going to abort the mission, even if you're going to drill the cylinders, you still give them a honk at this point because you want to be able to clearly see what the solar walls look like from top to bottom with that.inspection
process what I do is I include the inspection process with the details of the block so, this way, as you detail it, you are literally focused on every little part of it, so it will skip something that you would normally pass by high.
More Interesting Facts About,
engine block preparation for performance and abuse best practices for inspection and detailing...
So what do I mean by
detailing
a block when these things are cast from The Foundry? They don't really finish them, they do all the basic machining necessary to assemble it, but they don't bother to clean it. things above, so you will find as you go through any production block that you will find, well, here is a perfect example, you should find Flash casting everywhere, look like here this flash casting, look at this elevator, look at the flash casting. In it, this here is everywhere, now you can see these two. I already cleaned. I took the grinder and ran and removed all those flashes.
Now this is important for a First there are a couple of reasons because it's flash, it's not really structural, so there's a good chance that when you really push this thing and it starts singing, you know that at six and seven thousand RPM, Some loose parts vibrate and it is not an integral part. of the casting is just hanging so anything that is hanging needs to be knocked down with a die grinder, plus they are potential stress risers, actually any sharp edges inside the motor are a potential stress. Vertical bar cracks don't start on radius cracks they end on spokes they start on sharp edges so here's an example this side of the block is like it came from the factory so the valley and surface of the conduit where are found is very sharp, well, sharp edges are always a potential stress.

On this side of the block I took my grinder and just ground down those sharp edges. Now you want to go through the entire block, any sharp edges you find anywhere, those are the ones you want to clear now just because there's a block. was running on a functional car doesn't mean it doesn't have cracks. I've found a lot of these that have, let's say, minor cracks, cracks that will be on the top of the cylinder board, on the bottom of the cylinder bore. I haven't run into a water jacket yet, so they don't show up as a problem going down the road, but now when you start pushing this the block starts to contort, those cracks will spread, so go back to sharpen the cylinders and then everything. around the top and bottom of the soleno rods, you want to check for any kind of cracks, anything that doesn't look right because that's going to be a problem when you start pushing this engine.
Now, speaking of cracks, we'll do it. get to those things that fall off in a second, speaking of cracks, the main areas of the saddle where you will find the most problematic cracks because a cracked cylinder can cover it, but when you have a crack anywhere on the spine of the block anywhere between the cam bearing and main seat are junk, nothing to do with it now, you can take an engine that has been in service, it could have 200,000 miles on it and may have cracks in the seat area, but because the block I never got stressed, now you don't get any problems when you really push an engine and especially if it ever sees detonation cycles.
What will happen is the crank is coming down, it's pushing against the caps and the things that hold the caps in place. are these bolts and this is the boss of the bolt, so this area here on both sides is what holds the crankshaft from all the forces working downward, what you'll find is you'll get a crack that starts right here on each side. of the oil hole on some engines, like small block engines, will crack right in the center of the oil hole, but most engines I see cracked in the mounts will be on the sides, like this, and that crack will extend across the boss bolt right here because this is the section that is trying to move away and then eventually it will work its way into the hole itself so you can have a motor that let's say over the course of its life the overheated base has a heavy weight. heavy detonation and cracks in that area but because it's only used for regular service it won't show up as a problem but now you step on this thing and that crack will spread and want to throw the crankshaft into the In extreme cases the ground will split the block in half, but these areas here are definitely your number one focus area to look for any kind of cracks or imperfections, so we removed all the sharp edges around the block at the top.
On the side you want to do the same thing with the main saddles, you can see that this one here, which is machined for the thrust bearing, has a good edge radius, but this one here has a sharp edge, they all have, so you want to take. your grinder and again just lightly break the edge, just break the edge, don't do it on this surface right here because you don't want to do anything on a bearing surface where the bearing sits, but on each side of the saddles. I definitely want to fix them in any area here.
Look, this is very sharp right here. All of this you want to clean along the outside along the panoramic rail. It's just good general practice. This should never be a sharp edge inside an engine. smooth it out on the radius, same with the main caps, the outside parts of the main caps have a very sharp edge so this all fixes too so now any rebuild has to include removing the freeze plugs and going through the water passages when If you're making a high-performance engine, you want to go a little further now, even if you're going to ship the block and boil it, if you have serious deposits inside the water jackets, it's not going to penetrate that stuff. it won't come out, you have to physically break it and what you want to do is obviously take the plugs out of the core.
You have one right here, weird, you want to take the plugs out of the core and scrape everything you can reach with a screwdriver. You can use a variety of different sizes and styles of screwdrivers, but you want to go through and scrape any surface you can. This block already removed a couple of these. You can see what we have here so that the fine thing comes out. with the boil, but when you get these pieces, they will tend to stick to the inner surfaces, you know, rough surface, hard piece and it just sticks there. Passenger car, it may be fine, but let this thing sing at 6500 for a couple of seconds, the harmonics and that block are going to release these things and they're going to find their way through your cooling system while you're at it , you want to take a wire like a hanger, a stiff wire and you want to run it through wherever you can, you want to run it between the bars of the cylinder between the sleeves because there will be bits of build up there that boiling won't remove, so you have to loosen that stuff so that when boil acid can get in there and you really give it a good cleaning, you'll push an engine and that stuff will completely break loose and start finding its way around the cooling system.
You could knock around the block and you can also hear things falling through the water jackets or the The water passages in the outer block of the cover make the whole block like this and the valley because the valleys of a part of the passages of water, the water jackets you can't really reach, there are no center plugs up there so sometimes you have to tap. even heat it up like a MAPP gas torch and heat up the valley of the block, get it really hot and then hit it and you'll be surprised at some of the gunk that will just fall out of the bottom.
What else do I want to talk about with these bolt holes? Obviously you want to go over the bolts, so now these things just fall out of there, that's just from the little tapping. I just did what was dropped, so this is what you have to think about. If you're just doing a straight rebuild, the booster came out of the engine and the booster went back in and they're the right depth, but now you're going to machine this, okay, so you're going to take 10 20 000 off the deck, it's going to take 10 20 30 off. 000 of the cylinder head. You can use a thinner head gasket.
Now the length of the bolts becomes an issue. You must ensure that the bolt holes are clear at all times. I have a uniform depth in all the holes, so in this block, as I go through it, my depth in all of these is fine and then I get to this one, fine and up to here it goes the same thing down here. it's not as bad as this one so now you see the difference if like this thing was assembled and was working before this bolt was in and tightened and everything was fine when you put it in you are adding the distance the bolt has to travel . if the bottom is out, if that bolt can't be tightened any more, it will tighten but it won't actually hold the head, so there you have a possible head gasket sealing problem, here you have to go through all the holes of the bolts and make sure they are at least the same depth as each other and are drilled all the way through, they may not be drilled all the way through so I am running a bottom top to put the pick in there and pick out any dirt or GAC. that could be at the bottom and I'm running a background tap to make sure the CL, the threads are clean all the way through, it can't miss anything and things like this here that will catch it every time, here's another stuff.
Now this block is going to be surfaced, so these holes will need to be chamfered later, but I want to show you this, this is important, so look at this bolt hole right here, you'll see that it has a nice chamfer. the way around before the threads start, this one also has a nice chamfer all the way around, but now look at this one, you see it's flush with the top and it's not even round at all, this is where a thread starts, not chamfered. one is beveled now that's how it came from the factory but why is this one nice and beveled? this one is nice and beveled this one but this one here is cut flush so that one right there that little bit of protrusion when you press this thing down there's a good chance this thing is going to crack or break and then you have another stress riser somewhere else for it to start a crack or I've even seen them where you're going to have a problem with the head gasket and it's because as you tighten it down this is going to chip and wedge between the gasket and the deck so you want to make sure that, especially if you're not going to have it, if you're going to have it.
After it's been surfaced, you'll bevel all the little holes afterwards, but if you're just putting it together without surfacing it, make sure you don't have a situation like this, just give it a quick bevel and that's it, and these oils back holes of sewer system. I wanted to say something about this before, but you can see there are rear oil drain holes here next to the lifters and none of them are round or the shape they're supposed to be, they're all a little flashy. so all you want to clean them and make sure they're nice and smooth, the oil needs to flow down so any surface that can catch oil that can catch dirt and you want to make sure they're all cleaned so everything can flow into the pan. the way it's designed, it takes time to get through a block and I tell you if this was like this it would be a dinomotor but if this was actually going to go into one of our cars there's a lotextra weight that you'll find on one of these blocks left over from the casting process like, for example, these Nubs right here, this section of the block just sticks out if you go over the block.
You'll find tons of extra metal or stuff that you can thin and polish or you can get at least five six seven pounds out of a block, it adds up in extreme cases if you go back to the Pro Stock days. 72 73 74 when it was still running, you know, the factory castings on those guys Not only did they polish the side of the block with no problems, some of them went so far as to completely polish the entire cast iron on the side and then both aluminum sealing plates water shirts and no one expects you to get that far these days. but I'm just showing you how far people went in the past, they weigh these things, so you could spend a lot of time on the details in one of these blocks.
I'll probably have a full day on this by the time it's done because in addition to everything I talked about, all the oil galleys need to be planed, make sure there's nothing there and you want to do all of this at this stage of the game before the block actually makes it to the machine shop so that when they have it and it's clean and machined you don't have to go back and start polishing it and cutting it and doing all kinds of nasty things to it, once you're at that point, from there you want to do just your final cleaning and assembly so that any dirty work or potential messy work is done.
This is the time you want to do it and it may not show up, it may not show up in the numbers, but it will show up in the official longevity. Sometimes it shows up in the numbers, it depends on what we're talking about, but the block details are really good general
practices
, but especially if you're going to do a high-performance build, anything that's going to be stressed. So from this point on, it's up to David. I have no idea how you're going to specify this in Machine Shop, what comes out of the platform or anything like that.We are going to leave that in his hands and we will choose him. on his channel, so I'm going to come back to this with a lot of work to do, so I hope you got something out of it and I'll see you tomorrow.
If you have any copyright issue, please Contact