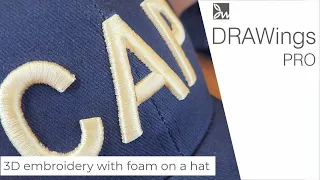
Embroidering a Weave Design with Variegated Thread on a 6-Panel Cap
Apr 07, 2024What's up guys? Welcome back to the Embroidery Center. My name is Carl and I am your new host. Do not worry. Andrew is still here and he's on the New Roma Prince channel. The link will be in the description below. Are you ready for today's event? episode I hope you are because I'm on today's episode. I'm going to show you how to do one of the most popular embroidery techniques on the market today. We are going to make a 3D
variegated
yarn weavingdesign
in apanel
of six. So I'm going to go over the entire embroidery process from start to finish and the digitizing process along the way.
We'll also talk about the dangers of what it takes to embroider on a six
panel
hat and how to avoid some. Before you get started though, be sure to hit that like button, subscribe to the channel so you can stay up to date with the newest videos that are coming out. Don't forget to click the little bell icon right now. digitize, follow me, hey, I don't hear anyone coming, okay guys, let's make the magic happen. I'm going to use Chrome alux, but you can use any version, so what we'll do first is open the background tool to import our letter, which will be R, so I have it here.
More Interesting Facts About,
embroidering a weave design with variegated thread on a 6 panel cap...
I'm going to go ahead and hit the background tool. You'll see it highlighted here, it lights up. I'm going to click. in the r and I'll open it. I'm going to use my mouse to zoom out. I have my scale here set to inches, so if I right click on the scale, put my mouse up there, right click on the scale. to set it to inches, I want this R to be between 2 inches, 2 and 1/2 inches anywhere that's okay, so using my little arrow I'm going to reduce this, but I want to make sure it's the r itself, not this real square that goes down to two, so here's my zero mark.

I have 1 in and two, so I want to be between these two because from here to here and from here to there there are 2 Ines, so I still have to go down a little bit. so I'll be right below this line here and that line there, so here we go. I'm going to take it and we're going to climb. At any time during this procedure, you can rescale or check the density. I'm going to get it right around 2 and 4, so we're at 2 and a half, so once I've scaled it I can use my ruler to go ahead and just mark at the top and mark at the bottom. be right at 2.5 2.45 is fine I'll leave it at that.

I'm happy now I'm going to zoom in using the scroll wheel and start setting up some guidelines. I like working with guides. I somehow make it all nice and easy, so I'm going to go up here to the top ruler and drag down a guide line just so it touches the top. I'm going to go back to the top again, drag, label another one and I'm just describing the whole process. I'm going to make another one for the bottom of the R again. I'm going to make another one for the bottom of the R, so even if in this
design
here, notice that this is the thickness of this.R is a little bit thinner than that, so by setting up your guidelines you avoid any kind of errors that might occur. Then I'll drag from the left side of the screen and set my margin like this now again, these are just guides. to help me start my path and thus know where I am going. I'm going to drag this one back now. I want to have this serif. This serif is a little long, so I'm going to shorten it and in this part of the r. I'm not too excited about this, so I'm going to create a serif here, so I want that serif to be about an eighth, which is uh A4 inches is 25 and if I go here Sorry, if I go all the way here it should be right at 2 , so 17 is not half of 25, so I'm going to go ahead and take my ruler tool and zoom it in a little bit so you can zoom in with just a tap. so now we're going to go to the ruler and measure that again and we have about 6, that's okay there, so I'm going to set my serif correctly for this Edge.
Now I'm going to do the same for this little bit. here, so I'm going to drag my ruler again, place it right here and I can use the ruler while I still have it and just measure that's 17 here I have 17 perfect beautiful, now comes the interesting part, this is a very simple design, everything What we're going to use is satin stitch and hand stitch, we're going to use satin and hand stitch, so I'm going to go ahead and click on my satin now every time you do whatever embroidery you want. use end caps in embroidery because what it does is cut the edges of the foam so that the edges of the foam don't stick out, so if you're
embroidering
something and you have a piece of foam and you're just covering the top, yes you don't cover these edges then you will have a little bit of foam sticking out and you won't be able to cut it so when you make a lid you will cut the foam and let me when you tear it off it won't have exposed foam so we're going to do that after all well in At this point I already have my scale down and I'm going to start making the parts of the The last thing I'm going to do is tack stitch so that the foam stays attached to the hat and also create my end caps, but I'll do that after We are working in reverse.We're working from front to back, so the first thing we're going to do is do our satin stitch that's going to match up here, so I'm going to zoom in really close to that area and see what I want to see. I want to see right here. I want this to be as straight as possible. So I'm going to start with my satin stitch. I'm going to start right in this corner. Now I want the stitches to go up and down, not to the left. Okay, depending on how I start, this is how it's going to be laid out, so once I start up and down here, notice the little line continues on this side, here now I can go down, keep it straight and once I right click , that's my Satin Stitch now underneath there's an underlay that I'm going to remove at the end at the end I'm going to remove everything underneath but right now this is what our satin stitch looks like and we're going to change it to a density of 30 and I always click Apply , so now we have our density of 30.
If I use my selection tool, I can see that there is a middle point here. I'm going to drag it down to the midpoint and now I'm going to do the knitting pattern, so this is where the hand stitch comes in, so we're going to do it one by one like we're actually sewing it, so I'm going to do around out of 16. I'm going to start here, just do one. two and just space them about the width of the little cross two 3 4 5 6 6 7 8 9 10 11 12 13 14 15 so right there that's okay 15 okay so now I can just right click and there's my stitch, right?
OK? We're going to this is already selected, we're going to right click and we're going to duplicate it. I'm going to put it up here, but it's in the wrong orientation, so once I select it, I'm going to flip it. duplicate it, so I'm going to use the icon up here and actually flip it and now it's exactly where I want it to be. Notice that it matches these points exactly, it's right where I want it, so that's the only point we need to make. In the future, everything will be cut and pasted, so the first thing I'll do is select everything and group it so that everything moves at the same time now that it's still selected.
I'm going to right click and I'm going to duplicate it now, wherever you click, it's going to put it directly on the screen and I want it to slightly overlap this Edge because I don't want you to be able to see it. so if you want, you should see just the little V part, so if I put it right in this little corner, you'll notice that it covers exactly where I want it and we can repeat that all the time, so I'm going to go right to that little part . corner and I just start my knitting pattern and we're doing like fish scales, each one will overlap the other a little bit, okay and we can move over there, we go there, we go like this, so we're almost there.
We're almost there, so if I zoom out and go to the 3D view, this is what the pattern will look like. Okay, now we want to overlay certain areas of the R so they look a little better. And? What I'm going to do is just zoom out a little bit and I think this is enough to set up my sarus, but we're going to do this last, so the first thing I'm going to do is, I'm going to do this part of the r, then this part, then the serifs will come in at the bottom and then this part at the top, so this is all I have to do.
I'm going to take this and I'm going to duplicate it and I'm going to put one here now that this one is here. I go ahead and select everything and now I can rotate it and have it follow the edge of the art like this, so now I'm going to put it right there, so notice I have it going up a little bit in here. I don't need it to go up that high, but just a little bit and I'm going to remove some of these at the bottom. so I can go here and just delete some of those.
I think if I make a more perfect one, I'll right click. I'm going to paste again, so now I have another one. I'm just going to drag it and now I'm going to make this long part here, so I'm going to rotate it vertically and I'm going to make this go in just a little bit. I want a slight overlap, okay. I'm going to right click paste. again and I have the top part and this one I'm going to rotate again, keep it vertical and I make the bottom part and again I'm going to overlap it a little bit right in the middle, beautiful and I'm going to remove a little bit of these I don't need that many, so If I click here I can just delete delete delete and delete that's perfect.
I'm going to right click. I'm going to paste one more time and now I can grab this one and drag it around. it's at the bottom and that's going to be one of my serifs and again I want to delete this part here and since they're all grouped together, they're all going to come out the same, so I'm just going to delete them. remove until you get to that little mark there and notice that they fit perfectly right where I want it to fit so the bottom is ready. I'm going to right click paste again and drag this one and do the same thing. thing, so I'm going to set that little margin, it was about 16 from here to there, so it's pretty much the same and I'm going to click here and just delete the edges of this one, two, three, I think they're about three. what we did and there is the bottom part so we have our bottom part we have this we have that and it's all in the same order that we want we want this to be on top of this we want this to be on top of that part however I want this to go below, so we're going to click on the top, actually we're going to select all of this and we're going to right click and I want to change CH the order and bring it forward once I bring it.
Note that it's on top of that, so the easy part is done. Now we're going to work on this circle right here, which isn't that hard, it's super easy, all you have to do is grab one of these. We're going to right click and duplicate it and now we're going to start pasting them over and over again and changing the angle, so let me zoom in a little bit and I'm going to continue on this center line and every time I duplicate it right here, it's going to give me the right amount of overlap, so I'll continue like this until I start entering the curve right now.
I'm entering the curve, so now I'm going to start. rotating these things, so I'm going to place one, select it and just rotate it slightly, like this, I'm going to select it again, right click on duplicate again, I'm going to press the same part and I can do a couple. and what I'm going to do is just move them out of the way one at a time so it doesn't take as long here we go, I'm going to rotate this one a little bit and I'm going to reposition it just following the center, click on that one, put it right there.
Notice that wherever the mouse is is this exact center where I want it to be placed, click on this, put it right in the middle and I'm going to rotate it. Now we have some kind of curve forming and once you pull away, you'll notice it looks pretty good again, we'll go back in and continue moving down the curve. We don't have to do too many of these, we can just keep duplicating and we're going to hit a couple more, we're going to get a little bit more of the curve and then once we're done, we're going to do it. copy a couple of them and then move it down a little bit more, so here we go.
I'm getting a nice curve, bring it down a little bit, grab this and then bring it to the center right there and now I've got I've got my curve just fine, so now let me select a couple of these, okay, I'll right click and duplicate that and once you click here, I have that big piece completed, so I'm going to go ahead and select it. And you'll see it starts to get easier once you start racking up a couple more screams, let me not do that. I'm going to undo that for a second. I'm going to reselect all of these and now I can rotate everything again.
Let's do the same thing, notice how our curve is almost finished and if you don't like any part, you can rotate it and reposition it and we can make that curve work correctly and everything is fine now that we have finished the r and we have everything put together now we are going to put the end caps on the tips of the R so I cut the foam so I can do thatWe're just going to do a regular satin stitch, so we're going to go here for the satin stitch and I'll do it to the side, for example, so I'm going to go to the side and I'm just going to do it roughly and if you look at the little ruler it's going to tell you how big it is, so 1/4 inch is 25.
I'm going to use about half ofthat, so that would be 2 uh and a half, so let's go to the point We're going to 14, we're going to go to 14, so I'm going to set my satin stitch to go horizontal, not vertical. It's very important that you do this first and then I'm going to come over here. and do it more or less the same and again another 14 so that it is nice and parallel. I'm going to left click and there it is. I also want to change that color, so I'm going to left click on the yellow so that changes that color to Yellow, so I'm going to left click on the boom, so now I have yellow so I can see a little bit better.
Now I'm going to zoom in on this and I'm going to grab this and drag it. right above this area here, so notice I'm going. I'm just leaving this a little bit underneath and I want it to go just a hair underneath, so once I have it set up, it's just a matter of Duplicate it, so now that I like this position, I'm going to wait a minute before I do that. I'm going to put it on hold for a second. I want to group all of this first and what that will do is let me save all of this in one move, so I'll select everything and you'll see it's all here.
I'm going to put it in a group. I'm going to go ahead and group it now. This is much cleaner and I can move it around and change it. I'm going to take this one now and I'm going to go ahead and put it back where I wanted it again. Let's zoom in to get the correct position. using my command key or control key I can use it and use the arrows to just gently nudge it pixel by pixel and that's exactly where I want it so it's perfect. I'm going to right click and duplicate now.
I'm going to go all the way down and I'm going to go ahead and put one right here. I'm going to go ahead and put one in there here and also here now instead of going ahead and lining everything up. I'm just going to select them one at a time, so I'm going to choose my arrow tool, my selection tool, and I'm going to continue with the command or control key, depending on the system, I'm going to select each of these and I'm going to use my alignment key. I'm going to use center alignment. horizontal. I click on that and now they're all lined up as I continue to hold down the control or command key.
I can move the arrows left and right a little to achieve this. move just a hair to get it in the right position now, once it's the height I want, I can go ahead and select them individually and go ahead and align them a little bit more using command or control and the arrows. Ok, perfect, now I have all my little tips in a row. I'm going to select them all. I'm going to zoom out a little bit so I can select them all using the command control key, select that one. that one and that one I'm going to right click and I'm going to group all of those, so now that's a group, okay, perfect, now the last thing I'm going to do while I still have this, I'm going to type, click and send it back because I want the blue to come forward, so I'm going to send it all the way to the back arm.
Now the last thing we're going to do is do a Sew Sew this will hold the foam in place while we wait so you don't have to tape it or pin it so I'm going to use my running stitch and I'm just going to start and draw a r and once I get to the curve, I'm going to press my control or command key and you'll notice that it's going to do the curve for me and that's going to create the shape of an r and a right click and that's it. Now this goes. to stick the foam before it ends or before it starts and again while I still have that selected I'm going to take that and move it all the way back I'm going to order and bring it all the way back so now if you look here, The first thing that's going to happen is to make my down stitch, the second thing I'm going to do is make the little caps for the puff and finally it's going to make the r.
Now remember. The reason we removed all the base of the Stitches is so that it doesn't compress the foam and cause it to lose its swelling, so let's go over it one more time, let's go ahead and have it run automatically and I'm going to let it plays and this is exactly how it will happen, let's do that and then it will do the RS so we can speed it up a little bit, just do it. Go very fast and I'm very happy with it, that's great now, if I have these bridges here, I can cut them later or I can do it now, let me go ahead and take care of that, now I'm going to go ahead. and I go to my group.
I can hide the R so I can see these. I can click on it. I can right click and I'm going to, actually, let me choose this one. Here we go. I can right click on it, ungroup it and now. This one in particular here I'm going to go back to my selection tool on this one I'm going to crop out that little piece, so once I hit Apply, you'll notice that that little crossover is gone, which is fine, so now I can go ahead and select them again. I'm going to select that one. uh command control select select select right click and I'm going to put the order backwards.
I'm just going to go back one, so now when I bring this back, notice that I still have all of these here, so while it's selected I'm going to right click, I'm actually going to click on them again and just gather them into a group and that will clean things up a bit, here we go, it's really easy. we have a group for that, for this the notice the order changed all we have to do is take this, drag it and then we put it back where it was, there we go, so now we have our race, we join our points and our R there .
Come on guys, let's do it if you've never tried digitizing a puff pastry design in 3D before, don't worry, we have previous episodes on the Embroidery Center that show you how to do it. I'll be sure to leave a link in the description. Next, now that I've shown you how to digitize, it's very important to test before moving on to the final product. You don't want to ruin the actual garment, so you will always test. These are some examples that This one I made here is just a normal plain color, that way I didn't have to waste any of the
variegated
yarn and in this one you can clearly see the weaving pattern when using a variegated yarn, now it's important that the density or the space between the different colors will be a little bit bigger when you're doing the dots uh what do I mean by that?Here you can see that between the white, the gray and the black there was a little bit of separation in the
thread
, that's why every time. part of the fabric breaks to a different color in this hat even though it is a variegated yarn the colors matched too evenly and because they were so monochromatic you can't really see theweave
between one segment and another in this one you can see clearly the different colors, so depending on the final effect you are looking for, always test and not all variegatedthread
s are the same. Now we'll go over the supplies you'll need to get the job done.We're going to need our cap ring, six panel hat, variegated yarn, scissors, 3D puff and a heat gun or lighter in case you need to clean things up and now, in the moment you've been waiting for, we're going to put our cap in the cap controller, so I'm going to do this. I'm going to invest my sweatband. I like to make it all the way now because we're wearing a structured cap that we don't necessarily need to wear. stabilizer certain things that you can run into when you are not using the stabilizer are needle brakes, loss of registration and a lot of headache oh no so it is very important to position your hat correctly.
The stabilizer also protects the seams of the hat from sticking to the little brims of the embroidery machine which I'll show you in just a second, here we go, so you want the ring of the cap to be right along the bill and that The frame stops right at the top of the bill, so this is a properly hooped hat and you're ready to go if you want to learn more about the different types of hats and how to embroider them. In fact, we have previous videos on the embroidery center showing the five most popular cap styles to embroider.
I'll leave a link for the video in the cards above and in the description below so you can watch it now it's time to import our layout once I put the USB in I'll go ahead and select the layout select the layout scroll up a little until I find the design I want, which is the r design. I'm going to press Design R. A little image appears. Now I'm going to go ahead and select it. It will ask me if I want to save. to the machine, why yes sir, save it to the machine and we're going to go ahead and save it now that we've saved it, we're going to press the machine button and there's my R.
I'm going to go ahead and click on it and press select and now our design has been selected just in case I'm going to select my ring again just in case it wasn't on the right one, but I'm going to press the lid ring, select and press yes and you I'm going to notice that the machine will articulate to make sure everything resets to zero. It's always a good idea to do this now, once I have my design selected, my hoop selected, I'll go ahead and choose my colors in this design. just one color, the variegated color which on this machine I have at number nine and I'm going to go ahead and choose number nine for the little 3D puff tips and then I'll use that for the actual R and then we're done, now we have all of our selected colors, let's go ahead and hit the Save button.
Now that we're done entering the design and selecting the colors, we'll go ahead and grab the hat. and put it on the cap driver when you put the cap on the cap driver, you don't want to push it into the machine, but you want to squeeze it into place just like that. If you press too hard instead of squeezing, you risk moving the pentagraph. which will take the image out of the center, so you will have to remove the cap and let it hinge again by reselecting the ring and then putting the cap back on, so remember to squeeze and not push.
Now let's go ahead and trace. our image and prepare it to embroider, but before we do that we have to put it in settings mode, we will go to settings mode, we will say yes and now the trace button is available, we will press trace and I'm going to do the trace area first, the Machine always moves to needle one to make the stroke. The trace area gives you a general idea of where the image is. Now I can go ahead and do the stroke design. The trace layout will show you exactly where. The needle is going to work fine now that we are done tracing, the only thing left to do is put the foam in the hat and press the start button.
For this design, I'm going to float it, which means I'm just going to hold it in place, tack side down. Stitch will hold it in place for me once it starts and then I can let it go and we'll be fine and by the way, we're using 3mm foam now. once I press start we're on our way guys ready here we go it's alive now it's time to clean it up the only thing left to do is cut this little Bridge Gap right here and the other end and now we are. I'm going to peel the foam off now, the foam acts as a terway so it's just a matter of gently peeling it off right now.
If the digitizing was done right, there should be very little left and not much to do or trim, and there you are my friends, all set, if you have any loose ends or bits of foam sticking out, this is the time you would use the lighter or the heat gun to get everything nice and tight, we will remove it from the ring. Well guys, what do you think? I think it looks great, okay guys, that's all. Thank you for welcoming me to your home. If you need more advice on future projects, be sure to join our embroidery and printing business.
Help Facebook groups. Be sure to follow Roma on Instagram and Tik Tok for more entertaining and informative videos and let us know in the comments if there are any other topics you'd like to see in future Embroidery Hub episodes thanks for watching. I'll see you guys next. time I'll be fine now I have to get out of here let's go down in that elevator
If you have any copyright issue, please Contact