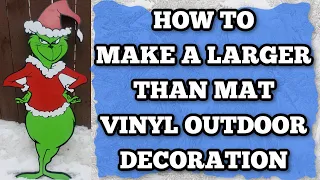
DIY Cardstock Cutouts Larger Than Mat: Baby Yoda is Off the Mat!
May 04, 2020Hello everyone, my name is Jennifer Maker. Today I'm going to show you how to cut out
cardstock
cutouts
larger
than the mat, like this bigbaby
Yoda. I'm the ultimate creator and I'm telling you that yesterday I made ababy
blanket with a cute baby Yoda and you were all crazy about it and told me all the other ways you wanted to make more baby Otis, like giantcardstock
cutouts
, and actually They've been asking me how to do this for a while now if they really want to do other characters. big, cute cardboard characters for the wall or even just standing around a very popular for parties and children's rooms, especially things like Disney and Marvel characters.
The nice thing is that you can totally cut this baby
yoda
or any other large character or other image on your Cricut Cutting Machine, although the largest cutting mat you can buy and use for Cricut is the 12 by 24 inch size, you can do this even with a 12 by 12 cutting mat and I'll show you the secret to making it. today, so for this projectlarger
than a mat, you will need cardstock, really any size from eight and a half by 11 to 12 by 12 to 12 or 24 inches will work for this project, although the larger the paper, You will have less work, it is always good, the weight does not matter much, you can use 65, 80 or 110 pounds, although the heavier the cardboard, the stronger it will be.
More Interesting Facts About,
diy cardstock cutouts larger than mat baby yoda is off the mat...
You also need a cutting mat, either the standard 12 by 12. or the larger 12 by 24 size and you need some masking tape and Civ spray and some tacky glue and if you want to make a cut out cardstock leaning against the wall or even standing completely, it feels like baby Yoda, here you are. You'll also need a couple sheets of foam core and a craft knife to cut it. You can't cut the foam core on your Cricut because it's too thick. You'll also need a design that's appropriate for this technique, so one that's full or mostly solid with extra layers, like Baby Yoda, works best and there are plenty of character designs in Cricut Design Space that are perfect. for this, so let's go to Cricut design space so we can show you where to find them and then.

I'm going to show you how to prepare a design for a larger than standard cut on your Cricut. The first step is to find an image for your large cardstock cutout area and Cricut design space, which is a great place to look for images that are appropriate for these. large cuts. I recommend that you click on the images and search for what you would like to do. Let's say you want it to be Mickey Mouse so we can write Mickey and you'll probably get a lot of images. I just borrowed this one, it looks perfect. We'll click on that and say insert images and actually, this is perfect.

If we look here on the right, we can see all the layers and there are many layers, including a nice big one in black that will be our base layer. This is exactly the type of image that works great for this large cardstock cutting technique and there are actually quite a few of these and they are all ready to go and they are already layered so you don't have to do a lot of work, you will still have to prepare them for the large size, but they are already layered and that makes it a lot easier, so there are also Marvel characters, there are some very cute ones, these things up here are not ideal for what we are doing. but anything with capes like these would be fine, Spider Man would be fine, this Captain America would probably be fine.
I mean, take a look at this one, if he's layered, he's good and he's layered, so this would be fine, it's a lot. of layers, but that would be fine, really just a lot of layers, so this is the kind of thing you're looking for, it doesn't have to be a character, it can be something else, it can just be an animal or an inanimate object. whatever it is you're just looking for layers and in particular you want a big background layer so in this one we have these layers here on the right look this is the full body and it has that big background or the ability Making that big background layer through things like soldering will make a big difference, so this is the type of image you're looking for.
Of course, you can upload an SVG you find, just be careful about licensing and that sort of thing now. yesterday I showed you how I created baby Yoda, so let's remove them from our canvas and go find my baby Yoda. I created baby Yoda from a licensed Star Wars image that you can purchase if you want to do this too and here is my baby. Yoda and you can access it by going to jennifer maker comm slash baby Yoda there is also a link in the description of this video let's click on customize this is what you will see when you go to the file baby Yoda yesterday we made this version on hover cart today I'm going to show you how to make this version in a size larger than Matt, so it's very, very big, so let's save this first.
I don't want to accidentally rewrite everyone's image here, so let's say baby Yoda bigger and then Matt because that's what we're doing now and I'm also going to save this file that I put together so you can see how it works when we're done, so let's get rid of it. of baby Yoda in his movement. cart and we're going to focus on baby Yoda when he's walking right now. If you're curious how I made this file because it doesn't start this way, check out my video from yesterday on the baby blanket and I showed you exactly. how I created this image from a very black black, a basic black in my image and how I created layers for it and all of this is useful because if there is something you really want, I will show you what it looked like before the good image.
It's Yoda type, let's see, this is what it looked like before I modified it so you can see it was very different, so this is what I started with and I was able to create layers and change things to make it look baby. Yoda, so you can do this to watch that video and learn how to create all these different layers and modify things, and it's cool, but you know you're probably already going to find what you want in design space, ready to go, so let's get started. with this image and for step two we are going to prepare this image to cut it.
Now I want to crop the baby to a much larger size than it is now. It measures seven inches. I want it to be longer than 20 inches. tall, so I reduced the size of my canvas to have more space and there are two ways we can resize things, so I can just click and drag this resize handle in the bottom right corner to actually do it big like this or I can go up to the size fields at the top of the screen and change its height there so I can say 20 inches and press return on my keyboard.
Annie, change the size to 20 inches, whatever works for you is totally fine. Now let's talk about which size is better. Ultimately, you decide what size you want and what you need it for, but there are a few things to keep in mind that will make it more efficient, so if you use the 12 by 12 mat, it will be the largest size you can cut. . It's 11 and a half by 11 and a half right now, if you're using the 12 by 24, it's 11 and a half by 23 and a half, so if you want to cut a little less pieces of paper, you'll keep your limitations within of those increments, for example, this one is currently 20 inches, this artist baby is currently 20 inches tall, bye guys, bring them down a little bit by 30 inches wide, so right now that's pretty good because it will fit, it's very big, so it is large in size. and it will fit quite easily on three of the 12 by 24 inch mats after you prepare it properly, so that's always something to keep in mind and if you go a little further, you'll be doing a little more work well, so stay within the size of your mat increases you know do it in 11 inch increments for example that's what I would recommend and right now this falls within 11 inch increments and we could even go a little higher we could say make 22 inches like this. and I'll make this a little bit smaller so we can see it better and turn off my grid.
By the way, do you know that you can disable your grid by clicking on the top quat right here where you govern me if you click there? you're cool it goes off so here's our baby Oda and we have to get it ready to cut because if we try to cut now, let's go ahead and try it, let's click to do it. You'll get this incompatible image project and it's so vague that it's What do you mean it's incompatible? It's wrong? What did I do? It's kind of an alarming message and what it is is it's too big, it doesn't fit on a mat and it doesn't say that, but it's okay because now we know, we're going to change, we're going to make this to fit on the mat and that is the secret to doing a large project like this, because we know that this size fits our 11 inch incremental size. of our mats right, so we have 22 inches on one side and about 33 on the other, which is actually pretty good, so if you're going to use a smaller mat, that technically means you can fit six mats on this one. space if You are going to use the larger 12 by 24 inch mat.
You could get three, one, two, three, so you just have to look at your mats and decide what you're going to use. I have a I have a 12 by 24 inch mat, however not all of my paper is that big so I will use a variety but I will start by cutting everything into my largest mat size which is 12 by 24 so I will do click on the shapes and I'm going to click on square and I'm going to create and drag this here and I'm going to create a mat size for my mats, so I'm going to resize it so it's 23 inches long and I'm going to click on this lock. here at the top right up here so I can change the height and width independently and I'm going to change its width to be eleven point five, which is the maximum for the mat, so now we have eleven point five by twenty three. inch rectangle which is comparable to the size of the mat, we can cut this size on our mat and if we hover over place it over baby Yoda, we can see that we can get like his left side, so if we had two more we should be able to get it all the way in there, so I'm going to duplicate this twice like this and I'm going to drag them around and see if I can fit it inside these three mats and I can, so if you're using the smaller loco, you would. you only have the smallest size, you would have six here, but three large mats will fit my large baby Oda, so it's perfect, so now I need to line up these three mats and we're going to start using them for cutting.
Hold up baby Yoda so we can cut him up because the trick here is to divide him into pieces that fit on the mat and then cut him up and I would cut his pieces and then put them back together. Basically, you have to look. You may want to zoom this in so you can see better if you want them to be just next to each other, with no gaps in between or overlaps. That's your goal here is to get these three rectangles and we can select all three and go up to a line and make a top line, there we go, so this looks really good, so there are my three Matt, so I'm going to duplicate this and set it up here and now I have these two sets. from Matt, you might be wondering why I duplicated it because now I had this beautiful Matt outfit and I don't want to have to recreate it again.
Now let's look at our image and decide what we really need to do here. These are not layers, like the other images I showed you. We have a black cape. Wow, let's ungroup this, so come up here to ungroup and we have a black layer that's too big for a mat and it needs to be cut. we have a brown layer and this brown layer is 9 by 16 so it would fit on our 12 by 24 inch mat so we don't have to cut it unless of course our mat we don't have the largest mat for the eyes. they fit on the ears so they fit, but baby Yoda himself here is too big, so we have two capes here that we need to make smaller, this green cape and this black cape, so we have two sets of mats here, one for each one of these layers I need to make smaller.
I'm going to move my ears and eyes down. I can select them all together and move them down so they're out of our way because we don't have to cut any of those objects. There we have it. come on so we're going to focus on the green layer and the black layer and we're going to split them into mat sized pieces which are our target mat sized pieces and it's really not that hard so we're going to take our three mats that we created previously. and those are the three rectangles and we're going to slide them on top of Yoda, well he's underneath Yoda, that's fine, just make sure Yoda is completely inside these three mats.
Let's do the same thing with these three here, so I've selected all of them. three and I'm going to move them so that Yoda is completely inside those three and I'm going to move the outline down a little bit now it's time to cut, so cutting is removing the overlapping parts of two shapes to create a new shape. in only two ways, no more and no less. I'm going to zoom in a little bit so you can see it better and you can see our three mats here, so again we want to select just two items, so I'm going to select the one on the left. mat was the matleft and my green layer and I went to click cut and I get cut results, but you can see here on the right and I'm going to delete the ones I don't want, which is the gray matte. color and there is one below.
I'm going to see it here in layers. There are always three when you're done and here I'll bring it to the front so you can see it. It's great. It is cut. since we don't want that one, we get rid of that one too, if you can't see it, you're not sure you can move this layer, it doesn't matter, it doesn't have to stay in position at this point, so let's do the same with the middle mat, so we select a rectangle and the green layer and select cut now. get rid of the parts that we don't want let me click and drag on this and delete this piece and on the left the same thing we select the rectangle and select the green layer and click cut and then we get rid of the parts that we don't want what are these two , so now we are left with baby Yoda cut into three pieces that fit on our mat.
You see, we have ten inches by 18 inches and eleven point four by twenty-one point seven. and ten point nine by eighteen point four now we can cut baby Yoda's green layer, we do the same for his identical black outline layer, so we select the rectangle and the black layer itself and click cut and then we get rid of the parts that were cut that we don't need so those are the gray layers essentially you just click and delete them again we select the two layers that we want to cut and then we click cut and then we delete the things we don't want and the last we cut it and delete it there.
Now let's make it a little bit smaller so you can see what we're working with here, so we have these three images cut out for each of these two layers and then these additional layers down here that were Small enough now, if we click Create It, we shouldn't see that project in the compatible window and it should take us straight to our map previews, let's see if it worked, hooray, look, it was awesome, that's what totally worked, so now we can cut out our baby Yoda. the size of the mat we have and that's it, that's really all you did to prepare it, there's nothing else, so if your image is much larger than this you just need to make it to fit your mat size Please remember the smallest standard size.
On the mat, your maximum cut size is eleven and a half by eleven and a half and on the large 12 by 24 inch mats, your maximum cut size is eleven and a half by twenty three and a half, so be sure, Of course, you have paper that size, so just because you have a 12 by 24 cutting mat, you may not actually have paper that fits right now. I have some green paper that is styled 24. I have one of the Cricut sampler packs that I have. However, I don't have 12 by 24 black paper, so let's fix that now, click cancel plus and go back, so in order for this black layer to fit on my 12 by 12 paper, we need to cut it into smaller sizes , so I'm going to zoom in a little bit so I can see this black layer better and I want to create like before.
I want to create rectangles that fit my mat, so when I click on the shape, click on the square and my square will appear on this side. okay, we're going to drag it and I want the square to be my maximum cut area for that mat size which is 11 and a half by eleven and a half and I'm going to want to make a duplicate and then line them up. like I did before, but this time from top to bottom, so let's line up the left side and then zoom in to see. I think he needs to be a little closer.
We don't want it to happen. I have them just meeting each other, not overlapping or separate. in the middle, that looks good to me, so let's duplicate these two two more times. Oh wait, you can see there's a space there. I don't want that, I don't want any space. In short, I'm better. so we can better see what's going on. I don't see a space there, if you're not sure if there's a space, what you can do is select both and change the line type to like something like punctuation and you can see this. The score lines are on top of each other, so that looks good to me, so okay, so we're going to duplicate this twice and we're going to want to center it right over our Yoda.
I go to the layers, duplicate another one. time and the same thing happens over the layers like this, back up a little bit and this one is also over the layers, yeah, so we have these two and let's make sure that everything is aligned just to be absolutely sure that They are on top of the images so aligned that we can align them in the middle and then align them to the left, everything is fine, we are doing well and now we do the same as before cutting them, so we simply select this layer. these two layers and we cut them, remember that if you have problems seeing the division it is because you have more than one layer selected.
I'm going to go through and cut everything, so I double select the two layers and then I just click. we cut and then we'll go back and delete everything, there we go, so we've cut everything, so let's zoom in here and delete all the extra bits that we don't need, so that's going to be all the cool stuff we do. No need, let's just start with that which was black, let's start deleting, deleting and then these gray layers as well, there's always a third layer and then if you can't find it, just click and drag it so you can access what's underneath .
Come on now, this black outline should fit on 12 by 12 paper, so let's click on Create It and it actually works, which is great for us, so there we have all of our images on 12 by 12 paper ready to go. cut so if you have a smaller size. paper, this is a useful thing, of course, you can move some of these elements to other pieces of other mats to save on paper, so we have everything in 12 by 12, except for our brown layer and our green layer, so let's move on. and crop everything out so you can see how it works, so click continue.
You can say ok here and just make sure you cut into the right material for what you want. You will most likely only want to use medium cardstock. settings, but if you have a heavier cardstock, you may want to do the settings on heavy cardstock or even glossy cardstock, which will have more pressure and we will cut twice. Step 3, Cut the Cardstock Now cut the cardstock into the appropriate size mats, whether they are 12 by 12 inch mats, 12 by 24 inch mats, or a combination of the two sizes, this is an awesome tip if you have a mat. 12 by 24 but only 12 by 12 or eight and a half paper.
For paper 11, you can place two pieces of paper next to each other on your larger 12-by-24-inch mat and let it cut those two pieces together. If your paper isn't super sticky, you may want to tape the bottom of the two together. sheets of paper together before placing them on the mat. Now I was able to do it without tape, but tape is probably safer because it will prevent the corners from sticking as the mat moves through the cutting machine if the quarter sticks. You can reattach the cutouts from step 4 once all the cardstock pieces are cut.
Make sure you know how to put them back together. I recommend you check the images on the Cricut design space screen where you cut from to be sure. you know which pieces go where and in what orientation after checking, you know where all the pieces go and your cardstock cutout it's time to start gluing back together the layers you separated. It is important that you tape the pieces to the back of each one. layer again, check the screen in cricut design space to see which is the front and which is the back of your design. If you make Baby Yoda, you will need to tape together the black layer, the green layer, and maybe the brown layer if you cut. place it on pieces of paper like I did in step 5, place the layers with the layers back together, now you can start putting the layers together, start with the bottom layer and work your way up use a thin layer of tacky glue or spray adhesive permanent the back of each subsequent layer to attach them if you make baby Yoda this is the order I attach them Green layer then brown layer then black outline layer then ears then eyes mouth and the nose. six and this is optional, add a foam core and a stand, if you plan to just place the cut out cardstock on a wall you are probably done but if you want it to lean against the wall or even stand on its own which is great .
I need to add a stiffer backing to it because the cardstock alone is not enough, it will be super flexible with just the cardstock. I recommend a foam core backing to add a foam core board backing, place a foam core sheet on your work surface and then place your cut out cardstock on top of the foam core align the cutouts with the edge bottom is against the bottom edge of your foam core board now trace your cutout character onto the foam core with a pencil using a sharp craft knife cut along the inside of the pencil line to make it a little smaller Cut out cardstock, repeat with any additional pieces of foam core as needed;
You may need two or three or even more depending on the size of your image and then tape or tape the entire core pieces together and of course you need to attach the cut out cardstock to the foam core. I recommend spray adhesive for a nice even coverage, but technically it was fine as long as you kept it thin and didn't stick it down too much. a lot of dots because otherwise they will pop up and look a little strange now if you want to create an easel type stand your cardstock cutout can stand on its own cut a four inch strip of foam core board that is about 80% the height of your cutout Mark a line about four inches down on that strip, but don't cut it all the way, then fold that marked section.
Now flip your cut out cardstock with the foam core attached, of course I will line the bottom of your stand with the bottom of your cutout fold the marked section underneath and then glue that marked section to the back of your cut out cardstock now simply Support your cut out cardstock with that easel stand and it will stand on its own and this is what it looks like and I thought it put together pretty easily, it's a little big so it can be a little awkward, you'll just want some room to work , but otherwise it was just like putting together a really easy puzzle, it looks really good and the nice thing about it is that you don't watch them loom just a few inches away, you usually watch them from quite a distance away and you can't see the lines of sewing and paper or any small imperfections where you haven't covered it all the way. exactly, it looks great from the distance that you would normally see something that big, so don't worry if it's not exactly perfect, so I hope you can see how it's really possible to cut an image to almost any size, imagine everything. of the cool things you can do with this technique for corporate bedrooms, parties, holidays, name it now if you're curious about how to cut really big vinyl like this.
I have a whole tutorial on how to cut large wall decals like the super cute ones. unicorn, you can get the details, video and free unicorn file on jennifer maker comm slash large wall decal now, if you have any questions about how to make these amazing larger than net cardstock cutouts, just leave your question below from this video or ask above Anna's Facebook Group at Jennifer maker.com bar Cricut crafters check out the fastest response there and don't forget I have a Cricut giveaway going on right now for a chance to win a cutting machine Cricut.
Get all the giveaway details at Jennifer. maker.com removes the Cricut giveaway and that's it for today. I'll be back tomorrow to show you how to make decorative cake toppers for that special birthday or party coming up. Remember that I'm always interested in your project ideas, if you can say so. Tell me what you want to do. I can show you how to do it until next time. This is Jennifer Maker reminding you to create the life you love.
If you have any copyright issue, please Contact