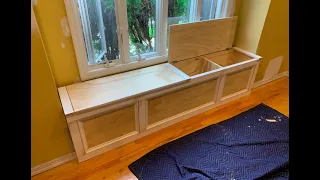
Built-In Mudroom Bench w/ Drawers & Slab Top
May 05, 2020Today we are going to build a custom
built
-in foyerbench
with storage. The first part of this project was going to be building the cabinet shell, basically the box that all thedrawers
would live and slide into, so that would be the bottom. From thebench
we needed to build it basically similar to a base cabinet that you would find in a kitchen or bathroom, so we used 3/4 inch plywood and cut it all out, plus I did a rough sketch on the computer so I knew what sizes I needed and then we cut everything to size, then we went back and sanded everything, all those pieces, Jamie says, on all those pieces so you don't have to worry about getting into those tight corners.
After assembling it with all the pieces cut out, it was time to assemble the bottom base cabinet and we did it with pocket hole joinery. We needed to drill all those pocket holes and when larger pieces of plywood I found it's easier to use the Kreg, our three pocket hole jig, it's just a little pocket hole jig that you can easily clamp to any surface and it just makes To make the material handling process much easier with all the pocket holes drilled, we then went back and assembled the bottom or base cabinet box essentially with quarter inch pocket hole screws, so with the case of the cabinet or box instead of being all assembled, it was time to assemble the platform and I did them separately because I wasn't exactly sure how I wanted to do it.
More Interesting Facts About,
built in mudroom bench w drawers slab top...
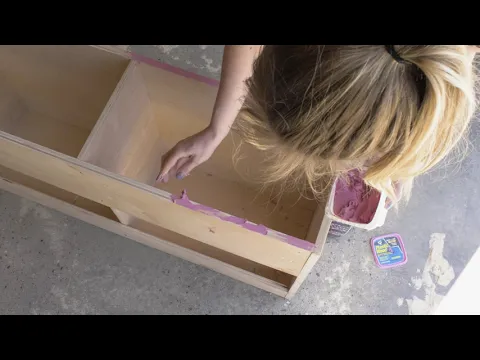
He knew he wanted to incorporate some feet in there to make it look more like furniture. However, he wanted that platform to also have a toe stand, so it's a little recessed about three and a half inches. behind the front face of the cabinet shell and that kick alone will allow you to walk up to the bench and hang a backpack or jacket behind it easily without kicking the bottom of the cabinet. We then installed the pallet to the bottom of the cabinet base or cabinet shell and also did this with pocket hole screws, but before we can move on to painting we need to fill in all the imperfections as well as the plywood. edges with wood filler and we chose wood filler instead of just a standard edge band because we thought it might be a little more durable and the way kids are going to bang and bang on this thing, I didn't want that edge banding. will remove now, the wood filler we chose was Plastic Wood We have the base completely assembled.

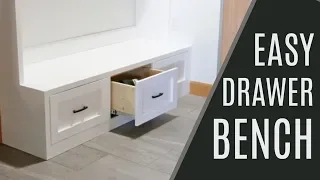
I'm going to go ahead and measure our drawer fronts since we're going to be making our own drawer fronts it's going to be a shaker style and we have some router bits to put on the router table to make the process pretty simple so the We got drawer boxes from a woodworking facility not too far from here, they make drawer boxes and can make them cheaper than I can and better, so it was nice to be able to deliver that test, however, we made the drawer fronts and if you want to learn a lot more about that, I have another video that we just posted and we will link it here in this card and in the description where the base of the cabinet was assembled and sanded it was time to paint and we chose a color that it was actually called cracked pepper and the paint is from Bayer but it's not just a standard latex paint they actually make an enamel paint designed specifically for cabinets and trim and it just gives you a harder surface for a longer lasting finish for The top we wanted to do something special, so we took a trip to Live Edge Detroit, which is a local reclaimed wood place in Detroit.

The good thing is that they cut down trees and then cut them into
slab
s, dry them and then sell them to sell thoseslab
s to the public. Well I'll start by using a track saw, if you're not familiar with the track saw it's essentially a circular saw. which runs along a track and will give you a nice clean straight cut, so it will be the closest thing to a table saw, however, you can position that cut however you want and cut it, you don't have to go out of a fence, this is a new track saw that Craig was kind enough to send me for this project and they are actually our sponsor for this project;However, since this is a new track saw, there is a piece of plastic with no clearance on the edge where the blade is and when you make this first cut, you will see that the saw blade actually cuts through that and it's going to make sure that it's exactly a zero clearance cut, so when we align this track from then on we just need to align that piece of plastic with where we want to make our cut. The reason we are cutting it is because we don't have a planer wide enough to be able to plan this entire slab.
We can cut it to 13 inches or less, which is the maximum capacity of our planer, so we'll do it with the tracks right, so now I have both slabs cut to about twelve and a half inches wide. What I'm going to do is choose my front edge because I want my front edge to be as thick as possible. We have about two inches of slab here, so I'm going to choose the straightest edge on one of these. boards so that the board has a kind of curvature and cupping, so I will choose the straightest edge because that way I don't have to take the least amount of material off the front edge if I have to take more material off the back pieces I don't care because It will be hidden behind the counter now the wood we are using for the top is Siberian Elm and the problem is that it is not a flat surface, so we had to flatten that slab.
The process I chose for this was to basically level the slab on a sled. A plywood sled that I then slid through my router. If I had to do this all over again, I would use a What is a router sled? I would build a router sled and then flatten it with a surface bit on the router and if you're looking for a video on that, I know my friend John Bielecki just posted one, it's called a 10 minute router sled. and that will show you the process of building a router sled and that is the process that I would follow if I were to flatten another slab, okay, so I have the slabs very close to being flat, they are not. perfect and I think a lot of that had to do with the way I was shiming the board and the plywood and the flex and the length of the board as well, but they are close enough that we can highlight it and it'll be okay, The problem is that when we run the track saw down it is very, very close to being straight, but it is not as straight as a jointer would make it, so what we need to do is leave a perfect edge on both. of these slabs so that they join together well so that when we glue them there are no spaces between them and what I am thinking is a test, we will see if it works.
I held both ends and intentionally left them. slabs long, so what I'm going to do is cut about three to four inches on each end and line up this line, all perfectly with this joint and then cut it down like that. cut even if it has a slight run, that cut should match up perfectly with the other cut, so when we loosen them and put them back together, cut the ends that we left, it should match up perfectly again, so after we flatten them or get them , I put them as flat as possible again we had two pieces we needed to join together and we did it with just a little bit of wood glue and biscuit joints, the biscuit joints were there just to line them up and make sure that slab were as level as possible each other and then once we joined them together, we brought back with us a hand planer and a sander and just flattened everything around or smoothed that joint out as best we could.
Now there were a couple of imperfections in the slab there was a small crack in the slab that we ended up going back with some epoxy we ended up staining that epoxy with black just an acrylic paint just a couple drops of that on the epoxy was what gave it that stain that we put that epoxy put on and then he went back and sanded it to fill that gap because the crack went all the way through the table. Now as far as installing this, it was pretty easy, we ended up grabbing an oscillating saw. with just a dremel oscillating saw and cut the molding exactly where we needed it to be and then slid the box into place.
I ended up making a filler strip because on the right side of the bench we needed that drawer. to be able to remove it and since that bench was going to be against a piece of molding, I made a strip of filler about an inch and a half wide so that I could remove that bench from the wall and be able to remove the drawer. then we could take and create a template for the top, we could use some plywood and measure the angles. We had a funky little corner that we had to figure out, so we put in a template and created a template for that and then we brought that back to the slab and cut the slab with that Craig saw to the exact dimensions it needed to be.
Now the final finish we wanted for the slab top of that bench was just an oiled finish, something we can continue to maintain. and I apply oil over time and something about the oil we've been working with it a lot lately and it's just that it brings out the natural beauty of the wood and kind of like that slab that I didn't want to take off using a polyurethane finish so that the oil leaves you that nice matte finish and it's a great finish. I think it will probably be our preferred finish from now on. Now it was time to secure the base to the wall, so I used some longer wood. screws and I just found the studs that were in the wall and screwed that base to those studs, then once the top was cut and everything was good, we came in and set that up, put it in and secured it from the inside of the cabinet to above. at the bottom of the slab so we installed the drawer boxes and went ahead and mounted the drawer fronts using a little hot glue to temporarily position them and then came back from the inside with quarter inch wood screws to secure them from the inside. from the drawer I want to take a second to thank our sponsor.
We used his products throughout this project, including his carpenters' wood glue just for this general build. We also used the wood filler, plastic wood X to fill all the edges of the plywood. as well as any joints and cracks, and then we also use your Alex plus to attach this entire structure to the wall for a nice, integrated look, whether it's carpentry or small projects in and around the house, DAP will most likely have a product that suits your needs. need so make sure you watch them adapt calm down wait a second make sure you watch this video here YouTube thinks you like it and so do I if you haven't hit the subscribe button you can do that right here and also if you want the article writing written on this bench, you can get it right here until next time, be safe and happy building it.
If you have any copyright issue, please Contact