Build an Expensive Camper WAY Cheaper
May 01, 2024functional, lightweight, easy to
build
and affordable, these are my goals for this project. I want to have acamper
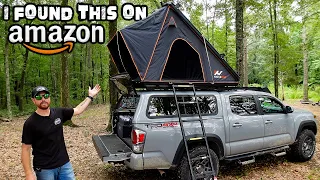
with a drop top for my truck, but even the cheapest ones I found are like $8,000, which is tooexpensive
for me and they don't sell. They are where I live here so I'm going to try tobuild
my own here in my garage. Basically, we're combining the IDE of a rooftop tent and a truck top so you get all the benefits of both and can also fully stand up. inside and I want to do all this for about a quarter of the price of buying new.
I think it will be easier if I just start building and I will explain my design and reasoning as we go. I am marking 9mm Structural Plywood and I have printed this little book with all the pieces I need and the measurements of the 3D model I have made so I can prepare the four sheets at the same time. Most of the cuts are just simple 90° angles, so everything can be done by simply carefully following the lines with a circular saw. Of course, the circular saw blade won't cut inside corners without overlapping, so they need a little more coaxing.

More Interesting Facts About,
build an expensive camper way cheaper...
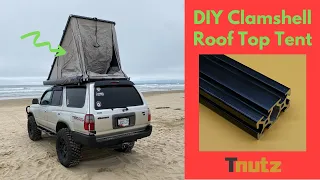
These panels are They will become the bread of a construction sandwich that I'm making here. Let me show you that the meat that gives strength to this caravan will be aluminum Hol section beams to join all these beams together and complete the rest of the structure. They will be laminated on both sides with our plywood panels and then those walls can be joined together to create the frame. This works so simply because all the walls are straight up and down, with no tapering angles, which also gives us maximum internal space. I will start by building the side walls first, since they have the most functions.

I chose to use plywood and aluminum because I think they fit the goals of this project better, they are relatively cheap, easy to obtain, and you only need basic tools and skills to work with them to make room for the aluminum beams to sit on the walls. I need to attach some 18mm wood strips that I cut earlier. The height of these strips is 25 mm, which is the same width as the aluminum beams. using exterior grade wood glue to attach these strips to the panels, then drilling pilot holes and screwing them in because this exterior glue is a little thicker, it likes to slide when you try to hold it, so seasoning it with a little salt gives it some grip which then dissolves as the glue hardens, placing the strips around the perimeter of the panel is easy CU.

I can just look at where to drill those holes, but for the strips that sit a little off the edge, I found it easier to drill. first through the panel before gluing and fastening it, then I was able to drill and screw from the bottom knowing everything was aligned, the process was exactly the same for the other panels, I just glued and screwed the strips for the front wall. I went a little more complicated and added some diagonal bracing since this panel does not have aluminum beams. Now the top edge of this tray is not quite flat, which means I had to cut a bit of a concave into the bottom edge of the side panels, which I did with a jigsaw and then smoothed it out with a number four Stanley hand planer .
Now I'm ready to add the aluminum beams to the walls. I had SPL Metal cut the longer beams to the exact size I would need, but for these short lengths I had to stand up a lot to get an exact fit. The nice thing about aluminum and part of the reason I chose to use it is that if you take it easy, you can basically use carpentry tools to cut it. Here I'm using a #62 blade and I'm just pushing slowly through the middle so as not to put too much chip load on the surfaces already cleaned with a little acetone.
I am using heavy duty construction adhesive to adhere to the wood. I did some testing before this. and it seemed like the two materials joined well, but I'm also securing it with self-tapping screws in the middle. This is the 2.7M main beam that goes in and is the one that will support the bed platform lever, so yeah, it did get a bit. A little extra attention just to make sure it was right. It was the same process to glue and screw the other beams to finish off our wall sandwich. The exterior panel can now be glued because this is the exterior side of the wall.
I didn't want screw holes everywhere so I found all the clamps I could fit my dirty gloves on and held them in place for 24 hours in a perfect world all the pieces would be completely washed off each other from the glue but I used a circular saw to cut these panels, so a little cleanup with the trim router makes everything nice and neat before assembling the walls. I'm reinforcing where the beams will be attached. I made these blocks by laminating three pieces of glue together to give me the correct thickness. Adding these blocks will allow me to screw the ends of the beams together and will also keep them from crushing when I screw them together.
You'll see what I mean shortly. This is the back wall piece that lines up. Up with the tailgate of the truck and I'm putting up both sides just to make sure I have enough room to walk around the edges of the garage to connect the walls together. First I'm starting by drilling a couple of pilots. holes and then half drive some screws, so when I add the glue I already have the alignment and can focus on making sure the screws are correctly placed at all the connection points between the aluminum beams. I'm using these heavy duty 125mm screws. which go in blocks I made just before the second side wall goes exactly the same way as the front wall was a little harder as I didn't have anywhere I could easily clamp it so I made the old clamp with a clamp . trick and then used ratchet straps to hold it in place while I drove the screws into the front edge of the can, it is also a sandwich of plywood and aluminum and with the last panels glued on the main structure of the case is complete and I can move Let's assemble the pop-top frame.
Here is a small error on my part while timing these holes to receive the screw head. My counter timing was not wide enough because there is no plywood panel. on these joists so that the heads are completely flush, they should have been hex head screws instead because that would have given an even stronger connection. Now the reason there is no plywood on the sides of these roof beams is not just to save weight, but it is because I need to be smart about how this roof is sealed from water. If we look at a cross section profile, we have the widest top edge of the wall with a raised lip on the inside face and the narrowest bottom edge of the roof.
The space created between them gives us room for the tent fabric to adhere in a way that does not allow rain to drip into the caravan when the roof is open. I'm spacing the ceiling and walls the distance of the rubber seals. I will use and mount the roof hinges along the front edge. I just have to be careful where I put those super long screws. For now I'm just putting in two hinges so I can check that everything works later. I put two more. in the middle it's pretty well balanced front to back, so I have to be careful not to tip the lever over while it's resting on these blocks.
Yes, the bottom edge of the lever is 7mm structural plywood that I am gluing and screwing. place it at the bottom of the aluminum beams, this has to support the weight of the legs of the people standing on it, so I am reinforcing it with equal angles of 25mm wide and 3mm thick aluminum that I have riveted, the front edge of which fits Some slots that I cut earlier in the front beam and in the back that I am screwing to the front wall, these are going to come out again for painting, so I won't screw them all the way.
I left the plywood a little big, so I'll trim it now to reinforce the corners. I thought about buying some shelf brackets to act as corner supports, but they aren't even square. After I finished ranting about it, I made my own using the extra plywood. By cutting off the side panels, the caner lever also gets a giant version for holding the load. My design has a sliding bed platform so that when not in use it can retract over the caner lever giving more space in the rear, but without it. There is 2m long and a queen siiz wooden mattress again.
I am using 7mm structural plywood and it is reinforced with the same equal angle. I'm really challenging myself to build as light as possible, so I'm dancing on the edge. than I think will be strong enough, it's easy to go too far on the side of caution and build too much, and that ends up with things being overweight and under budget, so I'm building as light as I can, but I'm also aware of leaving an opportunity for reinforcement if that is something that is needed later. I just said that the front edge of this actually needs to be quite strong, so I'm using 18mm ply and a piece of reclaimed wood that I had left over when I built my last motorhome?
This needs to support the weight of people getting on and off, so we'll see if it's strong enough when it's all put together. The bed platform will slide along these 18mm plywood rails, they're not exactly high tech but I think it should do the job, let's put this here, okay, how convenient. I guess I should have talked about this before, but you've already seen some of the finished takes, so you know what's going on. This design has folding doors. all three sides and while that's what I chose for its versatility, I hope you can start to imagine what other options you could build, such as leaving one side as a full wall to mount recovery gear or surfboards or even adding a style window
camper
instead these doors will again use the 25mm aluminum equal angle this time as a full frame to add structure later.I actually ended up changing the plywood here with a different material, but I kept these frames the same. To reinforce the corners of the frame I needed to make a notch at the equal angle, which I did using a metal blade on my jigsaw due to the thickness of the blade, the notch is a little thick, but that is not important since the small equal angle piece placed over the top hinges are riveted into place then mounted through the door panel and on the aluminum frame in CAD I figured out the pivot locations of the gas struts so that all the doors would open perfectly to 110°, which would raise the edge of the doors high enough to not hit my head where the gas struts mount into the wood.
I'm using insert nuts so the ball ends can screw on easily. I use 3mm gaps and a couple of shims to align the doors into position to screw the top half of the hinges on, then screw the gas struts into the insert nuts I just fitted and see if my computer math actually works In the real world. Yes, same process for the other two doors and then I had this was incredibly satisfying to open now, thanks to my success with the gas struts on the doors, it was time to tackle the large gas struts that would open the roof.
I want them to screw into something a little meatier than the relatively thin walls. from the aluminum beams, so I'm making four mounting plates out of 18mm plywood. I'm recessing the rear a little bit so it can receive a T-nut that the ball ends of the gas shock will screw back into. use CAD to calculate the ideal position of the struts so that they support the roof at a 30° angle which from the research I did seemed to be what most other motorhomes on the market did, that doesn't scare you at all , for sure yes. I made sure that my computer world and my real world were really aligned.
I installed the fusion plates with the gas struts attached so I knew 100% they were in the right place and while I check my measurements I'll just leave them attached. place for now, I make these YouTube videos for two reasons: First, I want to provide quality information so people can learn from my experiences and in the same way that watching YouTube in the mid-2010s really helped me, Secondly, I want to use my projects. to try new things and expand my own skills and it is with that in mind that I am very excited to try building this drop top tent.
I spent several weeksdesigning it in CAD before this, trying to find a balance between getting the features I wanted. but in a way that would be capable for a beginner or someone like me who had never done this before, what I have here is a 600D PVC coated waterproof polyester fabric. I bought a ton of samples in the weeks I spent researching this trying to find the perfect fabric and while this isn't the only type you could use, it fits my budget and looks like it would work using a print of the 3D model I made.
I'm cutting all the pieces I need for the rectangular one. back wall, the fabric is easy to cut with a rotary cutter, but the mesh is very slippery - holding it while cutting is a challenge. In fact, I have taken into account my own potential for error in the design and most of the pieces are being cut. It's oversized and then trimmed to fit, so it's no big deal. This will be a window panel and needs zippers running vertically on both sides. I'm using number five YKK continuous coil zippers that I cut to size and then mark a 10.mm hem on those edges too, if you have loose fluffy bits of fabric, sealing them with a little heat separates them, that's why the pros They use a hot knife cutter on this type of fabric and that actually gives me an idea to use laser cutters to create the hems like any good viewer.
I'm using double sided basting tape to stick them together. This may seem like cheating, but we want to minimize the number of times we poke holes in the fabric with a needle because that will make a difference in waterproofing and also this is easier for a beginner. I'm marking a reference on the zippers so I don't lose sight of them later and try to sew them backwards or something. I'll split them up for now to make things easier to manage and hold the zipper in place so the edge lines up with the hem. that I made, which you can see on the front, should leave us with a neat reveal, the first few stitches on the fabric I'm not nervous, you're nervous, I drop my foot, move forward a couple of stitches and then back a couple to fix the Sew and then sew along the zipper removing the clips as I reach them and as expected I'm not going to win the British sewing competition anytime soon but we all have to start somewhere in the another edge of the window panel is exactly the same glue the hem fasten the zipper sew along the line I have had this sewing machine for a couple of weeks and made a lot of small bags to try to improve my skills before filming this and I have to To say that sewing is really fun, although this sewing machine is called heavy duty, it is really nothing more than a somewhat thick home sewing machine, so anything you have access to should work well with this type of fabric , moving forward a little now because that's all.
In the same process, I have the zippers attached to each side panel and sewed the window mesh onto the top panel. These panels need to be sewn together now, so again I'm using masking tape to hold these edges in place and get the position. okay, I'm putting the zippers back in to make sure the fabric stays aligned, then I can tape the window mesh and top panel. I'm turning it over so I can draw a chalk line to help me keep the stitches straight by doing it carefully. Making sure the basting tape doesn't come loose, I can attach the panels together because I need the window panel to unfasten from the main body of the tent while I sew.
I'm opening it to get it out of the way, same process on the other side. except this time I just removed the window panel completely to get it out of the way. I also gradually started to see an improvement in my seams, meaning all the back wall pieces were sewn together and the window panel was simply zipped back to the side walls. exactly the same way, the only difference is that I am cutting slightly angled rectangles instead of squares because the two sides are equal. You could cut the first piece, rotate the piece so it's mirrored, and trace the second piece so that Actually, the process was pretty quick, assuming you have the machine set up correctly.
I found that the things that improved my stitch quality the most was making sure I had a good reference line to follow with the machine foot, similar to how you need a clean line to make an accurate S-cut and the other thing was handling the fabric in such a way that it was easy for the machine to advance, especially with larger pieces. I had to be careful with how I held them, so I didn't put them into the machine awkwardly or with too much force. I trace parallels by inserting a piece of wood like a table saw or band saw.
It has a lot to do with how you handle it. It's not just about the cutting blade itself, any just a few. Observations I made. Now I have all three sides sewn together and since I made them a little bigger, I'm holding each one in place on the frame so I can check that they fit and that I got the angles right. They seem fine. so I'm going to screw on the Gest St mounting plates that I left attached earlier, which has only been in the video for a few minutes, but it was actually like a week for me on the edges of the panels.
Now I can put a mark where they meet the frames, so if I draw a line between those marks, that's where my joining points need to be so I can trim off the excess leaving a little bit of seam allowance and you know the drill, use Baste tape along the seam to hold it in position. I attached some clips and then sewed the line and with that the sewing of the tent was complete. I came up with a simple way to attach the tent to the frame. I made this guide with a bunch of holes spaced along it and I used the soldering iron to melt holes along the bottom and top edges of the tent, the tip of the soldering iron melts and pushes the polyester fabric to the edge creating a nice sealed hole and I'm using garden edging to make plastic strips that I cut to the same WID as the height of the flange we talked about before, so all I had to do was line up the plastic strips that I drilled using the same guide stick and screw them onto the tent fabric for something I've never done before.
I'm pretty excited about how well it turned out, like it actually looks like a top tint because the roof doesn't have its final weight, but the gas struts that hold them up are too strong to let the roof go down. so I'm going to remove them again before I start working on the roof panels, yeah damn it, and now I can also trim the oversized tent fabric along the top edge. I chose to use an aluminum composite panel for the roof, which is a plastic core sandwiched between a super thin aluminum sheet on each side that is waterproof and comes pre-coded with a gray exterior finish.
I bought two sheets from the supplier, one standard 2.4 x 1.2 M and the other larger, 3 MX 1.5 M, which I cut to my size, this would give me coverage across the entire roof with just one joint and leftover cuts to reinforce the joint and support the center of the largest panel. I used another piece of the same aluminum at the same angle to span. along the middle using some 90° corner brackets to go between the beam and the bracket. I'm using some shims to lift the edge of the panel so I can apply a solid bead of Ms sealant, which acts as an adhesive. and a tight seal, so I'm careful to go around all the edges and then press them flat using this roller I had back when I used to duplicate screen printing.
I drill pilot holes around the perimeter of each panel and put a drop of sealant on each one that way, when I screw in the washer head screws, I'll have a tight seal. Okay, the panels on the roof are now at their final weight, so it's time to install the gas struts once again and do this. pop top pop I made a couple of brackets to hold the roof at the correct angle while I put them back on and now we can see if the roof works, okay, they are actually adjustable, they have a valve to let some of the gas out.
To dial them in with the exact force you need, the closure is that even though only gas comes out, you can't put it back in, so we're going to have to do this incrementally and like 20 minutes later, we have a pop-up lid. In fact, I can. I can't wait to show you all this. This is great, which means we're in the home stretch. Now everything is dismantled and prepared for pain. All the outside holes and screw heads are filled with epoxy resin and any sawdust that was in my dust bag. mitur and all interior holes are filled with Bondo, all edges are cut with the trim router and all surfaces are sanded with 120 grit sandpaper.
At this point you usually put some fiberglass on, but I'll Let's try an Even simpler option: I'm using a penetrating epoxy sealant, which I'm very skilled at pouring this material. It is a thinner mixture than regular epoxy, so it penetrates the pores and fibers of the wood and hardens because it is so runny that I need to apply it. otherwise it just drips all over the floor over the course of a couple of days. I applied about five coats of this inside and out using 120 grit sandpaper again. I dented the surface so my top coat of paint would adhere properly then I brushed and applied exterior primer to all surfaces, after two coats had dried I started marking for the top coat, although this is essentially a box large sitting in the back of my truck, doesn't mean I can do it.
It doesn't have any personal character, so I masked it in a couple of angles to help break up the visual silhouette a bit. The first color to follow is this matte white and I will follow it with a semi-gloss black. I had an extra aluminum composite panel which was enough to replace all the doors, which I think worked out much better than the plywood and saved me a lot of time because it's already pre-finished, the last thing before putting this camper together. The truck should place rubber seals around all openings, the bottom edge that sits on the truck receives a double coat, side by side, and all doors and roof edges receive a single coat, paying attention to the direction in which the water will drain.
There was nothing else to do until this camper was in the back of my truck. I figured it was light enough to lift and luckily my mate Nick had a free spot at a Saturday avvo to help me out. Now the plan was simple. get it out of the garage, turn it around and pull it back oh yeah, lift your corner and then we'll just rotate it, line it up with the edge of the bed, it's pretty tight on my side. and it was a perfect fit oh you'd be funny if I wasn't recording. Now I'm next.
We knocked down the roof where we managed to lift it in the wrong position. You move to that corner and then you have the chest boards exactly in position. Wrong place, but considering all the things that could have gone wrong, it happened pretty easily, to keep this thing from sliding out the back as soon as I pull out of the driveway, I need to secure it to the truck. I'm using these tie down locations, each of which has a capacity of a couple hundred kilos. I made these brackets using 3mm steel equal angle drill holes to match the tie down locations and where they would attach to the caravan.
I'm using the factory bolts. the bottom of the bracket and some roof screws that go into the camper and then I put a bolt that goes all the way through and did it on all six tie down points, you may have noticed that my doors don't have any latches on them and that's because I thought the standard cam lock latches were silly because you have to lock and unlock them individually and you can't lock them from the inside, so I designed my own which also has remote central locking, the idea is that it takes the unique linear motion of the actuator It splits in opposite directions which shoots a steel rod on either side between the door frame and the caravan frame so with the steel rods inside I also made a 3D printed bushing so I can put silicone in place so the water does not enter.
I attached stainless steel retaining latches so I could use a padlock to lock the roof and added handles to the doors and roof lift points, gas struts were fitted. It was turned back on and the tent was put back up and a new brake light was added. I wanted to put on some custom stickers to really make it my own and while I don't have a vinyl cutter, I do have a box of spare parts and a new laser cutter design that I've been working on in the background for a while and sure to use a laser of 90W CO2 to cut a dozen LS vinyls is a bit like using a hurricane to blow out a birthday candle, but it gets the job done too.
I'm pretty sure this vinyl is PVC, which is abig no, not in a laser cutter because of the fumes, so I don't recommend trying this at home on the kitchen bench, but rather putting your name on something you've worked hard on. It's a good feeling, so now that it's finished, let's talk numbers first, how much does it weigh for context? The lightest production models of this style of caravan weigh around 125-160kg. I weighed all the pieces as I put them in my truck. and mine weighs about 120kg so that's a big point for being light, the truck barely even realizes it's there, in fact my fuel economy improved from 6 miles on the highway before turning it on to 9.9 fully loaded, which means taking longer road trips while I was testing instead of the short trips to the hardware store I was previously making, make a bigger difference than having this camper in the back.
I also had several days of rain while I was testing and so far everything has stayed dry. inside, including the store. Now the big question: how much does it cost to build? Remember I was aiming for a quarter of the price of the cheapest production models which cost around $8000 and after adding up all my receipts mine only cost $1500 so I think that's a pretty good saving if you're handy with the tools if you want to create your own or a similar one. I will have a page on my website with more information and I will link it in the description if you want to see more from me in the future, please like this video and consider subscribing to the channel it really helps me because I have many more projects that I want to share with all of you.
If you have any copyright issue, please Contact