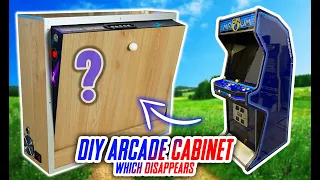
Build a BIGGER BARTOP ARCADE - FULL LENGTH AND FREE PLANS!
Jun 05, 2021Hi, I'm Mike, from re
build
ing things. This video is part of a series of vile logs following the construction of anarcade
on top of a bar using a 28-inch screen. Follow the steps I used and see the process I follow whenbuild
ing instead of skipping them. parts of the build. I will show almost all the steps like subscribe to show support for this channel. Alright, today I'm starting a custom build for a newarcade
. This will have a 28-inch wide screen. Someone asked me to make one. I have had to modify theplans
that you normally find on my page here this one is going to be a little higher a little longer this way and each of the main pieces instead of being 55 centimeters wide will be about 70, let's see .
I may change some things as I go, so since I don't have a
full
size printout, I wrote this in AutoCAD and added all the different angles I'll need to make on my protractor and I'm going to draw everything on these pieces, they're pretty much Same as my others, but I made some changes just to the actual dimensions, a couple here and I'll make them available at the link in the description through the screen. It will have an opening that will be 61 by 34 and hidden behind it will be all the blocks that hold it in place.
More Interesting Facts About,
build a bigger bartop arcade full length and free plans...
It's just a TV screen from here to here and since I don't have a fancy ring, I used a ruler, so I'm up too late now, yeah, yeah, yeah, okay, so I drew my basic shapes here, the arc with which I had to settle for looking at eye to eye. I think he did a good job with that just bending something flexible. It doesn't have to be a ruler, it can be a thin piece of wood, something that can hold that shape and then I can draw a fairly smooth arc. I'm going to go ahead and nail these two pieces together and cut them out. both at the same time so I don't have to redraw this twice after finishing.

I'm going to add all my dimensions to determine where my blocks go again according to these floor
plans
, where are all these pieces going to go? Look at this set of plants that would be these lines here, that's where all those pieces go. You may have to remeasure things as sometimes there's a bit of human error involved, but as long as they fit together everything should be amazing. alright, I've drawn all the starting points, the location or the line blocks, my dashboard, all my stuff is going to go. I didn't have any kind offull
size template, but I did use here, it's just a large protractor ruler and another block of half inch MDF to lay out my width.
The half inch MDF works pretty well, so nailing the two pieces together , you will be able to have exact pieces, they are all cut, you can use a jigsaw, a band saw, a jigsaw, anything. that will work, just look at it, use what you have, go nice and slow with a jigsaw and you can get perfectly straight lines with minimal sanding. What you're seeing here has probably been sped up about four times one of the major ones. The reasons I'm using a jigsaw for this is to show people that you can do this with any tool.
In my last video I used a band saw for this and all my big stuff. I tried to use smaller tools for this bill specifically to show people that I don't need a huge workshop to do it. I am lucky to be a workshop teacher at a secondary school. I run a play engineering and construction club and that's where I get to do all the things with my students, get a piece of wood, grab some. sandpaper, wrap them and start sanding, make everything smooth now, it will make your life easier later. I still have them pinned, so they will still be a mirror image.
I took it to the large belt sander just to make it quicker, but you can still do this by hand now to break up my pallet pieces. I'm going to use a circular saw and a table saw. I'm going to demonstrate here that you can do it with any circular saw you want. To take it easy, I'm setting up a very simple saw guide here with another piece of MDF, set it to the width of your tool. You should be able to get nice straight cuts. I'm putting in some other points here just to make sure I have enough material.
I put it on a crosscut sled on a table saw and am cutting out some of the larger pieces. I can also do this with the small pieces. You can also do all this with the circular saw or jigsaw, it will just take a little more time. I can take the nails off now and start putting them on the other side panel. I want them to be a mirror image and physically cut out and where I'm going to be. I added all my dimensions and lines. I go according to my plans and measure from the other panel I drew.
I always get a little bit of human error, but if I can reduce it, I'll do my best. I'm using a half inch piece of MDF to trace these lines because that's what things are going to be made of, I might as well trace it instead of trying to draw it with a ruler when I was designing this, I wrote down all these useful little details. measurements in my AutoCAD file which makes it much easier to figure out where these things are supposed to go. I always wanted to take my time when I'm designing things, do it the best I can, it'll make my life easier later and give me a better look of the whole build.
I don't want anything to wobble when everything is ready. He is sitting at a table. The next thing I'm going to do is make a slot for the tea molding. Here you see a piece that's going to be my control panel, it's going to be a piece of tea molding on the front of this, now it's going to the router on these side panels, take it nice and slow, this thing is spinning really fast. I wear a dust mask to keep this stuff out. my face I do my best to use them at all times and work with MDF.
If you're not sure which computer Alden is, don't worry, it will look like you'll install it in a future video in this series. Here I am also helm and out. the bottom piece will also have another piece of tea molding. This piece is for the top panel. I have a nice angled cut, but that's optional, you can hide it behind other things if you don't have a chance to angle it. on it, so I'm just using regular 2x4s that I bought from Home Depot to create the supports for my cabinet. I cut about four feet total.
I'm going to cut them into 3/4 by 3/4 inch strips. It will be square, you could use an inch if you want a little more support but so far I have found that making 3/4 has been enough once you have cut all the strips it is time to adjust them to fit your arcade cabinet. I usually buy my adhesive at Home Depot, but sometimes you have to go to the supermarket. I really recommend wood glue, don't use mustard. You could use screws for this entire build. I choose to use brad nails on glue, there really isn't a huge amount. difference, as long as you place it correctly, take your time to make sure all the blocks are well aligned and straight along with the design lines, wipe off the glue before it dries so you don't have to scrape it off again, this is just the The way I choose to do my builds there are many different ways to put the cabinet pieces together, you could do it all without blocking if you wanted.
I forgot to press record when I attached the bottom piece, but I attached it exactly the same. Since I made this top panel here to help keep it square while the glue dries, I like to place a couple of my other panels as placeholders until it can dry at 90 degrees or square. I will usually let it dry for at least an hour before continuing with more pieces. I'm waiting for it to dry. I'm going to place some of my other things, in this case the top marquee where my artwork will be displayed. I'm measuring a 3/4 inch border around the entire thing.
I'm going to cut it out with a jigsaw or whatever tool I have. She wanted to dress up. You could use a router for all this, but I'll do it. This project is mostly simple tools for at least most of the steps, so I use a jigsaw. I can use a circular saw. I can use a table saw. The important thing is that you take your time. Make the lines straight. Cut them to make it look good. I like it. Trying to cut a little larger gives me some room to sand things when using a jigsaw compared to a table saw, the cuts may not be as perfect so get out that sanding block or file and make it nice and soft. this is just a test fit below, you will see where i will place my speakers next, it's time to design my control panel.
I have a couple of angles I need to cut here. I give you the use of a table saw for that, you can just cut it shorter and it doesn't have any angle and no one would really see it unless you have gaps between the pieces. I used to do a little test strip, then go back and finish it good enough for me. Okay, next is the control panel. I can see on the left where I directed it for my tea molding. I want to make sure I don't put the angle on the wrong side. Now the reason I do this angle is because when I place my screen marquee it's going to be positioned. match and fit flush you don't need to do this this is how I designed it when I'm drilling holes for t-nuts I'm going to use a 3/16 inch and a quarter inch drill bit You'll see why in just a minute I'm putting these on holes so that when I have the bolts in, they will line up in the middle of where I put my blog, so I'm doing 3/8 from the edge.
So first my 3/16 inch hole prepare my T nut, make sure it fits and here it is for the bottom or front control panel exactly the same measurements 3/8 inch from the edge. I'll drill the holes where I think I want them. to go as long as they're even that's all you need so I used the 3/16 bit going through it as kind of a guide to make a little dent or a little hole and then I can change to a quarter inch because that is the diameter of the T-nut, then I'm going to drive the T-nut in from the back when the bolt goes through the pieces and into the Tub, it should hold it nicely in place, this is where sometimes you might want to use a harder nut. wood than pine now that the washer will not be the center for the finish this is just to test my fit.
I will give up another 50 control panels. The same steps change my bits. I drill the holes. I try to use my fingers to start putting them together. if you go straight with a drill you run the chance of it twisting, let's take it easy, make it work. Now you see me gluing some small blocks here to hold the T-nuts in place. I've had a problem where sometimes the T-nuts fall off from behind, so if I put a little piece of wood there covering the edge of the T-nut a little closer to it, it should work and keep it in place. place again, this is the way to do it, I came up with this and it seems to work pretty well, no one will see it from the outside anyway, okay let's try the control panel.
I made the
length
of the control panel just a couple of millimeters less than the actual width I want. To make it easier to put the panel on and off, there will be maybe a millimeter on each edge. Next is the back door. I'm going to cut that big back piece into three pieces. The top will probably have some holes for some. airflow, the actual tailgate will eventually have two large holes for some fans and the bottom will have the hinge and electrical system. What I should have done was cut my electrical holes before gluing this permanently, that was an afterthought of mine.Different ways to hang a hinge. This is the way I do it. You can glue it there so you can't see the hinge at all, but this is much easier and since it's behind the cabinet, no one will see it. I always try. To drill a pilot hole before using a screw, stagger the screw so it goes in easier and there is less chance of splitting the wood. I could have used slightly shorter screws, they stick out a bit, but I'm not too worried that next it's time to move on. about how I'm going to position the monitor, some people just use plexiglass, but the monitor behind it is held in place by the visa mounting holes.
I will not do it. I'm going to create this big marquee to hold everything together. I just like the way it looks, I think it's pretty solid and I think it's pretty easy to make, so I'm taking this big piece. I'm going to place where the screen opening will be, I should be able to hide the bezel. and the monitor or screen itself. I will cut it with a jigsaw, circular saw or table saw, in my case I will start with the table saw and then finish with the jigsaw. I learned this trick a few years ago I never had any problems with safety, but you still have to be careful if you do it alone.
It's not a bad idea to have a spotter finish it with the jigsaw and then I'll file it gently. an extra touch, you could take a champ for a while with a router running around theinside to get a nice beveled edge on the inside of this hole. I would do it in a later construction that you will be able to see in a couple of months. It's a pretty crude way to do it. I just put the screen underneath, took my pencil and traced the shape of where I'm going to put my stands, so using the router I'm going to trace out some slots for the TV. to fit I don't have to do this at all if I don't want to but this just adds a nice touch and this is my personal preference with that first little slit in the eye I'm using it as an indicator to figure out how far away it should be my router guide my router.
This is any straight piece of wood that you can bump into and get a good groove going into. I set the depth to about half the thickness of the MDF. It's okay if you cut a little wider because that leaves a little wiggle room for the TV to do the same on the other side all the way to the top and then I'll make a custom piece for the bottom. and slow so you have full control over what you are doing for the bottom. I simply traced the bottom of the TV on a little piece of scrap metal.
I'm going to cut it with the band saw. You can use a jigsaw or any tool you have if you choose. With this method it doesn't have to be perfect again. I like to have a little bit of wiggle room as spacers or just making sure it's securely held in place after I have my main spot here. I'll just get rid of it. the excess just looked at it again if you are using MDF make sure you use some type of dust protection to keep this stuff out of your lungs. It looks very good. Next on the back is that I will make my custom fastening system which has worked for me several times, this involves making a couple of these cute strips here, making some slots for my tea nuts to fit behind and then I will create some wooden blocks which will hold everything together again, this is how I do it, make sure you use glue that is strong enough for this again.
This is my custom mix. You can get it at most grocery stores. These are my detailed plans. I spent hours and hours on them, so I only used some again in pairs. fours or whatever blocks you have I'm going to use these to hold the TV in place cut them with whatever tools you need this band saw has seen better days it doesn't cut perfectly straight it always ends up cutting a bit of an angle I think I need to fix it up a bit , see how your fingers use a pusher when necessary, so now with all these pieces together this should start to make a little sense as to what I'm doing, this will all be removable so I can turn the TV on and off if necessary, I'll probably never remove it, but I like to build all my projects in a way that it can be taken apart and changes or updates made and things like that.
Do a quick test fit to see if I need to make any changes before putting it together. This fits well so we can move on to the next step. The next thing I can do is replace my mounting holes. This is all modular. I can take this. putting the whole piece on and off, that's my plan, so I'll use t-nuts again to hold them on the game cabinet. I initially drilled with my smallest drill, but I think it was the 3/16, but I'm going to drill them later. a little larger to give yourself a little wiggle room, makes it easier to install so it doesn't have to fit perfectly.
I'm going to install the bolts. You've seen this method in other videos where I drill my holes and then simply use those holes as a guide to drill the next ones. I'm wondering if I should invest in some smaller hammers to fit in small places. These little blocks, when nailed and glued, will prevent the T-nuts from accidentally falling off if there really are any problems with the T-nut in the future, you can take a chisel and grind or cut them off. You must cut a piece at a special angle. I have a little visitor hanging around and watching my every move, so I have to be careful.
You don't have to cut angles on all your stuff, you won't see this on the back anyway, but I like to make these nice little finishing touches. Any small gaps you see will be covered with wood filler again. Use your custom adhesive to hold things together and nail them to this piece is the speaker mount under the artwork branding key piece, basically this is where the speakers will be mounted under the artwork marquee , two holes to hold it together and what do you think I'm going to use? to attach it to the game room, I'm probably doing these test fits too with finish washers in there, this is what it will look like when it's all done, everything is starting to fit now, I'm very happy with the progress of this project, this piece will be permanently glued to the last one, they can be put on and taken off together, glue and Brad nails it in just so it's nice and flush, what do you want to keep my back door closed? using magnets I bought them at Home Depot for a couple of dollars, they are super simple and easy to use.
I like to drill pilot holes whenever I have to use screws to prevent the wood from splitting. Your pilot hole should be smaller than the drill you are using with the supplied screws. I'm going to attach this piece of metal to the back door. I want to make sure that any screw I'm using is no longer than the width of the material. That makes sense. I do not do it. I want it to stick out the back, shape it and just beat it out. Now I'm going to use wood filler to fill in all the little spots that you might want to blend in or fill in the little Brad nail holes.
It takes a little time, so I'll skip most of it. Next up are the grommets and hole for the joystick to stick out of this paper template I originally used in my first arcade video. I found it on Instructables and I know it's floating around the internet. Design your dashboard the way you want, not necessarily the way I do it. I always try to do a little center drilling before drilling, it just allows me to be a little more precise when laying out the points for the front. The control panel buttons are on a separate piece again, that's my design, not necessarily the way you have to do it.
The pilot holes help guide my Forstner bit when I re-drill my large drill. This is optional, but this is how I do it. I think it makes it easier for me and that's the way you should do it, it always works, whatever the meaning, you handled your joystick too carefully or you didn't buy them on eBay and I'll mount them with four bolts and nylock nuts, take your time when Arranging this so you don't have crooked joysticks. I'm going to countersink them so the flat head bolt can sit flush with the top of the control panel.
You shouldn't feel it when you play there. There are many other methods to do this, but again I'm doing it the way that works for me. I will countersink them a little more to fine-tune their fit, but this is fine for now, so before I can paint the cabinet. I need to make sure that everything has been smoothed out, that all the scratches have been repaired, and that I have sanded everything beautifully. I'm going to skip most of that. Here I am drilling a hole to set up a cam lock that way if I really wanted to.
I put a lock on the back of the game room. I start by drilling a larger hole and then make the hole smaller for the actual shaft with a cam lock to fit it. I'm just using spray paint. I'm going to use about two or three cans to make this. I'm going to try to apply a couple of coats and show you the whole time painting in fast motion, of course, but I won't skip a single spray now. Also use paint with a roller or you know you're going to buy a gallon and then you apply it with a roller, which will give you a different texture.
The choice is really up to you. I thought I'd save a little money with this. This has paint. and primer in one, works well for wood, looked great on this cabinet. I didn't have any problems with the paint scratching off after about 20 to 30 minutes. I usually do a second coat and I think I do a total. three layers here, so before I assemble the actual case with the electronics inside I want to test it and make sure everything works. My plan here with this was to take these speakers out of the TV and remount them into the arcade cabinet in a slightly different way.
I didn't really need to do this, but I thought it would be a nice touch. I would probably do it differently in the future, but I'll still show you how I did it, so I separated the back of the TV. I kept all the small screws in a small bag so I wouldn't lose them and I wanted to find out how difficult it can be to achieve this. It was actually pretty easy but it took a bit of time so it seems to open it. pretty simple, the speaker came off very easily and everything is attached there to a little record board, the little snap connector, so I thought if I cut the spliced wires into some new ones using some butt connectors and some Bulleit butt connectors, some wire could extend this and stick these speakers anywhere I wanted in the cabinet, so I grabbed my wire strippers, stripped the wire and I'm going to crimp them.
I could also solder the wires, but I wanted to display them this way. I think I'm putting in about a 60 centimeter extension so I can glue them into the cabinet under the Marquis artwork, so by attaching the bullet connectors I can connect and disconnect the speaker cables fairly quickly and easily in case that you need to take them. the game room is separate for maintenance that's good I'm going to crimp them in there there are different methods different tools for this but this worked just make sure you test the crimp so they're actually connected so I want to clean these wires up so let them be seen. a little better, so I'm just going to lay them out in straight lines, I'm going to wrap it with some electrical tape, that's it, no one will see this when it's all done there, that'll just clean it up a little bit, okay, let's plug it back in the proof. and see if the speaker still works uh-oh.
I have a solution for that and drill a hole in the back of the TV, run those cables through, plug it back in and it shouldn't cause any problems. I'm taping the wires together. in case someone pulls it, it won't pull out the connector when all this is done. I only had 30 extra screws, no problem, so no problem, the speakers work great, now it's time to figure out the rest, good on the tea molding I bought. this tea molding thing, calm down, the price is decent, you shoot with the foot, I would have thought a minimum of 20 feet, you don't necessarily need these tools to do this, but I found that this has worked very well to turn the corner you want . to cut a small notch and that way the tea moldings can be bent more easily whenever there is a bend.
This is a good idea while I'm doing this. I'm going to check it for any bumps or any places it might have. we fail and we'll make sure it's nice and tight. You can use an exact blade instead of those side cutters if you want to use whatever you have now. That's not the Chipmunks in the background, those are my students, they're for the games club at now at lunchtime I usually don't need to write down where my court is, but I thought it would be a good visual reminder for the video in the future . I probably wouldn't make such a sharp little turn there, I'd keep it a smooth transition it might cut a little better either way.
I think it turned out great, line it up as best you can. I set it up so that this cut is at the bottom and you don't see it anyway, flip it over and do the same thing. on the other side and give it a little spin, thanks Sean. If you're using a piece of art for your arcade, you'll probably want to put it on before molding the tea that way, any excess you can hide underneath and then cut off with an Exact Blade. where I should have used an exact blade I probably got a better cut now I'm going to add tea molding to the control panel as well as the bottom piece they will be the same
length
so I'm actually just going to trim it here once measure it and make the same cut for the bottom, be careful with sharp objects, you could cut yourself, be careful with those knives, okay, let's put it together and see how it looks, oh, I love that paint job.I find the green. a black, we have a really nice color scheme to work with, so I did a very simple job for these speakers. I think I would have changed it if I had done it in the future. I pretty much just added a hole for the sound to come out. and carved a small funnel with a chisel so the rest of the speaker wouldn't vibrate against the panel in retrospect. This may not have been the best idea, but it worked, it's functional, and it sounds really great. I like this. hat buttons style, they are easy to change by microswitches and easy to mount on your control panel, these things basically just pop in and out, soIf you break one, you can just take it out and replace it.
I think this is very simple. system, but the choice of buttons is really a personal preference, so I personally start by putting all the buttons on first and loosely tightening the nuts that hold them together. For this build, you can see that there is just one button in the middle that will act as a hot button on Rico's box that allows me to do certain menus or little shortcuts, like exiting the game and saving my states. You could even rewind games, everything is built in, they are very easy to use and are only connected to the first player.
The second player's hotkey will be hidden inside the cabinet and is really only used when I'm setting up the controls first. I'm using USB encoders for this build because of their simplicity and ease of use, you plug in the cables they come with. with it on your buttons and your joystick directly into the USB encoder and then a USB cable goes from there to whatever you're connecting it to, whether it's a Raspberry Pi, a PC, you could use it as a little fighting stick, anything that you want. In fact, things will work with some consoles as well as the Raspberry Pi and PC.
I'm going to make a little map or some sort of plan to figure out where I want to put all of this and I'll try it. to make sure that player 1 and player 2 are set to exactly the same binary, so that it's sub zero zero zero zero one zero one zero zero zero usually these just snap in there, pretty simple and easy to use if you sometimes put one in the wrong place. They can actually be a little tricky if you look carefully at the tab coming out of the microswitch. There is a small hole that lines up with a small tab that grabs the end of a quick connector, so they are a little tricky to remove, so make sure you do it right the first time.
In most kits they will come with one or two extra cables just in case, but don't count on that with your build, you can take the micro off buttons if you want and just plug them in like this and then put them in. It is a very personal preference. Sometimes it's hard to get your fingers into those small places. Sometimes things fall apart. I was lucky enough to be able to open this. one in the past I had to rewire and solder things and basically run completely new sets of hires. I was lucky here. I can put it back in place and it worked.
These things are not very expensive, hence the build quality. You can see I have some basic labels inside that are just to help me remember, if you wanted you could wrap a piece of tape around each wire and label it to make it easier for you, but I've made a lot of these and I don't really need them anymore. do that, but if it helps you do it normally, another thing I would probably do is try to find a space where I can glue or screw the USB encoder directly to the case, where the cables just happened to be.
It's not long enough for this build so I had to let it float
free
ly, but it won't be a problem because it's out of the way of anything getting damaged to keep everything together with my joysticks. I am using machine number 10 for 24 unc. Nylock Bolts and Nuts Nylock nuts have a small plastic retainer on the inside that helps it stay tight and not loosen too much over time. I wanted it to be nice and flush, so if you remember in a previous video, I countersunk those holes I just stared at it, make it look nice, there are many other ways to do this, this is the way I did it for this build Yes, those little snap connectors are nice and easy, just make sure you have the joystick facing the right direction, whether that's up or down. left-right back forward mirrored z' just do it the right way, sometimes you won't know until you plug it into the Raspberry Pi and check it and you may have to change cables or reverse the wiring to get An Arcade is actually very simple if you follow these types of videos, if you are making something like a Pandora Box you might need a harness or something but really you just have to find a way that works, there are a lot of tutorials. online that show you how to do this, this is the way I do it now, there are a couple of ways you can attach a ball top if you want, you can use Loctite or Thread Locker, put it on the threads, screw your two pieces. together and should stand firm in this case.I'm just quickly tightening it with locking pliers and tightening it with my hands. I did this only because I wasn't sure if I was going to make a change later, so now. Let's move on to a quick fit test, be careful not to crush the cables when you're putting it all together. That's why sometimes it's a good idea to securely connect your USB encoder directly to your control panel, maybe on the bottom, things like that, so I'm just doing a quick test, put my finishing washers on and screwed those pieces. It's time to put the screen back on.
Be careful not to crush the cables. You'll remember this from the previous video, which was video number three, how I made this little one. Clamping system, but it works. This is all made from pieces of 2x4s. It's very simple, easy to use and you can do it with almost any major hand tool at home. You can use a jigsaw or just a hand saw or back saw I guess. As you would call it, you look carefully at the bottom right of the screen, there was a small hole underneath that allowed a TV remote to access the infrared sensor behind it, it's not too obvious, you don't see it. it's great now, while I'm screwing it in, I'll cut the plexiglass cover so that eventually, but you just don't see that once again.
I just want to test it out and make sure the game is working so I'm using a Raspberry Pi 3 for this build, you could use a PC, you could use an au droid xu4, there are lots of different ways to do this. I chose a Raspberry Pi 3 because at the time it was pretty impressive for the price and it is These are little plastic standoffs that I will use to mount the cape to the case. You'll see below there's an IEC outlet that I'll show you how to plug in and that switch will be used. to control the backlight and then of course a power bar to power everything, so here's a heatsink where you're supposed to put it, which is much better, and a second one, so I want to put these here.
These two five six screws don't fit. so I need to find a solution drill a
bigger
hole just be careful not to destroy your boring don't drill with your hands that's a stupid thing so next I make a pilot hole before putting the screws in the cabinet I'm going to make Sure which I don't go too deep so as not to go through the bottom of the case, so these are just small screws that come with the kit, I plug in my USB encoders and have left plenty of room to add almost anything HDMI. for the TV, turn everything on and we'll do a quick test to see if it works properly, so initially I need a keyboard to set it up and navigate the menu so I can access the controller settings first thing you tell me. what I have to do is hold down a button to identify which player I'm going to set up, follow the prompts, press buttons as needed, buttons that aren't being used, just hold down any random button until it pops up, lastly my hotkey press ok and move on. to player 2 you can go and set other inputs later if you want, if you want to assign player 1 or player 2 or toggle them all in the menu, so try the same with the player to make sure the inputs match player 1 , so let's say Your button A doesn't become a button B on the other side.You want them to be a mirror image of each other. A player. 2 hot keys inside. Click and save. Let's try some games now, so I'll start with just a few. old classics some games that only use your joystick and two buttons things seem to be working let's move on to something that has more buttons so six buttons here is Street Fighter 2 fast Hadouken x' that works well take a break from that I'm I'm going to install the speakers because I want to listen to audio normally I would screw or screw them but in this case because of their shape I will just put a little hot glue on them, they are easy to remove if I need them but still strong enough to hold it so it doesn't come undone I probably would have changed the way I did this if I had to redo this specific project again.
I probably would have also bought a new glue gun this thing wasn't the best so do a quick test and do some playtesting so this is probably one of my favorite classic games so I'll do a quick test here . I'm not a sprinter, but I still enjoy and love it. This game is a little tricky to do with a joystick compared to an analog stick, but I always enjoy the challenge of doing it. The first time I managed to escape was probably on an emulator for my macbook in college using just a keyboard. Try some other games again.
The things I love to play here are just the fighting games. You're using all six buttons for these, so each one will get a quick click. Test each of the microswitches. Make sure you have connected them correctly. Nothing. is wrong and then move on to something else. Now I think the best way to really test these arcades is to let some of the students in the arcade club or just some of my other students try them out if they can handle the teen abuse, which means The Room The game room is probably built well enough, so even though the game room works, there are still a couple of things I want to add to it, one of them being cold because the game room is practically completely closed and needs some way to get in air and cool the electronics.
The components in this diagram give you some suggestions on how to set it up if you are using a completely enclosed cabinet. I'm going to do something similar to this and just mount them on the tailgate to allow air in. in and out and cool mainly the screen which will need it the most, the real Raspberry Pi will need a bit of cooling but it won't overheat too much so I'm just doing some quick calculations here that I need to set up. Lift it up and cut some round holes in the back of the door. I'm going to use a jigsaw.
Ideally I should have used a hole saw for this, but I didn't have one at the time. This is in fashion again. Show it with the tools you have was in a bit of a hurry. I probably should have gone a little slower when cutting so my cuts weren't as smooth as they could be, but it will be on the back of the unit that you're not really going to see, next is a hole for a power switch IEC. I probably should have done this before painting but I forgot, but it fits, no one will be able to tell the difference anyway, this will supply power to everything, back to the fans.
This is just putting them together. I probably should have used some longer screws to do it, but it works, it's not going to come apart, so these are just connected via USB and have a little power controller to change the speed of the fans. I'll probably leave it up next. This shows how to wire the IEC outlet or switch whatever you want to call it. It has a 10 amp fuse which should be enough to handle almost everything. I'm using 16 gauge wire for this and should have used some fully insulated quick connects, but they'll work fine for now.
Then I'll wrap them in electrical tape so you don't notice. I used a diagram I found on Instructables to do this and I'll show you a picture later, before you cut out your actual power bar make sure it actually works, test it so you don't waste all the time, take them off enough so you can put the connections in fast at the top. I had to make a little cutout there, crimp them and start plugging it into the actual outlet. Now the first time I went to try this I actually forgot to put the fuse in and it took me a while to figure out what I had. done wrong, well, pause the video if necessary for this part, so like I said before, I just dropped some electrical tape on it to keep the connections from touching each other.
We don't want a short circuit. Nothing of this. it's good enough it will work ideally you should use fully insulated connectors a quick trip to home depot these are the ones i should have used these are female quick connectors and they are fully insulated but my way it will work too ok it's time to connect these LEDs I have a power brick and I have a switch and I want to put them all together so they work. The first thing is to find out the polarity, which cables go and where to change them. Not reallyI'm worried about getting cut off because this is pretty low power that works perfectly and even though I try that connector I decided to just cut it off and splice it into the wires, that's a little easier.
I'll wire them up again using little quick connectors to crimp them together, this is the way I used to do it when I wired up car stereos and the other way to do it is to just solder it and wrap it with heat shrink, so to wire the switch itself I'm just referring to the diagram that comes with it. To connect it, the correct tabs come out quite easy and I will also do it with the female quick connectors. Now I didn't really like these little adapters for connecting my LEDs to the cables, they were cheap, I thought they were a good deal when I bought them but clearly I should have spent some more money on it so we'll quickly add my female quick connects there and they will slide right into the back of the ignition switch plug into a power brick.
There's my diagram and we're going to connect them the right way until they work perfectly, oh wait, almost so this is the problem with that little adapter, they're a little finicky. I don't think they grip the LED strip as well as I would like, but they work. once you put them in the right place just don't move them, yes the adhesive that came with my LED strips wasn't the best. I ended up having to gun them down there, but it's inside the cabinet, no one will see it and that's just the way it is. feature: Now I want this to be the one who said it, so the glue gun is not the prettiest, but it will be hidden behind everything.
Ideally, I'd love to have, you know, a single light bar that would just pop up without having to do it. All this work, but for the price it's fine. I need to make a hole for the switch in the back of the cabinet. I'm going to use two different sized Forstner bits. You don't need to use Fortuner, so you could use a spade bit or just have a big one on the back, it's up to you. I'm going to put them together nice and fast. Works. Put the nut on. Pinch it very clumsily with these terrible needle nose pliers.
Works? I see lights flashing fantastically. Alright, now to hook all this up properly, I'm going to put the power bar that has been connected to my IEC socket in there. You could use screws, bolts, or in my case a hot glue gun and I'll use these. little cable tie holders to organize all the cables and the mess that will be in here since I removed the screen, makes it much easier to do all this work. That's why I like to build my things in a modular way. I like being able to take things apart and make changes if necessary, it probably could look better and cleaner if it didn't have all these nuts and bolts sticking out everywhere, but this is just my style, build it to suit yours now I know there are special tools for cutting plexiglass or plastic or whatever you have, however, I didn't feel like buying them and just used what I had on hand.
I was very careful and slow when using the circular saw and it worked pretty well. I don't really notice the difference on this project, these again Screwing it in and removing it will line up with the same holes that are in the front screen piece, maybe for another project. I would like it to slide in and not be permanently attached that way, that way you can get it in and out easily. to clean up, but for this project I had a little time and got it working. I also cut a piece for the Marquis artwork and just a hot glue gun that holds it in place pretty well and I know it's going to work well.
I'll change this for a future project, but it works, so yeah, extra fuses. I didn't have any of those when I first plugged this in, so I think I had to wait two days and did some shopping to go. It is definitely cheaper to buy them online than to have a store. Well, let's see if it works. The light turned on. The system turned on. The lights are fantastic. You may not always want to have them on and off, that's why these switches are there. I don't always want to be blinded, so here's a quick look inside the work cabinet.
I have all my energy. I have the Raspberry Pi 3 with the USB encoders attached, as well as the cooling fan and some artwork I designed it on. Photoshop just some quick images and I borrowed a printer to print them on this. It cost me about 10 dollars to print the banner in full color and I am very happy with that to save this temporarily. I'll just use it. Duct tape probably isn't the best way, but I was planning on changing the sign later so I wasn't too worried about a permanent solution. I should have used clear tape instead of masking tape, the masking tape ended up creating a little shadow. the LEDs behind it, so let's do a quick test and see how it all looks together.
I really like this color scheme with black and green. I think it looks really good, so I thought it needed more lights, so I took out another two basically. layers and I will connect them to the part that holds the speakers. I'll add some bullet connectors in there so I can take them apart and put them back together. I like to make things modular and this worked well for me again. the adhesive didn't stick very well so I had to use the hot glue gun to attach it to my piece, give it some white before reapplying the artwork and it should work, so on this one I use clear tape, As far as I know, that's never the case. release, put the speakers back, make them work.
I put my DIY labels on there and they practically work three times over. Lighting put the bolts in and put everything together permanently. I think this was the last time I took it apart so this project is pretty much done, I really enjoyed working on this, it was a fun way to get started and you actually make a design completely from scratch. I base some of the shapes on my previous builds, but it works. I'm happy with him. I really like gaming on the larger screen, you can place two people much more comfortably next to each other to play multiplayer games like this.
I wish they had made the control panel a little deeper so I could put all the buttons on top, but for the most part. I think it still looks very clean, so let's take a look inside the case, so the player one hotkey that matches here and the player 2 hotkey, if you remember from the previous videos, is on the inside the cabinet because I only use it for one setup which is exactly the way the Rico box works so there is a small switch for the LED lighting there is a switch for all power which is an IEC c14 if you look for them on Amazon or Ebay or wherever you are using intake and exhaust fans to cool and circulate air through the unit, it has a small speed controller.
I believe there are three speed settings. My power bar, with just three things plugged in, should have power for the Raspberry Pi lights, the TV screen and the speakers are powered directly from the screen, so the Raspberry Pi 3 isn't too bad. I moved on to using an old xu4 roid for another build, but this still plays almost any retro game you could ever need. The speakers are up there and hidden, easy to access and my next arcade project video will be a full size cabinet. I already built it. I just need to edit the videos, so stay tuned.
Thanks again for watching these videos. It was a lot of fun to edit and create them in their entirety. project itself. I'm happy it's finally finished. I'll probably do a couple of videos in the future on how to actually program Raspberry Pi or Oldroyd or whatever you're using. It's extremely easy. Check the Rico box anyway, the plan links are in the description please message me like share subscribe all that good stuff bye
If you have any copyright issue, please Contact