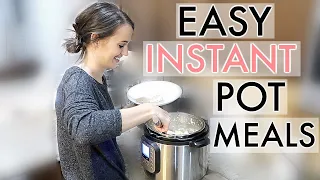
8 of the BEST things to make in an Instant Pot
Feb 27, 2020Today I'm going to share eight of the
best
things
tomake
in the Instant Pot. Hi, I'm Karen Peterson and I own the website 365 Days of Slow and Pressure Cooking here on YouTube. I sharethings
from theinstant
route with you every week. Today I'm going to share eight of my favorite things tomake
in the Instant Pot and why I like to make them and then savor why it's better than maybe making them the traditional way, number one: hard-boiled eggs, my favorite thing to do. is to make hard-boiled eggs in a large batch at the beginning of the week in my Instant Pot.
The reason I love it so much is not necessarily because it's a faster method, but because the shells almost slide off and are very easy to peel. Farm fresh eggs peel much easier using the Instant Pot than using the stovetop method and that's how I make Instant Pot Hard Boiled Eggs. The first thing I want to mention is that I live about 4,500 feet above sea level and that probably affects the cooking time a bit, so if you're at sea level, whatever result you get today, your eggs might be a little more cooked than when I showed it to you, so you may want to adjust the cooking time depending on where you are. you're in the world I'm going to use large eggs if you use extra large eggs or medium eggs instead that could affect the cooking time and another thing that could affect the cooking time is the temperature of the water that you put in your
instant
pot.
More Interesting Facts About,
8 of the best things to make in an instant pot...
I took it right out of the tap and it was like it's not hot it wasn't cold it was just in the middle and I put it right in the pot if you're using boiling water that will affect. the cooking time if you use ice water that would also affect the cooking time and another thing that can affect the cooking time a little bit is how many eggs you have in there let's say you fill the pot completely to the top which I don't really recommend filling it to the brim, but with eggs it might take longer to come up to pressure, so if you're only going to put one in there today I'm going to put about six eggs in each one. pot, okay, let's get started, so I'm going to add the eggs to the pot.

I have the trivet that came with my pot on the bottom with a cup of water, 6 eggs on top of that trivet, it doesn't matter if they are touch or no touch just add them in there, it's okay so we have our eggs in our pot, put the lid on into the pot and make sure the valve seals and for this one I'm going to use the manual button and it's on high pressure. I'm going to set the time to just two minutes. This one I'm going to set the manual button and I'll set it up in 5 minutes.

Well, this one has arrived at 5 minutes. This will be a 5 5 5 experiment, so drop the. pressure use tongs to move the eggs to a container filled with ice and water 10 this was the 2 minute NPR and then the 10 minute NPR so it came to 10 minutes so we can move the valve to the Aventine there is no left pressure, so you can take the lid off and then take those eggs and put them in the ice bath. Okay, both eggs chilled in the fridge for about 5 minutes until cool to the touch and now we have the moment of truth.
Method 5 5 5 here, let's go ahead and cut it up, it looks pretty perfect to me. Well, let's go for this one, see if there is any difference. They look practically the same. I'll eat them and then I'll let you know. yes there is a difference in case I have tried each of them and they are very similar, but I think there is a slight difference with the five five five method, they are just not as creamy, these ones had a creamier consistency. and this wasn't grainy because it was quite creamy, but not as creamy as these. I'm going to continue making my eggs with the NPR five five five two minutes and 10 minutes is a great method and it's easier to remember because it's five minutes of cooking five minutes NPR five minutes of ice and it's an easy way to remember it Greek yogurt number two now you can easily go to the store and buy Greek yogurt, but the reason I like to make my own Greek yogurt is because I know exactly what's in it and it's a lot cheaper.
I can buy a gallon of milk at my grocery store for about two dollars. I can make eight cups of yogurt for two dollars. That's a seal. This is how I make it instant. jarred greek yogurt, the first thing is to make sure your instant jar actually has the yogurt button. Some instant pot models don't have it, so I'm going to show you how to make it in the instant pot, as long as it has the yogurt button. I know there are ways to do it in the Instant Pot when you don't have a yogurt button, but I'm just doing it the way I know, which is on the Instant Pot that has that feature, so first things first.
Ahead, import in a gallon of milk today I have 1%, but I often use whole milk because I love full fat yogurt. My ideal would probably be 2% just because it's kind of a happy meet between low fat and high fat. So whatever type of milk you have, you can use it now. You can use a half gallon if you don't want to use a full gallon and that's fine, but today I'll pour the entire gallon of milk and that will do. Make about eight or nine cups of Greek yogurt and more, if you're not going to make it into Greek yogurt, you're going to go ahead and put the lid on, but before that and to change the roof rings, this is something I'd rather do once. .
I made yogurt, where the night before I had made curry in the instant pot and my yogurt tasted like curry. It was very strange, so I like to keep this green roof ring just for yogurt so you can buy an extra roof. Call Amazon and I'll link you to where I got this. I don't know, it was probably less than 10 bucks for a 3 pack, very affordable, so go ahead and put the lid on and then press. press the yogurt button and you will press adjust until you get to where it says boil, once it starts to boil you will go ahead and walk away and this will take about 45 minutes to reach the proper temperature once the cycle is over you can go ahead and remove the lid.
I like to use this digital thermometer. I bought it on Amazon. I'll link it in the notes, but it's helpful because what you need you need this milk to be one hundred and eighty degrees or warmer 180 180 a okay and it should be very close if it's not there yet now if it's not there you don't need to continue. Go ahead and do the yogurt cycle again, all you need to do is press sauté and leave it and beat it really well until it reaches 180 degrees. Mine is at 180 degrees, so I'm going to go ahead and remove it.
You may want to use hot pads. Mine is not too hot. Take it out of the pot. So what am I doing? Do I put a plug in the sink and then fill it with cold water? I'm just showing that cold water can surround the pot and cool the yogurt faster. This will take about 10 minutes to get the appearance and get the milk. to the temperature it needs to be, I like to shake it a few times to get the air flowing and it seems to work faster when I do, once it cools to between 90 and 100 degrees, done.
I would like to test it right in the middle of the pot so that towards the edges it has a different temperature than the middle, so you just want to whisk it really well and then test it in the middle and make sure that If it reads between 90 and 100, in at this point you will add the starter so what you need as a starter the first time you make it is just a little bit of plain yogurt this is greek yogurt but it can be just regular yogurt you just need it. to make sure it has live active cultures and it's not flavored or anything like that so this is plain Greek yogurt and it has live cultures so I just eyeball it but you're supposed to make about two tablespoons of yogurt and just Go ahead and put it in a separate small bowl and then you'll add about the same amount of milk and just stir until it's creamy and smooth.
I have whisked the starter with the milk in the pot now. I'm going to put the lid on, you can seal it or vent it, it doesn't really matter because it doesn't put any pressure. I always seal it out of habit and then I'll go ahead and push the yogurt button here and then push the setting button until I get to eight hours. I like my yogurt a little less sour, so I go for eight hours, if you like your yogurt more sour, go higher towards about ten hours, that's it. For you, now between 8 and 10 hours you will notice something different than the normal pressure cooking mode.
When this switch ends it will start counting up instead of down so usually if it says it will say eight hours and then it would go to 759 7:58 but this actually counts so don't worry that's normal and Once it reaches eight hours, it will make another little beep and you'll know your yogurt is ready after it's finished. chilled for several hours you can go ahead and strain it, you can also just make Oh Gert happy as it is now if you want Greek yogurt this is the way I make it. I take a bowl and then my strainer, yes, put the strainer on top. the bowl and then I use just one of these flour sacks, you can buy them in a pack of 10 for very cheap at the Amazon store wherever and I used it instead of cheesecloth just because that's what I had in my house and it really works Well, I go ahead and put it on top of the strainer and then I'm going to go ahead and put the yogurt in this strainer, and then I just pick up the edges and tie them together or just do it like this, twist them and put them like this and then I put this in the refrigerator until a lot of weight has come off, as you can see here, you see it dripping, so the way it's going to rise, I don't.
I don't know about that height and then I go ahead and your Greek yogurt is ready to eat, so I left it in my refrigerator for several hours. I forgot about it and look how much whey is in there, it's a ton so it's okay. If it's too thick, your yogurts are too thick, you can always add it back in, but you can't take it out, so it's better to have too much whey in here, so that doesn't make sense, so I'm going to go. go ahead and I have this big container that I like, it's a nine and a half cup container that I put my yogurt in and this was a gallon of milk so we're all set and we just dump it out as
best
I can. no mess, so you can see here, the consistency is almost like cream cheese, that's how thick it is, so obviously I'm going to add a little bit of this again to make it creamier and a little less thick, so basically just from pour in as much as you think you want, go ahead and grab a whisk and stir it really well, add more shapes as you need and then once it reaches your desired consistency you're ready and you can just cover. an airtight container store it in your refrigerator mine last firm I don't know until three three weeks later when you want to make your next batch of yogurt just use two tablespoons of this to start your next batch or you can always use a little your way and that you can use it as your starter number three, roasting now is one of those things that I always used to turn it into a slow cooker and that's awesome because the slow cooker is a great tool for that, but sometimes I forget. put the food in and at the beginning of the day or I wouldn't I would try to start cooking but it would be later in the morning and there wouldn't be enough time to cook the roast in time in the slow cooker and that's why the instant pot is so Amazing because it probably only takes two hours from start to finish for a melt-in-your-mouth tender roast to fall apart, this is how I make an instant pot tenderloin roast with just three ingredients, the first thing I did was add my rump roast to the instant pot.It's about 2 and 1/2 pounds of roast rump. I trimmed off any excess fat on the sides, but there wasn't much fat to begin with. I'm going to add 2 cups of water and then I bought this as a sauce mix packet at my grocery store. I'm going to add that and then I'm going to add a packet of onion soup mix that looks like this okay, so that's basically it If we're going to go ahead and put the little lid on, we're going to make sure that the valve is set to seal. , which is, so we're going to go ahead and set the timer, so we're going to press the manual button. or if you have a pressure cook button, press that manual and this recipe will take a lot longer than most recipes we need, we'll set this up to 90 minutes to ensure the roast comes out nice and tender. and then the Instant Pot will beep and we will switch to pressure boost mode once the pot has finished the time we set to 90 minutes, you can go ahead and move the valve from the roof to the vent once all the pressure has been released. pressure.
Go ahead and open the pot and at this point you can add the vegetables. I'm going to add baby carrots and fairly large pieces of potatoes. Go ahead and replace the lid. Make sure the valve is placed on the ceiling and we will set it up. for manual Oops, I forgot to turn off the power button first and then the manual and we'll go down to five minutes, long enough to cook those carrots and potatoes, once the pot starts beeping you can go ahead and release the pressure, move your wrist . from the vent or from the roof to the vent once you can go ahead and remove the cover it looks fantastic.
I'm going to go ahead and place the vegetables and the meat on this plate and then I'm going tomake a sauce with the fat that is good now. since I have everything on my tray I'm going to go ahead and change this to sauté mode, first you have to turn it off right there and then turn it to sauté right there and that will just turn it on so it heats up the pot like it's on a stove. burn that's what it's doing now in sauté mode, so while it's heating up, I'm going to go ahead and mix equal parts cold water with cornstarch, this will continue and thicken the sauce nicely.
I made it about two. tablespoons of water and two tablespoons of cornstarch, so I'm going to grab my whisk. I'm going to go ahead and whisk this cornstarch into the Roth and whatever fat is left in the pot, just whisk until it thickens, it should only take a couple of minutes to thicken once it starts bubbling, you know, it's pretty much having a nice thick gravy, go ahead and turn the pot off and then I'll go ahead and serve my roast potatoes, carrots and gravy, rice number four, it's very easy instantly. pot because all you have to do is put the water and the rice in it and press a button and walk away and come back and you don't even have to worry about it getting crunchy at the bottom of that pot or overflowing or not being done enough in the case of brown rice, that was always my problem is that the brown rice didn't cook evenly and the instant pot comes out perfect every time.
This is how I make brown rice in the Instant Pot to make brown rice in an instant. pot, you're going to use a ratio of one cup of rice to 1.25 cups of water, so today in my 6 quart pot I'm just going to add one cup of brown rice and then one cup of water and then 1/4 cup. of water, then I put the lid on. I shook it to make sure all the rice is covered. Put the lid on. Make sure the valve is sealed and then press the manual button or pressure cook button, depending on the model. own and then use the plus or minus buttons to get to twenty-two minutes.
Now, after the 22 minutes are up, you're just going to leave that pot there for ten more minutes and then you can release the pressure and the rice is ready. mashed potatoes number five perfectly cooked potato salad all potatoes I love making instant potatoes, they cook very quickly and again I don't have to worry about them overflowing on the stove I don't even know how to make regular mashed potatoes since the I have made it in the Instant Pot so many times now I love making mashed potatoes in the Instant Pot. Whenever I make mashed potatoes I always put about two of this size potato per person and how many I want. food, so let's say I'm feeding four people.
I want to put about eight medium to small potatoes. I already have some there. I put two cups of liquid in the bottom of the pot and then I'm going to cut them all up. my potatoes in this size pieces you can peel them if you want sometimes I do it sometimes not only depending on how much time I have and who I am serving today I am just not going to peel the potatoes but it is totally up to you once you have cut all the potatoes , go ahead and add them to the pot with the water and then don't add a teaspoon of kosher salt or table salt, whatever you have on hand, cover the pot and make sure the valve is set.
Don't over prepare and then you can press the manual button or the pressure cook button, whichever model of instant pot you are using and then set the timer for about 10 minutes for this specific size of potato, once it is gone time, you can do it. a quick release add a little butter and just start mashing once they are well mashed, didn't you add a little milk or am I using half and half just for a creamier experience. I just add, I don't know two or three tablespoons is all and then I add freshly ground pepper and salt to taste, there you have it, creamy, delicious, super quick and easy, instant mashed potatoes number six using your Instant Pot as a double boiler.
I learned this over the holiday season when I was dipping pretzels and other things in chocolate using your Instant Pot as a double boiler, it's perfect because you can put it on the counter and you can melt it and it keeps the chocolate temperature perfect the entire time you melt it until you you use everything instead of having to reheat it in the microwave or reheat it on the stove or whatever you do your tip when melting instant chocolate works great for this here's how I made instant chocolate pretzels here are the items you'll need for your pretzels dipped in chocolate you will need some wax paper or parchment paper or a silicone baking mat something that will keep the pretzels from sticking you will need some pretzels I use the twisted type a bowl a glass bowl or a metal bowl works and then some melted chocolate.
I use this Ghirardelli brand dark chocolate, it's really good, but you can also use milk chocolate or white chocolate. You can use chocolate chips, but you will have to add a tablespoon of shortening with the chocolate chips. to make them shiny and nice and soft for this recipe we're going to use the instant pot as a double boiler so add two cups of water to the bottom of the instant pot and turn the instant pot to the sauté setting and adjust it to higher and then look for a glass bowl or a metal bowl that fits well on top of the instant pot you will see how it doesn't fall over it just sits there the water will heat up and you pour the chocolate into the bowl and the water will vaporize and the bowl will make the chocolate will melt and be delicious, but it won't burn the chocolate, which is the biggest problem when you cook chocolate in the microwave or try to cook it in a pan on the stove it just burns and burns very easily and it just doesn't taste good, still , one of those chocolates just in case, eat it right now.
I dare you and then wait a couple of minutes until the chocolate starts melting every two minutes. with a spoon and just stir it in while those chocolate disks are melting the water is getting really hot so I moved on to sautéing the bread more and I adjusted it all the way down and I'm going to keep stirring until it's totally melted and smooth once the chocolate is fully melted, turn off the Instant Pot and then click the keep warm setting, this will ensure that the chocolate stays melted and doesn't harden while you're trying to dip the pretzels, but it doesn't.
It's going to be boiling hot in there, get out a long sheet of wax paper or parchment paper and then prepare those pretzels, we're going to need pretzels and then a fork to dip the pretzels in, take one pretzel at a time and put it down. on your fork and then just dip it into the chocolate so it's well submerged and then tap, tap, tap, tap the sides of the bowl to get all the excess chocolate off and then you can place it on top of the parchment paper and then you'll repeat this process over and over again until all the chocolate is gone.
If you like, you can add sprinkles to the pretzels with chocolate sauce. Make sure you put them on the pretzels while the pretzels are still wet or they will win. It doesn't stick very well here we are at the end of the chocolate, we just try to use it all up as much as possible. You may need to get some type of rubber scraper and scrape all the chocolate in the middle to make it fit. enough to be able to dip those last few pretzels in the pretzels, it only takes about ten minutes to dry and then you can put them in an airtight container number seven, macaroni and cheese.
I love making macaroni and cheese in my Instant Pot, just add a few ingredients. you walk in and you press start and you walk away and then you come back and you add some cheese and it's creamy and delicious and perfect. My favorite macaroni and cheese recipe is this Three Cheese Macaroni and Cheese Recipe. I know you're going to love it too here's how I do it to make our macaroni and cheese we're going to add 3 and 3/4 cups of water to the instant pot and then a 16 ounce box or bag of elbow macaroni. I use these large ones because that's what I like. but you can always use the small ones too 3 tablespoons butter 2 teaspoons kosher salt 2 teaspoons ground mustard 1/2 teaspoon pepper you can also use red pepper if you want a little more heat in your macaroni and cheese.
I just use black pepper and that's all we need to get started, this is what it will look like, it will be mostly covered with water but not completely covered, lock it in place and make sure the valve is sealed and then use Press the manual button or pressure cook button depending on your Instant Pot model and set the time to three minutes for al dente pasta or four minutes for slightly more cooked. I'm going to do the four minutes today because of the larger noodles later. Time is over. I let it count to about five minutes.
Now I'm going to release the pressure by moving the valve from the roof to the vent. Once the pressure is released, I remove the lid a bit, sometimes when I'm stirring something. in the Instant Pot, I take one of these binder clips and just clip it to the side so it doesn't spin as much so you can stir it easier. Now I'm going to add a little bit of half and half. You can also use whole milk. I'm using about a cup and then we'll slowly add our cheese. I rate it with eight ounces of sharp cheddar cheese, eight ounces of Monterey Jack, and 8 ounces of Colby Jack, so these are our 3.
Mac and cheese and cheese, lots and lots of cheese, it'll be good, so we'll tell you about a third of it. of that at a time, the longer it stays, the thicker it will get at this point, it's still a little runny, but boy. Don't wait to dig into that now if you want to add breadcrumbs on top you can do that by adding about a cup of panko breadcrumbs and we'll toast them with our melted crunchy top so the first thing we need to do. What we do is we unplug our instant pot then you take the crispy lid that we have here and you plug that thing in as soon as you put this lid in place it will turn on and then you can set the time and the temperature.
I'll just do it. I just want to grill these breadcrumbs so they're nice and toasty, so what I'm going to do is set the temperature to 500 and the time, let's start for two minutes to start and we'll go from there and push this little triangle. button, you're done using the crispy lid, it says on the silicone mat that comes with it, that way it doesn't burn your counter, oh just look at how delicious it looks and the last recipe I want to share with you today is frozen chicken . I'm a procrastinator by nature, it's not something I'm proud of, but I definitely always do things last minute, so when you're like me and forget to defrost chicken, you have frozen chicken you want to use. dinner, that's where the instant pot comes in so handy you can use it to cook frozen chicken and this is how I do it: I usually buy a big bag of chicken breast at another Costco store and keep it in my freezer just for reasons of convenience, now some of the chicken breasts will be huge, like these, which are quite large, but they will take longer to cook than smaller organic chicken breasts, so decide how long to cook frozen chicken breasts.
This is the method you can use. scale I could show you where I got it on Amazon at the link below. Zero hesitation about my scale and now I'm going to weigh the chicken breasts, so this individual chicken breast weighs 14 ounces, which is pretty big, so it's a good rule of thumb for frozen chicken. breast is 1 maybe so if I were to cook Bressler chicken that was this size I would cook them for 14 minutes and that's for juicy, sliceable chicken breasts. Now, if you want a pedal chicken breast, you'll add three minutes to that time. so four shredded chicken breasts for one like this, which weighs 14 ounces, would be 17 minutes, a pretty easy formula and works great if you have a digital scale, if you don't have a digital scale you might want to get 1/3 No.
That expensive thing I really encourage you to do is find chicken breasts that are the same width and about the same size, that way they will all cook evenly and you won't get one that's still pink in the middle and one that's it's fully overcooked, that's a good rule to follow, if possible, look for chicken breasts that are the same size right now, we know exactly how long to cook these frozen chicken breasts, let me show you how, so you can use a trivet. I had this one that came with my Instant Pot, I bought this one and it's like a sling on a trivet in one or you don't have to use any equipment, it's up to you what you need is a cup of water or broth.
Pour it into your Instant Pot and if you want to steam the chicken, then place the chicken on top of a trivet. If you want it to be cooked in the liquid that you have in your Instant Pot you can go ahead and put the chicken directly in the bottom of the pot today I'm going to steam mine but it's really up to you what you prefer they actually taste very similar, so it doesn't matter too much. I'm going to use my sling and put these chickens in. breasts weighing approximately 14 ounces each and if possible try to place them in a single layer, if not possible what you should do is layer themcrosswise, like this, one on top of the other, that's how I'm going to do it because They're pretty big, they take up a lot of surface area in the bottom of the Instant Pot, so I'm going to place them crosswise.
Now I want to be able to shred these chicken breasts, so I'm going to use your 14 ounces of H so the average weight was 14 ounces, that's 14 minutes plus 3 minutes, so that's 17 minutes for the shredded chicken breast. I'm going to use that formula for these chicken breasts, so I like to use the manual button and then go down to 17 minutes when the pressure cook time is up. I like to use a natural release for five minutes and then move the valve to vent and open the pot, take out the chicken and shred it or whatever you want to use it for, just take the chicken out of the pot and it has an internal temperature of about 170 1, so it is well cooked.
These are ready to crumble. I hope you try these eight best things to do on the fly. Pot see you next week bye bye
If you have any copyright issue, please Contact