7 PHOTOGRAPHY TIPS FOR BEGINNERS - Canon EOS Rebel T7 / EOS 1500D
Jun 04, 2021If you have the Canon EOS Rebel T 7 or 1500 d, be sure to stick around because I have seven great
photography
tips
just for you. Hi Paul, from a fellow genius, welcome to my channel where I like to dophotography
tutorials. sharetips
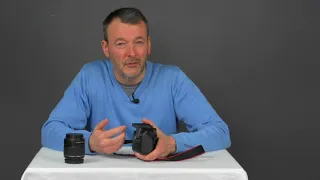
and tricks and also do occasional gear reviews so if you're new consider subscribing now in this video we'll be talking about the Canon EOS Rebel t5 which we just picked up this week here in Australia, this camera is actually called the EOS 1500 D, if you are in Europe you may know this camera as the 2000 D and if you are from Japan this is the Kiss this camera as t7 in this video which is the name given to this camera in the United States and that is because I get more viewers from the United States than anywhere else so why did I choose this camera ?
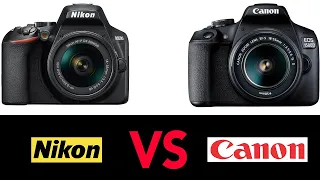
Two main reasons Number one is that I want to use this camera in my courses and workshops here in Brisbane, but the second reason is because a lot of people ask me about this camera. It is a very popular camera. This is the Nikon d4 at 500. This is Nickens. entry level camera great camera made with a lot of videos, I love it, this is the Canon equivalent and there are tons of people asking me about this camera so I picked one up. I'm going to make some videos about her and if there's anything specific you'd like me to cover, why not leave a comment below?

More Interesting Facts About,
7 photography tips for beginners canon eos rebel t7 eos 1500d...
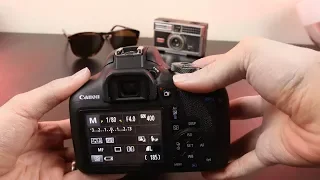
Well, this is t7. I have 7 tips to share with you about this camera, so make sure you stick around, let's get into it now. The first tip is to consider using your camera outside of automatic mode. Now when this camera comes out of the box it will always default to auto, meaning the camera does all the work for you, all you need to do is point. and shoot now, while it might be fine to begin with, you quickly get tired of it and there really is a lot more this camera can do if you're willing to learn a few things and get out of auto mode now that there's a There are a few different options you can choose from here, but if you're new to cameras and less familiar with using a DSLR like the t7, the one I would recommend is program mode, which is in p on the camera dial, now program is a bit like automatic with benefits and what I mean by that is that it takes care of the key features of the camera, ISO aperture and shutter speed, but it opens up options that you simply can't do in Auto, for example, in fully automatic mode, no It is unusual for the flash to appear and this can be extremely annoying and to be honest whenever possible I try not to use the flash now, when you are in program mode the flash will not appear and that is because it is your choice which cameras give you the capability. to make your own decisions, that doesn't mean you can't use the flash, there is a button on the top of the camera, press it up and the flash appears.

That's why I like program mode now, besides being able to choose whether to use the flash or not, there are other functions that you can use that you can't do in Auto, for example ISO on the back of the camera, there are an ISO button, press it and you can go full auto if you don't know much about it. ISO or you can play with it. My default ISO is 200, don't worry if you don't know what ISO is right now. I've made a separate video, you might want to watch it. Put a link here. At this stage you don't need to know too much about this, but it is a way of controlling light, so it can affect your exposure.

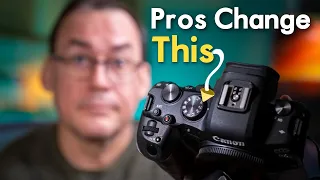
Now again in the program mode, you can play with this automatic button, now you can do it in the program mode and the other manual. modes you also get an extended menu, so in Automatic there are limited things you can change within the camera, but when you start using the manual modes it extends the menu so there are more things you can do. I don't have anything good. What I like about program mode is that you can use exposure compensation so this will come up later in the video so tip number one is to consider turning off auto mode and program is a really good mode to start if you are a beginner and new to using it. a camera like the t7 now my next tip is about the location button.
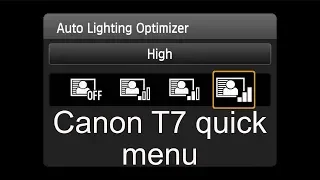
Now the t7 is a very well designed camera and has many buttons that allow you to change the key functions of the camera, but if there is a function that does not have a button, you can use the enter button to navigate to that function and make a change . This is really good. Q stands for quick access and means you don't have to go to the menu to make these changes. You can go directly to it. let me give you a demo, we have many buttons on the back of the camera, it is easy to change some of the key functions such as ISO autofocus and erase, but if there is a function you want to select but there is no button for example , star images for example, all you have to do is press the q button and select the option you want, so here I choose Picture Styles because I want to shoot in black and white.
I simply choose M for monochrome, press set and it's done, the signal button is a quick alternative to use in the menu. Now for my next tip, let's look at the live view versus using the viewfinder. Now this camera is a digital camera, of course, and it has a feature called Live View, there's a little button. on the back of the camera and if I press it you'll hear a little click and now you'll jump to a live view on the LCD of whatever the camera can see. This is quite useful and to use it I just have to press and hold. the camera composes my image etc, this is very useful when you are making videos, it is a great option now, the other option is to use the camera the old fashioned way, if you want, before digital cameras we looked through the viewfinder to than the other option is to raise the camera.
I look through the viewfinder and compose and take the photo that way. Now there are pros and cons of both. Okay, let me give you a couple of examples by holding the camera up and putting the camera in. Elbows in is a very solid way to hold a camera that can help get sharper images because holding a camera and looking at the screen can be an unstable way to hold a camera and this can cause camera shake, so reason. when I use a camera like this handheld I prefer to use the viewfinder now the benefits of using the screen or if you are making videos you have no choice but to use the screen but the screen can be very useful when you are on a tripod because you can place the camera in a tripod, turn the screen back and you can usually look at the screen and see how your compositions look, what's in focus wasn't in focus, so now there are pros and cons to either, if you are.
As a visor fan, you can adjust the visor to suit your eyes and this is something I would always recommend checking. Now, hidden on the side of the rubber eyepiece, is a small doll. Now, when you turn this dial, you are adjusting what is. It's called a diopter and it's located behind the viewfinder so you can adjust the viewfinder and get a nice clear view. This is very useful, especially for those who wear glasses. I wear glasses sometimes, but I don't like it. When I'm taking photos, I adjust the viewfinder to compensate, so this is tip number three.
Now tip number four is to consider using the Wi-Fi option on this camera. The Canon t7 has built-in Wi-Fi allowing you to connect it to a device like an iPhone or iPad now. Can I create a free app? It's called Camera Connect. It connects directly to your phone and gives you some cool features, such as the ability to set up and control your camera remotely using your smartphone. the other option is to review the pictures on your smartphone that you took with the camera and another option is to take pictures with your camera and send them to your phone so you can share them maybe on social media etc. so it's a really cool feature .
I'm going to show you how easy it is to set up, so let's start by selecting the menu on the back of the barrel on t7. Now I need to go to the tools option. This is page three of tools and go down to Wi. -Fi NFC press set to select and choose enable. I press set one more time and now we have the option to give our camera a nickname so we can identify the camera. This is easy to do, but I'll just use the default name. I press menu to configure again. Now I need to select the Wi-Fi function in the cameras menu and choose to connect to a smartphone.
Now I have two options and I'm going to choose an easy selection. Now you see that the camera is waiting. To connect and confirm the camera name, we now also have an encryption key. This will be very useful in a few minutes. Now I need to go to my iPhone, select Wi-Fi options and select the device which of course is called iOS 1500 D. Now I am asked for a password, which is the encryption key shown on the back of the LCD screen, so all I have to do is type it and cross my fingers that the phone connects to the camera, yes, those are words and Now you will see that the camera asks me to start the Canon app on my smartphone, so I open the Camera Connect app which confirms that a new camera has been found and the name matches the name given to my camera so I select the camera and now the camera also verifies that I want to connect to the phone so I press ok and we have an established connection.
Now I can use my smartphone to control the camera, so if I start by selecting Live View mode the app gives me a live view directly from the camera, if I press the up arrow I can adjust some of the camera settings , such as ISO and exposure compensation, and I can also move the focus and of course I can take a photo by simply pressing the circle icon very It's easy now, if I select the back arrow at the top left, now I'll show you how I can transfer my images from the camera to my phone so that the app shows me what images are available.
Now I will choose two images. I'm going to select the last image I took, which is a JPEG, but I'm also going to select a previous image which is a raw image. Now I select the download button and from the two options I am going to choose the original size. Press OK and these images will now be transferred, as I mentioned. I selected a JPEG image and a raw image, but this app only allows you to download JPEG files, so it will be saved as JPEG images on my phone even if one of them was taken as a raw image in camera, it can't transfer images or RAW videos using the camera.
Can we exit the application now? Let's go to my photos app and here are the two images that we transferred wirelessly from the t7 to my iPhone. Now my next tip is play with exposure compensation and what is exposure compensation? It's the ability to make your images brighter or darker now fully automatically. You don't have a say in these kinds of things. You press the button. Your camera takes a photo and that's it, but yeah. If you're willing to go out of automatic mode, manual modes will give you more control, such as the ability to adjust exposure, so it will work in Eva aperture priority mode, shutter priority mode, or program mode that , if you remember, was the mode I recommended. and the beginning of the video if you are a beginner or if you are new to a camera like the t7 now adjusting the exposure is easy there is a button on the top of the camera March a plus minus all I have What I have to do is hold the button and twist my wrist on top of the camera and I can adjust my exposure.
Let me give you an example. One of the best things about using program mode is when you press the shutter button halfway down the camera. Calculate what shutter speed and aperture will give you a balanced exposure. Now this is your light meter with the dial in the middle at 0. You will get a balanced exposure, but if you want a brighter image you can adjust the exposure compensation, but first take a photo with the light meter balance at zero now with just an exposure compensation we can make the image brighter, just hold the exposure compensation button to the right with the dial on the top of the camera and you will see the marker move to the positive side now this is an overexposure stop and if we take a second image you will see that we have a brighter image if we hold down the exposure compensation button again and this time we turn the dial to the left we can move the marker to minus one which is one stop underexposed again we take a photo and of course this image is going to be darker because it is one step underexposed so let's check the images this is the third image that is standing below the second image standing above and theFirst image was taken with the balanced exposure compensation meter which allows you to be more creative with your camera and of course it is not available in automatic mode.
Now tip number six is the Canon t7 slideshow feature that allows you to play your images as a slideshow, so when you have taken some photos and want to play them for family and friends, you can play them as a slideshow. animated slideshow on the back of the camera's LCD screen or you can connect it to a large TV using an HDMI cable is really cool, but it has some really cool features built in, like the ability to add background music etc. Let me show you how it works to create a slideshow, we press the menu button, we need the playback menus, so that's it. on the right, the second playback menu, go down to slideshow and press the Set button.
Now the first thing we need to do is choose what we want to show. The first option is to show all images. The next option is to select classified images, there is only one. The option for the still images only and movies only folder is for images that are stored on the SD card in a separate folder and lastly, images by date, which is the option we are going to choose now if we press the Show button. I can choose to display images that were captured on a specific day. I want to select the images that I took today so I highlight and press set now we go down to the settings section where we have some options the display time is how long each individual image will be displayed to repeat lets you choose if you want your slideshow to repeat or repeat The next option allows us to choose the transition between each slide I prefer to fade 3 and finally there is an option to add background music to your slideshow, to do this you need to have a music file saved on the SD card as well That once I have selected what I want to show, that is the images taken today and I was done.
Through the setup process, all I need to do now is select start and wait for my slideshow to start now. If you want to watch your slideshow on your TV, you can connect your camera by opening the rubber cover on the side of the camera and plug in an HDMI cable. Please note that the camera has a mini HDMI jack, so you may need an adapter. Details are in the description below the video and finally, tip number seven is the view button on the back of the camera. Now the display button allows you to adjust. what information is displayed on the LCD screen and affects the camera in different ways depending on which mode you are using.
If I'm just taking photos, I can press the Display button and turn off the screen now, although this might save me a bit. a little battery can be a bit annoying now I don't know what the functions of my camera are, but that's not a problem because if I bring the camera up to my eye when I look through the viewfinder and press the shutter button, the camera weighs towards up and you can see all that information in the viewfinder it's green it's along the bottom shutter speed aperture light meter it's all there so you don't have to spend time looking at the screen all the time you can often just Open the camera up to your eye, look at the numbers and you can see exactly what the camera is doing, so this is great now that when you use the camera's live view mode again, pressing the Display button will adjust the information that shows. you can get rid of most of the information or you can press the button to bring up some information.
It's really cool now if you are using the camera in video mode, pressing the display button again changes the information that is available to you and Finally, if you are playing back your images and reviewing your photos, you can press the Display button to More information appears, such as what your camera settings were at the time you took the photo. This is incredibly useful because of course if you've taken a photo, these are great, you can play them back, review the information or try to figure out where maybe you went wrong, but you can still look at your good photos, press info, look at the settings and find out what made this photo work very useful when you're just starting out and learning how to get the most out of your camera, so the Screen button is really useful.
Now before I end the video, there is one accessory that I am thinking of purchasing for your Canon T7 and it is a tripod, especially if you want to take low light photography or do night photography. A tripod is an essential piece of kit. Now I made a video on how to take photos at night. I'll put a link here. Take a look, you'll love it. The Canon EOS Rebel T 7 is a really good camera. Soho, you have learned some good tips in this video. If you liked the video, give us a thumbs up. Consider subscribing to my channel.
Don't forget that below you can leave your comments, video suggestions and questions. I hope to see you again soon, see you, goodbye.
If you have any copyright issue, please Contact