5 Build Your Own Electric Car: DC Motor Basics
Jun 01, 2021Obviously, one of the biggest differences between a gasoline car and an
electric
car is that anelectric
car has an electricmotor
. We got our electricmotor
from a forklift and I have a different motor. Did you show him thebasics
of how a car works? Series Wound Electric Motor Works All electric motors work basically the same. We are going to use a forklift motor wound in series in any motor. It is a magnetic field pressing against another magnetic field that makes the motor spin. Now there is more than one way to do it. in smaller motors, it could be a permanent magnet motor, which means one of the set of magnets are mineral magnets, permanent magnets and then the other magnetic field is created by an electromagnet, the electricity from the batteries through the motor.
Now those motors have a limited power because of how strong those permanent magnets are now if, instead, you have two electromagnetic fields that push each other to spin the motor, which is usually a series wound motor, there are other motors of style we're not going to cover, and this is a DC motor. DC motors use electricity directly from the batteries, they do not need any circuitry to convert the DC power from the batteries into AC to then run an AC motor, so these will be the most powerful, robust, long lasting and simplest motors that you will find.

More Interesting Facts About,
5 build your own electric car dc motor basics...
It's easy to get and we have tons of electric forklifts everywhere in factories, warehouses, and junkyards, so if you go to a junkyard, chances are you can find a pretty good motor for not a lot of money, so let's take a look at some of the parts of this engine here this came off a forklift this was the drive motor the style of forklift was one of those three wheel types where there was a single drive wheel in the back and the entire engine was turn that wheel to turn this is a series wound motor up here we have an identification kit that tells us a little bit about it, it tells us it's a 36 volt motor, it also has a part number on there that we could continue with .

Search the Internet and find more information about this engine. I removed a couple of bolts and then here just to open it up a little bit so it's a little bit easier to see here, but start from here, this is the end of the transmission. the driveshaft and if I spin it, you can see in here, it's not just the driveshaft that spins, but there's also a big electromagnet inside that's part of it and they spin together. The whole assembly is called a rotor or armature, now you too. Look, there's a bearing in here and the same thing in the back, so the entire rotor or armature and the drive shaft are supported on those two bearings.

The whole electric motor is really something very simple. We have some kind of end cap that covers the end of the center part and the armor there is actually only about four parts in all of this, so it's very easy to take apart. Typically, to take it apart, you'll have maybe four or six bolt holes on the end when you take those bolts out. If you have bolts on the opposite end, you'll take those out as well and then you'll just have to remove all of this and you'll want to hold the axle while you do it so the internal parts don't hit each other. and engine damage now another thing you're going to notice on this engine is that there are four power connections and you're thinking uh-oh, this doesn't make sense because the battery only has two power connections, one positive and one negative. then the motor must also have a positive and a negative, that is true.
This is a series wound motor and that means the electricity that runs through the inside of the armature and creates that electric field and the electricity that runs through the field coils. These magnets that are on the outside of the stator are all the same electricity and it runs in series between the two, it goes through one and then it loops and goes through the other and then it goes back to the battery, so that's what the batteries do. power connections. because two of these are for the armature and two of them are for the stator, so in a motor that has four power connections, what we are going to do is use a wire or some piece of copper bar to connect two of the connections of feeding. connectors to each other now another thing that's interesting here is how you run a series wound motor in the opposite direction, if you put the motor in the car and the motor spins in the wrong direction you will have several years of reverse and only one .
It's going forward, so we want to make sure the car moves forward. The trick with this is that if you find that the motor is spinning in the wrong direction, just reverse that crisscross power cable so that we reverse the power only in a magnetic field. or the other, not both, if we just swapped the connections on the battery cable we would be reversing both fields and the motor would still spin in the same direction now, if you only have two power connections there it could possibly be a magnet motor permanent o The other possibility is that it is still a series wound motor, but that connection is on the inside and you can reverse it, that will be a little more work because you have to take this whole thing apart, find that wire, cut it and redo it.
your
self, so that's a little complicated for the connections, which makes this a lot easier.Also, if you want, you can set
your
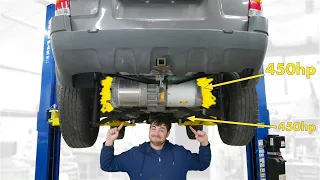
car to have an ignition switch that turns your engine in either direction. Now in my car, I didn't do that. I only designed it to go in one direction and only used reverse gear. Now some engines not only have a driveshaft but also have a tailshaft coming out the other end. The engine I chose to use for my car had a rear axle on it, but I actually ended up having to cut it off because the engine was too long to fit in the front of the car, that rear axle would have gone right into the passenger side tire and that wouldn't have been good for anyone now. on your engine may actually have a horsepower rating on this little nameplate right here.The most important thing to keep in mind for horsepower in an electric motor is that it has almost nothing to do with horsepower in a gasoline engine, it really is. different, for example, I also have an electric motorcycle and the motor is rated at eight horsepower and yet without a transmission I can just twist the throttle and stick to the tail of any Harley, no problem, horsepower They really don't mean much. Electric motors have a lot of torque, they just have that Fe Go Power and in my metro I can start from a dead stop in any gear including v, no clutch, that's the difference between torque and horsepower, another thing we'll notice in a engine like this is that it uses a front-mount design.
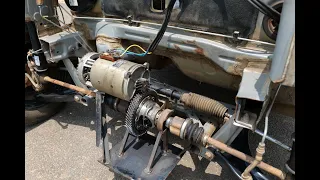
We can put bolts from this part of the face into the adapter plate and that is what will actually hang the motor in the transmission. On other engines, they can sometimes have a foot. from the bottom and if we were using a motor like that we would have to make some sort of L shaped adapter plate so that the motor sits on the foot and then still lines up with the transmission and that adapter plate to make it all work . go together, so let's take a closer look at this engine. Like I said, I already took the end bolts out, so what I'm going to do now is pull this motor very gently.
Besides, now he has a slightly better view. Here we have our drive shaft. Here is the drive shaft. You can see it has a keyway there and that is what would be used to connect it to a pulley or some other power connection through here in the middle this is our electromagnet this is what all the electricity goes through and creates a magnetic field while this thing here spins believe it or not it's not gum but when they make the motor they add a little bit of putty that balances the motor so it stays nice and smooth as it spins down here this is the end bearing and this part here It's called a commutator and the commutator is a pretty important part of the motor what happens there is that each of these copper bars is separated by a slot and these pass this copper through the iron and create the magnetic field and because each of these separates each time the brushes hit one of these from one to the other it alternates the electric field to make a push pull push pull effect that spins the motor like this now inside the casing here this is one of the coils this motor has four of them some motors can have six basically they're just copper wrapped around a block of iron in there and that's the magnetic field that this one fights to make the turning motion now on the back we have the brushes and the commutator here aligns with the brushes now also over here this is usually called the drive end, sometimes abbreviated to and here and here is called the commutator end, sometimes abbreviated to Cee.
Now what you're looking at is the inside of the engine around the edges. You can see those field coils right here. When you take the motor and take it apart you will want to take a look at the coils and make sure the varnish doesn't look worn, if so you can take out the screws that hold them on, take them out, clean them and refinish them. I did it with just a can of a green spray varnish it actually worked really well and it was just uh Oh, an hour and two in the afternoon to really clean everything that's on the back are the brushes and the brushes are basically just coal, small blocks of coal that conduct electricity. and they have little springs, so you can see here how the brush can slide up and down while being pressed with that little spring.
Well, what you're going to want is some kind of screwdriver or pick or something you can stick it through. from the outside and pull back on the spring and then when you do that you can slide the brush up and let the spring push back to keep the brushes out of the way and you always want the brushes to stay out of the way. , when you're trying to get the armature in and out, you know you should also inspect those brushes to make sure they don't look burnt, they're not cracked, they're in good condition, if you need new brushes, they are commonly available, check the yellow pages or the internet to find a forklift repair shop somewhere near you and the brushes cost me about $50.
Mine were in very bad condition, there wasn't much left for them so I needed new ones so I paid 50 dollars for the motor, 50 dollars for the brushes and you know, five dollars for the can of epoxy and with a little effort I basically had a new motor for about a hundred dollars. Here's another view of the end of the switch this time. I removed the bolts from the end of the commutator just to make a little bit of room so we can see here this here is the commutator itself here is one of the brushes that brush is removed right now this little spring is holding it there so if we pull it back that allows us to slide the brush in and then that little hook goes right over the top of the brush to gently push it down against the switch.
Now it's not going to do it now because we have this taken apart, but just to show you how that works, so we just want to make sure that all the brushes are removed when we slide them back in there again and again, always be careful with the switch and how things are lined up so as not to hit anything. the inside there, so we'll use this little scribe, have some strength here to pull, pull the brush out, let the spring rest on the side of the brush and it will hold it in the outward position, so that the The motor that I ended up using for my project a Nissan forklift engine.
It didn't really have a nameplate, in fact it was surprisingly rusty when I bought it. I bought it for $50 in some guy's garage. where he was still on a forklift engine he was taking apart, he was using the hydraulics to
build
a lift for his car for his garage. I made sure the motor turned over first. I brought with me one of those portable battery starting devices with the jumper cables and I put them on the engine, I just put, you know, I put the two connections directly on the power posts and brought a little extra piece of wire to make the connections and barely turned.I had to turn the driveshaft first and then it went, but it turned so I thought that was a good sign. I brought the engine home. I removed all the bolts from the ends. I disassembled the engine. I cleaned it and re-varnished the field coils I bought. all the grease that was in there I put it back together, it was basically a couple hours of work and when I was done I basically had a new motor, the brushes I bought at a local forklift repair shop and I paid $50 for a set. of four new brushes, they had them right there in stock, very easy to replace, just take out the old ones, take out a screw that holds the electrical connector on the brush, put the new one in, put that screw back in, slide it back in the brush in yourposition and you will be ready to start again.
Electric motors are very simple and very durable. I can't imagine taking apart a gasoline engine and re
build
ing it in an afternoon. I wouldn't even know where to start, but an electric motor for I've never done this before, it really wasn't that difficult, so take a look. You should be able to find a good used serial wound forklift motor at a junkyard, possibly through somewhere like Craigslist, you may want to look into electrical rebuilder repairs. stores, there may even be a forklift rebuild place near you, give them a call to see what you can find and I'm sure you'll be able to find a good used motor for not a lot of money.If you have any copyright issue, please Contact