3 Tricks To Installing Stronger 4X4 Wood Fence Posts That Last Longer
Jun 01, 2021good morning gardeners and cables everywhere, it's Sunday February 2nd and I've spent the
last
few weekends putting upwood
enposts
as part of my huge garden expansion project that I'm completing this winter for the 2020 growing season and today I wanted to give you some tips andtricks
on how to put awood
en post in the ground to make itstronger
,last
longer
, and be more resistant to rot. All of the woodenposts
you see in front of you measure 4 inches by 4 inches by 10 feet long. posts and all are #2 pressure treated lumber that is rated for ground contact.
Any wooden posts you place in the ground have to be pressure treated and rated for ground contact. Here you can see the severe weather stamp found on each of them. these pressure treated posts and you can clearly see the ground contact general purpose label printed on them, while it is absolutely mandatory that you use pressure treated ground contact rated lumber for setting as posts just because it is pressure treated. pressure and rated for ground contact. This doesn't mean it never rots. All pressure treated wood is rot resistant. The pressure treated soil contact rating will simply slow rot, but it will not prevent rot, so to further slow rot there are some tips and
tricks
you can use.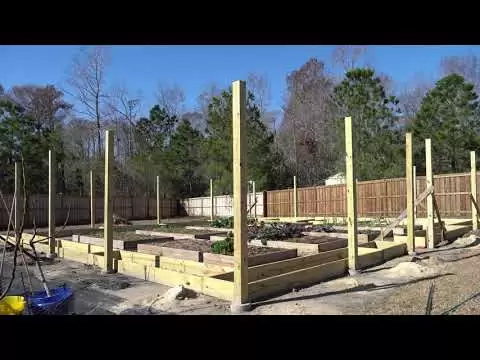
More Interesting Facts About,
3 tricks to installing stronger 4x4 wood fence posts that last longer...
You can use it along the path when you are setting your post to ensure less contact with water and
longer
life for all the wood that is installed in the ground. The first tip I will give you today is how to increase stamina. of the wooden posts you areinstalling
in the ground now, when most people install wooden posts in the ground, they embed them in concrete and the main purpose of embedding them in concrete is to add additional strength, but the inherent problem with the Concrete is that you need something to hold on to to really add strength, so if you just add a wooden post in the ground and pour concrete around it, there aren't good friction forces between the concrete and the wooden post itself, and What that means is that the wooden post is smooth and it's so even and straight that it doesn't have a lot of rough edges for the concrete to grab on to, so what we want to do here is increase the surface area of this wooden post so that there is more surface area for the concrete to adhere to. and grab it and we also want to make it rougher and less uniform so that there is a better grip where the two frictional forces of the post and the concrete meet, so to do this I took simple three inch wood screws and drove them into the post here and what those wood screws are going to do is create irregular spots with ridges and a lot of friction for the concrete to adhere to, so instead of the concrete just trying to hug the post, those screws are going to be embedded in the concrete and it will add a tremendous layer of strength to your post so here you can see the wooden post in front of you and this is a 10 foot long wooden post and this wooden post should be buried at least. 3 feet on the ground, so here you see two different marks that I made you see a straight line to your right and that is exactly 36 inches, which is the burial line of the wooden post just to the left, you see a line of points. that's at 24 inches so I have a mark at both 2 feet and 3 feet and what I want to do is place the wood screws within the 2 to 3 foot range because that will be near the top of the concrete and close in the middle of the concrete so all I did was take 4 3 inch long coated wood screws with a 10 year warranty and drilled them into the side of the post at about a 30 to 45 degree angle and it's very important You should buy a galvanized or coated wood screw that is made to last at least 10 years because it will be embedded in concrete and you will want the screw to last as long as possible and those screws sticking out of the wood post will give that concrete something really nice to look at. than if you simply buried that post inside the concrete Now that we have discussed how to install the posts so that they arestronger
and sturdier when placed in the ground, let's discuss how we can install them so that we can increase the resistance to oscillations.
The number one mistake most people make when
installing
a wooden post into the ground is that they install the hole deep enough so that the bottom of the post rests on the ground itself and this is a problem because the post is in direct contact with the ground, that ground is inherently moist and that moisture will be in contact with the bottom of the post at all times, furthermore, if it receives any type of rain event in which the ground may become increasingly moist over time. This is an extreme problem if you live somewhere that has clay soil because that soil can be wet 365 days a year and because of that wet clay or wet soil it is in contact.
The bottom of the wooden posts at all times is going to corrode the base of the post and that rot will slowly travel up the post and rot it at a faster rate, so one way to prevent this is to put a three layer of gravel six inches below each post, so in my case my holes have to be dug at least 36 inches deep to place my post. I have been digging them 40 inches deep and under each post I put four inches. layer of gravel and right in front of me I have a simple 50 pound bag of quikrete all purpose gravel, this is basically crushed bluestone and they sell it at Lowe's or Home Depot for about $4 a bag and every bag I'm buying. about two holes of gravel when I dig the hole that is eight to twelve inches in diameter to place the post and what happens is that because we are now sitting on a layer of crushed bluestone, the bottom of that post is not in contact with wet soil if there was severe rain and the soil becomes saturated, the soil will drain around the wooden post and drain through the gravel, so the gravel will always be drier than the surrounding soil, So you will add years to the bottom of your posts life and slow rot by placing a firm, dry foundation around your wooden post.
The third and final tip I want to give you for installing a wooden post in the ground to increase its longevity and resistance to rot is to install the wooden post with a revealed base and this is probably the best tip I give you in this video. I have watched several videos on YouTube on how to install a wooden post in the ground and they are all the same for the most part, they all include someone digging a hole and filling it with quikrete rapidset concrete or mixing concrete by hand and shoveling the concrete in the hole and then the concrete always ends up on the surface and this is setting you up for a critical failure where the concrete will eventually sink into the ground where the concrete meets the post will be the low point on the line of the ground and every time it rains the water will wash down to where the concrete meets the post and the water will get into that little space where the concrete meets the wood and over time it will leach and rot the post at a very fast rate. quick, so here we have a simple 8 inch quikrete concrete pipe and these come in all different sizes, you can get them 8 inches, 12 inches, you can get them in 24 inches, in 36 inches and what this is is a way to tube that is installed above the grade line that presses into the top of the concrete and allows you to overfill the concrete so that the top of the concrete base is several inches above the grade line.
I recommend at least a three inch foundation base, which means the top of this pipe should protrude a minimum of three inches above the ground line and what this means. What it does is prevent water from pooling around the exact point where the concrete meets the wood because I have a three inch opening in each footing. What will happen every time it rains is that the water will wash around the concrete, not at the point where the concrete is attached to the wooden post using these concrete form tubes it is a very simple process, you will see every five inches.
I have a mark, all I do is mark every five inches and I also cut a five inch piece of this concrete form after I set my post, I fill it with concrete to the top of the soil line, then I take one of these concrete forms and push it two inches into the concrete to have a three-inch reveal sticking out above the floor line and use a level to level it laterally, but leave the back of the base slightly higher than the top. front of the base, that way rainwater won't attract the top of the base because it will be tilted and will run off using these With three simple tips and tricks, you can set up a wood post that is stronger and lasts longer.
Thank you all very much for watching today's video. If you find it useful, hit the like button and if you haven't subscribed to the channel yet, please subscribe. Future updates and more videos like these if you are curious about anything I use in my garden, everything I use is in my Amazon store linked in the video description, thank you all so much for watching and I look forward to seeing each and every one of them . from you in the next video
If you have any copyright issue, please Contact


