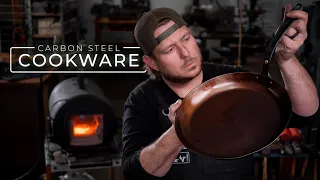
Forged iron skillet - blacksmithing
Apr 27, 2024It's the middle of May and although it snowed last night and it's pretty cold and wintery in the tent, summer is coming today and that means campfire cooking season and what better thing to use over the campfire than a small hand
forged
frying pan that I have already. a piece of cut round plate. I think this is something that was cut from a larger project and at one point my steelyard had tons of this type of stuff so you might want to look around to see if they have it. It is very well cut. I don't have to worry about grinding it to shape it this way, it's eight inches in diameter or about 200 millimeters in diameter and it's about a 12 gauge thickness, so it's about three millimeters thick, something like that.
Now this will fit my gas door. Forge and that will be absolutely the easiest way to heat everything up. It's much easier if it's completely hot when you forge it. The eight inch material is a little heavier than I would normally use. 14 gauge is pretty good. I've done about a 16 gauge, but that's a little light and larger pans at once should be really good. Now, as part of today's video, I'm running an experiment with more new camera equipment. I bought a 22 millimeter manual focus manual aperture lens which is on the little camera I'm using now so I'm trying some more manual settings trying to explore that and I just want to see what it looks like if this doesn't look very good , you might see me in this. camera here, which is the usual Sony Handycam in case this one doesn't get a good image.

More Interesting Facts About,
forged iron skillet blacksmithing...
I'm also experimenting with a different microphone. I am testing the road go microphone which is a very small transceiver microphone, the microphones built into the transmitter I don't need the cable that I am always stuck with, but just in case I still have the Lavell Err microphone for the Road wireless lab Link, which is a slightly fancier microphone system, but I have some issues with the cable getting caught on things. and being retired and sometimes it causes problems, so we can go back and forth a bit between these nowadays, now we record them both and I'll watch an edit, if one is really good and the other is really bad, I can still return the other , if it doesn't work very well now to work on this, I'm going to check the bottom end of an old oxygen cylinder and start by combing it out.

I don't start by creating a flat background. This is a technique I learned from Jim Hoffman. There are a lot of colonial reproduction jobs that you just want to go slow. Now this has a small defect on the bottom and I wanted to make sure it's on the outside, not the inside. where it will make the food stick, you can place an electric hammer to place them. I press or do a hydraulic press. Be careful not to go too fast or you'll end up putting waves in it and then you'll get little cold hits and it'll be a real problem to deal with, but the heavier plate alleviates some of that so it's getting there.

I think we can go a little deeper. We have not yet reached the full depth of our form. Now at one point I had experimented with a shape that actually had a shape for the pan and you worked the pan on the outside of the form, it had a big C-clamp type arrangement, you heated the edge with a blowtorch, you bend it a little bit but that always left little gathers that left little folds it was really a lot of work to make that work once Jim showed me this technique there was no going back to that previous way because not only does this give faster and easier results in a better product, but it's one less piece of things you have to do.
I've left it on the workshop floor to trip over so many things, if you just take your time, throw the scale up and find a moment, there's no reason to move forward, so ideally this would be smooth and polished, but rarely they generate more heat. and then we'll be ready to serve while we do this. I'm going to talk a little bit about the different microphones or should I say I'm going to alternate as we edit between the different microphones right now. I'm talking while I'm traveling, I just want to see how the sound quality is both vocal and whether it picks up 4G noise better, worse, annoying or more than the other microphone, so now let's switch to the rodelink. filmmaker kit, which is my old lab microphone, see how it works under the same circumstances, that's pretty good, so this is still the length of the way, the wired lab microphone that goes to a transmitter and then goes to the camera and now let's get back on the road. wow, that just goes, it has a microphone on the transmitter that goes directly to the camera, those are really a big difference between the way, now back to the way, Lake Wireless, which is a bigger and more expensive system and I have real problems with hook the microphone cable. from time to time and being unplugged a few times has caused some real problems in the videos so now let's get back to it because it doesn't have a cable it might solve some of those problems but it has the slightly larger transmitter here and the The microphone is probably not as high quality, so we are starting to see what the difference is between these two microphones.
Which one will I continue the video with? I'll decide when I'm done with the editing. I discovered another. Taking advantage of the small path, I can still zoom in on the diopter of this camera to check my focus on the anvil and with that larger microphone, the transmitter is that big and hangs far enough back from the back. I can not do this. Go back to the forge or the frying pan now we want to go ahead and make this flat, of course, if you wanted a little walk to saute, that wouldn't be a big deal, this generates a lot of heat, so even in this hot milk. gloves, my knuckles would get hot before we were done with this, something to keep in mind now, the deeper you sink this, the straighter the sides of your pan will be and that depends on what you want in your pan, you come too. here like this and start lifting the RIM up a little bit more, it's one of these things that as you work on one area you'll end up needing to fix another area and back and forth back and forth back and forth back and forth you might go back to the bottom. of the cylinder to refine some of that.
We have to be careful not to remove the plan we have started. You want to try to get this tire even more complete, whether you need a straight side. frying pan or not, it really depends on how you view your skills, it's much easier to put a spatula in there if it doesn't have straight sides. I guess if I were making hundreds of pans I would only have one fly pressed die. this or a hydraulic press will probably just stamp them in one push. I'm just trying to soften the lip. I'm not trying to put everything back in here again.
It's getting pretty close. We are also looking. For any signs of this lip being curved a little bit and flattening it out, it's easier to forge it than try to grind the inside of this, I just want to clean up the bottom a little more and we'll be ready. For a handle, the first thing is to make sure it looks like it has an even lip all the way around, it won't hurt anything if it doesn't, but it looks better if it does, and then we want to make sure the bottom is nice. and flat, then use the flat side of the rounding hammer here, a round flat would be good, you don't want to use anything with really sharp edges, the surface of these things is probably rougher than you'd like on a pan anyway I think .
I'm very happy with that. I think it's time to put a handle on it. I let our pan cool and cut a piece of one-quarter by three-quarter flat bars to make them a flat bar about six millimeters by twenty millimeters. It is about eight inches long, so it is the same length as the pan and it is very important that when you make the handle you think about leverage. If you get a very long handle, which is good for keeping your hand away from the flame, you will have enough. take advantage of that it could cause the pan to tilt, being a heavier pan that I use sometimes it will be less likely to do that so this handle shouldn't balance it out too much but it's something to keep in mind.
Start this by placing about 3/4 inch from the edge of the anvil and just pushing in right there, that will be the part that will attach to the pan. I'm going to reduce it to about half an inch here and then. Let's place this a little bit back by having that shoulder. I can hook it over the edge of the anvil makes it pretty easy to work with. That's really all I need to do now. I'm going to clean this up a little. a little bit and then we will extend that thin part of the back leaving a little bit thicker than the original thickness, but not much, we will clean that shoulder up a little more symmetrical and even things before it starts to spread, the better it will all spread and around the edges of This finished to make it more comfortable.
Well, you have to hold a frying pan here by this part of the handle. However, the next thing I want to do is extend the small end. This is actually a place where I will have two rivets next to each other. -side towards the pan to make it a nice stable handle. I'm going to go to the cross toe and you can put a little shoulder on this. I don't think it needs it, you'll just need a little filing. or grind to clean it, but that will be a great support for the pan. Switch to some killing pliers and we'll pull out the other end.
I just want to continue this reduction and then I'll offset this. little tail and make a little curl so you can hang it up if you want to use a pair of slotted JA clips that fit a little better. I never seem to have a pair of tips. Let's try these. It is worth having many. Tom's options, let's just expand a little bit, we've made a very similar handle several times in the past, we unroll the nice square cone and then we'll round it, we'll take our square and we'll forge it into an octagon octagon and we'll round it.
I also want to go ahead and heavily bevel the corners of this as well because this is the part that it's going to hold, it really needs to be comfortable, there's nothing wrong with going back and filing this down a little bit, start with just a little curl at the end here, I'll set it up. a little bit, we can start this here on the anvil, do it on the horn where you feel most comfortable, make the ring go forward and I put my touch mark on what looks like it should be the bottom of the handle I want to start this with two center punch marks for punching out the rivets now I'm going to punch out these four eighth inch rivets.
I think it's strong enough now for a pan this size, though I'm going to put this in. the outside it's easier to drill my holes from the inside so I'll mark them on the inside, I barely see that silver pencil mark, if you're not comfortable with your marking just do a drill, retread it and then come back and drill through from the second hole to do it, but since I want to do this from the mark on the inside and the rivets on the outside, to do it this way now I'm just going to hold this with my hand under the drill, but I know that from the past. experience that I can stop this drill press, the belt slides very easily and I am not worried about him grabbing it and ripping it out of my hand if you are not familiar with your equipment or if you know your equipment is much stronger than you .
If we find a way to clamp this or use a hand drill it will probably be safer, but I'm not worried about this drill press. What's a little annoying is that it stops so easily at an eighth of an inch. The rivets are light enough, you can put them in cold, you don't need to heat them up and I just want to start with the first one and then I want to put the second rivet in which I think I just hit the ground somewhere. There it is, I can't believe I found that on the dirt floor now, if you look at this because it's curved it doesn't lay flat and if you try to put the rivet in like that it's going to cause problems so with the Rivet in there just make sure things stay instead.
I'm going to tap it in being careful not to forge the rivet and once it's set to contour, I'm going to use a little monkey tool to make sure it's really seated and then I can rivet it. I'm just doing this by hand. I like the look of the headset on a rivet. You want a really nice head. Go ahead and use a riveter. It's a functional frying pan now, but I think we need to give the hand board some shape. I'm just going to warm it up right here where it transitions, just give it a little bit of shape that might be all you really want for your hand.
I think I'd like to give that pickup a little curve and for that. we'll go to the forge I just want the handle to be hot I don't want to heat up the place I just riveted this depends on your personal aesthetic I think that's all I want to do Our pan ended up with about a five and a half inch bottom on it, an inch and a half on sides, so it's that metric that's about Oh, about 140 millimeters in diameter with a flat section at the bottom and about 35 millimeters high somewhere in there, that's not exact and it varies . just a little, it is hand
forged
, it has a unique character.We like to use small pans like this one to heat tortillas whenwe make tacos and I'll probably have a chance to try them in a day or two, but in the meantime I hope you can go to your store and be safe, wear your safety glasses, see you next time.
If you have any copyright issue, please Contact